
Back Strengthening Exercises for Desk-Based Workers
Let one of our Physios, Danny Wray, take you through a set of exercises which will help to strengthen your back and hips and that help counteract the negative effects of sitting.
At Physio Effect we routinely treat the general population for injuries and pain which can be attributed to a sedentary lifestyle. We have previously discussed the risks posed by excessive hours of sitting and how this is reaching almost epidemic levels in the Western world. Today's article provides some general exercise recommendations that can go some way to reducing this risk and counteracting the negative effects of sitting.
In an ideal world, those of us who have sedentary or sitting based occupations should aim to move, stretch, and be active for at least 1-2 minutes of every hour. While some of the exercises shown here may not be suitable for your particular work environment, any effort to perform a routine of this nature for 5-10 minutes before or after work or during a lunch break would go a long way to reducing the risk of pain and injury. General exercise and safe varied movement of any kind is also highly recommended.
Exercise 1 - Thoracic Rotation

Thoracic Rotation Start
Start on all fours with one hand placed behind your head.
Slowly turn the elbow towards the ceiling allowing your trunk to rotate and stretch
Hold at top position for 3-5 seconds. Repeat x 10 with each arm
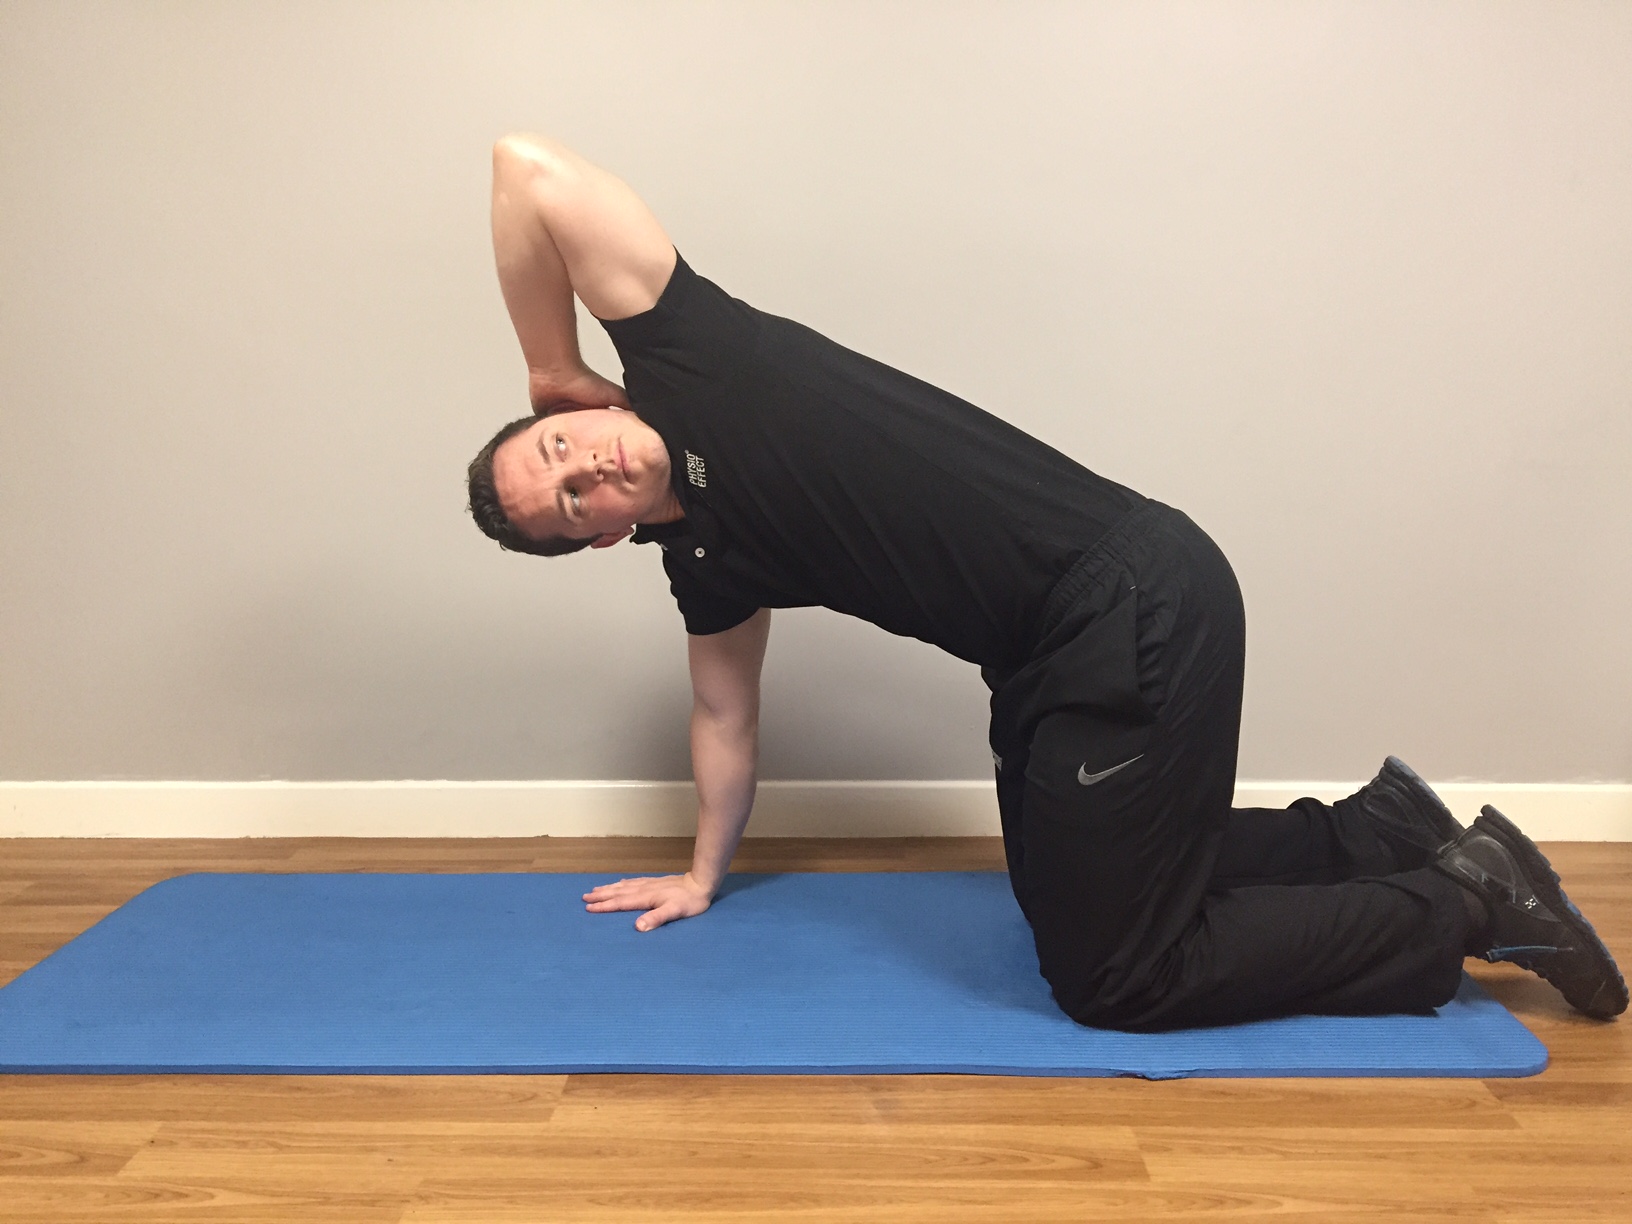
Thoracic Rotation Finish
Exercise 2 - Dart
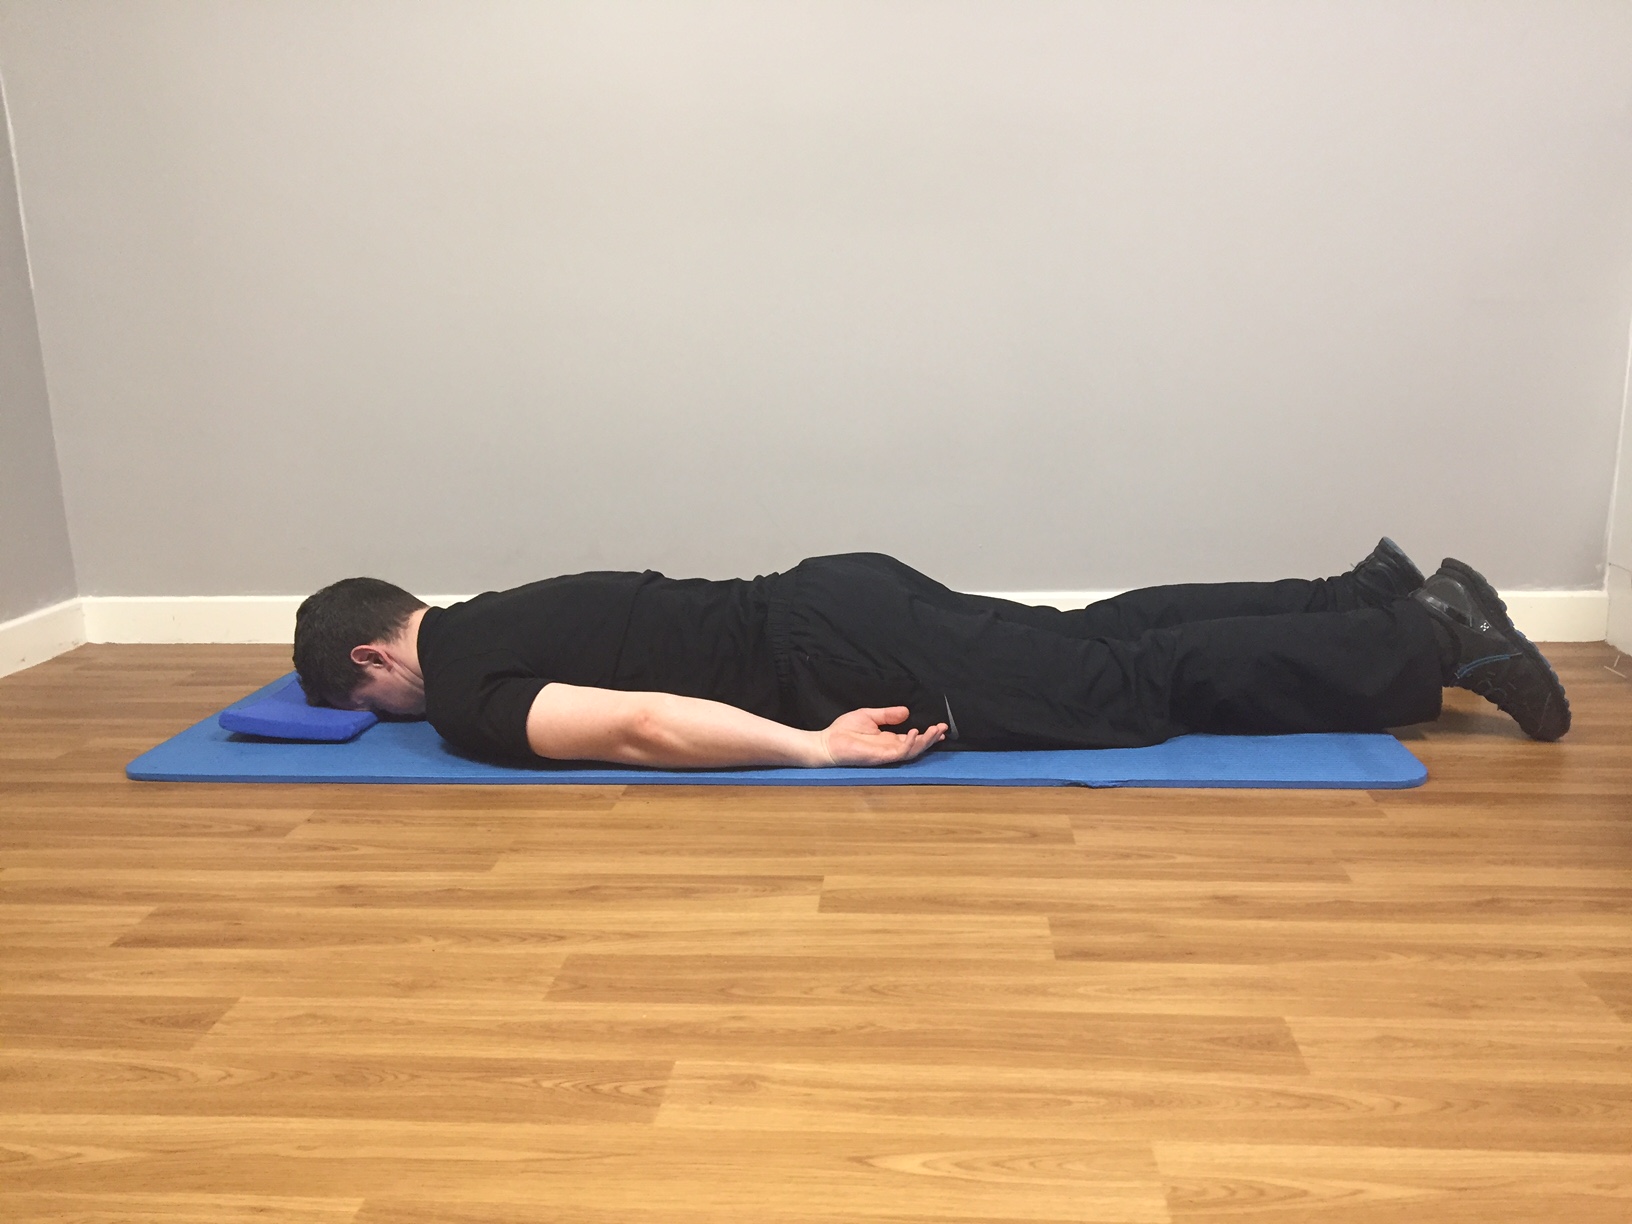
Dart - Start Position
Lay face down with thin pillow or folded towel for head support
Arms by your side, gently stretch your fingertips away from your shoulders allowing your shoulder blades to glide downward and slightly inward
Palms facing your hips, have your arms floating just off your side and not touching the floor
Keeping the back of your neck long and eyes looking to the floor, gently lift your head and upper body just off the floor - imagine lifting from your breast bone
Hold the finish position 3-5 seconds. Repeat 10 times 1-2 sets

Dart - Finish Position

Dart - Finish - Detail
Exercise 3 - Hip Flexor Stretch

Hip Flexor Stretch Start Position
Take a kneeling / lunge position as shown - use support of wall or furniture for balance if required
On the kneeling side gently engage your buttock and lower abdominal muscles - imagine you are tucking your tailbone in between your legs
You should feel a stretch at the front of your hip/ thigh. If balance allows gently raise the arm on the same side as the kneeling knee.
Hold the stretch for 30 seconds minimum and repeat 2-3 times each side.

Hip Flexor Stretch Finish Position
Exercise 4 - Cobra

Cobra Start Position
Lay face down with hands palms down about shoulder height
Using your arms slowly press out peeling your upper body slowly off the floor
Remain heavy in your hips trying to keep them in contact with the floor - relax your buttock muscles
Hold the finish position for 5-10 seconds, return to the start and repeat 5-10 times

Cobra Finish Position
Exercise 5 - Shoulder Bridge
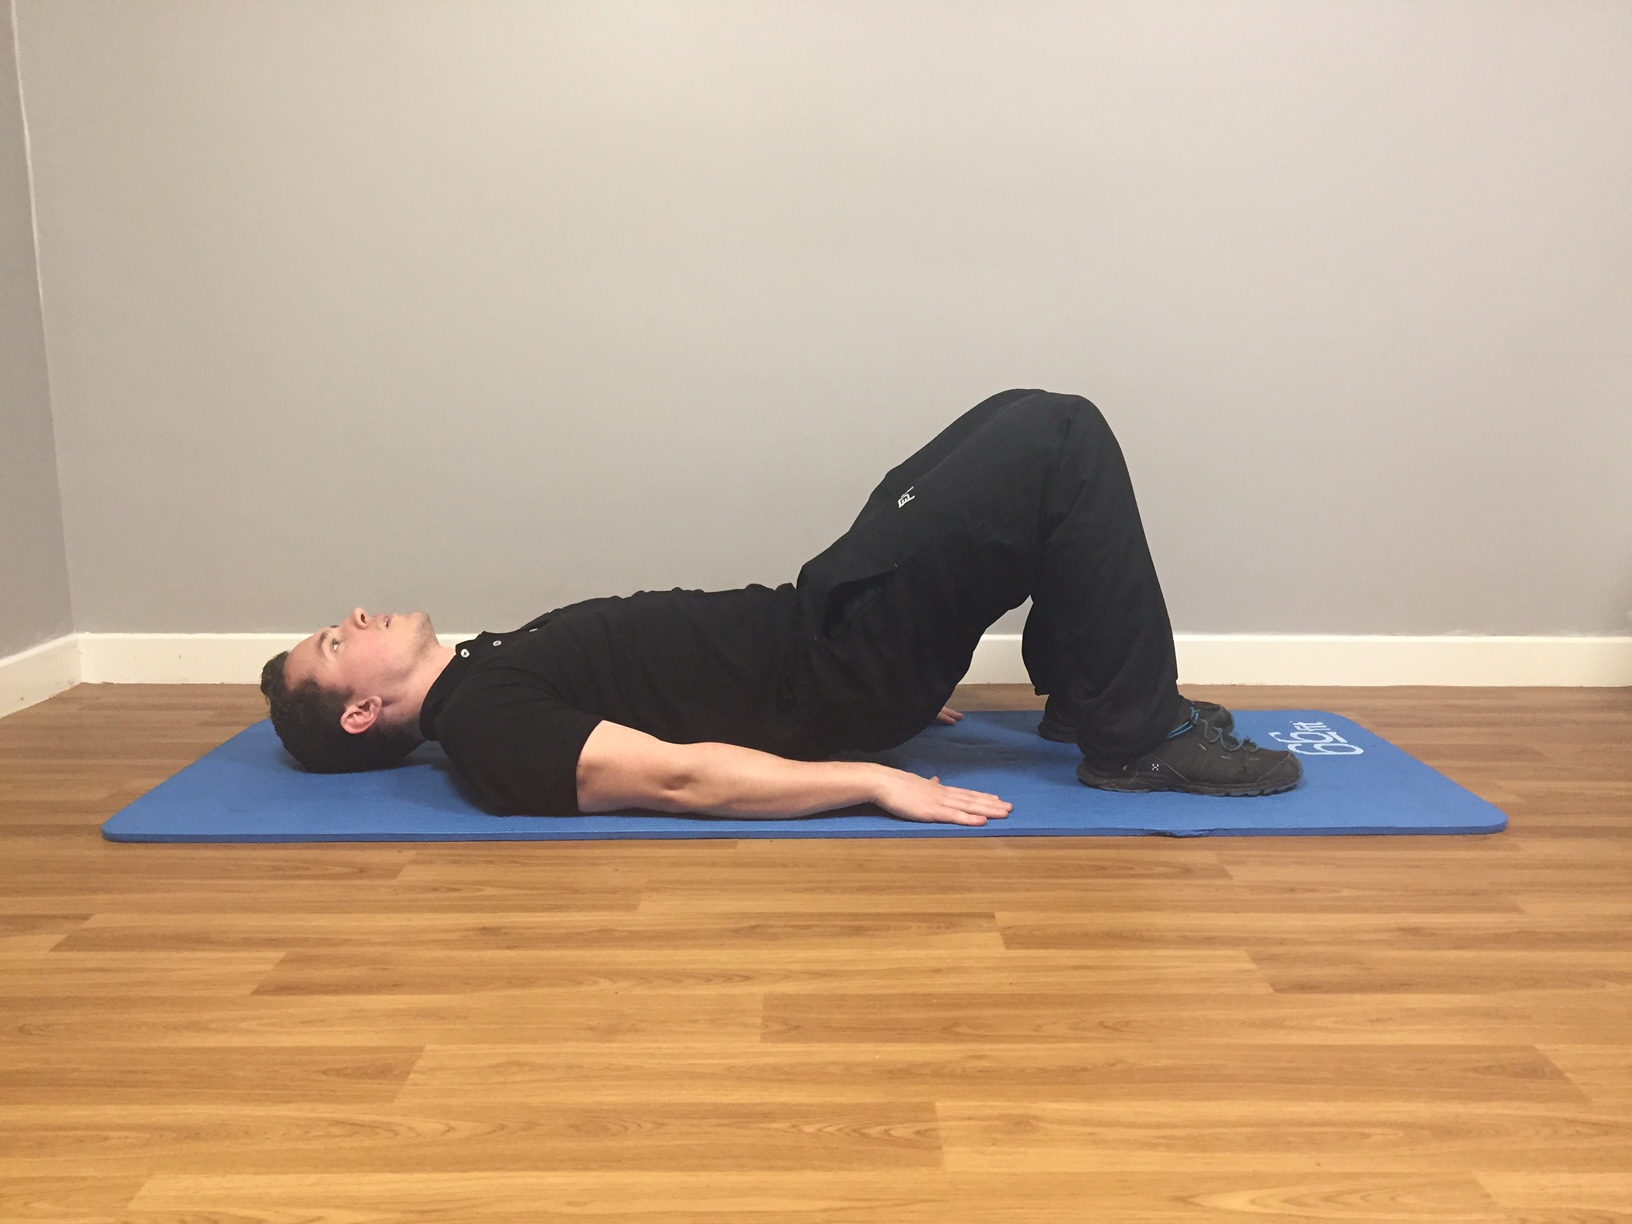
Shoulder Bridge Start Position
Lay flat on your back with feet shoulder width apart and knees bent
Using your lower abdominals gently tilt your pelvis to press your lower back flat to the floor
Pressing through your heels, using your buttock and abdominal muscles gently peel your spine up from the floor starting with your tail bone.
Finish with your weight resting across your shoulder blades and your shoulders, hips and knees in a diagonal line
Hold finish position for 3-5 seconds, return to start and repeat 10 times for 2-3 sets.
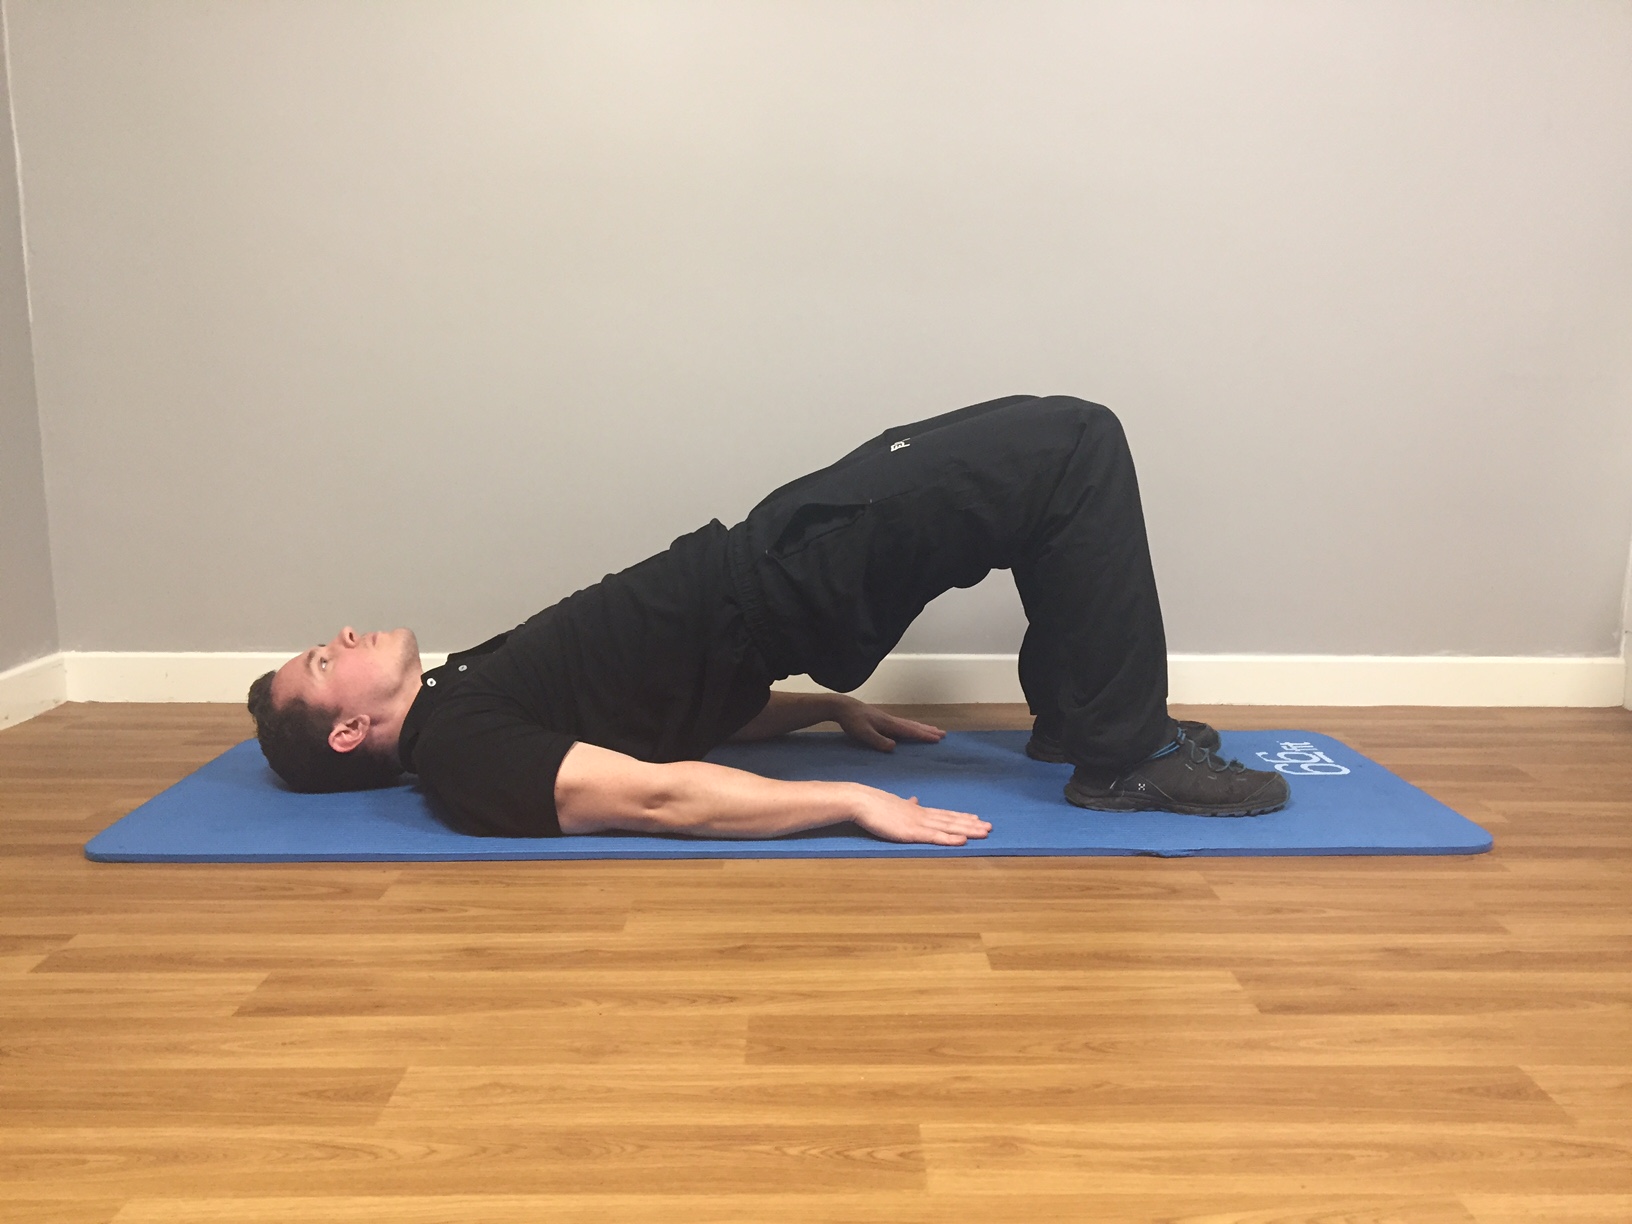
Shoulder Bridge Finish Position
Exercise 6 - Superman

Superman Start Position
Start in all fours position with knees under hips, hands under shoulders and spine relaxed
Slowly extend out opposite arm and leg pointing the toes behind and the fingertips to the front
Keep gentle tension in your lower abdominals - think about drawing your bellybutton in towards your spine
Try to maintain spinal position throughout the movement, return slowly to start position
Repeat with opposite arm and leg, try 10-12 repetitions for 2-3 sets.

Superman Finish Position
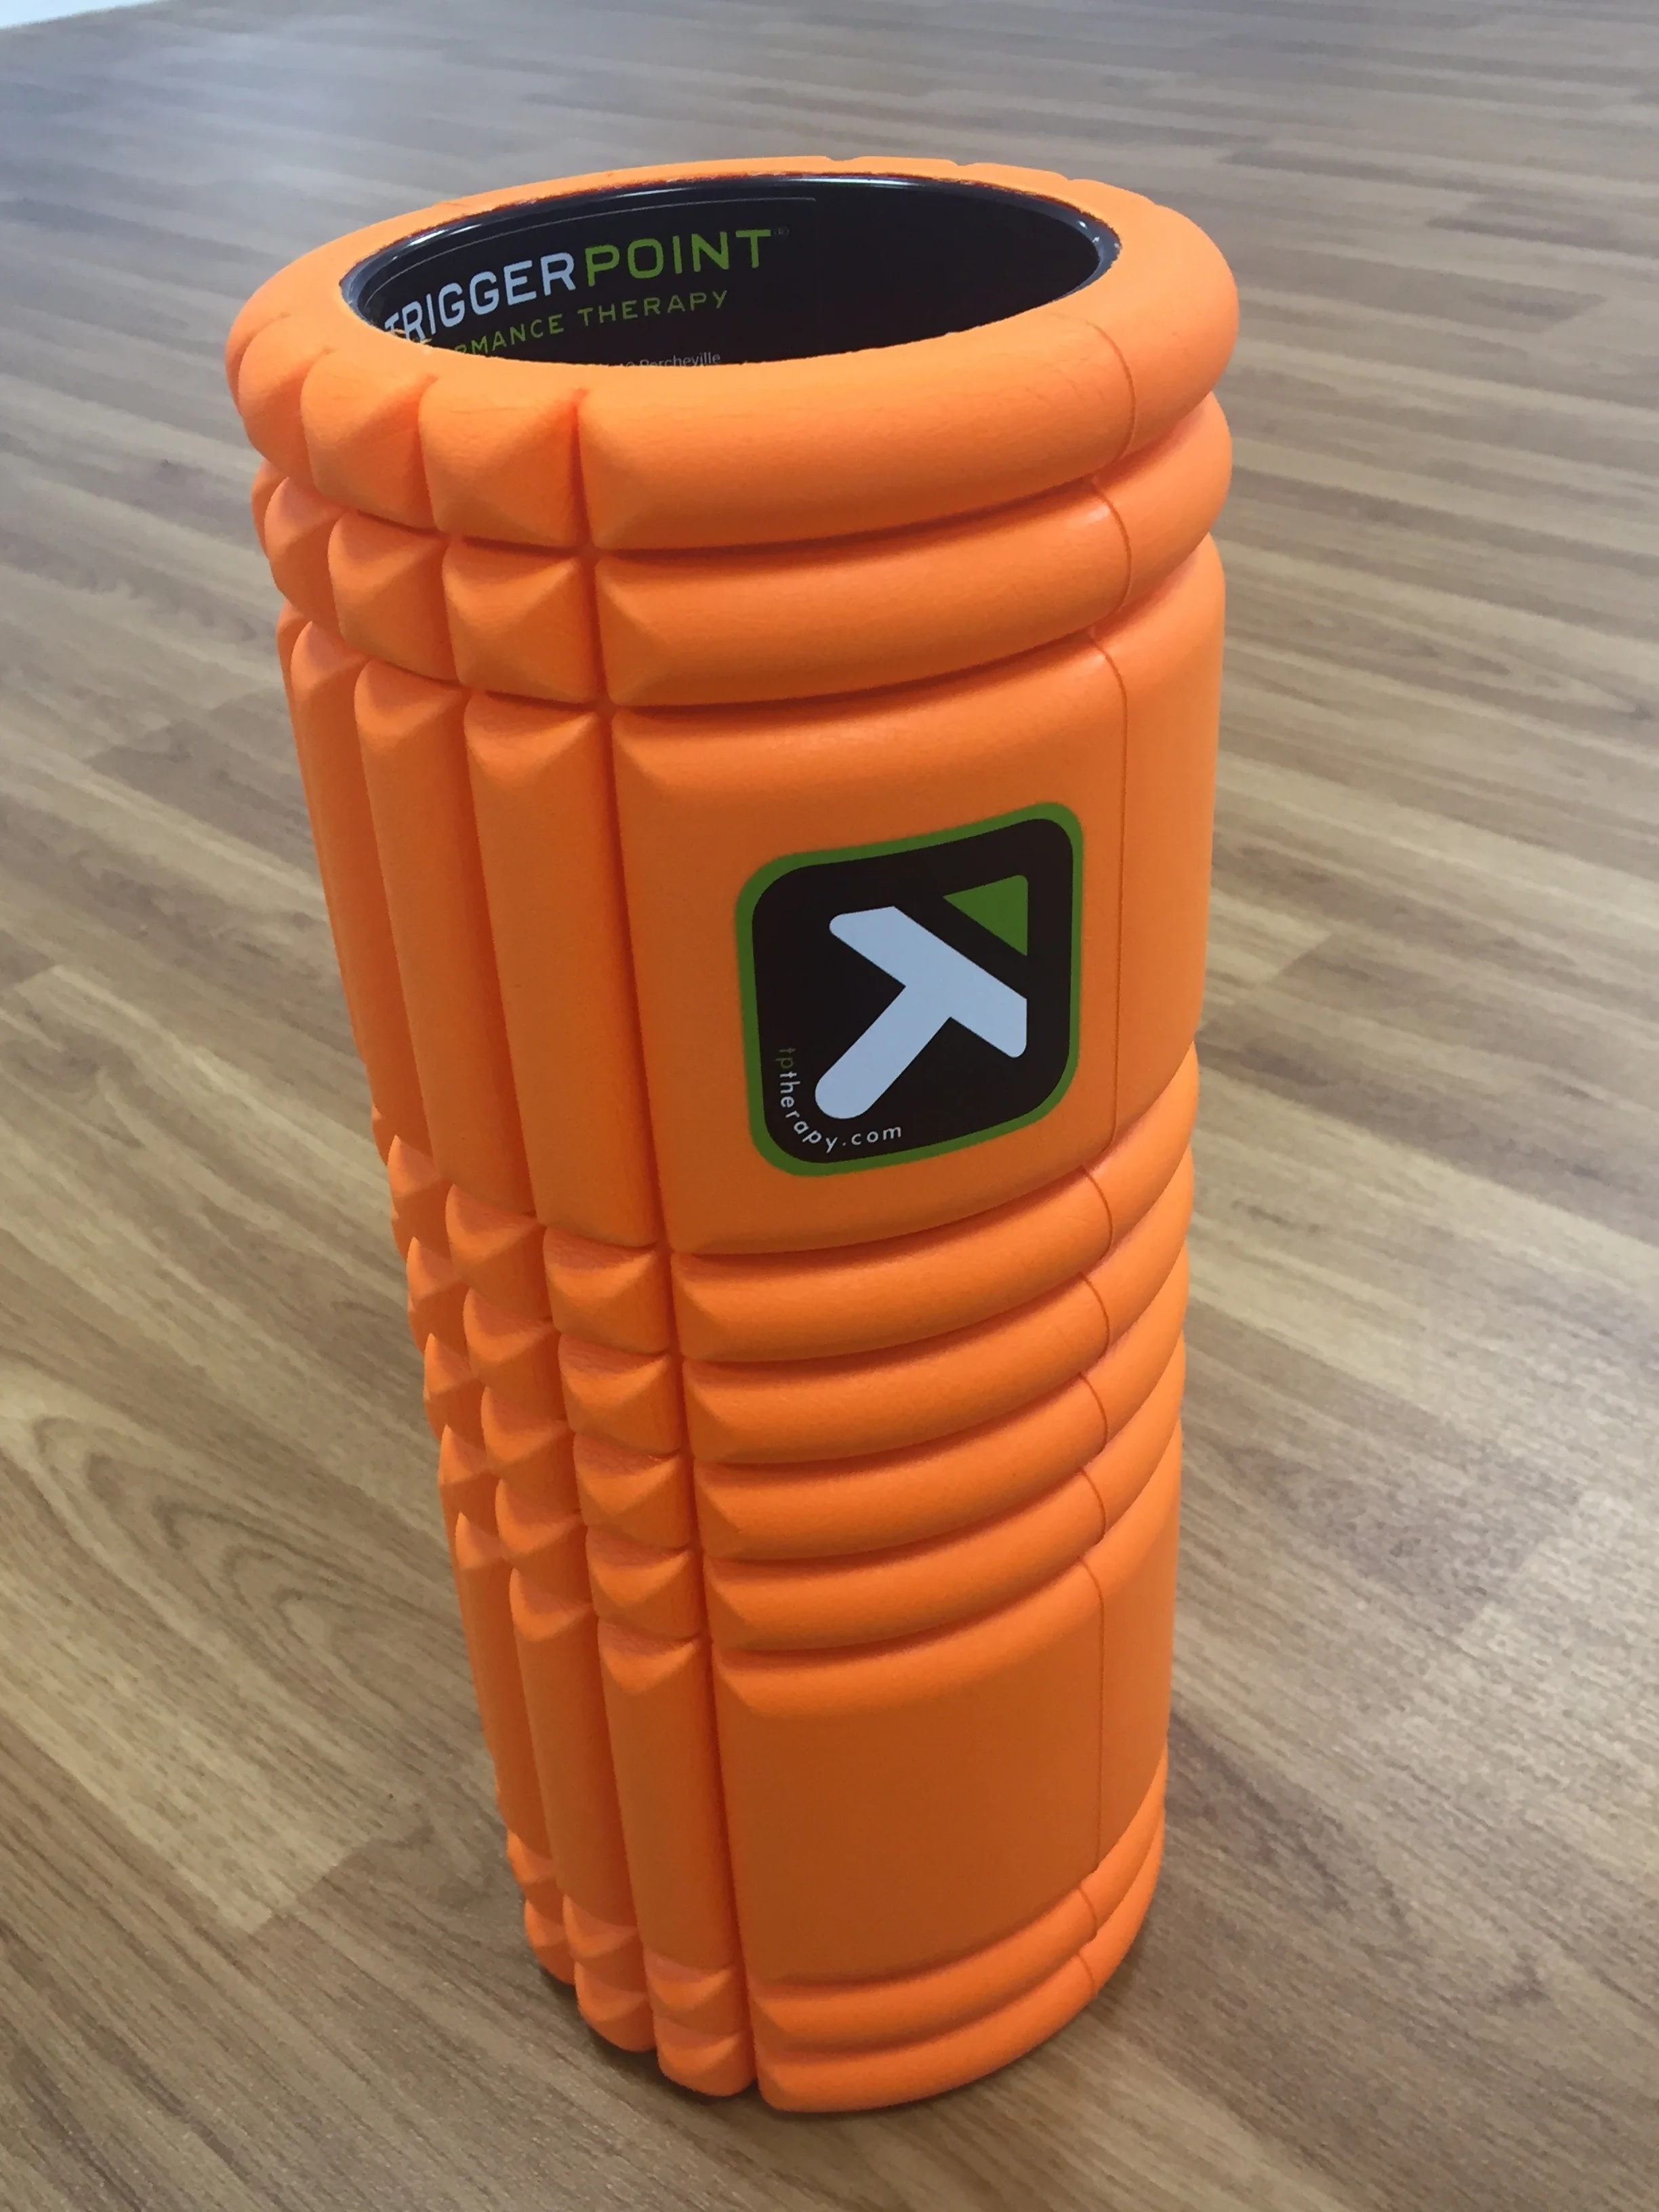
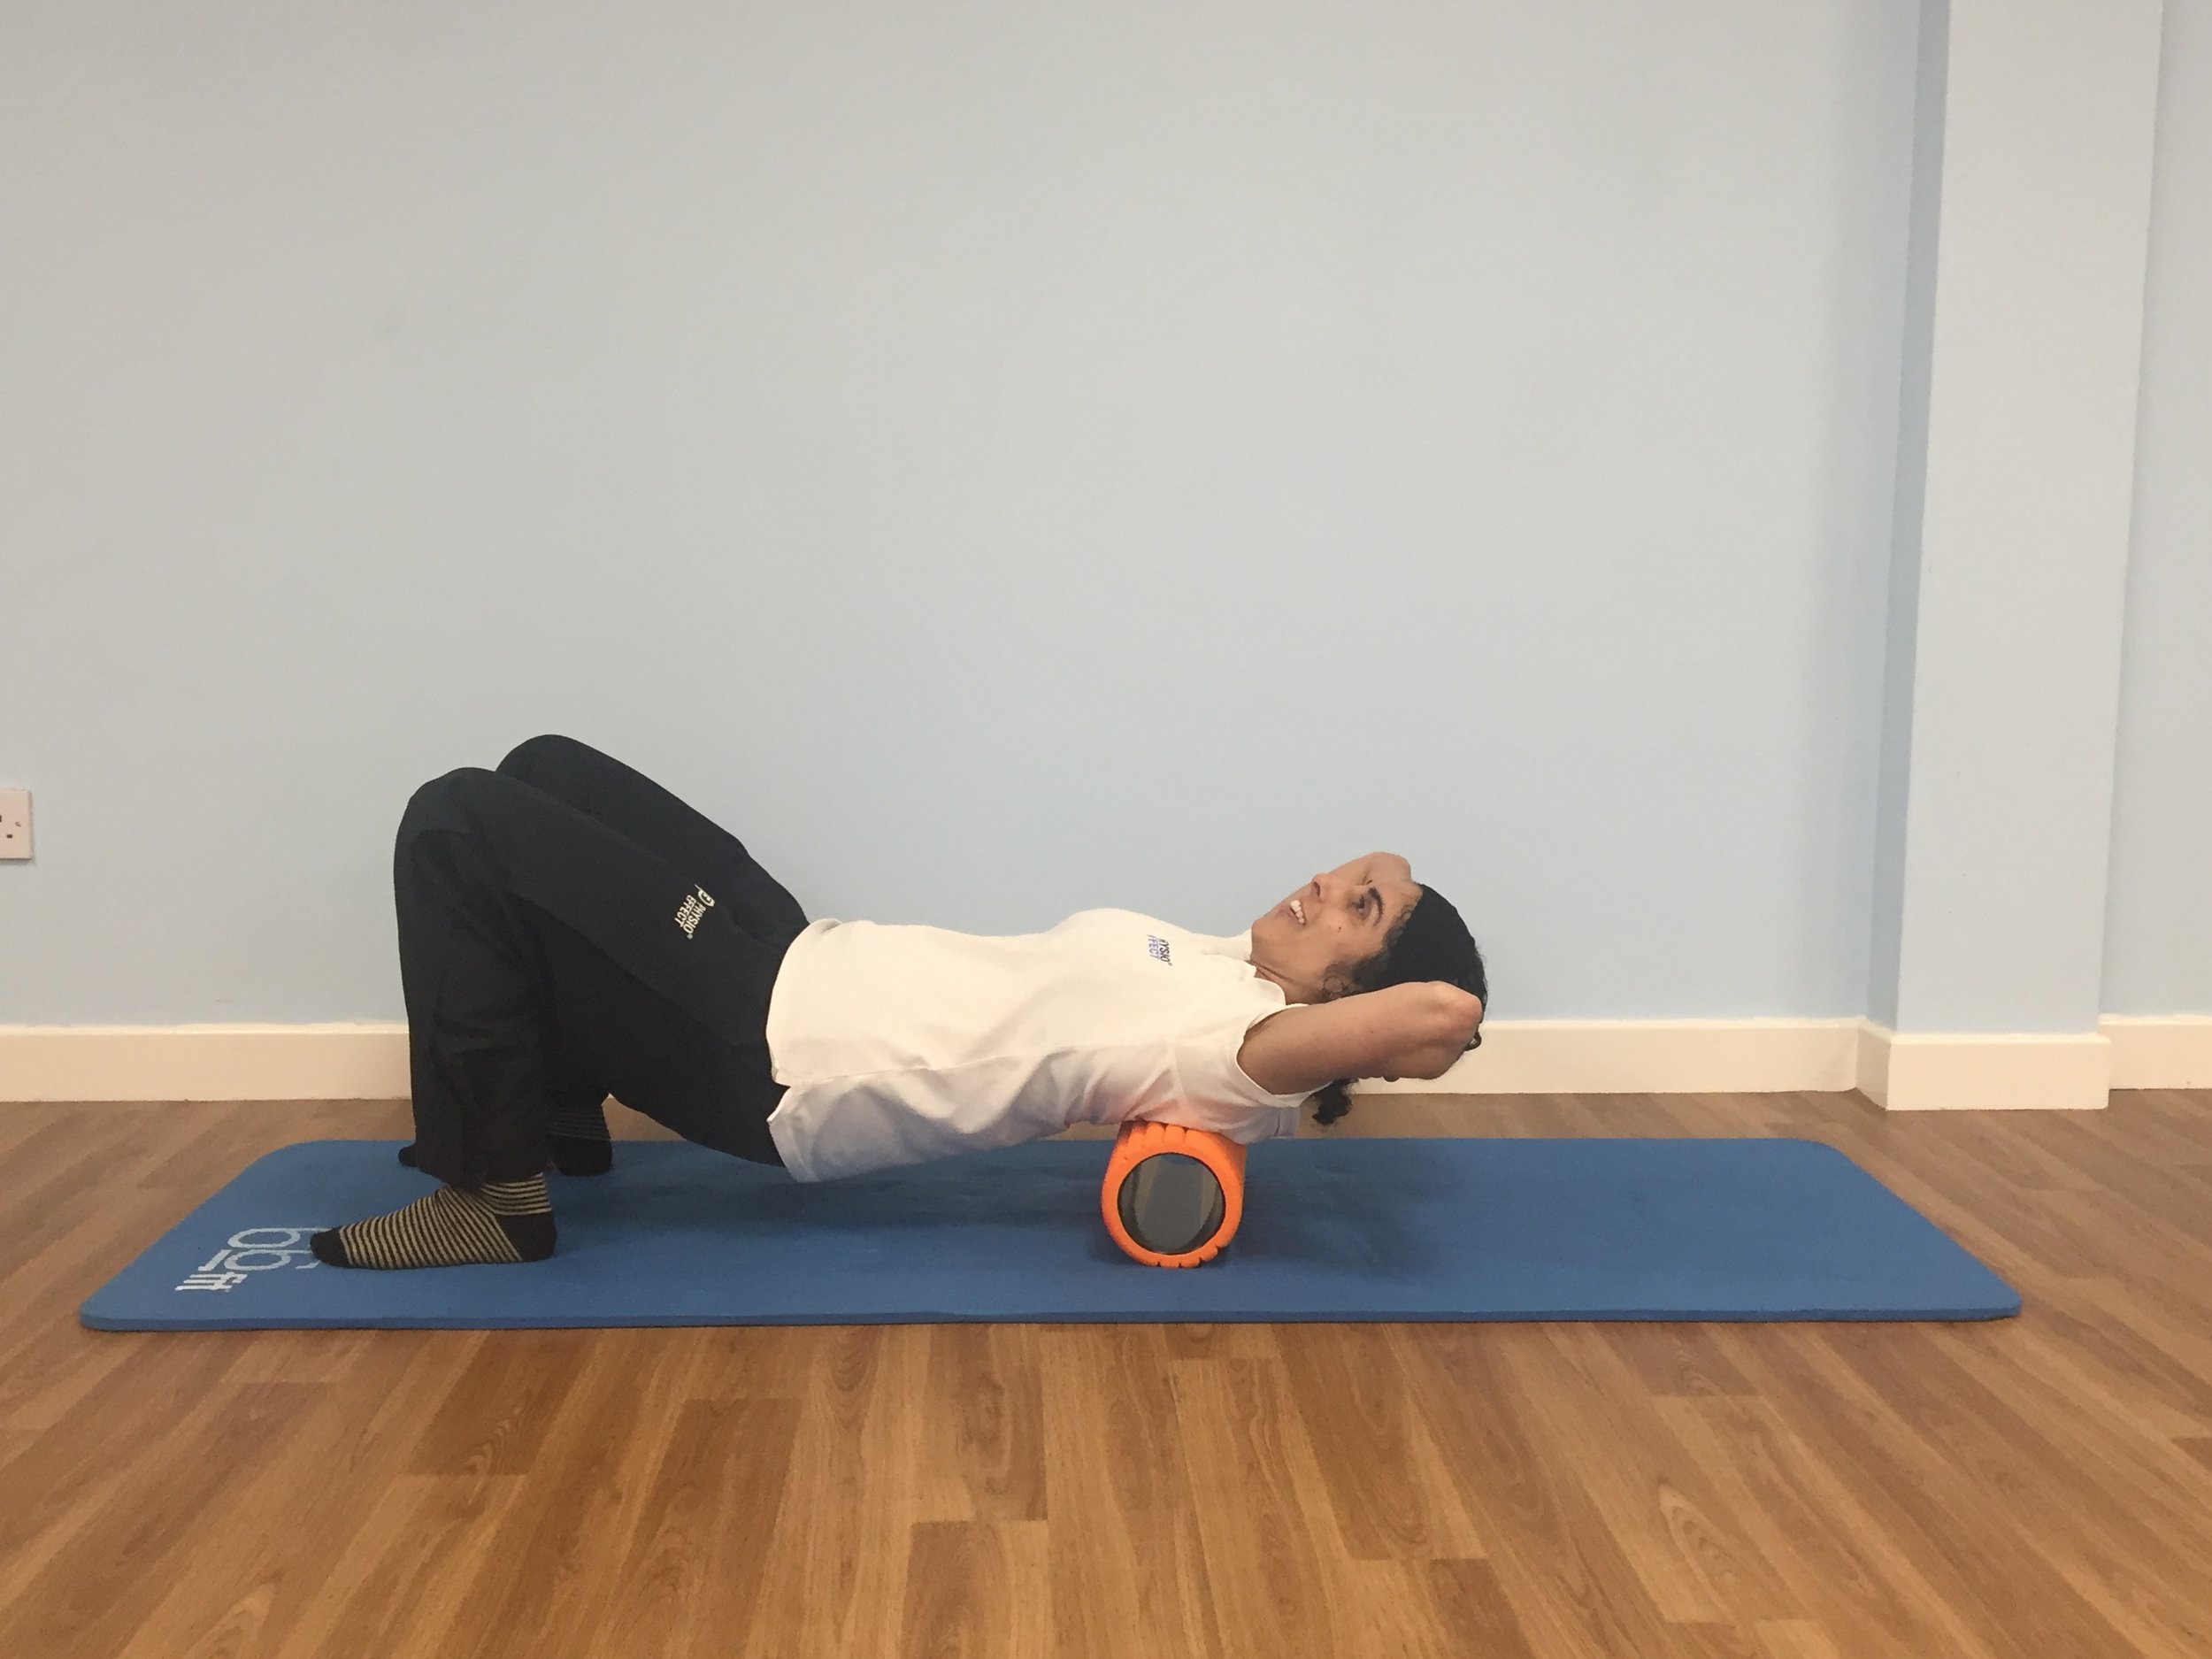
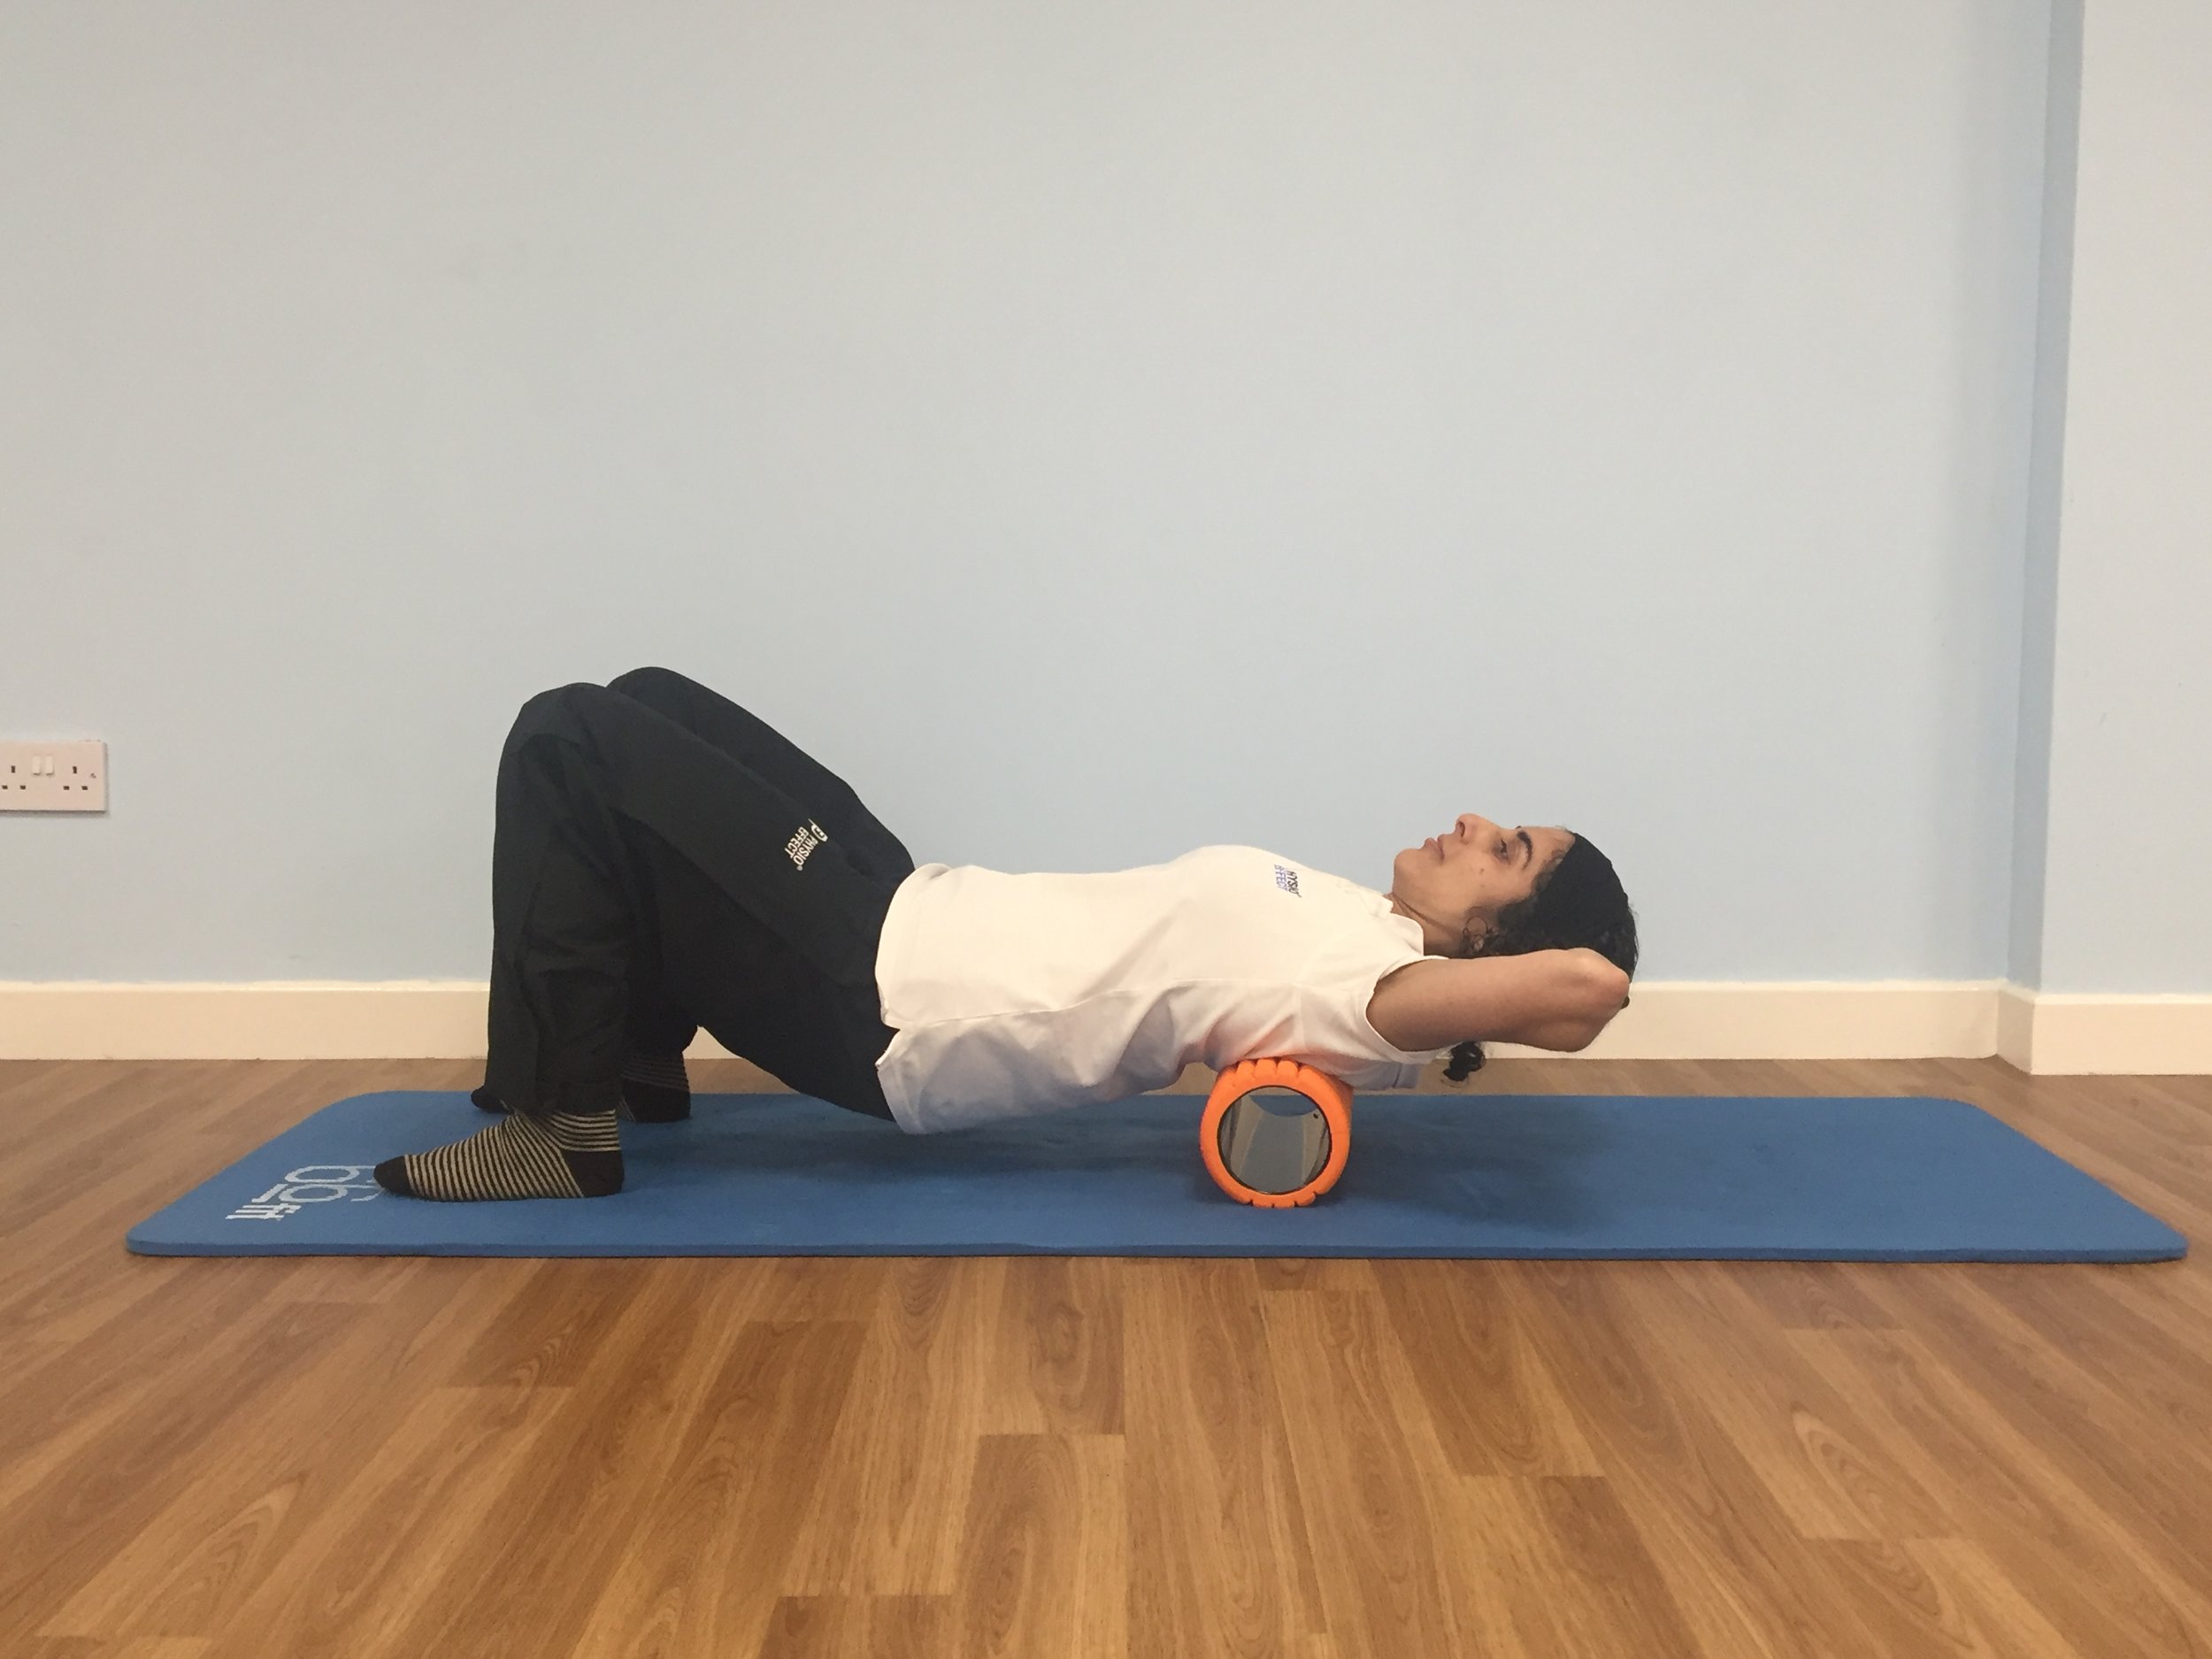
Exercise 7 - Thoracic Extension with Foam Roller

Thoracic Extension with Foam Roller Start Position
Lying on your back with knees bent and feet flat, place a foam roller under your mid-upper back as shown
Take a deep breath in and then, as you exhale, slowly extend back over the roller to stretch your back. Try to keep your lower abdominals engaged to avoid over-arching your lower back
Support your head with your hands and be careful to stay relaxed in your neck. If you find this too intense or uncomfortable, try using a pillow or pillows to rest back onto
Hold the finish position for 2-3 breath cycles, return to start position and repeat 5 times
Move the roller to another position in your mid-upper back and repeat the process, aim to work on 3-5 positions along your spine

Thoracic Extension with Foam Roller Finish Position

Thoracic Extension with Foam Roller Alternate Finish Position
Exercise 8 - Pec Stretch

Pec Stretch Start Position
Stand as shown with arm at approximately shoulder height and palm to forearm placed against the doorframe
Slowly turn your body away by stepping your feet around to open and stretch the front of your chest and shoulder
Lean gently into the stretch, keeping your neck relaxed, hold for 30 seconds+, repeat x 2 on each side
Alternatively, use a doorway to position both arms in the stretch position, step forward to feel the chest and shoulder open and stretch. Hold 30 seconds+, repeat x 2.

Double Pec Stretch Position
While these are general exercise recommendations suitable for the majority of the population they are not prescriptive for any specific pain or injury. These exercises should be performed slowly and gently in a range of movement suited to your own level of ability and flexibility. The exercises should not cause any pain and we recommend that if you are in any doubt or if you are suffering from spinal or joint pain issues you should consult a healthcare professional for advice.
At Physio Effect we provide a wide range of services allowing us to not only treat your pain or injury but ensure that you are given the best advice specific to your individual needs to prevent your problem from recurring.
Foam Rolling: What is it? What’s the Evidence? How to apply it!
Self-myofascial release is a name given to the use of equipment or tools to perform self-massage and stretching with the aim of increasing joint range of motion and improving muscle recovery and performance. One of the most commonly used tools is a foam roller. You will often see people in gyms attempting to manoeuvre their bodies in various positions over one of these rollers.
Foam Rolling
What is it?
Self-myofascial release is a name given to the use of equipment or tools to perform self-massage and stretching with the aim of increasing joint range of motion and improving muscle recovery and performance. One of the most commonly used tools is a foam roller. You will often see people in gyms attempting to manoeuvre their bodies in various positions over one of these rollers.
Most commonly rollers will be used in a way that the body is positioned with the roller in contact with a specific muscle or muscle group. The user then uses gentle motion to stretch and massage the area while controlling the pressure exerted by adjusting their position and the weight going through the area.
The theory is that using foam rollers used to massage and stretch our muscles, joints and soft tissues can make them more pliable thereby increasing range of motion. It is also theorised that pressure applied to soft tissues can stimulate change through the central nervous system by sending signals which alter the tissue activity and reduce tension levels.
What’s the evidence?
In general terms, self-myofascial release using a foam roller appears to have short-term effects of increasing joint range of motion without exhibiting any negative effects on muscle or joint performance. There is also some evidence to suggest that post exercise muscle soreness can be reduced while muscle recovery is enhanced when foam rolling is used after strenuous or intense exercise.
The overall summary of the evidence to date suggests that foam rolling is a safe tool to use prior to or after exercise to assist with warm up and/or recovery. However, the research is limited and fails to come to a consensus on what the optimal methods, techniques or frequency of foam rolling should be. There is not yet enough research or evidence to define the best way to roll specific muscles or how many sets or repetitions is appropriate.
How can I apply it?
The general consensus is that foam rolling is safe and can be a welcome addition to assist in warm up and recovery. While we do not have enough evidence to create exact protocols there is room here for individual preference and some experimentation to see what works best for you. From personal experience and from reviewing the literature we would suggest trying:
3-5 sets of 30+ second repetitions on each targeted muscle or muscle group
Apply gradual pressure in various planes and directions.
For larger or longer muscle groups consider dividing the application into 2-3 areas
Consistent application aiming for a minimum of 3 times per week
Slight discomfort during application is acceptable but strong or intense pain is not
Position yourself carefully to avoid unnecessary strain on other muscles or joints
Below are a few examples of positions used to foam roll various muscles

Foam rolling outer thigh

Foam rolling upper back

Foam rolling calf muscle
A word of caution
Foam rolling can be a useful adjunct to any exercise or training routine and may also be used by more sedentary individuals to reduce muscle and joint stiffness. Foam rolling, however, is not an appropriate tool for treating damaged or injured tissues and we would warn that it should not be used as such. Always seek advice from a qualified professional if you are in any doubt.
Foam rolling does not replace or negate the need for adequate warm up and the use of correct techniques when exercising. We would suggest using foam rolling to compliment your existing training or exercising routine but not to replace any aspect.
————————
Article written by Daniel Wray – Senior Physiotherapist and Director at Physio Effect
The dedicated team at Physio Effect provide a full package of services that will ensure you’re supported through your pain management, injury prevention, assessment, recovery and helping you achieve your ultimate performance goals. We offer a range of services including Physiotherapy, Sports Massage, Craniosacral Therapy, Clinical Pilates and Yoga.

Kinesio-Taping
Despite the clear lack of evidence for its use the spread of kinesio-taping throughout health and sport practices does not appear to be waning. As a Physiotherapist with more than 10 years in clinical practice I have been officially trained and certified as a kinesio-tape practitioner and while I recognise the lack of hard clinical evidence I do still have a place for using kinesio-taping in my practice.
Article written by Daniel Wray – Senior Physiotherapist and Director at Physio Effect
6th November 2017
What is Kinesio-taping?
Kinesio-taping is a commonly used form of support taping applied to the muscles and joints of the body. There’s a good chance you will have seen this brightly coloured tape on a friend or colleague or through its wide use across many sports including football, tennis and swimming. Tape is normally applied by a trained health and fitness professional and can stay in place anything from 24 hours up to one week. The tape can stay in place after bathing or swimming and its breathable elastic properties mean it is generally well tolerated by the skin.
The theory behind kinesio-taping suggests that it works via its unique elastic properties lifting the skin to improve fluid movement and alleviate pain. A suggested mechanism of how this works is the alleviation of pressure on pain receptors interrupting the normal transmission of pain signals to the spinal cord. Other popular notions suggest that application of kinesio-tape can help stimulate and strengthen a weakened muscle or relax and release a stiff or tightened muscle depending on the level of tension applied to the tape. It may also offer support and restriction of movement when this is required as part of treating injured tissues or joints.
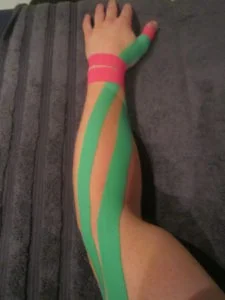
Kinesio taping application for shoulder support
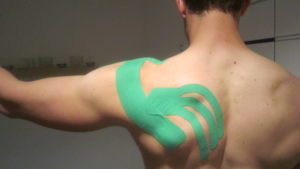
Kinesio-taping application for shoulder support
What’s the evidence?
As Physiotherapists and health professionals it is central to good practice that we seek out solid evidence to support the use of any therapy or treatment. Kinesio taping falls almost entirely into a category of little to no hard scientific evidence supporting its use. There have been numerous studies and systematic reviews of the evidence that conclude that kinesio-taping offers little to no clinically significant benefit. It appears most of the evidence and positive reviews from patients and health professionals to support kinesio-taping are anecdotal or based on single case reports or small samples.
Should I use kinesio-taping?
Despite the clear lack of evidence for its use the spread of kinesio-taping throughout health and sport practices does not appear to be waning. As a Physiotherapist with more than 10 years in clinical practice I have been officially trained and certified as a kinesio-tape practitioner and while I recognise the lack of hard clinical evidence I do still have a place for using kinesio-taping in my practice.
There is no clear evidence that proves any clinical risk in using kinesio-taping and anecdotally within practice I have had many patients report a sense of support or relief associated with the tape application. There may well be an element of placebo effect here but as long as that effect is positive and the potential benefits or lack thereof have been openly and realistically explained to patients then I see no issue with kinesio-tape use as part of a bigger clinical picture.
The use of kinesio-taping should not be considered as a complete treatment for any injury or condition and patients should understand it has limited evidence. Kinesio-taping should be considered as one aspect of treatment and any practitioner using it should be able to provide a rationale for doing so even if this comes down to personal clinical experience over specific evidence. Kinesio-taping should not be considered the mean to the end and should be an adjunct to support a full treatment and rehabilitation plan based on careful evidence based clinical assessment.
Article written by Daniel Wray – Senior Physiotherapist and Director at Physio Effect
The dedicated team at Physio Effect provide a full package of services that will ensure you’re supported through your pain management, injury prevention, assessment, recovery and helping you achieve your ultimate performance goals.