Mobility - What? Why? When? How?!
Do you struggle with constant niggling joint and muscle pains? You workout regularly but still feel stiff all the time? Do you need help understanding and implementing better mobility habits and practices? If yes then this blog is for you! Modern stressful and busy lifestyles often mean we neglect flexibility and mobility practices. Long hours of static postures cause us to stiffen up & this compounds over weeks, months and years. It’s time to start organising your mobility practices to move better & feel better!
Improving mobility requires consistent structure, practice & effort!
Written By Daniel Wray (Sports Physiotherapist & Mobility Coach)

What is mobility?
Mobility is the ability to move freely and easily, encompassing physical movement, flexibility, balance, and environment access.
Mobility is vital for daily activities and exercise, impacting overall performance and quality of life.
Improving mobility enhances physical function, reduces injury risk, and fosters independence. Prioritising mobility supports long-term health and well-being.

5 barriers to mobility practice
Physical Limitations
Joint pain, muscle weakness, and neurological issues can hinder mobility exercises.Psychological Factors
Anxiety, depression, and lack of motivation can create fear of injury, impacting engagement.Access to Resources
Limited facilities, equipment, or expert access restrict effective mobility practice.Knowledge and Awareness
Lack of understanding about mobility's benefits inhibits participation.Environmental Barriers
Poorly designed spaces and clutter discourage movement, obstructing mobility practice.
stop sitting & start moving!

Sitting Is the New Smoking!
In our experience the main cause of reduced mobility and increased joint pain and stiffness is a sedentary job or lifestyle. Sitting for over 40 hours a week leads to negative consequences. What we see regularly in clinic is huge frustration from people in this situation who do actively find time for exercise, sport & gym classes.
“I go to the gym 4 times a week so why am I so stiff & sore?”
The problem with modern life stresses and lack of time mean many of us compartmentalise exercise to one point in the day for perhaps 1-2 hours. Out with that we are too static often sitting or standing at desks for long unbroken periods. Structured & planned exercise classes or sport is great but we must also find ways to inject short, varied, but regular amounts of movement into our everyday activities.
Tips to improve Mobility practice

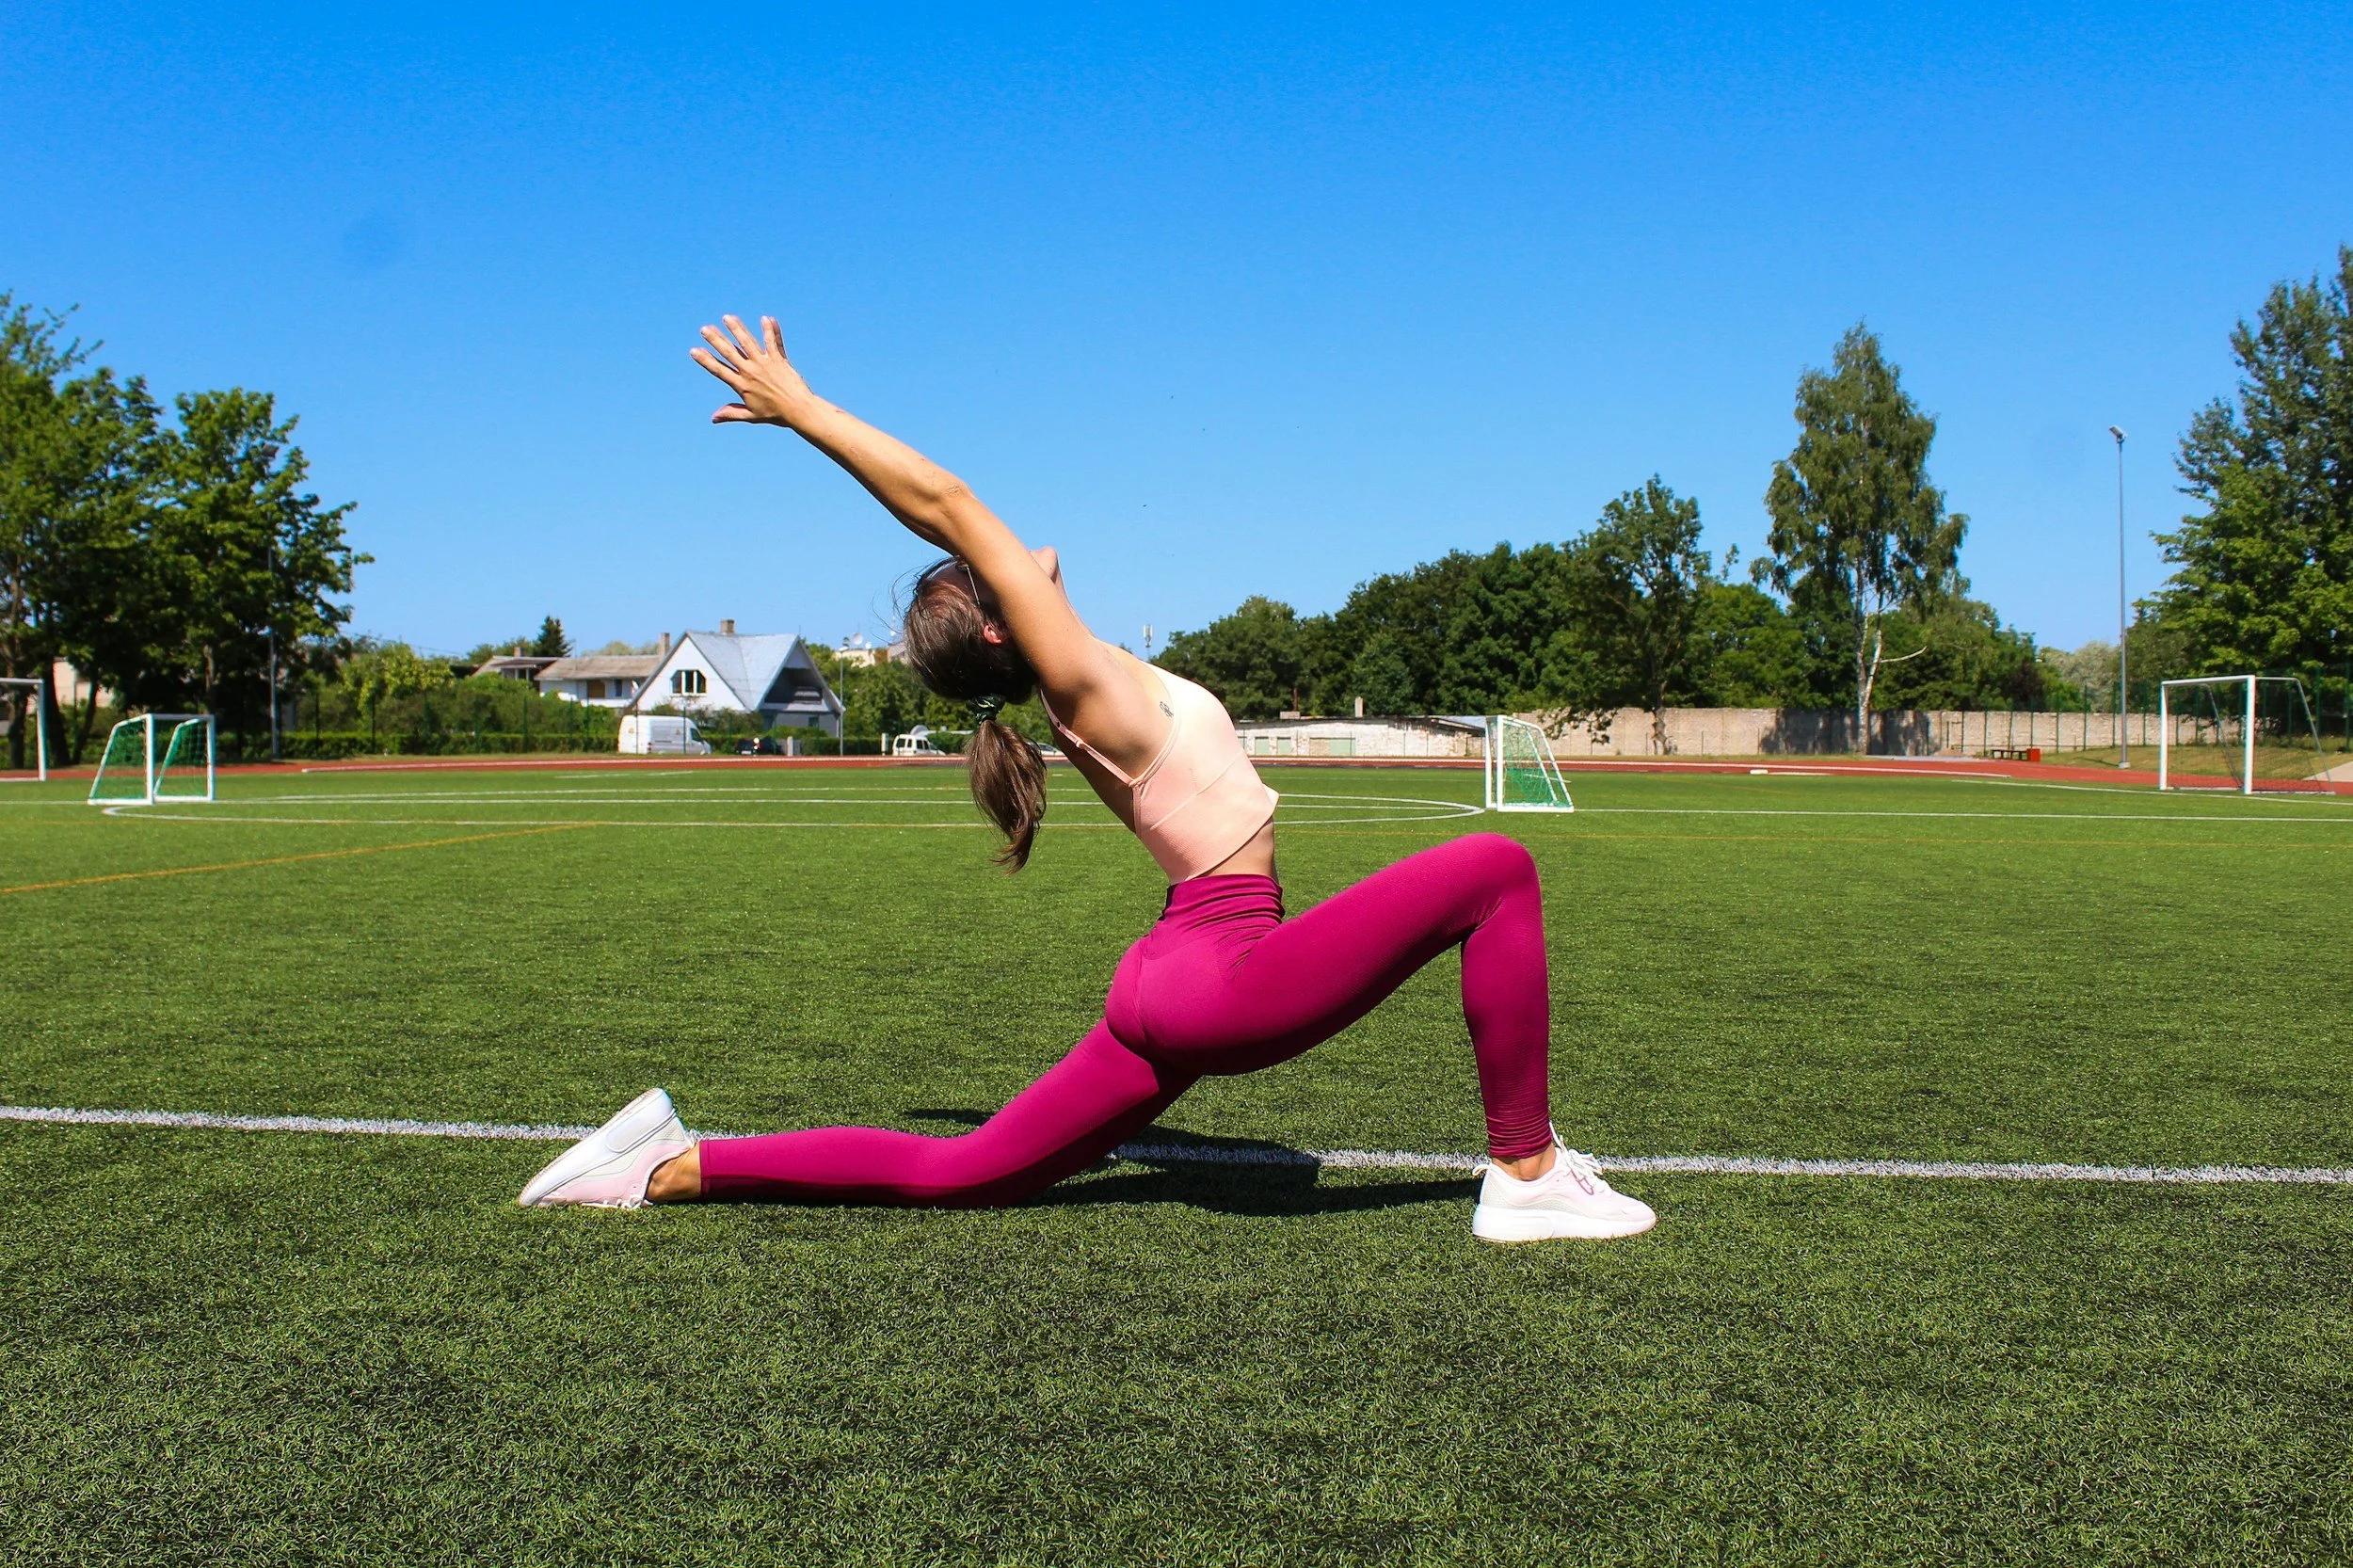
Prioritise Side bends & Rotational Plane Movements
Incorporate Daily Stretching & Mobility Flows
Dedicate at least 10-15 minutes each day to stretching. Focus on major muscle groups and areas that typically feel tight, such as the hips, shoulders, and spine. Consistency is key to improving flexibility and joint mobility.Engage in Mobility-Focused Activities
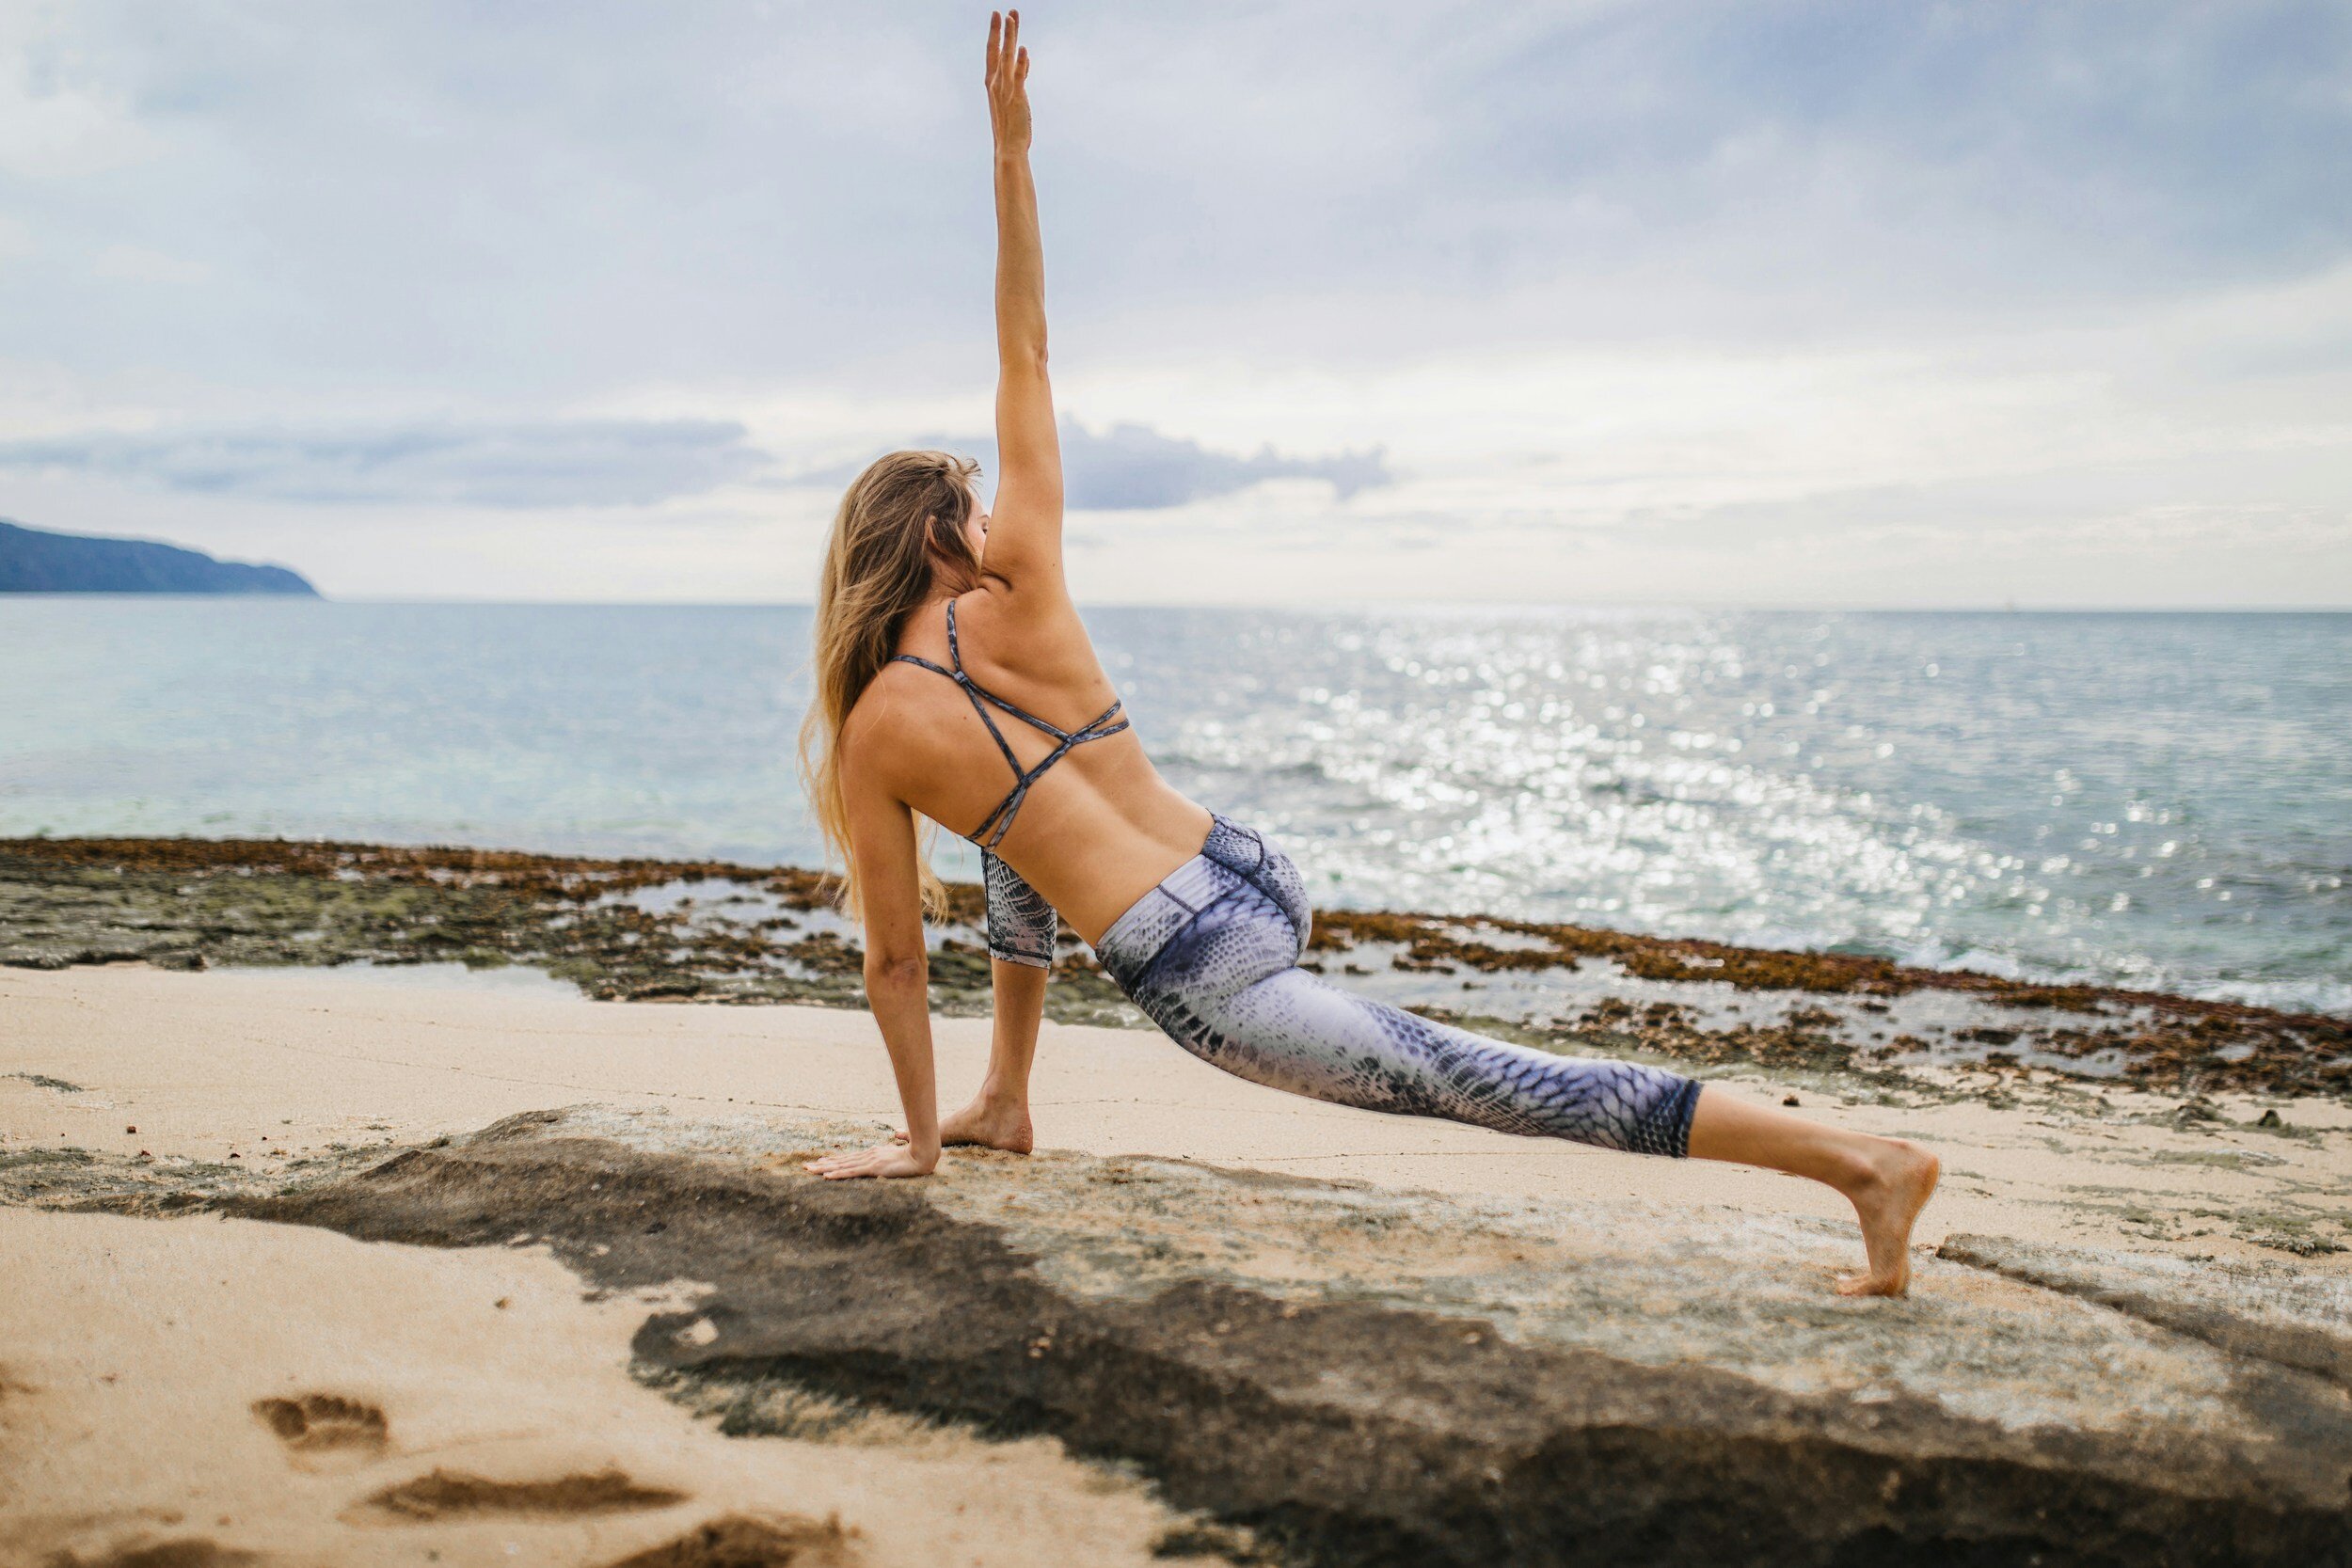
Activities such as yoga, Pilates, and tai chi are excellent for enhancing mobility. These practices encourage controlled movements and can help increase your range of motion, balance, and overall physical awareness.Incorporate Micro Breaks
Aim to move for 2-3 minutes every hour as a minimum. Large simple movements of all major joints helps to create pressure changes and encourage healthy fluid balance in our tissues and joints reducing the cumulative build up of static postures.
Include Dynamic Warm-ups
Before engaging in physical activity, perform dynamic warm-up exercises. Movements like leg swings, arm circles, and torso twists can prepare your body for more strenuous activity and promote better mobility throughout your workout.Prioritise Functional Movements
A strong body is able to move in all planes of motion. A lot of gym exercises and routines can be too hinge like and robotic in nature failing to promote adequate movements in all planes. Incorporate good accessory training to include rotational, side bend and functional movements.
Example Mobility Flows For Daily Practice
Back Mobility Exercise Flow - Try this routine to gently mobilise your spine
Hip Mobility Flow - Try this exercise flow to mobilise and loosen up stiff hips

We love a 3 Point Bridge. Movement is medicine, start taking yours!
Summary
Improving mobility and reducing pain & stiffness is no simple task but it can be done! Take positive action and start today dedicating time for movement and stretching as often as you can. Spend some time analysing your current practice and training and see where you can improve.
We help people improve mobility & reduce pain and stiffness on a daily basis. If you need help to understand your needs and to design & implement a plan unique to your goals we can help!
thank you
Thanks for reading, please share with any friends, family or colleagues who could benefit.
We are always here to listen & help. Our specialist team can help you navigate and manage any ache, pain or injury.
You can Use the links to Book an appointment now or Contact us with any questions

Working From Home Survival Guide
Is working from home making you ill and injured? Are you in pain & stiffer than ever? Are you feeling isolated and unsupported? The risks are real and you are not alone. This survival guide will help you make better choices to reduce pain & stiffness and look after your body and mind. What are you waiting for? Follow our top tips to move more, organise yourself and have a positive impact on your physical and mental health
Is Working from home breaking you? Do you feel:

WFH health risks are very real
Stiff and sore?
back, neck, joint or muscle pains?
headaches or vision problems?
overwhelmed?
fatigued?
irritable?
low mood?
The risks of working from home (WFH) to physical and mental health are significant and real.
If you are feeling any of these issues you are not alone. You need to take positive action now and improve your individual situation.
Below we will list our top tips for how you can act now to prioritise your health. In Summary you need to :
MOVE MORE
GET ORGANISED
OPTIMISE YOUR WORKSPACE

Take Positive Action and Get Organised To Improve Your WFH Situation
top tip 1 - move more!
The single most important thing you can do to improve your WFH health is to move more. If you roll out of bed, grab a coffee then plant yourself at your desk with no movement or plans to move then you are brewing trouble. The NHS recommends reducing your sitting time significantly to improve your health and reduce the risks of type 2 diabetes, some cancers and even early death!
Are you already struggling with pain & stiffness in your neck, shoulders, back or hips? Check out these links to our previous blogs for advice, stretching and mobility instructional videos:

Movement Is The Key - Could you try Yoga?
When we are static (sitting or standing still) compressive and dehydrating forces are at work on our joints and soft tissues. All of our major body systems slow down and become sluggish which in the longer term contributes to significant health issues. The phase ‘Sitting Is the new smoking’ has been coined to highlight just how serious the impact of sedentary lifestyles can be
Movement creates positive pressure changes and improved fluid movement through our body as well as stimulating our body systems to be more active and alert. All of this helps to balance and reverse the negative effects of being static. Research shows us that movement and exercise can also help reduce stress and improve your mood.
Try these ideas:

Make time to move or you will get injured or sore
Rise earlier - Fit at least 10+ minutes of movement in before you hit the desk
Step challenge - Set a challenging daily step goal and go about smashing it. You need to prioritise time to walk. Try breaking it up into multiple smaller chunks (10-20 minutes x 2-3) throughout the day
Take breaks - Do not sit and rust at your desk! Take multiple complete breaks away from your desk and work. Walk, stretch or exercise, it doesn’t really matter, just take a break & move
Get outside - Combine fresh air & movement. Great for refreshing body & mind
Exercise for fun - Find something you enjoy and can commit to on at least a semi regular basis (2-3 x per week). Gym, walking, jogging, yoga, swimming etc.

Daily step targets are a great way to increase your activity. Get walking!
top tip 2 - organise yourself

Set Regular Break / Movement Alarms
Failure to plan is planning to fail! You need to actively organise yourself to make smarter, healthier choices and start reducing the negative impact of WFH.
We are great at making excuses for negative behaviour as it is generally the easier/lazier option. Get organised & remove barriers to promote positive action.
Try these ideas:
Plan Micro-Breaks - Aim to move away from your work for a minimum of 2-3 minutes every hour. Ideally combine this break with a little movement, stretching & breathing. 2-3 minutes of movement hourly is infinitely more important than trying to undo 8+ hours of static WFH with an end of day workout.
Set Movement Alarms - Use smart watches, desktop reminders or a simple timer to remind you when it’s time to get up and move. As already mentioned, ideally aim for a few minutes movement every hour as a minimum. Don’t ignore it! Get up and move.

Drink at least 2-3 litres of water every day
Create Dedicated Space - Dedicate some space at home away from your office or workstation setup to stretch, move & exercise. Get a yoga mat down, gather any small equipment like foam rollers or exercise bands and have it accessible. Removing the barrier of having to get setup each time you want to exercise will significantly increase your compliance
Measure Water Intake - Aim to drink at least 2 - 3 litres of water a day. Many people are chronically dehydrated and don’t even know it. This contributes massively to muscle and joint pain, headaches and general fatigue. Poor water intake increases your risk of dysfunctional metabolism and chronic diseases. Your tissues and body systems need water to function so give it to them! Use a water bottle to track your consumption and trigger better habits
top tip 3 - optimise your work space setup
When it comes to WFH there is no perfect workstation setup but you can improve and optimise in some areas. This article by the New York Times gives some further ideas on equipment and optimal desk setup. However, there is no point in forking out thousands on space age chairs and desks if you sit on you butt and barely move for 8+ hours a day.
You can’t buy your way to healthier WFH and you must still prioritise movement, regular breaks and a structure to your day that gives you balance physically and mentally. Once that’s in place see if you can implement some of the following ideas:

Stand Instead of Sit. Use a riser to optimise your screen and mouse position.
Stand Instead of Sit - Standing is probably the lesser of 2 evils and tends to naturally lead to a bit more movement and reduced pressure on some areas like the neck and lower back. If your work station allows it alternate sit to stand regularly throughout the day
Use Equipment & Aids - Optimise your sitting & standing postures by utilising equipment. Perhaps your employer can supply equipment such as a desk riser for raising the height of your monitor. Ergonomic chairs and variations of mouse and keyboards are available to promote better positioning and reduce repetitive strain. Access what you can & make arrangements that suit your own setup.
Stretch & Move - Our bodies love symmetry but unfortunately WFH and office based work in general promotes repetition with repeated postures, positions and static behaviours.
At risk of repeating ourselves here you need to counter static behaviours by moving your muscles and joints regularly through a large range and routinely in the opposite direction to the postures you adapt while working. For example to counter tightness in the hips and lower back from sitting we should target arching our lower back and lengthening our front hip and thigh muscles. Check out our Mobility blogs and Videos here.

‘Cobra’ Back Bend Stretch
Lunge Hip Opener Stretch

WFH can be happier and healthier
Summary
It’s time for you to take positive action if you want to improve your WFH situation. Stop making excuses, organise yourself and make healthier choices now to improve your physical and mental well being. It’s up to you!
thank you
Thanks for reading, please share with any friends, family or colleagues who could benefit.
We are always here to listen & help. Our specialist team can help you navigate and manage any ache, pain or injury.
Use the links below to Book an appointment now or Contact us with any questions

Back Pain - A Self Help Guide
Back pain is very common. It’s frustrating at best and debilitating at worst. This guide will help you develop strategies for long term change to get rid of back pain and stay pain free long term. No magic bullet or ‘Guru’ advice here, just sensible and actionable tips allowing you to take control and start your journey to a pain free back.
Written by Daniel Wray (BSc Hons Physio/ PG Dip Sports Physio)

Back Pain?
We’ve all been there…..
Why does my back hurt?
Back pain is common, if you’re reading this i’m sure you have suffered at least one episode of back pain in your lifetime and in all likelihood more than that. It’s frustrating and restricting and can have a huge negative impact on your quality of life.
There are many reasons for back pain and unfortunately it’s rarely a quick fix. The most common form of back pain is often referred to as mechanical pain which is an umbrella term describing dysfunction in the soft tissues and joints preventing or impeding normal function. This may be stiffness, weakness, muscle shortening, joint wear and tear or any combination of these plus other factors.
In the absence of acute trauma back pain rarely appears suddenly or overnight and for most it’s a gradual and cumulative process related to lifestyle. Our modern lifestyles are simply too sedentary with too many hours spent in static positions meaning our joints and muscles don’t get the movement stimulus they need to stay flexible, hydrated and healthy.

Familiar hunchback posture?
For many people what began as a minor back ache or stiffness spirals steadily into chronic pain and disability and it can seem like you’re stuck in a repetitive cycle of injury and pain. We try to make changes but the daily grind means we continue to rack up hours of sedentary, static, and repetitive behavior trapping us in this negative cycle. The pain can force further lifestyle changes meaning less movement and exercise which reinforces the negative cycle and it can seem impossible to break free. Having a dodgy sore back slowly becomes the norm and we just accept it and carry on.
It’s not all bad news - here’s what you can do…
It all seems pretty grim and depressing right? Well the good news is that for the most part the majority of back pain, even when extremely painful and debilitating, is not due to serious pathology and it can get better. There are of course exceptions to this and we would always advise you seek advice from a qualified health professional if you have serious concerns about your back pain.

The bad news, if you look at it that way, is that the fix is rarely instant and usually requires significant effort on your part to make lifestyle changes and prioritise time every single day to look after your back. Of course if you Google hard enough (we’ve all done it) you will find some ‘Guru’ promising an overnight fix in exchange for a significant amount of your hard earned cash but truthfully the magic bullet doesn’t exist. Below we have listed some strategies you can implement to make a real difference.
6 self help strategies to help manage back pain:
1- Keep moving. Complete rest is not going to help and generally increases stiffness, pain and fear avoidance behaviors. Of course we must adapt our movement depending on the level of pain and there may be a need to avoid certain postures, positions or movements for a short period of time which is fine. I don’t recall any scenario with a patient where we couldn’t find at least one simple movement they could do to keep some gentle activity in their back to promote healing and relaxation while building confidence that they are not going to stuck in pain forever. Experiment with different movements and stretches (see below video) gently and slowly and see what you can manage comfortably and that will give you a starting point which you can gradually add other movements to as your pain allows.

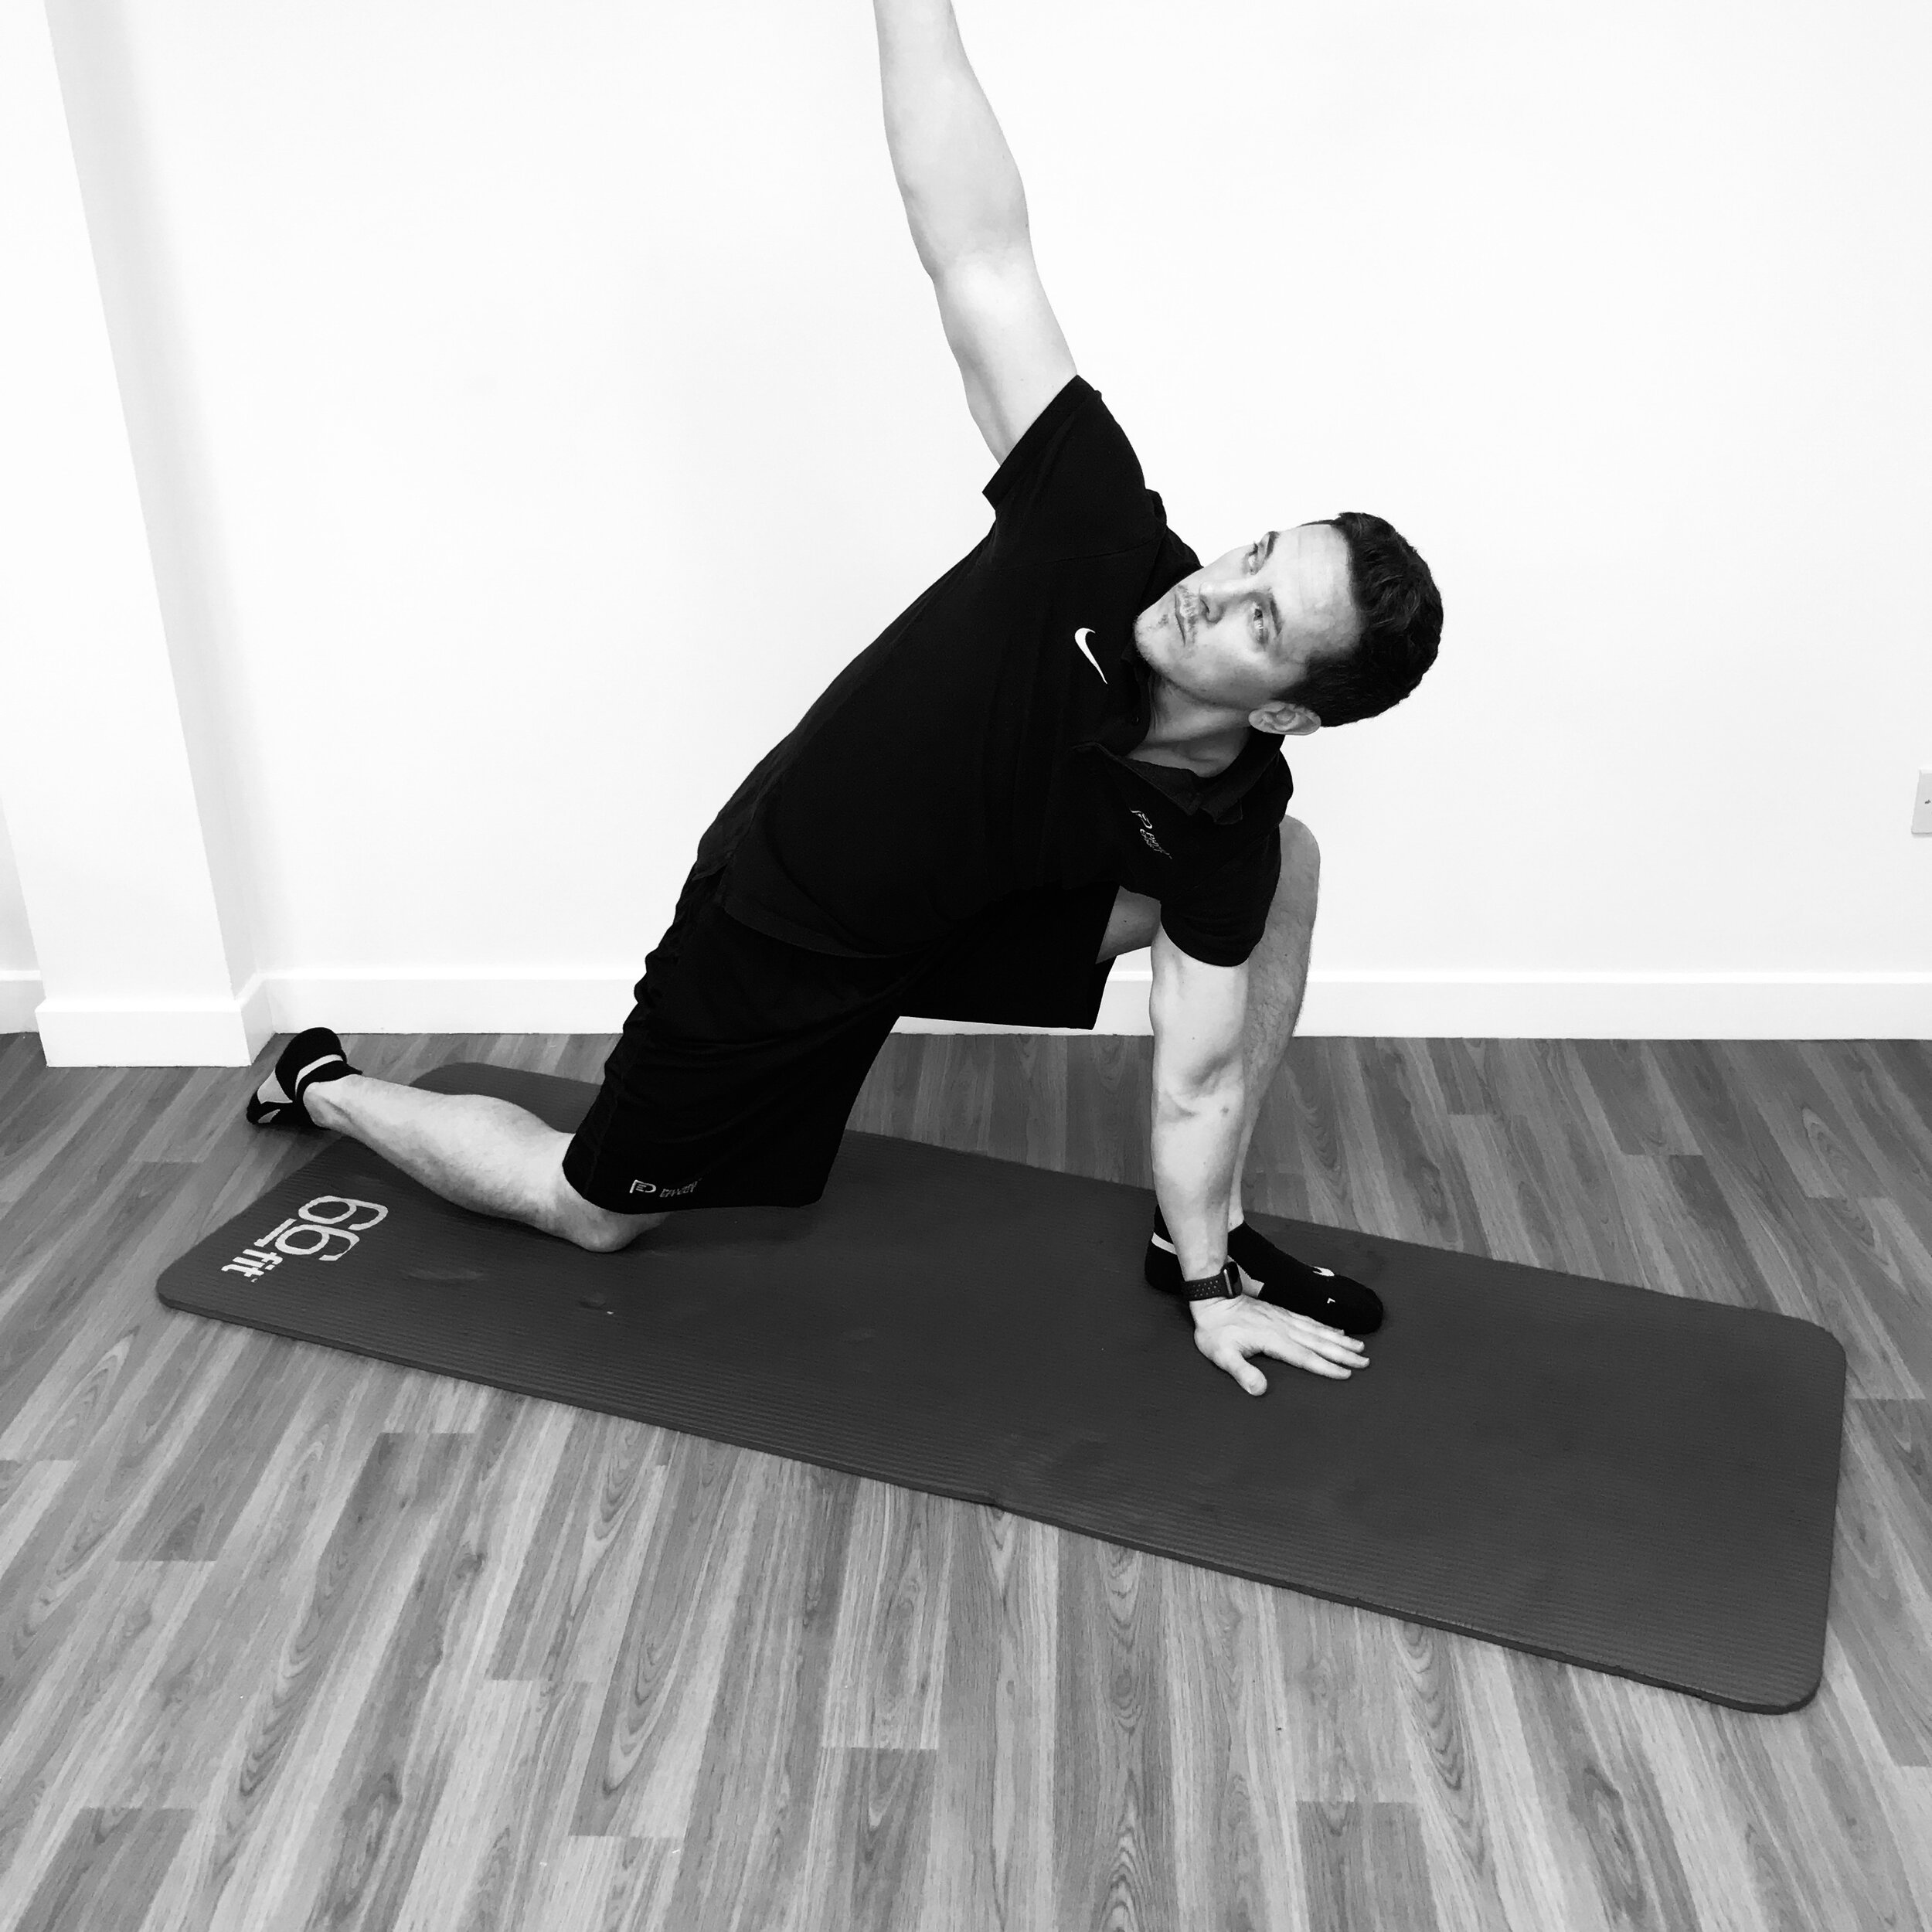
Lunge with arm and spine rotation
2- Establish routine & be proactive not reactive. You need to act consistently and with purpose. Don’t wait until your pain is crippling to decide you need to try some exercises to relieve it. Even if you’re feeling okay find a rhythm that allows structured gentle movement and exercise to be part of your daily routine ideally multiple times a day. Frequent exercise micro breaks to interrupt static postures will reduce the build up of pressure and stiffness and are more desirable than trying to undo hours of sedentary behaviour with a single bout of exercise. Think 2-3 minutes activity every hour rather than a 30 minute blast at the end of the day. Use a timer to remind you.
3- Accept responsibility & seek guidance. It is your body and your back and you need to find a way forward, nobody can do it for you. Don’t pass responsibility onto any therapist (no matter what some ‘Guru’ promises) and assume that by chucking money at it that will be enough to fix you. Do find help from someone you trust who has your best interests at heart and involves you in all aspects of any treatment or rehab plan. Passive treatments such as massage, acupuncture, and manipulation can be great for pain relief but long term are only as good as the agreed exercise plan and responsibility you take in changing your lifestyle. Be wary of any therapist promising to fix you but providing no education or prescription of exercises you can use to help yourself.
4- Exercise for fun. Find a form of exercise you genuinely enjoy and commit regularly to it. Don’t drag yourself to the gym if you hate every minute of it, exercise should be enjoyable and a way to relax your mind as well as your body. Try new things and see what you enjoy. Ultimately your long term compliance will wain if you pursue something because you feel you have to rather than because you really want to.

Back Strengthening - Extensions on the GHD machine
5- Manage stress. One of the biggest silent assassins to any life goal is high stress levels. You can have all the good intent in the world in changing lifestyle and exercising more but if you are under high levels of stress you can easily sabotage any progress. I realise this is a broad blanket statement and stress management is a big topic beyond the scope of this article but at the very least be aware of how it contributes and can damage your progress, then start to look for solutions.
6- Be patient. You won’t change things overnight and chances are you will have many peaks and troughs in your recovery. This is normal. Try to be patient and remember a backward step with increasing pain symptoms is not the end of the world, try to continually adapt but keep taking positive actions even when you feel frustrated and annoyed. If you follow the steps above you should see over time the more severe episodes of back pain decrease while your ability to manage and recover from any acute episodes will improve.
Picking Exercises - Where to start?
It’s imperative to get moving ASAP with pretty much every kind of back pain or injury but the exact type of exercise or stretch you choose to get started with will differ depending on your level of pain, stiffness and disability. Below is a back mobility exercise flow covering a multitude of different exercises and positions. Try it but STOP if you feel any specific movement aggravates your pain. At most a slight awareness of stiffness or aching is permissible but do not force anything and take it slowly and gently.
You may decide that only a couple of these exercises work for you in your current situation and that is fine, identify what you can do and exclude what you can’t. That will be your start point and I would advise doing these exercises a minimum of 3 times per day but ideally more frequently at least initially. As you become more comfortable hopefully you can add more of the movements to your repertoire.
Long term most people will require a combination of strength and flexibility exercises but it is important that these are specific to your own individual requirements. The routine below is provided as a starting point but is not all encompassing so please seek advice on your own needs but do use these stretches to try and initiate positive change through movement. The exercises are broken down individually in the pictures below the video & you can download a PDF cheatsheet to keep for your reference at the end of this blog.
Back Mobility Flow Video:
Seeking Guidance? We Can Help
Our experienced team at Physio Effect Glasgow are specialists in back pain and have helped 1000s of people recover and get back their quality of life. We talk the talk and walk the walk and will combine exercise based rehab with highly skilled hands on therapies to ensure you get the best possible treatment.
Most importantly we will listen and work with you in partnership to identify your specific issues and formulate an agreed unique treatment plan. We will relieve your back pain and give you long term self management strategies to strengthen your back and reduce the chance of pain relapse.
Please contact us if you have questions or to book an appointment and get your journey to back pain recovery under way.
Exercise Breakdown:
Here is a breakdown of each of the exercises included in the back mobility flow video. These are available in a handy PDF download from the Subscription box at bottom of the page.
Exercise 1
Cat & Camel Stretch
Begin in all 4s position. Cat posture - Allow your spine to soften and hollow along its entire length. Tilt your tailbone gently to the ceiling. Relax you lower back, rib cage, shoulders and neck
Camel Posture - Arch your whole spine slowly and gently to the ceiling in one large ‘C’ shape. Tuck your tailbone between your legs
Hold each position for around 10 seconds. Transition from one to the other 6-8 times.

1- Cat Pose

2- Camel Pose
Exercise 2
Childs Pose to Cobra
Begin in all 4s position. Childs pose - Gently sit bottom back towards heels as far as is comfortable opening knees and hips softly and as required
Cobra Pose - Allow weight to come forward and lower hips gently to floor. Stay relaxed in hips and lower back and if required bend elbows slightly so that hips can rest in contact with floor.
Hold each position for around 10 seconds. Transition from one to the other 6-8 times

1- Childs Pose

2- Cobra Pose
Exercise 3
Childs Pose Side Bend
Begin in Childs Pose - Walk you hands around to one side into side bend aiming for at least a 45 degree angle, you should feel a good stretch down your side. Hold 20-30 seconds.
Walk hands around in same way to other side and again hold 20-30 seconds in side bend.
Repeat 2-3 times on each side
1- Childs Pose

2- Side Bend Right

3- Side Bend Left
Exercise 4
Lunge Hip Flexor Opener
Begin in Lunge position. Gently engage your lower tummy muscles and tuck your pelvis in. Aim to feel a stretch in the front of your hip and top of thigh
Gently engage your buttock muscles and lean slightly forward taking care not to arch your lower back
Hold the position 30-60 seconds. Repeat 1-2 times left and right

1- Lunge Hip Flexor Opener

2- Lunge Hip Flexor Opener - Forward Lean
Exercise 5 - Part 1
Lunge Hip Opener with Alternate Arm Rotations
From Lunge position reach hands forward and rest on floor beside front foot. Take outside arm and reach under and between legs ‘threading the needle’ holding for a few seconds
With the same arm rotate outward and upward toward ceiling trying to get arm to a straight vertical position, hold for a few seconds then return to ‘thread the needle’
Repeat this 10 times

1- Lunge Position Hands Forward on Floor

2- Lunge Position Hands Forward ‘Thread The Needle’

3- Lunge Position Hands Forward - Rotate arm vertically reaching for ceiling
Exercise 5 - Part 2
Lunge Hip Opener with Alternate Arm Rotations
After completing Part 1 of this series stay in the same position but extend out your back leg as far as is comfortable
Take inside arm now and rotate upward to the ceiling trying to achieve the straight arm vertical position, Hold for a few seconds
Bring the same arm down and with bent elbow drive your elbow towards the floor down the inside of your shin. Hold for a few seconds then rotate back to the vertical arm position
Repeat this 10 times

4- Lunge Position Extend Back Leg

5- Lunge Position Inside Arm Rotate to Ceiling

6- Lunge Position Inside Elbow Drive to Floor
Exercise 6
A-Frame Walk to Squat
From the all 4s position drive your hips into the air with straight knees and gentle lower your heels towards the floor into the A-Frame (it does not matter if you can’t fully extend knees or reach the floor with your heels). Hold for 10 seconds feeling stretch in back of legs
Keeping hands on floor slowly walk feet in towards hands and slowly sit down into a squat, hold for 10 seconds
Walk back to A-Frame position and hold for another 10 seconds
Repeat 4-6 times

1- A-Frame Position

2- A-Frame Walk to Squat

3- A-Frame Walk to Squat 2

4- Finish in Squat
Thank You
Thank you for taking the time to read this post, we sincerely hope that you find it useful and can use it to implement some positive changes and reduce your back pain. Take your time and work at your own level but be persistent and try to gradually improve on your own baseline.
Please download your own FREE PDF Cheatsheet to keep and to help with your practice and share this post with anyone who could benefit. If you have any questions or comments please just ask we would love to hear from you. Stay healthy and move well.

Animal flows - What, How and Why?
Animal flows are a great addition to any exercise plan, warm up routine or injury prevention plan. Learning to move like a monkey, frog, or bear helps to build full body strength, mobility and motor control which in turn will make you a more awesome human and less prone to injury. This blog with video tutorials will explain what these movements are, how to utilise them and why you should should be doing them
What are Animal Flows?
Animal flows essentially refer to movement and exercise patterns where we imitate different types of animals such as bears, monkeys, frogs or lizards. Moving in these patterns can be very challenging, especially for the stiff & inflexible among us, but can also be really fun & provide significant benefits.

Deep Squat
Practicing animal flows can help improve strength, flexibility, mobility and overall motor control which in turn will help to make you a better functioning human and less at risk of injury. These movements can really challenge us in unconventional ways demanding our joints and muscles learn to control movement in patterns and ranges we would rarely otherwise practice. They can provide a great way to warm the body up in preparation for other forms of exercise or can even act as a stand alone training session. Once you have tried some of these movements for a few minutes you will understand why!
Where do I start?
As with all areas of training and exercise when attempting something new or different our advice is always start slow and work safely within your own levels of capability. Never push through pain or injury and if in doubt about whether this is appropriate for you please seek advice from a qualified professional.
Very few people will be able to perform controlled animal flow movements perfectly or even well at the beginning. When incorporating these kinds of exercises with my patients it’s essential we first establish their base level where they feel safe to practice but also feel that it is challenging. I would advise starting with getting comfortable in the static positions required as the foundation for the movement. In this post we will look at 2 positions - Deep Squat & A-Frame (Downward dog). These are the foundation starting postures for progression onto the animal movements monkey, frog and bear.
Deep Squat
The squat is a great foundation exercise for strength and mobility in the lower limbs and yet for so many people it is a real area of weakness and frustration. A lot of us slowly lose our ability to sit into a deep squat mainly through neglect and lack of practice combined with our static and sedentary western lifestyles. We become weak, stiff and tight and can no longer control the range of motion required to allow a deep squat. We rarely challenge ourselves to sit into a deep squat position let alone spend time exploring and improving on our range and control in this position. So first things first lets get a measure of your baseline squat function - check out this video and see how you get on.
It may take weeks or months of work to improve your squat mobility and that’s okay. For a more detailed look at improving your hip and back mobility please click the links to see our previous blog posts on these areas. You can use these routines alongside your deep squat holds to improve your squat function.
If you feel up to increasing the mobility challenge of your deep squat lets check out this next video requiring some active hip rotation movements at the bottom of the squat - a great way to improve your range of motion and strength.
I would recommend slowly building these exercises into your routines, aim for 20-30 second rounds initially performed for 3-4 sets thereby accumulating 2-3 minutes in the deep squat. Try this at least 2-3 times per week. Long term the idea is to become comfortable spending longer periods in the deep squat and find it relatively easy to perform movements from this position. Try to build up to 5 minutes total in the deep squat per day of practice over several weeks.
Monkey & Frog Mobility
These animal flow progressions are suitable once you have a comfortable squat allowing you to sit at least to parallel depth without the need of hand support. Don’t worry if you’re not there yet, keep practicing the squat, back and hip mobility exercises and you can move on to these once you feel confident.
These exercises are difficult and physically demanding but the pay off of regular practice will be improved squat mobility, increased lower limb strength and motor control with an associated reduced injury risk in these areas. Give each of these a try and see how you get on.
Add these to your regular practice at least 2-3 times per week initially
Begin with 20-30 second rounds aiming to build up to 1-2 minutes or longer
Look to accumulate time in the positions - Try a 5 minute timer & while stopping for breaks when required, try to spend as much time actively moving in these flows
Ideally we want to develop a relaxed freedom of movement where you can drop comfortably into a deep squat and easily move through monkey and frog patterns. You can mix and match the movements to create variation in the flow and challenge your strength and mobility through mixed planes of movement. Don’t expect overnight success but as with all training with hard work and consistent practice you should be able to improve allowing you to move better and feel better.
A-Frame (Downward Dog)
This stretch position is probably best known in yoga circles, most people will of at least heard of the Downward Dog. Another term we will use is A-Frame which refers literally to the fact we are trying to get our body into a position whereby it looks the a capital letter ‘A’. This position is another staple in many exercise forms and for good reason, it challenges the flexibility and strength of our body in many areas. The shoulders, back, hips, knees and ankle joints will be tested and for many people deficiencies in strength and range of movement will limit the quality and range available in attempting this position.
For many of us just attempting this posture will be tough and tiring. A lot of you will be feeling significant resistance in the backs of the legs (hamstrings and calves) and through the shoulders and upper back. Build slowly and increase the time spent in the stretch as you feel able, again looking to improve on your own current baseline level. Before attempting bear movements from this position we can work on a couple of simple variations which are shown in the video - slow marching on the spot and active shoulder extension pushing the head and shoulders through. Let’s give it a try and see how you get on.
Bear Movement Flows
The bear crawl can be utilised as a full body exercise to develop strength, flexibility and control in many areas. It is challenging and will take time to develop the skill and movement control required to perform it well but as with all these exercises your only goal should be to steadily improve on your own current baseline level. Once you have developed some comfort and control with the A-Frame stretch the first Bear Crawl movement we will try is with straight arms and straight legs as demonstrated in the video below. The key here is control so take your time and just do what you can, even if it’s only a few seconds initially, you can build on that. Let’s give it a go.
In the next video we demonstrate a number of bear crawl variations to give you some more options to explore. Depending on your own levels of mobility and strength you may find some options easier and others harder but it is great to play around and explore a variety of positions to find any weaknesses or restrictions and ensure a variety of stimulus is achieved. The key is to safely work on your own issues and don’t be afraid to explore positions that are challenging as long as you do so gradually.
Add these to your regular practice at least 2-3 times per week initially
Try:
Straight arms & legs
Bent arms, straight legs
Bent arms, bent legs
Straight arms, bent legs
Begin with 20-30 second rounds aiming to build up to 1-2 minutes or longer
Move forwards, backwards and sideways
Look to accumulate time in the positions - Try a 5 minute timer & while stopping for breaks when required, try to spend as much time actively moving in these flows
Summary
In summary adding animal flow movement practice into your regular exercise routines or habits can have significant physical benefits by helping to improve full body strength, mobility and motor control. It is a challenging but fun way to mix up your normal exercise routines and pushes your body to explore a variety of joint postures and positions that are not routinely trained or strengthened. This variety of stimulus will help to ensure strong and healthy muscle and joint function. Enjoy exploring and playing with these movements and ultimately you can learn to move better & feel better.
Thank You
Thanks for taking the time to read this guide, we hope you find it useful. Please share with anyone who might benefit and if you have any questions comment and let us know. Please subscribe to our mailing list to receive more interesting and useful blogs. Good luck and remember to move better & feel better

Our simple 7 point strategy to keep you injury free in your new found love of running!
New runners are often the most vulnerable to injury. Your body needs time to adapt to the new loads and demands that running puts on your tissues and joints. This blog provides expert advice on preventing overload and injury through planning, awareness and patience as well as tips on how to maintain tissue strength and flexibility to minimise injury risk.
I Can’t believe it, I’ve only just taken up running and I’m injured already!

Unfortunately it is an all too common occurrence for us have a disappointed runner sat in front of us for assessment of a new injury from recently taking up running. More recently with the restrictions on the forms of exercise we can do during the Coronavirus pandemic, combined with the excellent weather during that period, this has become very common with many more people trying out and enjoying more outdoor running.
It has been shown that novice runners face a much greater risk of injury than recreational or competitive runners. This is due to a combination of overload in their tendons and muscles as well as technique and fatigue issues that unduly overload certain areas.
When you are running, multiple times your body-weight in the form of ground reaction force is produced on impact with the ground. This has to be absorbed and controlled by the tendons, muscles and joints in the legs. Over time and with progressive increases in running mileage and duration, the tendons in the lower limbs adapt and strengthen to this, making them less prone to injuries such as acute muscle tears or tendinopathy. Running technique and fitness are also shown to improve which can decrease the adverse and destructive repetitive loading on the joints as well as improve running economy.
The most common injuries we see in new runners, or those runners returning from a lay off tend to be at the front of the knee in the form of a patellofemoral joint irritation (under the knee cap) or patellar tendinopathy (the tendon below the knee cap). It is also very common to see a tear of the calf muscle or pain at the achilles tendon in the form of a tendinopathy. In a runner these are all overuse and overload issues and some of them depending on the severity can result in a lengthy time off running to settle and fix them.
What can I do to prevent these issues?
Most running issues and injuries are really preventable as they are nearly all as a result of overuse. It has been suggested that between 60-70% of all running injuries can be attributed to training errors. Novice runners are the most prone to injury but they are also a group who can easily adapt their training to limit exposure to common injuries and “start as the mean to go on”. Here are 7 simple suggestions for someone who is new to or has recently started running to lessen their likelihood of developing a running related injury.

Be realistic about your current running experience and plan your training to be conservative in the first few weeks with progressive increases in your distance by 10-15% per week.
Initially give yourself a day of rest after each run to allow any tendon or muscle overload to recover a little before your next run.
Don’t be hesitant to adapt your training to something non-impact based like cycling or take a rest day if you feel a niggle in your knee or achilles/calf/foot. This one day of change or rest from running impact may be enough to stop you causing a worse problem and it will likely result in a much shorter time off running.
Do adequate recovery work between runs to release tightness and restore normal muscle and joint range. This can include stretching, soft tissue release such as self-massage or equipment assisted massage like foam rolling.
Strengthen the muscles of the lower legs and core to help prevent muscle tears or tendinopathy and increase the muscles load bearing capabilities
Wear running shoes that you find comfortable. Shoes that do not feel comfortable when running such as when the toes feel squished or the cushioning feels too much or too little is likely to result in you offloading any discomfort and then abnormally loading your soft tissue and joints. Don’t get caught up in the marketing and hype of certain shoes or brands; try on a number of shoes and brands and go with your gut instinct as to which feel most comfortable to you.
Most of your runs should be at easy pace. With greater speed comes greater peak forces and also fatigue. You cannot expose your body to this too often otherwise you will acutely overload the legs and injuries may arise. I’d recommend a 2:1 ratio of easy to hard efforts, where if you do 3 runs a week, then 2 of them should be at your easy pace and one of them at a moderate to difficult effort. For an easy pace you should feel like you could speak normally or if you have a heart rate monitor watch, your heart rate should be at or below a value of 180-your age (eg. 180-36yrs = easy pace of <144 beats per minute). For the remaining session this can be ran a little faster or include variations in speed such as intervals. This approach will also give your musculoskeletal system and your cardiovascular system a chance to adapt well to your running.
Home Exercises to Try - Stretch, Strengthen & Release
Below are some basic strengthening, stretching and muscle release exercises that will benefit most people starting out running. Always work within your own comfort limits on these as they will improve gradually over time and you want to take a consistent and not a torturous approach that you dread the next time. If you can only do part of the movement or a modified / reduced range then that is fine, just do what you can. Try them twice a week to begin with and you should gradually start to feel better and move better.
Exercise 1 and Exercise 2 below are video links to some self-administered soft tissue massage and release for the thigh and calf muscles respectively
Foam rolling technique for the outer thigh
Calf release using a ball
Exercise 3
Couch Stretch
In a lunge position have the top of the foot or ankle on the left leg back against a wall or your couch making sure to have some padding underneath the knee left knee.
Pull your lower stomach muscles and belly button inwards while also engaging or contracting the buttock muscles on the left side and imagine lengthening your left thigh bone and knee downwards toward the floor.
This should produce a stretch along the front of the left thigh and up to the front of the left hip. Make sure to keep the tummy in and buttock contracted as this will keep the stretch focused on the front of the thigh and hip and stop you overarching your lower back as can bee seen in picture 2 below.
Hold this position for 1 minute and swap to the other leg. Repeat twice, making sure to ease yourself a little further into the stretch each time.

1- Couch Stretch

2- Over Arched Couch Stretch
Exercise 4
Calf Raises
Begin with the ball of the foot on the edge of a step. Using your calf muscles lift your weight up, raising the heel above the level of the step. (Image 1)
Slowly over 2-3 seconds lower the heel below the level of the step (Image 2)
Repeat this movement for 2 sets of 8-15 reps on each side depending on your strength.
If this is too difficult to begin with, you can do the same movement using both feet on the step and aim to progress to using a single leg over a number of weeks.
This movement can also be performed with the knee bent the entire time. This will primarily strengthen the lower portion of the calf (soleus muscle) which is also important in running (Images 3 and 4 below)

1. Calf Raise

2- Calf Lowering

3. Knee Bent Calf Raise

4. Knee Bent Calf Lowering
Exercise 5
Figure 4 Stretch
Begin by placing your left leg on the wall at 70-90 degrees of hip flexion (knee towards chest)
Place the right ankle just above the knee of the left leg and drop the right knee outwards
You should feel a stretch on the right outer hip and buttock
Hold for 1-2 minutes and repeat on each side twice

Figure 4 Stretch
Seek Help & Advice Sooner Rather Than Later
If you find yourself injured and unable to run it’s advisable to get your injury seen to and diagnosed as quickly as possible. Getting the right advice early with an injury will significantly decrease the amount of time you will have to take off from your running and it will likely decrease your levels of pain and the stress you experience associated with it.
At Physio Effect our therapists are experienced and highly skilled in advising and managing running related injuries and we will be able to help you reach a diagnosis and an understanding of your injury, including why this likely happened in the first place. We will be able to offer you advice on alternative forms of cardiovascular exercise as well as specific strength training to address your issue so you don’t feel like training has stagnated or regressed. All treatment plans can be time graded and clear to you, with milestones to achieve that not only address your current levels of pain associated with the injury but also the issues that may have contributed to you developing the injury in the first place.
Thank You
Thanks for taking the time to read this guide, we hope you find it useful. Please share with anyone else who might benefit and if you have any questions comment and let us know. Please subscribe if you would like to receive regular updates and advice on everything health and fitness related - Zero spam promise. Good luck and enjoy your running


Stiff back? Try our simple six step mobility routine
6 step mobility stretch routine to ease back stiffness and relieve back pain. Practice daily and you will see improvements in your range of movement and alleviate tension, stiffness and pain in your back.
Back Pain?
We’ve all been there…..
What’s up with my back?
We’ve probably all struggled with a stiff achy back at some point. The reality is that our modern lifestyles are often dictated by technology and we just don’t move enough to maintain healthy joints and soft tissues. If you truthfully counted up how many hours per day or week you spend in sedentary / static positions whether working from a computer, driving, or binge watching TV and social media what would that number look like? How would it compare with hours spent being active, stretching, moving and getting some exercise? Chances are you are in the majority with your results skewed in the wrong direction and sedentary hours winning hands down.
Even for those of us who do exercise regularly it’s often at the back of a long day of not moving much. There is often a misconception that working out a few times a week should be adequate to ward off the stiffness and tightness that comes from our daily work routines. While of course some exercise is better than none what most of us need to do is work harder at incorporating small amounts of varied regular movement into our everyday routines. Micro breaks of several minutes every hour are a great way to break up the day & if you can practice a few hip and back movements and stretches with these then that’s a winning combination.
Familiar hunchback posture?
Most of the back pain we suffer is not serious (but do ensure you have checked with a medical professional) even when the pain and stiffness reach fairly extreme and debilitating levels. It is most often a cumulative and gradual process which results in reduced joint and tissue flexibility and a lower threshold or tolerance for simple tasks.
You may have a sensation of achy stiffness and tightness in your back and feel the need to fidget and change position constantly just to get comfortable. Sometimes acute painful events occur as the result of a simple daily task like putting on your socks and you can feel trapped in a cycle of stiffness, pain and vulnerability.
These symptoms most often aren’t indicative of something seriously wrong but rather your body is sensing changes it doesn’t like and is giving warning that something needs to change. X-rays and MRI scans aren’t normally helpful, unless being used by a medical professional to exclude other suspected pathology, and more often than not can cause confusion and fear which can negatively impact behaviour and recovery.
What can I do?
All is not lost and it’s never too late to make positive change. For most of us that can be very simple in the form of developing strategies that encourage us to move more in our daily routines. Try these pointers:
Be positive and take action of some kind. Note anything that seems to help or has a positive effect on how you feel and work to develop that
Focus on what is within your control to change and don’t worry or get hung up on the things you cannot do or cannot change
Develop simple daily habits and routines that encourage an increase in regular movement, exercise, and stretching
If you plan on being static/sedentary for extended periods plan micro-breaks of 2-3 minutes at least every 60 minutes and include some walking and simple stretching movements
Try to find a physical activity or exercise that you enjoy and doesn’t feel like a chore as you are much more likely to perform it regularly and achieve a long term change
Consider other lifestyle factors where you can implement simple change - e.g. drink more water, increase sleep, meditate or practice deep breathing & reduce daily screen time usage.
Let’s get started!
Below is a mobility routine for your back of 6 different exercises performed as a movement flow to get you started. Always begin slowly and gently and work within your own comfort limits. If you can only do part of the movement or a modified / reduced range that is fine, just do what you can. Try them every day and perhaps even multiple times per day if you’re able and you will gradually start to feel better and move better. Ideally try the whole routine or you can divide it up into single exercises and see which ones you find give you the most relief but aim to practice all the movements every day.
Back Mobility Flow Video:
Exercise 1
Cat & Camel Stretch
Begin in all 4s position. Cat posture - Allow your spine to soften and hollow along its entire length. Tilt your tailbone gently to the ceiling. Relax you lower back, rib cage, shoulders and neck
Camel Posture - Arch your whole spine slowly and gently to the ceiling in one large ‘C’ shape. Tuck your tailbone between your legs
Hold each position for around 10 seconds. Transition from one to the other 6-8 times.
1- Cat Pose
2- Camel Pose
Exercise 2
Childs Pose to Cobra
Begin in all 4s position. Childs pose - Gently sit bottom back towards heels as far as is comfortable opening knees and hips softly and as required
Cobra Pose - Allow weight to come forward and lower hips gently to floor. Stay relaxed in hips and lower back and if required bend elbows slightly so that hips can rest in contact with floor.
Hold each position for around 10 seconds. Transition from one to the other 6-8 times
1- Childs Pose
2- Cobra Pose
Exercise 3
Childs Pose Side Bend
Begin in Childs Pose - Walk you hands around to one side into side bend aiming for at least a 45 degree angle, you should feel a good stretch down your side. Hold 20-30 seconds.
Walk hands around in same way to other side and again hold 20-30 seconds in side bend.
Repeat 2-3 times on each side
1- Childs Pose
2- Side Bend Right
3- Side Bend Left
Exercise 4
Lunge Hip Flexor Opener
Begin in Lunge position. Gently engage your lower tummy muscles and tuck your pelvis in. Aim to feel a stretch in the front of your hip and top of thigh
Gently engage your buttock muscles and lean slightly forward taking care not to arch your lower back
Hold the position 30-60 seconds. Repeat 1-2 times left and right
1- Lunge Hip Flexor Opener
2- Lunge Hip Flexor Opener - Forward Lean
Exercise 5 - Part 1
Lunge Hip Opener with Alternate Arm Rotations
From Lunge position reach hands forward and rest on floor beside front foot. Take outside arm and reach under and between legs ‘threading the needle’ holding for a few seconds
With the same arm rotate outward and upward toward ceiling trying to get arm to a straight vertical position, hold for a few seconds then return to ‘thread the needle’
Repeat this 10 times
1- Lunge Position Hands Forward on Floor
2- Lunge Position Hands Forward ‘Thread The Needle’
3- Lunge Position Hands Forward - Rotate arm vertically reaching for ceiling
Exercise 5 - Part 2
Lunge Hip Opener with Alternate Arm Rotations
After completing Part 1 of this series stay in the same position but extend out your back leg as far as is comfortable
Take inside arm now and rotate upward to the ceiling trying to achieve the straight arm vertical position, Hold for a few seconds
Bring the same arm down and with bent elbow drive your elbow towards the floor down the inside of your shin. Hold for a few seconds then rotate back to the vertical arm position
Repeat this 10 times
4- Lunge Position Extend Back Leg
5- Lunge Position Inside Arm Rotate to Ceiling
6- Lunge Position Inside Elbow Drive to Floor
Exercise 6
A-Frame Walk to Squat
From the all 4s position drive your hips into the air with straight knees and gentle lower your heels towards the floor into the A-Frame (it does not matter if you can’t fully extend knees or reach the floor with your heels). Hold for 10 seconds feeling stretch in back of legs
Keeping hands on floor slowly walk feet in towards hands and slowly sit down into a squat, hold for 10 seconds
Walk back to A-Frame position and hold for another 10 seconds
Repeat 4-6 times
1- A-Frame Position
2- A-Frame Walk to Squat
3- A-Frame Walk to Squat 2
4- Finish in Squat
Thank You
Thank you for taking the time to read this post, we sincerely hope that you find it useful and can use it to implement some positive changes in your daily routines. Take your time and work at your own level but be persistent and try to slowly improve on your own baseline. Please download your own FREE Cheatsheet to keep and to help with you practice and share this post with anyone who could benefit. If you have any questions or comments please just ask we would love to hear from you. Stay healthy and move well.

Childs Pose

What is the difference between ‘Regular’ and ‘Clinical’ Pilates?
Interested in Pilates in general but not sure what we mean by Clinical Pilates?
Regular Pilates is conducted by a Pilates instructor, whereas Clinical Pilates is prescribed and supervised by a Physiotherapist. The difference is very important because a physiotherapist has an in-depth knowledge of injury, pathology, body function and movement patterns. The physiotherapist will assess each person and determine which exercises will be the most effective for each individual. This becomes especially important if you have a history of injury such as low back pain, whiplash, hypermobility or an athlete coming back from an injury. There will be certain exercises which need to be adapted specifically for you.
For more information on our Clinical Pilates classes here at Physio Effect, have a look on our Clinical Pilates page


#KnowledgeShare – Shoulders Month – Rotator Cuff
We see a lot of clients coming to us with shoulder injuries – sometimes it’s not what they think! In this new video, Danny gives us a the basics (and a bit more!) on the rotator cuff!
23rd February 2017
We see a lot of clients coming to us with shoulder injuries – sometimes it’s not what they think! In this new video, Danny gives us a the basics (and a bit more!) on the rotator cuff!

#KnowledgeShare – Shoulders Month – Mobility Exercises
Physio Effect physiotherapist Jonny Kilpatrick demonstrates some exercises to improve overhead range of movement using small equipment you’ll find in your gym
Here's Jonny from a few years ago demonstrating some exercises to improve overhead range of movement using small equipment you'll find in your gym
Foam Rolling: What is it? What’s the Evidence? How to apply it!
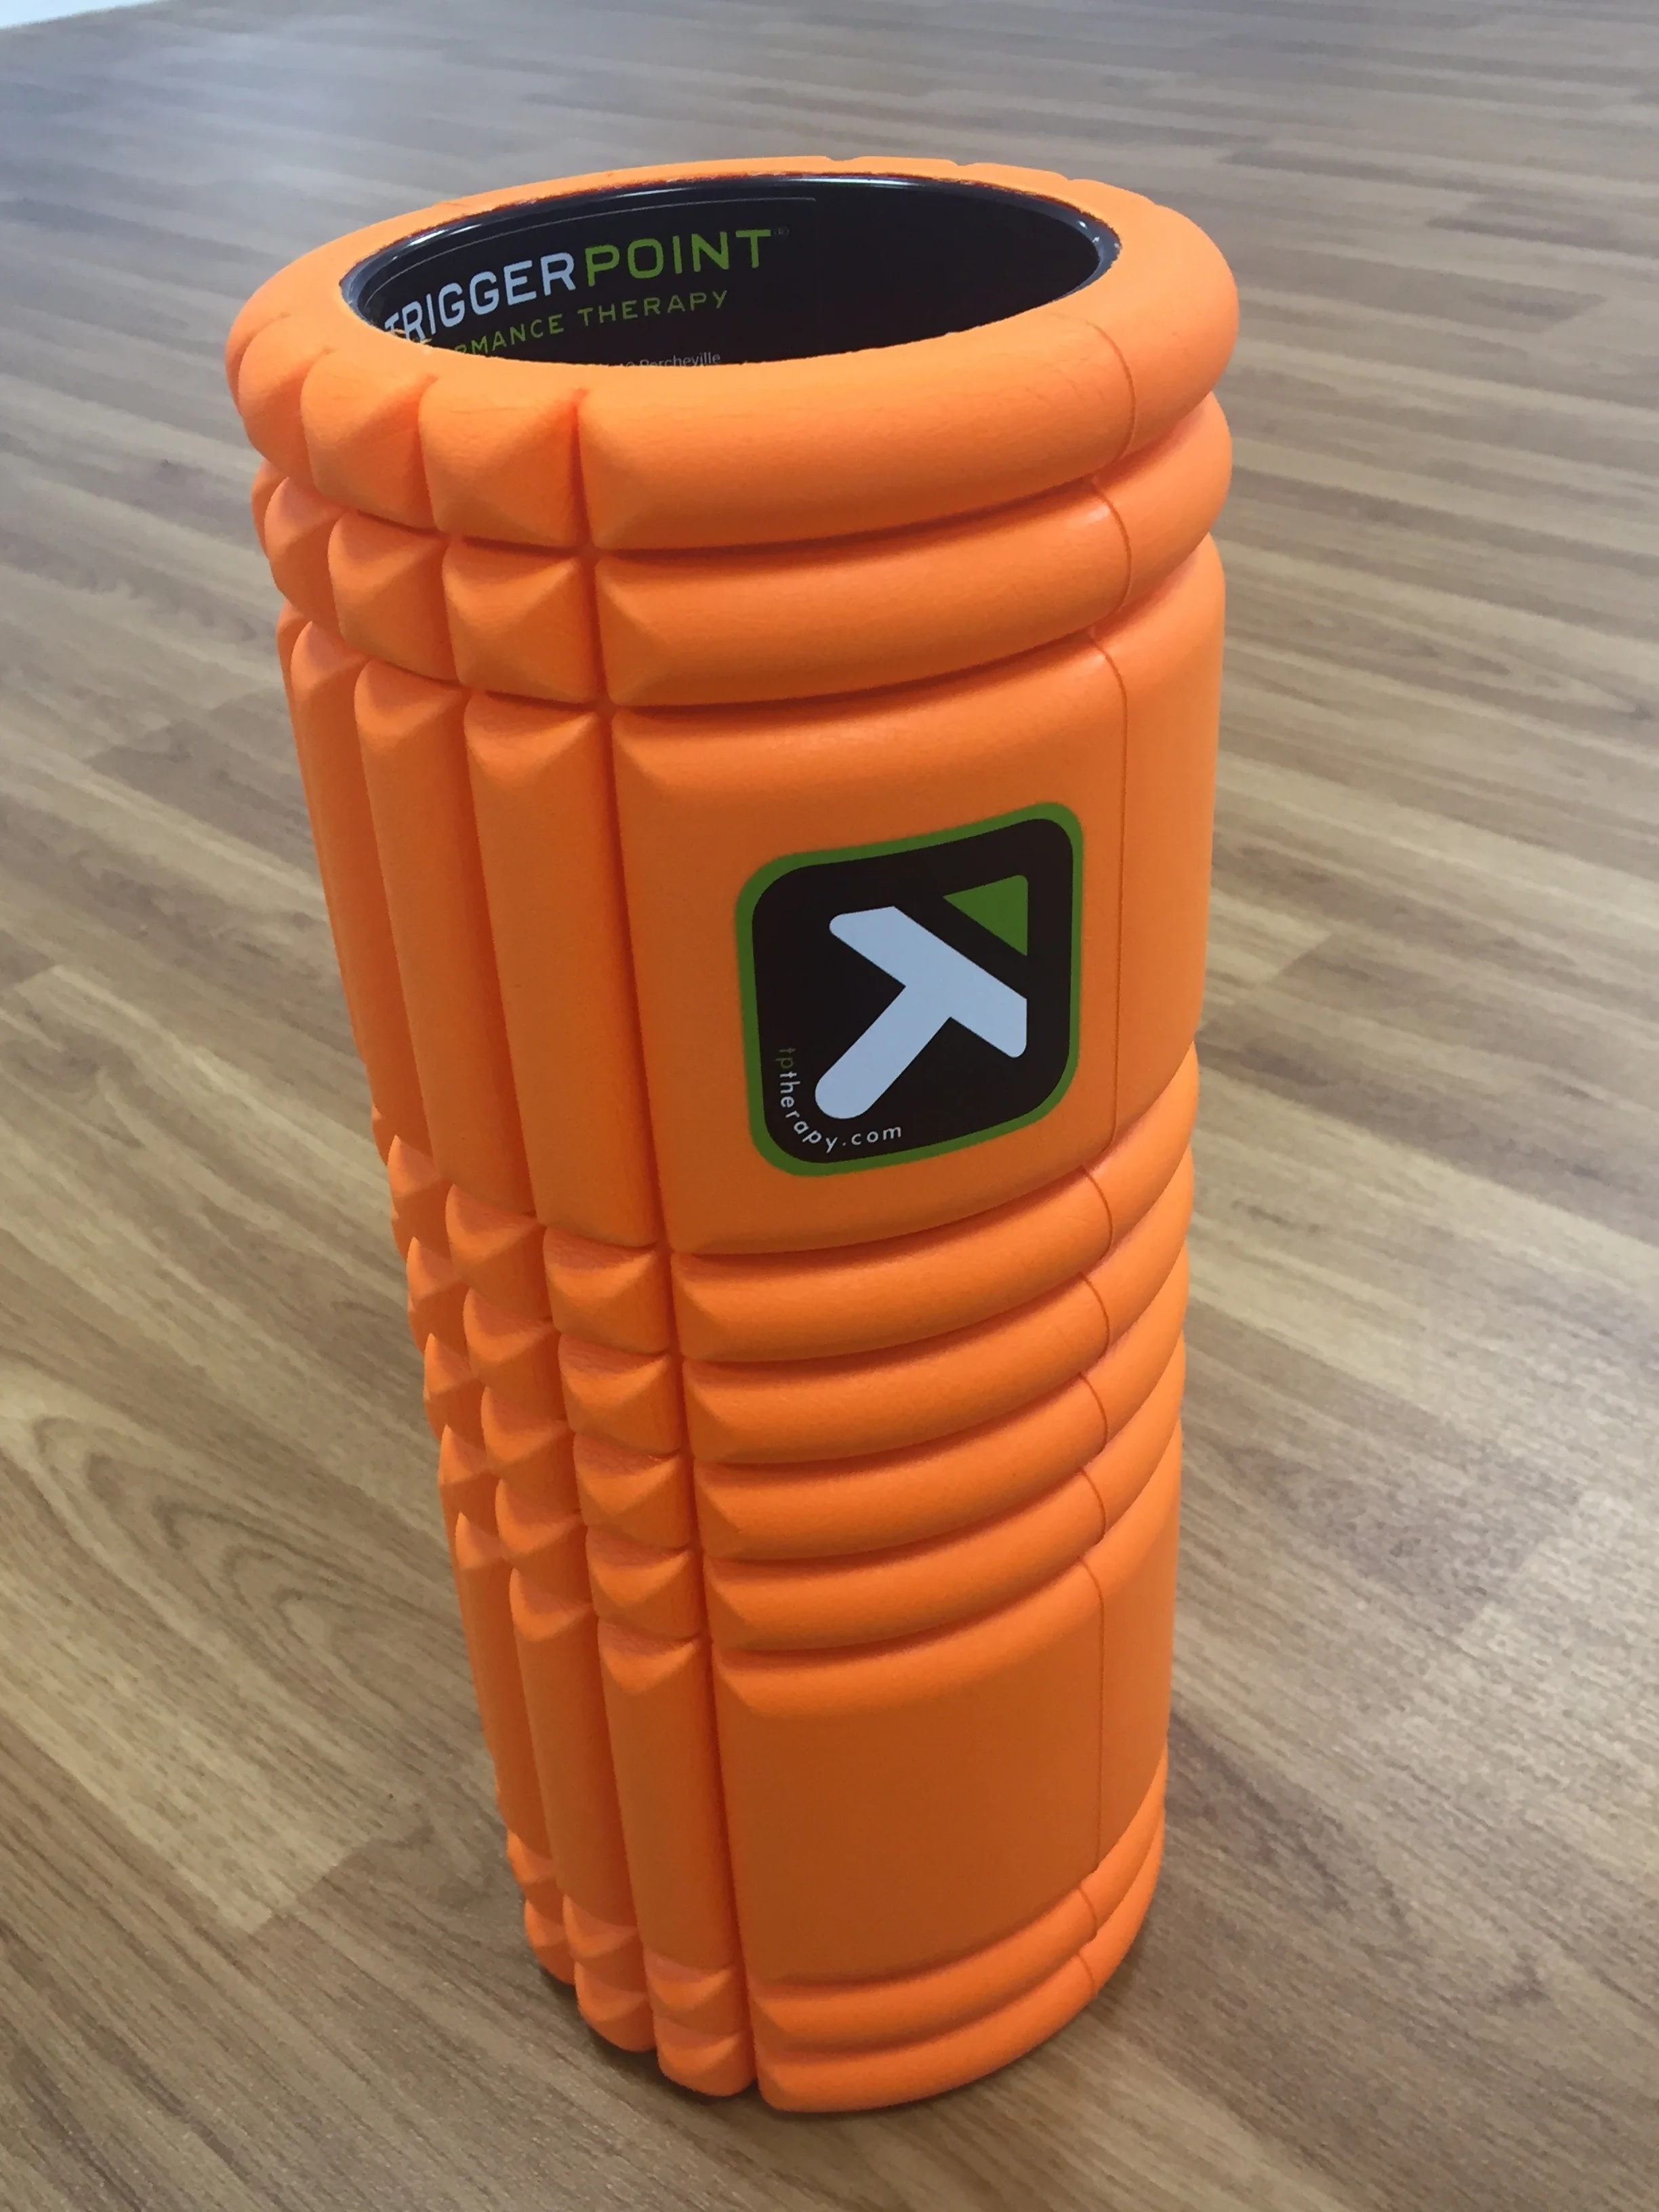
Self-myofascial release is a name given to the use of equipment or tools to perform self-massage and stretching with the aim of increasing joint range of motion and improving muscle recovery and performance. One of the most commonly used tools is a foam roller. You will often see people in gyms attempting to manoeuvre their bodies in various positions over one of these rollers.
Foam Rolling
What is it?
Self-myofascial release is a name given to the use of equipment or tools to perform self-massage and stretching with the aim of increasing joint range of motion and improving muscle recovery and performance. One of the most commonly used tools is a foam roller. You will often see people in gyms attempting to manoeuvre their bodies in various positions over one of these rollers.
Most commonly rollers will be used in a way that the body is positioned with the roller in contact with a specific muscle or muscle group. The user then uses gentle motion to stretch and massage the area while controlling the pressure exerted by adjusting their position and the weight going through the area.
The theory is that using foam rollers used to massage and stretch our muscles, joints and soft tissues can make them more pliable thereby increasing range of motion. It is also theorised that pressure applied to soft tissues can stimulate change through the central nervous system by sending signals which alter the tissue activity and reduce tension levels.
What’s the evidence?
In general terms, self-myofascial release using a foam roller appears to have short-term effects of increasing joint range of motion without exhibiting any negative effects on muscle or joint performance. There is also some evidence to suggest that post exercise muscle soreness can be reduced while muscle recovery is enhanced when foam rolling is used after strenuous or intense exercise.
The overall summary of the evidence to date suggests that foam rolling is a safe tool to use prior to or after exercise to assist with warm up and/or recovery. However, the research is limited and fails to come to a consensus on what the optimal methods, techniques or frequency of foam rolling should be. There is not yet enough research or evidence to define the best way to roll specific muscles or how many sets or repetitions is appropriate.
How can I apply it?
The general consensus is that foam rolling is safe and can be a welcome addition to assist in warm up and recovery. While we do not have enough evidence to create exact protocols there is room here for individual preference and some experimentation to see what works best for you. From personal experience and from reviewing the literature we would suggest trying:
3-5 sets of 30+ second repetitions on each targeted muscle or muscle group
Apply gradual pressure in various planes and directions.
For larger or longer muscle groups consider dividing the application into 2-3 areas
Consistent application aiming for a minimum of 3 times per week
Slight discomfort during application is acceptable but strong or intense pain is not
Position yourself carefully to avoid unnecessary strain on other muscles or joints
Below are a few examples of positions used to foam roll various muscles

Foam rolling outer thigh
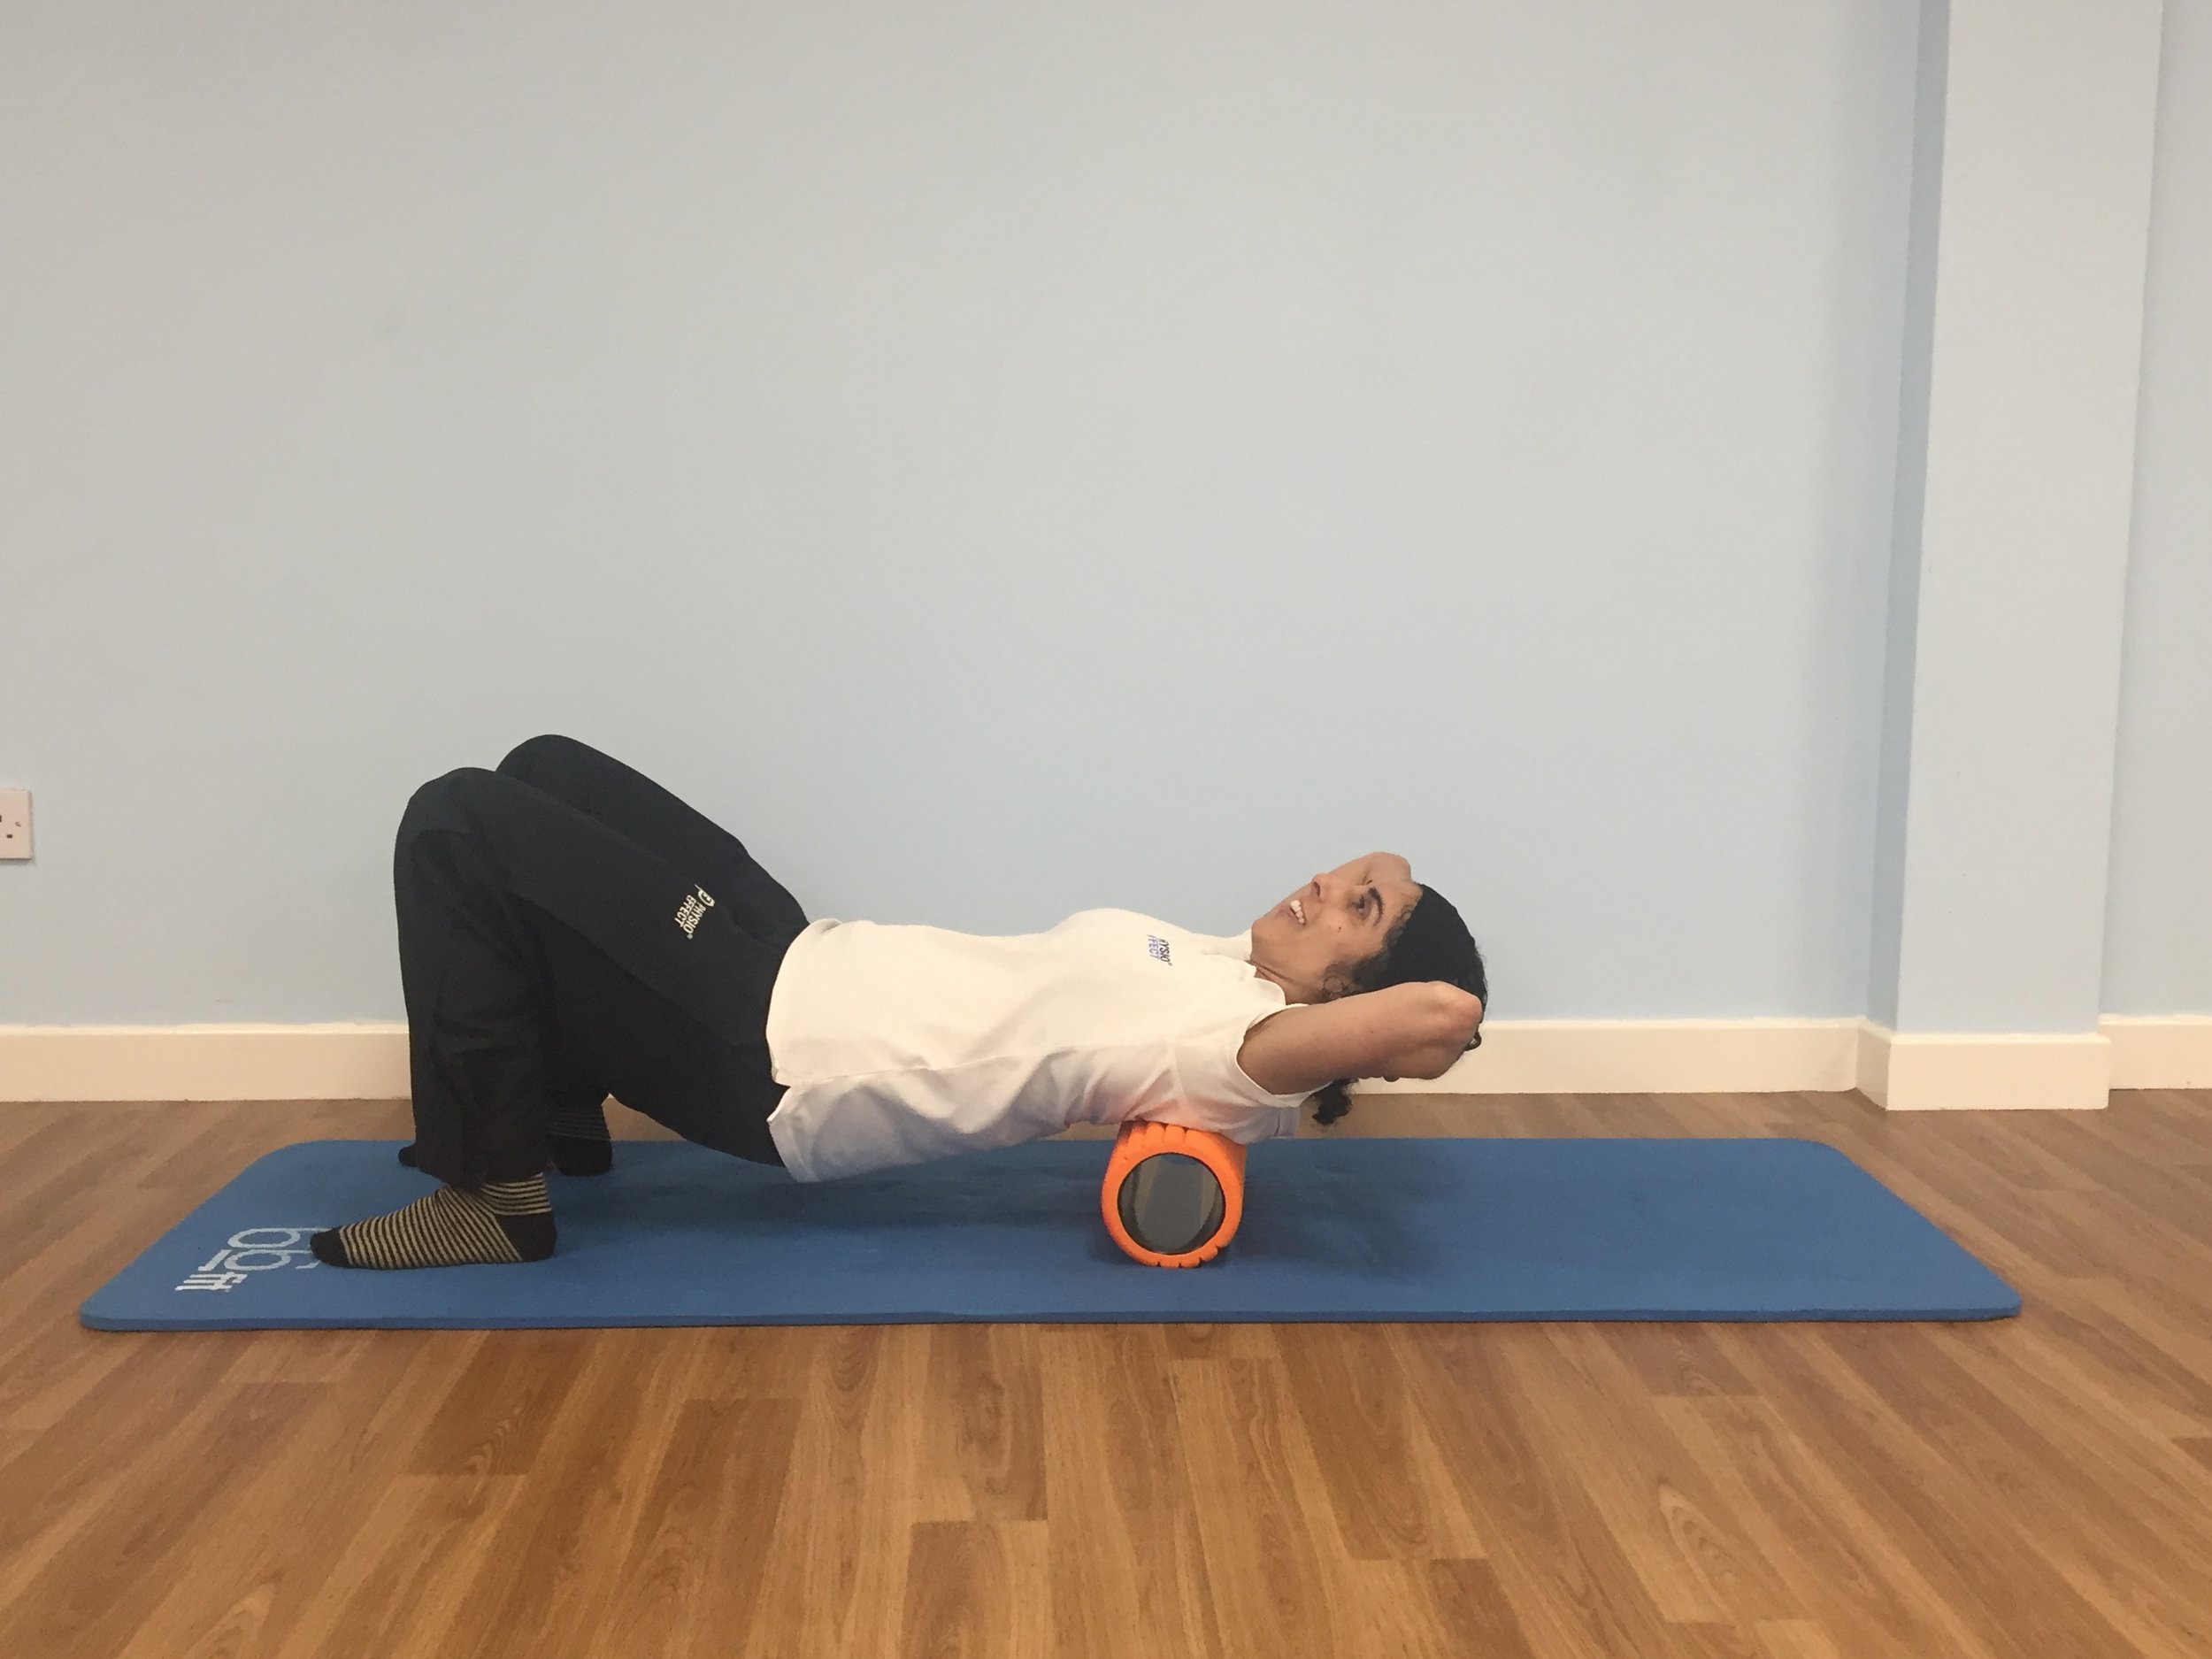
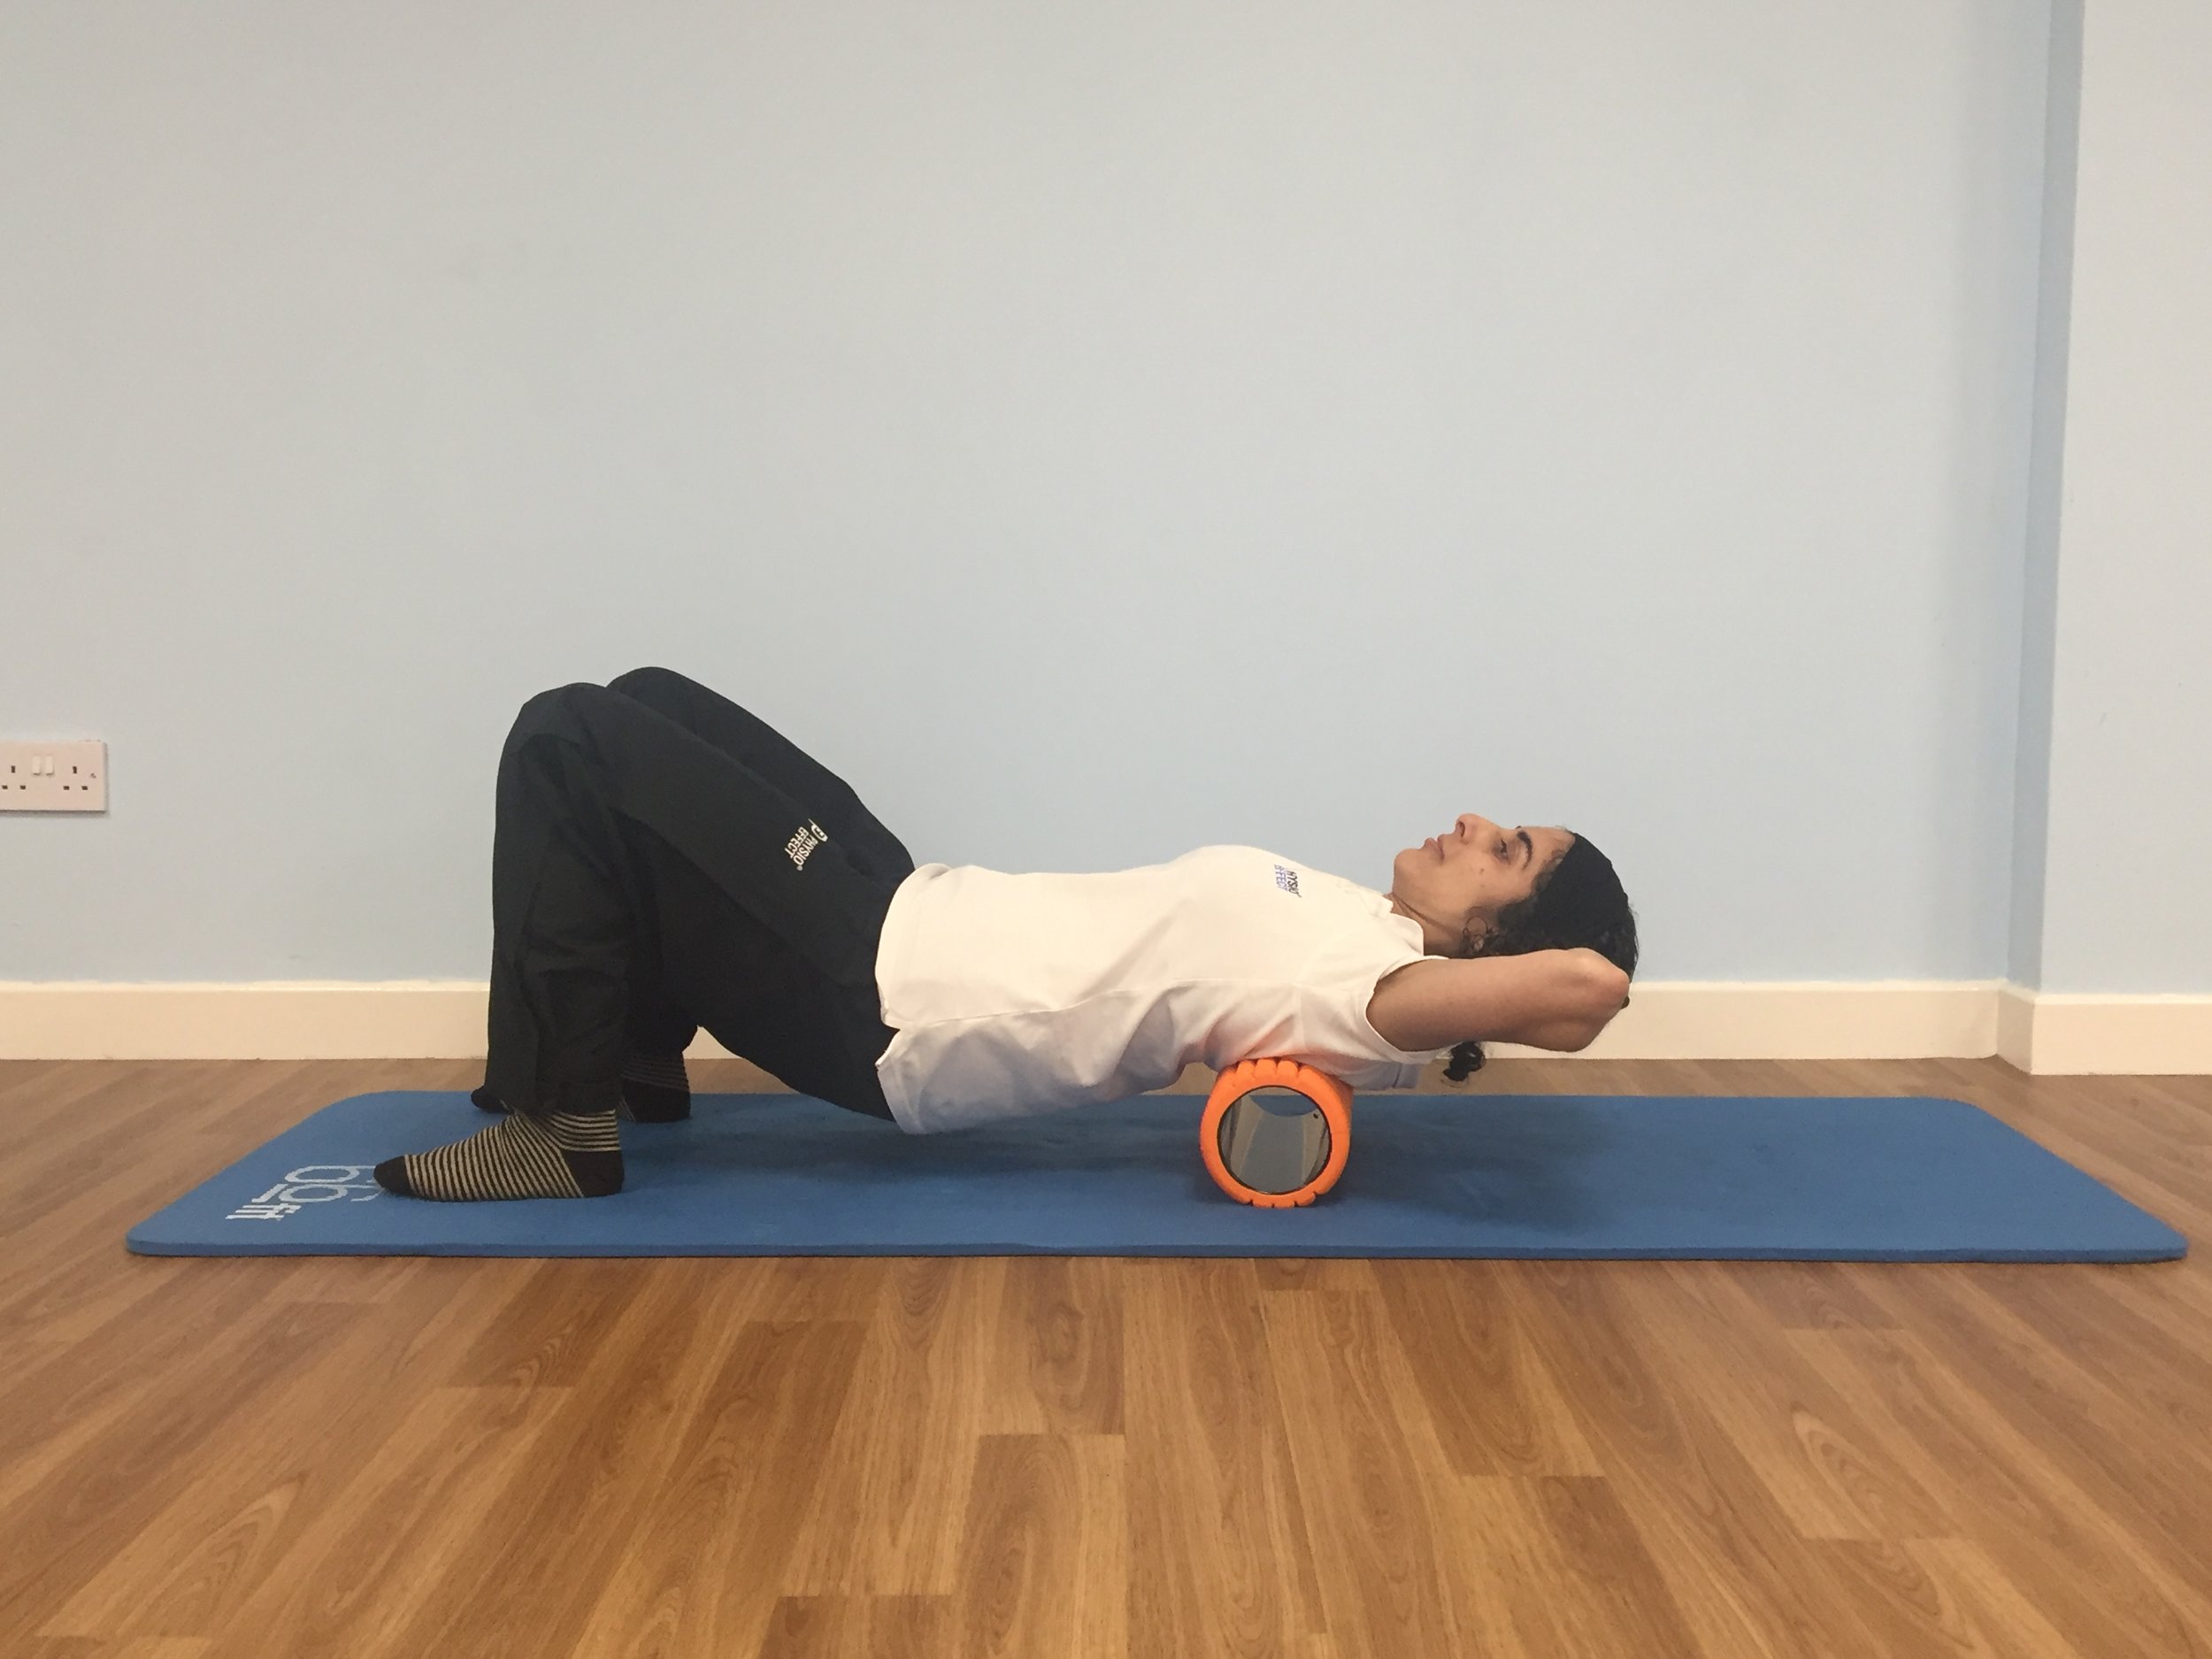

Foam rolling upper back

Foam rolling calf muscle
A word of caution
Foam rolling can be a useful adjunct to any exercise or training routine and may also be used by more sedentary individuals to reduce muscle and joint stiffness. Foam rolling, however, is not an appropriate tool for treating damaged or injured tissues and we would warn that it should not be used as such. Always seek advice from a qualified professional if you are in any doubt.
Foam rolling does not replace or negate the need for adequate warm up and the use of correct techniques when exercising. We would suggest using foam rolling to compliment your existing training or exercising routine but not to replace any aspect.
————————
Article written by Daniel Wray – Senior Physiotherapist and Director at Physio Effect
The dedicated team at Physio Effect provide a full package of services that will ensure you’re supported through your pain management, injury prevention, assessment, recovery and helping you achieve your ultimate performance goals. We offer a range of services including Physiotherapy, Sports Massage, Craniosacral Therapy, Clinical Pilates and Yoga.