
Pain - Finding Relief & Taking Control
That ache in your back, the stiffness in your neck, the twinge in your knee – these are common experiences we all face from time to time. Pain is something we will all have to manage at some point in our lives. Your understanding and response to pain is crucial in optimally managing & ultimately reducing you pain
Understanding Musculoskeletal Pain: Finding Relief and Taking Control
Written By Daniel Wray (Sports Physiotherapist & Mobility Coach)
That ache in your back, the stiffness in your neck, the twinge in your knee – these are common experiences we all face from time to time. Musculoskeletal pain, affecting our muscles, bones, ligaments, nerves, and tendons, can range from a mild annoyance to a significant disruption in our daily lives.
It's natural to feel concerned when pain strikes, especially if it's intense. However, it's reassuring to know that most musculoskeletal pain, even when it feels quite severe, is not a sign of serious underlying damage or pathology. Often, it can be related to things like muscle strains, sprains, overuse, or even just prolonged awkward postures. Our bodies are resilient, and these minor issues usually resolve with time and proper care.
When Should You Seek More Urgent Investigation?
While most musculoskeletal pain is not serious, there are certain situations where it's important to seek professional medical advice promptly. Be mindful of the following:
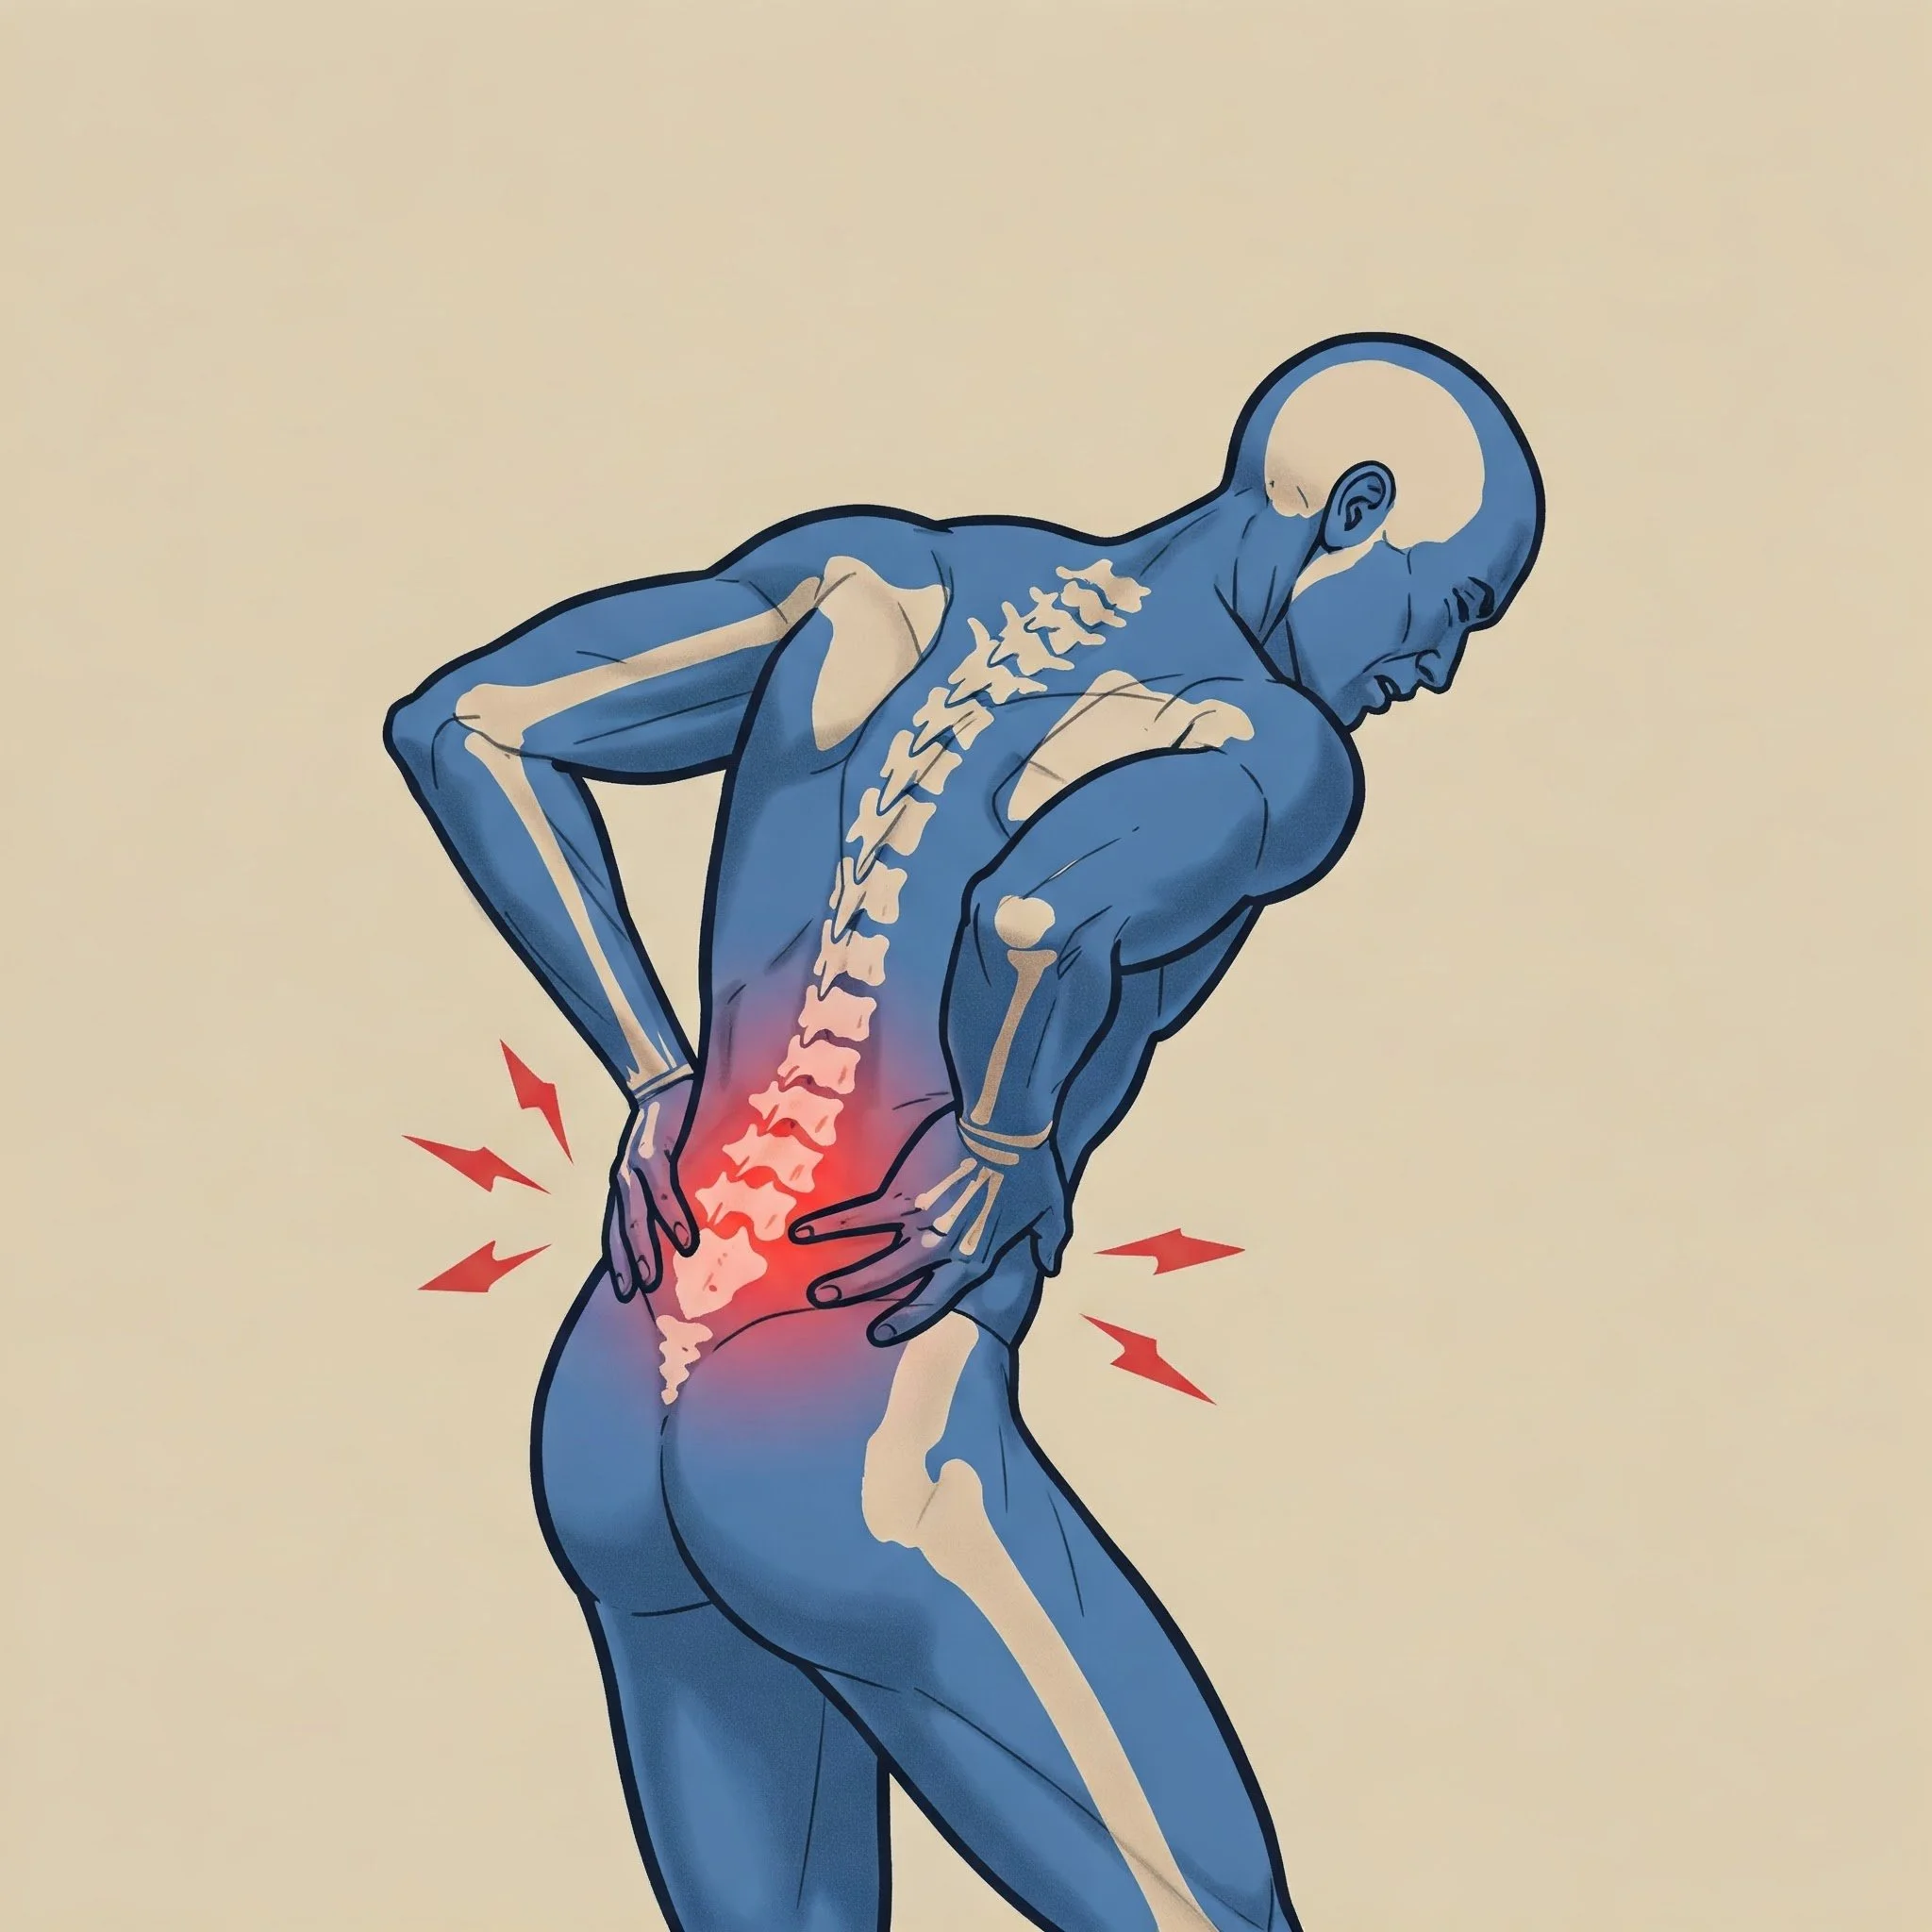
Lower Back Pain - Can Be Crippling but Is Rarely Serious Pathology
Severe pain that comes on suddenly and unexpectedly, especially after an injury.
Pain accompanied by other symptoms like fever, unexplained weight loss, or significant weakness.
Pain that radiates down your arm or leg with numbness or tingling.
Loss of bowel or bladder control.
Pain that is constant and progressively worsening, especially at night.
A history of cancer or other serious medical conditions.
If you experience any of these "red flag" symptoms, it's always best to err on the side of caution and consult a medical professional.
Simple Daily Habits and Strategies to Reduce Pain and Cope Better:
The good news is that there's a lot you can do in your daily life to manage and reduce musculoskeletal pain. Here are a few simple strategies to incorporate:

Some key areas to manage in improving Pain Control
Stay Active: Gentle exercise, like walking, swimming, or yoga, can help strengthen muscles, improve flexibility, and reduce stiffness. Find activities you enjoy and make them a regular part of your routine.
Practice Micro-breaks and Regular Movement: If you spend long periods sitting or in the same position, incorporate short, frequent breaks to move around, stretch, and change posture. Even a minute or two of gentle movement every 30 minutes can help relieve muscle and joint tension.
Be Mindful of Movement: Pay attention to your body when you move. Avoid sudden, jerky motions and lift heavy objects correctly.
Manage Stress: Stress can often exacerbate pain. Incorporate relaxation techniques like deep breathing, meditation, or spending time in nature.
Ensure Adequate Sleep: Quality sleep is crucial for muscle repair and overall well-being. Aim for 7-9 hours of restful sleep each night.
Consider Heat and Cold Therapy: Applying heat packs can help relax tight muscles, while ice packs can reduce inflammation. Experiment to see what works best for you.
Stay Hydrated: Drinking enough water is important for overall tissue health. This will range upwards from at least 2-3 litres per day depending on your circumstances
You Don't Have to Live with Pain – Help is Available:

Professional Physiotherapy guidance can help manage and improve your pain
Living with persistent musculoskeletal pain can be frustrating and limit your ability to enjoy life. Please remember that you don't have to accept pain as a normal part of your day.
At Physio Effect, our experienced team of physiotherapists is dedicated to helping you identify the underlying causes of your pain and develop a tailored treatment plan to address your specific needs. Our skilled practitioners are experts in assessing movement patterns, muscle imbalances, and joint mechanics. We utilize a variety of effective techniques, including manual therapy, targeted exercise prescription, and comprehensive education, all designed to help you reduce pain, improve your physical function, and prevent future problems.
Taking that first step to connect with the team at Physio Effect can make a significant difference in your quality of life. We're here to listen, understand your unique situation, and guide you on your journey towards a pain-free and more active future.
Summary
In conclusion, while musculoskeletal pain is a common experience, it doesn't have to dictate your life. By understanding the common causes, recognizing when to seek further advice, and incorporating simple daily strategies, you can take proactive steps to manage and reduce discomfort. Remember that expert help is available, and the experienced team at Physio Effect is ready to provide tailored support to help you regain comfort and get back to doing what you love.
thank you
Thanks for reading, please share with any friends, family or colleagues who could benefit.
We are always here to listen & help. Our specialist team can help you navigate and manage any ache, pain or injury.
You can Use the links to Book an appointment now or Contact us with any questions
Mobility - What? Why? When? How?!
Do you struggle with constant niggling joint and muscle pains? You workout regularly but still feel stiff all the time? Do you need help understanding and implementing better mobility habits and practices? If yes then this blog is for you! Modern stressful and busy lifestyles often mean we neglect flexibility and mobility practices. Long hours of static postures cause us to stiffen up & this compounds over weeks, months and years. It’s time to start organising your mobility practices to move better & feel better!
Improving mobility requires consistent structure, practice & effort!
Written By Daniel Wray (Sports Physiotherapist & Mobility Coach)

What is mobility?
Mobility is the ability to move freely and easily, encompassing physical movement, flexibility, balance, and environment access.
Mobility is vital for daily activities and exercise, impacting overall performance and quality of life.
Improving mobility enhances physical function, reduces injury risk, and fosters independence. Prioritising mobility supports long-term health and well-being.

5 barriers to mobility practice
Physical Limitations
Joint pain, muscle weakness, and neurological issues can hinder mobility exercises.Psychological Factors
Anxiety, depression, and lack of motivation can create fear of injury, impacting engagement.Access to Resources
Limited facilities, equipment, or expert access restrict effective mobility practice.Knowledge and Awareness
Lack of understanding about mobility's benefits inhibits participation.Environmental Barriers
Poorly designed spaces and clutter discourage movement, obstructing mobility practice.
stop sitting & start moving!

Sitting Is the New Smoking!
In our experience the main cause of reduced mobility and increased joint pain and stiffness is a sedentary job or lifestyle. Sitting for over 40 hours a week leads to negative consequences. What we see regularly in clinic is huge frustration from people in this situation who do actively find time for exercise, sport & gym classes.
“I go to the gym 4 times a week so why am I so stiff & sore?”
The problem with modern life stresses and lack of time mean many of us compartmentalise exercise to one point in the day for perhaps 1-2 hours. Out with that we are too static often sitting or standing at desks for long unbroken periods. Structured & planned exercise classes or sport is great but we must also find ways to inject short, varied, but regular amounts of movement into our everyday activities.
Tips to improve Mobility practice

Prioritise Side bends & Rotational Plane Movements
Incorporate Daily Stretching & Mobility Flows
Dedicate at least 10-15 minutes each day to stretching. Focus on major muscle groups and areas that typically feel tight, such as the hips, shoulders, and spine. Consistency is key to improving flexibility and joint mobility.Engage in Mobility-Focused Activities
Activities such as yoga, Pilates, and tai chi are excellent for enhancing mobility. These practices encourage controlled movements and can help increase your range of motion, balance, and overall physical awareness.Incorporate Micro Breaks
Aim to move for 2-3 minutes every hour as a minimum. Large simple movements of all major joints helps to create pressure changes and encourage healthy fluid balance in our tissues and joints reducing the cumulative build up of static postures.
Include Dynamic Warm-ups
Before engaging in physical activity, perform dynamic warm-up exercises. Movements like leg swings, arm circles, and torso twists can prepare your body for more strenuous activity and promote better mobility throughout your workout.Prioritise Functional Movements
A strong body is able to move in all planes of motion. A lot of gym exercises and routines can be too hinge like and robotic in nature failing to promote adequate movements in all planes. Incorporate good accessory training to include rotational, side bend and functional movements.
Example Mobility Flows For Daily Practice
Back Mobility Exercise Flow - Try this routine to gently mobilise your spine
Hip Mobility Flow - Try this exercise flow to mobilise and loosen up stiff hips

We love a 3 Point Bridge. Movement is medicine, start taking yours!
Summary
Improving mobility and reducing pain & stiffness is no simple task but it can be done! Take positive action and start today dedicating time for movement and stretching as often as you can. Spend some time analysing your current practice and training and see where you can improve.
We help people improve mobility & reduce pain and stiffness on a daily basis. If you need help to understand your needs and to design & implement a plan unique to your goals we can help!
thank you
Thanks for reading, please share with any friends, family or colleagues who could benefit.
We are always here to listen & help. Our specialist team can help you navigate and manage any ache, pain or injury.
You can Use the links to Book an appointment now or Contact us with any questions

Working From Home Survival Guide
Is working from home making you ill and injured? Are you in pain & stiffer than ever? Are you feeling isolated and unsupported? The risks are real and you are not alone. This survival guide will help you make better choices to reduce pain & stiffness and look after your body and mind. What are you waiting for? Follow our top tips to move more, organise yourself and have a positive impact on your physical and mental health
Is Working from home breaking you? Do you feel:

WFH health risks are very real
Stiff and sore?
back, neck, joint or muscle pains?
headaches or vision problems?
overwhelmed?
fatigued?
irritable?
low mood?
The risks of working from home (WFH) to physical and mental health are significant and real.
If you are feeling any of these issues you are not alone. You need to take positive action now and improve your individual situation.
Below we will list our top tips for how you can act now to prioritise your health. In Summary you need to :
MOVE MORE
GET ORGANISED
OPTIMISE YOUR WORKSPACE

Take Positive Action and Get Organised To Improve Your WFH Situation
top tip 1 - move more!
The single most important thing you can do to improve your WFH health is to move more. If you roll out of bed, grab a coffee then plant yourself at your desk with no movement or plans to move then you are brewing trouble. The NHS recommends reducing your sitting time significantly to improve your health and reduce the risks of type 2 diabetes, some cancers and even early death!
Are you already struggling with pain & stiffness in your neck, shoulders, back or hips? Check out these links to our previous blogs for advice, stretching and mobility instructional videos:

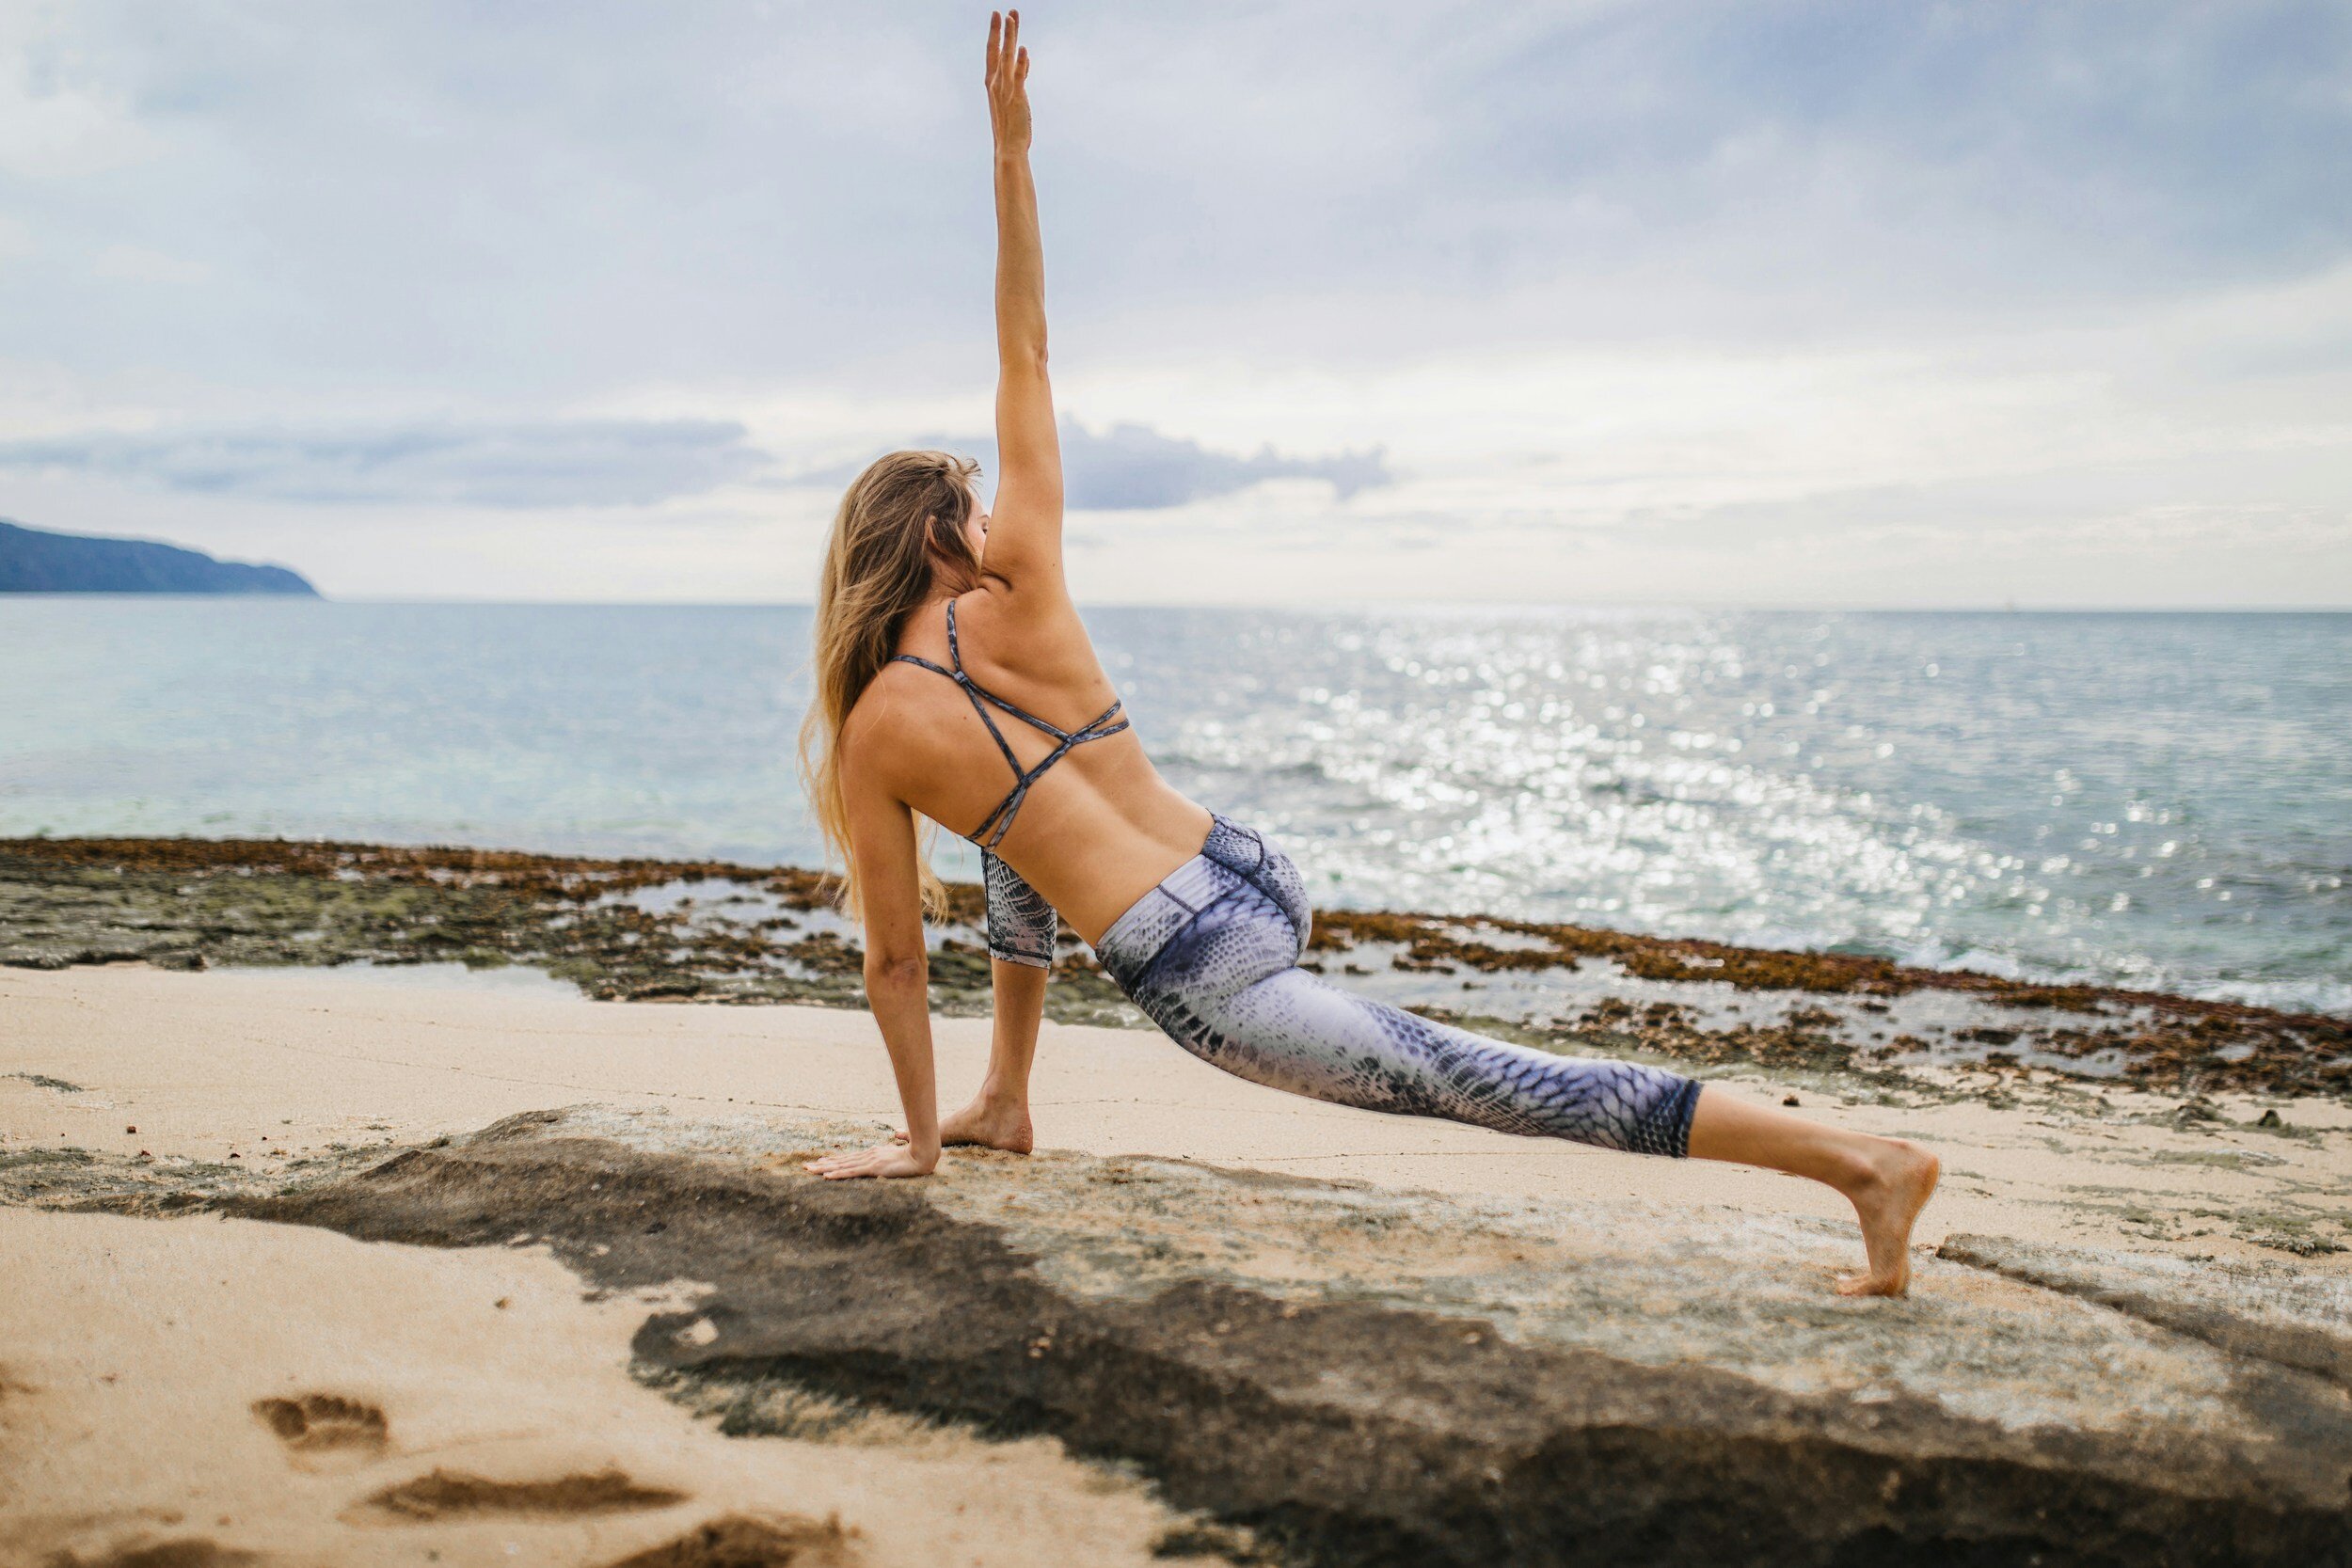
Movement Is The Key - Could you try Yoga?
When we are static (sitting or standing still) compressive and dehydrating forces are at work on our joints and soft tissues. All of our major body systems slow down and become sluggish which in the longer term contributes to significant health issues. The phase ‘Sitting Is the new smoking’ has been coined to highlight just how serious the impact of sedentary lifestyles can be
Movement creates positive pressure changes and improved fluid movement through our body as well as stimulating our body systems to be more active and alert. All of this helps to balance and reverse the negative effects of being static. Research shows us that movement and exercise can also help reduce stress and improve your mood.
Try these ideas:

Make time to move or you will get injured or sore
Rise earlier - Fit at least 10+ minutes of movement in before you hit the desk
Step challenge - Set a challenging daily step goal and go about smashing it. You need to prioritise time to walk. Try breaking it up into multiple smaller chunks (10-20 minutes x 2-3) throughout the day
Take breaks - Do not sit and rust at your desk! Take multiple complete breaks away from your desk and work. Walk, stretch or exercise, it doesn’t really matter, just take a break & move
Get outside - Combine fresh air & movement. Great for refreshing body & mind
Exercise for fun - Find something you enjoy and can commit to on at least a semi regular basis (2-3 x per week). Gym, walking, jogging, yoga, swimming etc.

Daily step targets are a great way to increase your activity. Get walking!
top tip 2 - organise yourself

Set Regular Break / Movement Alarms
Failure to plan is planning to fail! You need to actively organise yourself to make smarter, healthier choices and start reducing the negative impact of WFH.
We are great at making excuses for negative behaviour as it is generally the easier/lazier option. Get organised & remove barriers to promote positive action.
Try these ideas:
Plan Micro-Breaks - Aim to move away from your work for a minimum of 2-3 minutes every hour. Ideally combine this break with a little movement, stretching & breathing. 2-3 minutes of movement hourly is infinitely more important than trying to undo 8+ hours of static WFH with an end of day workout.
Set Movement Alarms - Use smart watches, desktop reminders or a simple timer to remind you when it’s time to get up and move. As already mentioned, ideally aim for a few minutes movement every hour as a minimum. Don’t ignore it! Get up and move.

Drink at least 2-3 litres of water every day
Create Dedicated Space - Dedicate some space at home away from your office or workstation setup to stretch, move & exercise. Get a yoga mat down, gather any small equipment like foam rollers or exercise bands and have it accessible. Removing the barrier of having to get setup each time you want to exercise will significantly increase your compliance
Measure Water Intake - Aim to drink at least 2 - 3 litres of water a day. Many people are chronically dehydrated and don’t even know it. This contributes massively to muscle and joint pain, headaches and general fatigue. Poor water intake increases your risk of dysfunctional metabolism and chronic diseases. Your tissues and body systems need water to function so give it to them! Use a water bottle to track your consumption and trigger better habits
top tip 3 - optimise your work space setup
When it comes to WFH there is no perfect workstation setup but you can improve and optimise in some areas. This article by the New York Times gives some further ideas on equipment and optimal desk setup. However, there is no point in forking out thousands on space age chairs and desks if you sit on you butt and barely move for 8+ hours a day.
You can’t buy your way to healthier WFH and you must still prioritise movement, regular breaks and a structure to your day that gives you balance physically and mentally. Once that’s in place see if you can implement some of the following ideas:

Stand Instead of Sit. Use a riser to optimise your screen and mouse position.
Stand Instead of Sit - Standing is probably the lesser of 2 evils and tends to naturally lead to a bit more movement and reduced pressure on some areas like the neck and lower back. If your work station allows it alternate sit to stand regularly throughout the day
Use Equipment & Aids - Optimise your sitting & standing postures by utilising equipment. Perhaps your employer can supply equipment such as a desk riser for raising the height of your monitor. Ergonomic chairs and variations of mouse and keyboards are available to promote better positioning and reduce repetitive strain. Access what you can & make arrangements that suit your own setup.
Stretch & Move - Our bodies love symmetry but unfortunately WFH and office based work in general promotes repetition with repeated postures, positions and static behaviours.
At risk of repeating ourselves here you need to counter static behaviours by moving your muscles and joints regularly through a large range and routinely in the opposite direction to the postures you adapt while working. For example to counter tightness in the hips and lower back from sitting we should target arching our lower back and lengthening our front hip and thigh muscles. Check out our Mobility blogs and Videos here.

‘Cobra’ Back Bend Stretch
Lunge Hip Opener Stretch

WFH can be happier and healthier
Summary
It’s time for you to take positive action if you want to improve your WFH situation. Stop making excuses, organise yourself and make healthier choices now to improve your physical and mental well being. It’s up to you!
thank you
Thanks for reading, please share with any friends, family or colleagues who could benefit.
We are always here to listen & help. Our specialist team can help you navigate and manage any ache, pain or injury.
Use the links below to Book an appointment now or Contact us with any questions

Early Postpartum Tips for Pelvic Floor
Women’s health expert Physiotherapist Jenny Devlin gives insight on what you might expect from your postpartum body and the best approach to begin exercise and optimise your recovery
WRITTEN BY JENNY DEVLIN, MSK PHYSIOTHERAPIST AND SPECIALIST WOMEN’S HEALTH PHYSIOTHERAPIST AT PHYSIO EFFECT
So, you’ve just had a baby… CONGRATULATIONS!!
The first days and weeks postpartum can be a blur and prioritizing pelvic floor exercises might not be at the forefront of everyone’s mind. There are some things you can do, however, throughout the day to start working on your pelvic floor while also enjoying sweet baby cuddles.
BREATHE
Something that we do every day but often don’t do well. Once we have had a baby our breathing is often altered as our baby has been taking up the space in our abdominal cavity and achieving a deep breath might have been tricky for the past few months. Remembering how to take deep breaths can help with the healing process. Our diaphragm and pelvic floor move together and as a result breathing deeply in can help relax and lengthen the pelvic floor muscles and conversely exhaling can help engage the same muscles.
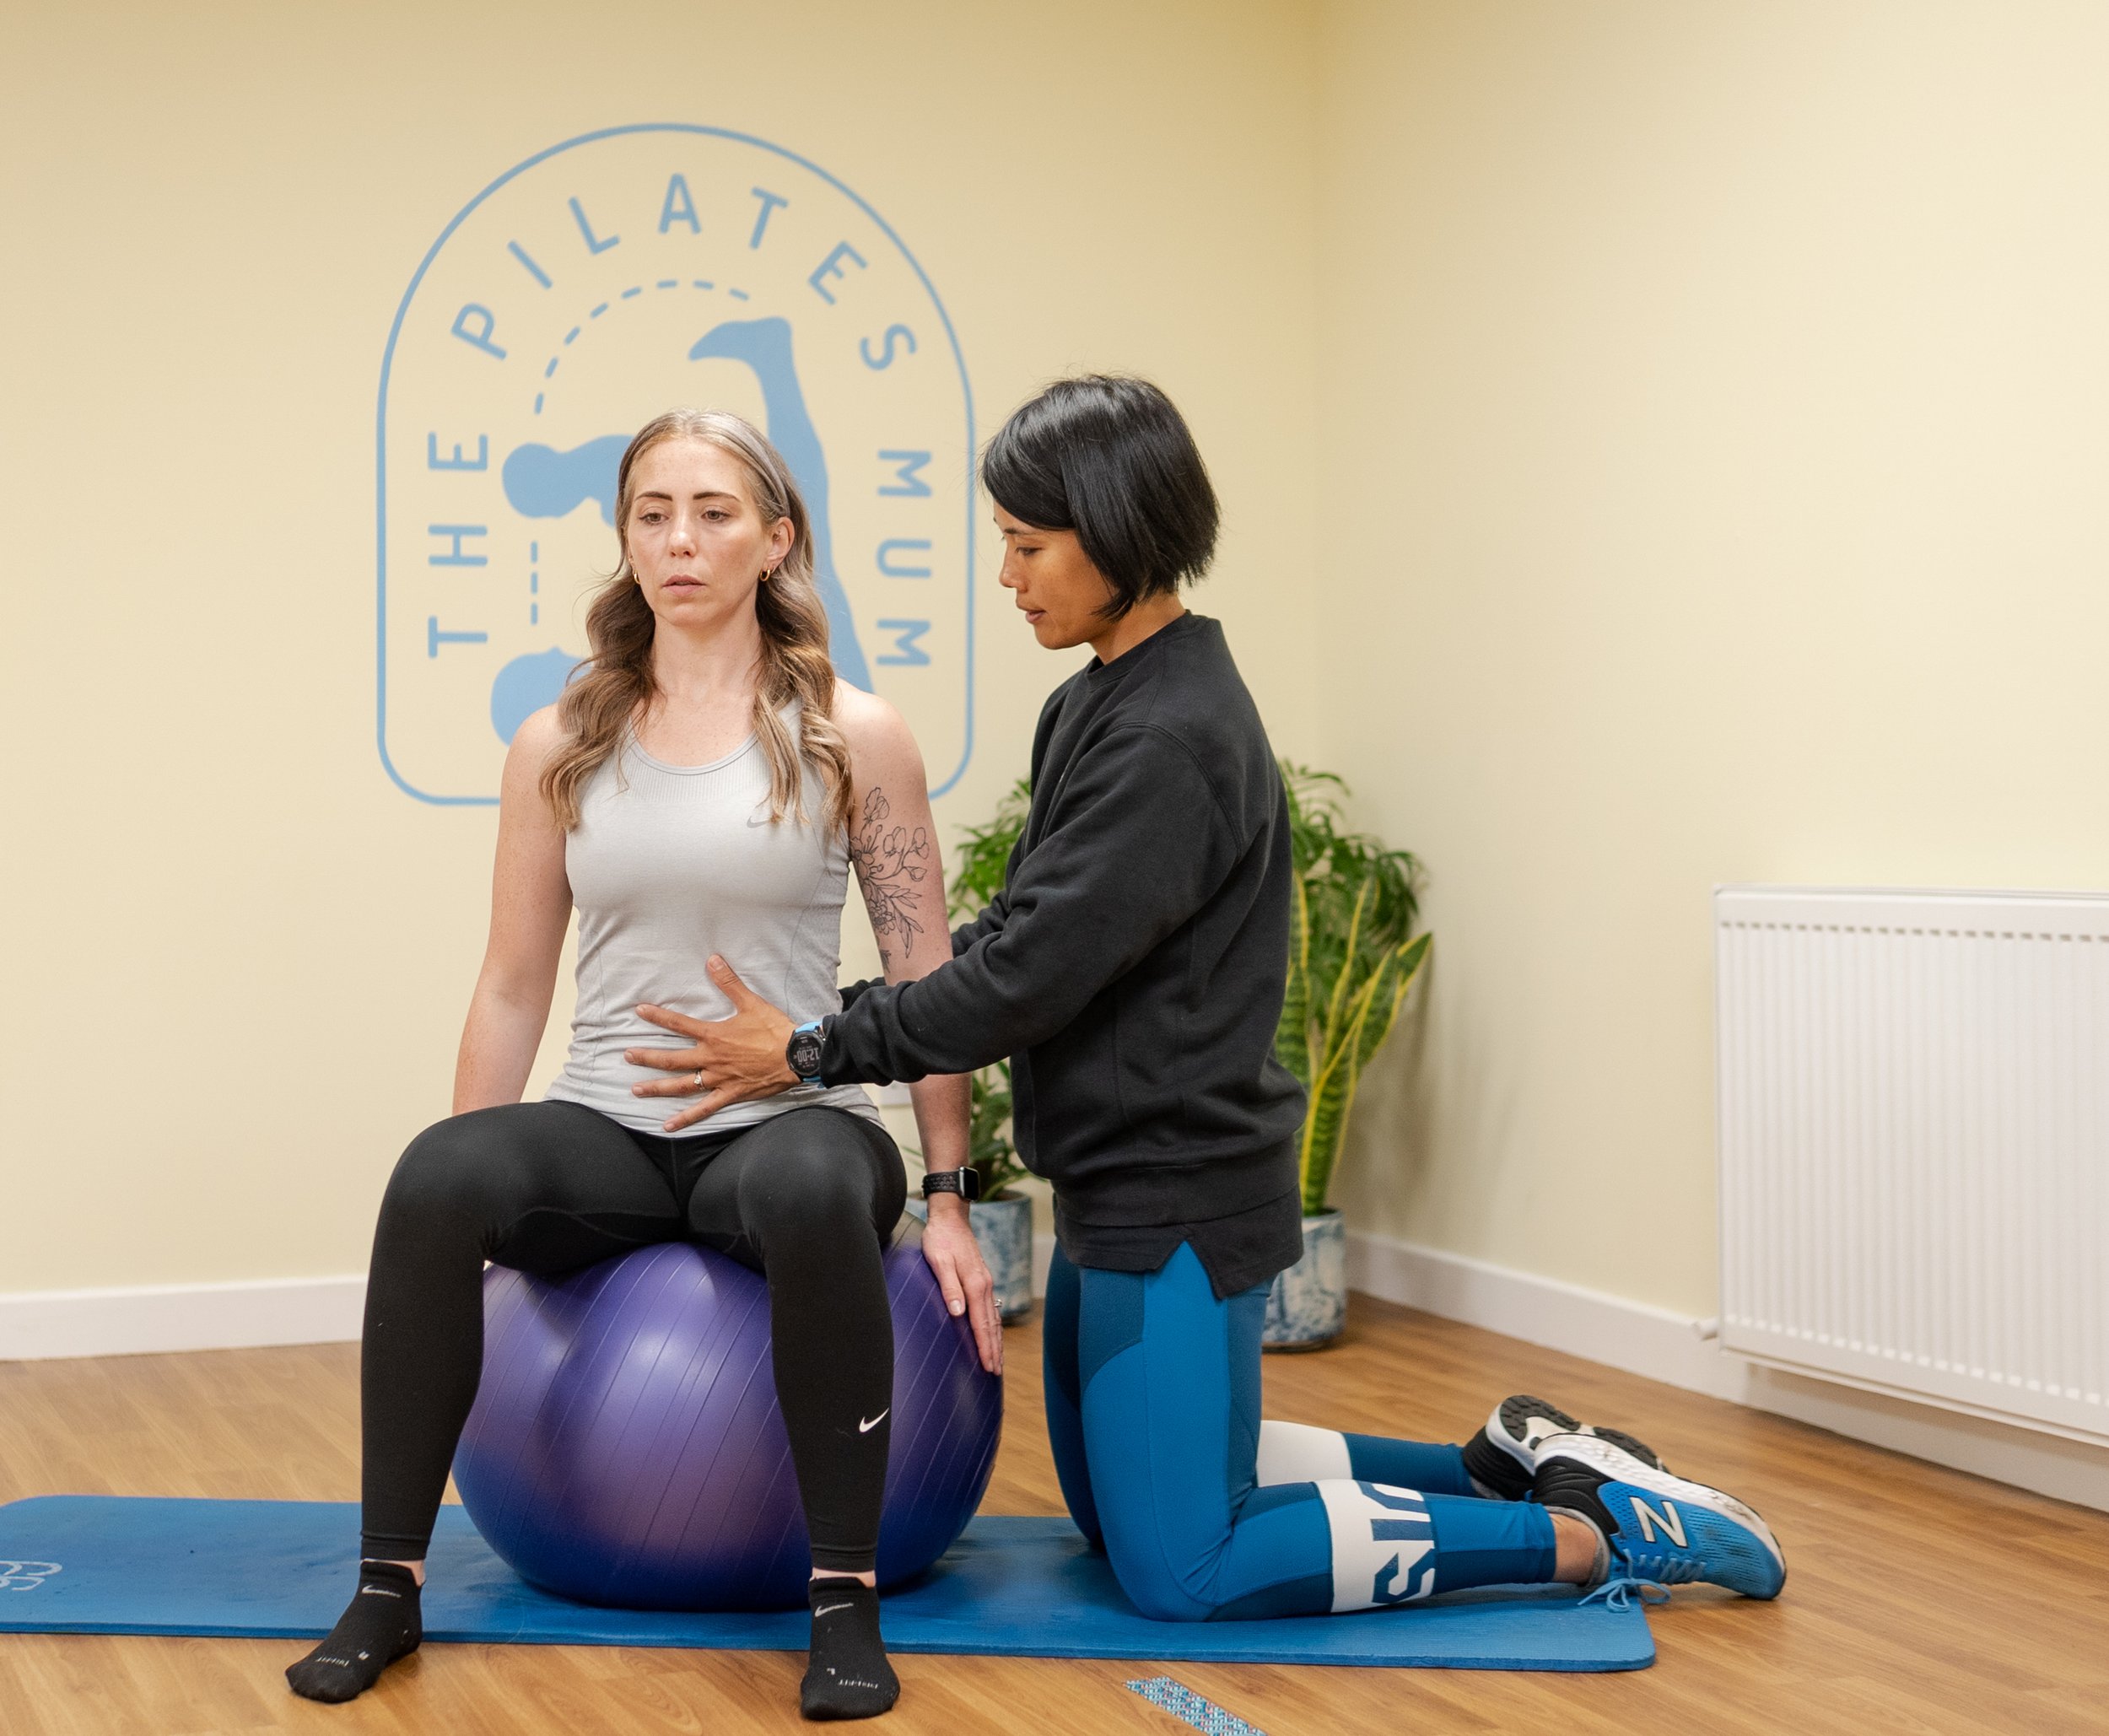
Women’s health Physiotherapist, Mariam Kilpatrick, educating a patient on diaphragmatic breathing.
Getting the muscle pump of the pelvic floor working can aid pelvic congestion and help heal the tissues through lymphatic drainage.
Deep breathing can also help us enter into ‘rest and digest’ mode which can help us feel calm and decrease anxiety and enjoy being present with our baby.
You can practice breathing anywhere but it might be easiest sitting or in a semi-reclined position. Make sure you’re comfortable. Inhale slowly through the nose, feeling the air fill the lungs and the pelvic floor lengthen. Exhale gently through the mouth and feel the recoil of the tissues. Keep your shoulders and jaw relaxed. You can learn more about the structures that make up your abdominal cannister, including your pelvic floor in our recent Blog Post.
Posture
Throughout the day, check in with your posture while sitting, standing and moving around. Has your posture changed since having your baby? Can you find your way back to your previous position?
How we hold ourselves while feeding baby for many hours per day is important. Make sure baby is supported to come up to you, so that you don’t have to hunch over to feed. Try to maintain an upright posture for feeding as much as you can - it has an impact, not only on your back, neck and shoulders, but on your pelvic floor too! This NHS guide has ideas alternative breastfeeding positions from the commonly adopted ‘Cradle Hold.’

Image Credit: Shutterstock. Breastfeeding in a reclined position can ease the tension of a painful back and shoulders.
Have a think when you’re holding baby, are you always holding them on one side? Can you switch? Can you wear them for a while in a carrier instead of carrying them? Try placing your hands on your ribs and stacking them over your pelvis.
There are lots of little ways we can improve postures throughout the day to make our pelvic floor a little happier and function better too!
Pelvic Floor Exercises
Throughout the day try to practice a few pelvic floor muscle contractions. You may find it easier to do it lying down or in sitting. Check in with yourself and see what you can feel. You should be able to feel a gentle lift of the pelvic floor without your pelvis tilting and without your legs or bum muscles working hard. You should also be able to feel it relaxing. Try for some longer contractions and some short, fast ones too.

Women’s health Physiotherapist Mariam Kilpatrick demonstrating the ‘Butterfly’ Technique to connect with your pelvic floor.
Gentle Exercise
In the first days postpartum, take it easy. No matter how your baby was born, the body goes through a lot to bring your little one into the world. You might feel like you can do more exercise wise, but do you really need to? Give your body time to rest and recover and gradually build in your exercises. The first days or weeks might start out just thinking about pelvic floor, core and posture and progress from there. We are all about getting you back to doing the things you LOVE so let’s make sure you’re doing them sequentially in a way that’s right for your body and will allow you to continue doing them long term!

We offer ‘CryBaby Pilates’ classes in our Studio to women and their babies from 6 weeks postpartum.
See a Pelvic Floor Physiotherapist
Pelvic floor symptoms are common, but they are not normal! We hear a lot of people normalizing pain or incontinence. Often ladies don’t know there is help out there but there is level 1, grade A evidence to show that pelvic floor assessment and treatment can improve pelvic floor function. Enjoy baby cuddles and gentle progressive exercises and anywhere from the 6 week mark, come and see us and have a pelvic floor evaluation so we can do an assessment, assist with any symptoms and help you work towards your goals, no matter what they are.

Pelvic Organ Prolapse
Pelvic Organ Prolapse - Signs, Symptoms and Treatment
PELVIC ORGAN PROLAPSE
WRITTEN BY JENNY DEVLIN, MSK PHYSIOTHERAPIST AND SPECIALIST WOMEN’S HEALTH PHYSIOTHERAPIST AT PHYSIO EFFECT. MCSP & HCPC
For a lot of people a diagnosis of, or even the thought of, pelvic organ prolapse is terrifying. It is extremely common though with the Royal College of Obstetricians & Gynaecologists suggesting that as many as 1 in 10 women over the age of 50 are affected. This number may well be higher with an increasing risk of complications after pregnancy and childbirth.
The good news is that many people are able to reduce or resolve their prolapse with the help of a pelvic floor physiotherapist. In this blog we explain more about Pelvic organ prolapse and look at how our experienced and specially trained Pelvic health Physiotherapists can help you.
What is pelvic organ prolapse (POP)?
A pelvic organ prolapse occurs when a pelvic organ (or organs) bulge into the vaginal space. Strained, tight or weak muscles, ligaments or fascia can contribute to this. It can occur in different ways and we name the POP based on the organ that is not in its optimal position. A bladder prolapse (or cystocele) is where the bladder pushes against the front wall of the vagina. A uterine prolapse is where the uterus drops down into the middle of the vaginal space and a rectocele is when the rectum moves into the space at the back of the vaginal canal. You can also have a vaginal vault prolapse which occurs after a hysterectomy.
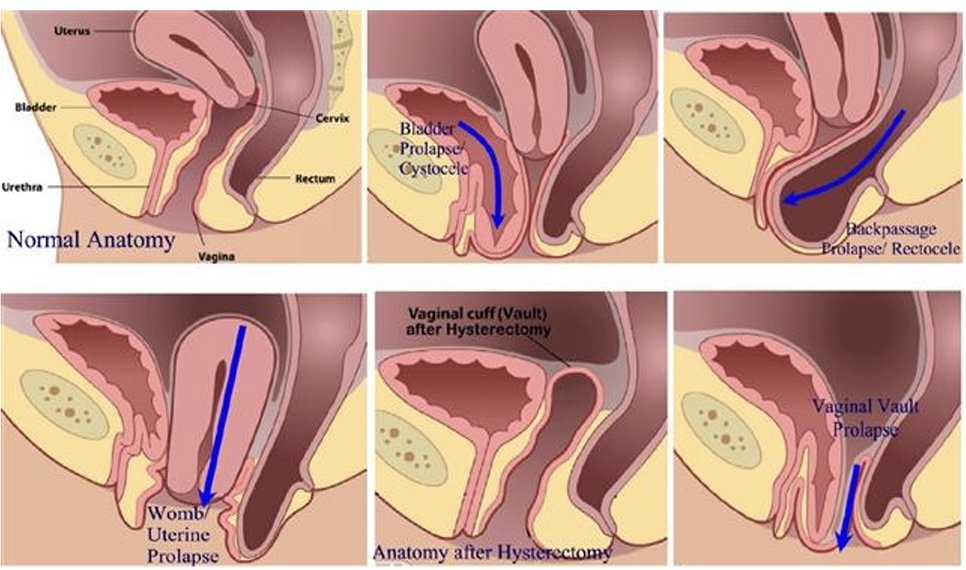
Pelvic Organ Prolapse
Symptoms of a pelvic organ prolapse
Prolapse affects everyone in a very unique way both physically and mentally. Some people live with prolapse and do not experience any symptoms. Other people can experience any number of symptoms which can be mild or affect your quality of life. Symptoms include:
pressure or heaviness in your pelvis area, which is often worse at the end of the day or with exercise
low back pain
urinary symptoms such as a slower stream, increased frequency or urgency to void, feeling of incomplete emptying of the bladder, urinary incontinence
bowel problems such as constipation, straining, feeling like the bowel doesn’t empty completely, increased frequency of bowel movements, faecal smearing (stool on the tissue after wiping clean), incontinence of faeces
Discomfort during sexual intercourse
Treatment options for pelvic organ prolapse

Pelvic Health Physiotherapy Assessment
Great news! Pelvic floor physiotherapy may be able to help with your symptoms of POP. Our team can help suggest changes you can make to your day to day routine to manage pressure on the organs, help with toilet positions to aid more effective urination/defecation.
Our specially trained Physiotherapists can assess muscle tension in the pelvic floor and abdominal muscles and help you to release this. We can also assess the strength and endurance of the muscles and teach you how to improve this if need be.

Physio instructed strengthening
We can guide you on correct strength and endurance exercises to help support the pelvic organs and the pelvis itself. This can help you in everyday functions when straining or lifting and on safely returning to sport. We can also make individual suggestions for more comfortable positions for intercourse.
Pessary For Pelvic Organ Prolapse
At Physio Effect our specialist team can assess and fit a pessary. A pessary is a device you wear inside the vagina, intermittently or continuously, to help hold things in position while you do the things you love. Once it is in place, you don’t feel anything but it can provide instant relief from that heaviness or pressure and can help with symptoms of incontinence too.

Cube Pessaries
Best of all once fitted these pessaries are designed for self management so you are in complete control and can remove and fit the pessary as required. After assessment and discussing your individual symptoms and needs our physiotherapists can help you decide if surgery might be the best route for you if conservative therapy has not worked.
We are here to help so please ask us anything. Hopefully this information makes things seem a bit less overwhelming and gives you hope that your symptoms can be improved. Give us a call or book in online for a full assessment and personalised treatment plan.

What is Pelvic Floor Physiotherapy?
What is pelvic floor physiotherapy and how can our team help you get back to doing the things you love symptom free?
Written by Jenny Devlin, MSK Physiotherapist and Specialist Women’s Health Physiotherapist at Physio Effect. MCSP & HCPC
What is pelvic floor physiotherapy?
Pelvic floor physiotherapists are musculoskeletal physios who have undergone specialised training in assessing and treating conditions that affect the pelvic area. This can be from pregnancy, childbirth or surgery but it does not have to be!
Some pelvic floor issues that can be treated with pelvic floor physiotherapy include:
Urinary and faecal incontinence
Urinary urgency, retention, frequency
Diastasis rectus abdominus
Pain with bowel movements or urination
Pain in the vulvar area (vestibulodynia, vulvodynia)
Painful intercourse (dyspareunia)
Constipation
Interstitial cystitis
Pudendal neuralgia
Endometriosis
Low back pain
Hip pain
Prenatal care - including pain management, exercise advice, positions for birthing, breathing techniques
Postpartum care - including return to sport

Jenny Devlin, specialist pelvic health Physiotherapist explaining pelvic health assessment
What does a pelvic floor assessment involve?
At your first appointment you will be asked several questions about your current symptoms, past symptoms and other relevant medical and social information.
We will then conduct a physical assessment which will be different for everyone depending on what’s going on with you. It will likely involve postural assessment, checking your pelvic alignment, tummy muscles and how your body moves when you do certain tasks like squat or stand on one leg.
If your pelvic floor seems to be involved then we will recommend an internal assessment. The benefits of a digital vaginal or rectal examination are that the physiotherapist is able to assess tension, strength, prolapse and improve activation of the muscles. The risks are that there may be local discomfort or emotional stress, skin reaction, nausea or bleeding, though we take all measures to minimise these risks.The alternative is doing an external examination and observing the abdomen and giving verbal cues for exercises, however, we will not know exactly what the muscles are doing and often progress is slower with this option. All of this will be discussed with your physiotherapist prior to therapy and throughout treatment. Consent to assessment and treatment can be withdrawn at any time. You are in charge!

Women’s Health Physiotherapist Jenny Devlin conducting a pelvic floor assessment with a female patient.
Does pelvic floor physiotherapy work??
Studies have shown that pelvic floor physiotherapy has Level 1, grade A evidence for treating urinary incontinence and pelvic organ prolapse. Clinical guidelines (2008) on the conservative management of urinary incontinence by the Society of Obstetricians and Gynaecologists of Canada recommend “proper performance of Kegel exercises should be confirmed by digital vaginal examination or biofeedback”. This is crucial because a high percentage of women can not contract their pelvic floor correctly. Further to that, performing more kegel exercises may not be what you need and an assessment with a trained pelvic floor physiotherapist can help guide you as to what treatment is most effective for your body.
Often people are prescribed pelvic floor physiotherapy in their postpartum period or when they are older but physiotherapy should be routine for pregnant people too. Research shows that pelvic floor muscle training between 20-36 weeks of pregnancy had a shorter second stage of labour, less urinary incontinence and less pregnancy related low back pain compared to people who did not perform pelvic floor exercises. This is an essential time to have your pelvic floor evaluated, learn optimal positions and breathing for labour and delivery and to set yourself up for a more successful postpartum recovery.
Make sure you align yourself with a pelvic floor physiotherapist who understands that not all pelvic pain is tissue based. Pain, especially chronic pain, is multifactorial and therefore it is so important that you find a physio who understands the relationship between pain, biological factors, the nervous system, psychological and social factors so that you can have the best outcome!
How do I know if pelvic floor physiotherapy is for me?
Do you have a pelvis? Then the answer is YES, pelvic physio is for you! Joking aside, there are so many reasons that might bring you to a pelvic physiotherapist. If you have pain or discomfort in your pelvis area; heaviness or pressure at the vulva, vagina or rectum; leaking of urine or stool; need to go to the toilet often or experience urgency or have pain with intercourse. If you have uncontrolled doming of your tummy muscles when you move or have noticed a gap between your tummy muscles. If you have issues with constipation, hip pain or low back pain. If you are pregnant and in pain, or are looking for exercise guidance or tips and tricks for labour and delivery. If you are postpartum (6 weeks after childbirth for a vaginal exam, though physiotherapy can start before that). If you want to make a plan for returning to running or working out or to make day to day tasks feel easier on your body.
Still can’t decide? Call us on 01412304766 to discuss or use the link below and book your initial assessment, we will figure out what is best for you.

Back Pain - A Self Help Guide
Back pain is very common. It’s frustrating at best and debilitating at worst. This guide will help you develop strategies for long term change to get rid of back pain and stay pain free long term. No magic bullet or ‘Guru’ advice here, just sensible and actionable tips allowing you to take control and start your journey to a pain free back.
Written by Daniel Wray (BSc Hons Physio/ PG Dip Sports Physio)

Back Pain?
We’ve all been there…..
Why does my back hurt?
Back pain is common, if you’re reading this i’m sure you have suffered at least one episode of back pain in your lifetime and in all likelihood more than that. It’s frustrating and restricting and can have a huge negative impact on your quality of life.
There are many reasons for back pain and unfortunately it’s rarely a quick fix. The most common form of back pain is often referred to as mechanical pain which is an umbrella term describing dysfunction in the soft tissues and joints preventing or impeding normal function. This may be stiffness, weakness, muscle shortening, joint wear and tear or any combination of these plus other factors.
In the absence of acute trauma back pain rarely appears suddenly or overnight and for most it’s a gradual and cumulative process related to lifestyle. Our modern lifestyles are simply too sedentary with too many hours spent in static positions meaning our joints and muscles don’t get the movement stimulus they need to stay flexible, hydrated and healthy.

Familiar hunchback posture?
For many people what began as a minor back ache or stiffness spirals steadily into chronic pain and disability and it can seem like you’re stuck in a repetitive cycle of injury and pain. We try to make changes but the daily grind means we continue to rack up hours of sedentary, static, and repetitive behavior trapping us in this negative cycle. The pain can force further lifestyle changes meaning less movement and exercise which reinforces the negative cycle and it can seem impossible to break free. Having a dodgy sore back slowly becomes the norm and we just accept it and carry on.
It’s not all bad news - here’s what you can do…
It all seems pretty grim and depressing right? Well the good news is that for the most part the majority of back pain, even when extremely painful and debilitating, is not due to serious pathology and it can get better. There are of course exceptions to this and we would always advise you seek advice from a qualified health professional if you have serious concerns about your back pain.

The bad news, if you look at it that way, is that the fix is rarely instant and usually requires significant effort on your part to make lifestyle changes and prioritise time every single day to look after your back. Of course if you Google hard enough (we’ve all done it) you will find some ‘Guru’ promising an overnight fix in exchange for a significant amount of your hard earned cash but truthfully the magic bullet doesn’t exist. Below we have listed some strategies you can implement to make a real difference.
6 self help strategies to help manage back pain:
1- Keep moving. Complete rest is not going to help and generally increases stiffness, pain and fear avoidance behaviors. Of course we must adapt our movement depending on the level of pain and there may be a need to avoid certain postures, positions or movements for a short period of time which is fine. I don’t recall any scenario with a patient where we couldn’t find at least one simple movement they could do to keep some gentle activity in their back to promote healing and relaxation while building confidence that they are not going to stuck in pain forever. Experiment with different movements and stretches (see below video) gently and slowly and see what you can manage comfortably and that will give you a starting point which you can gradually add other movements to as your pain allows.

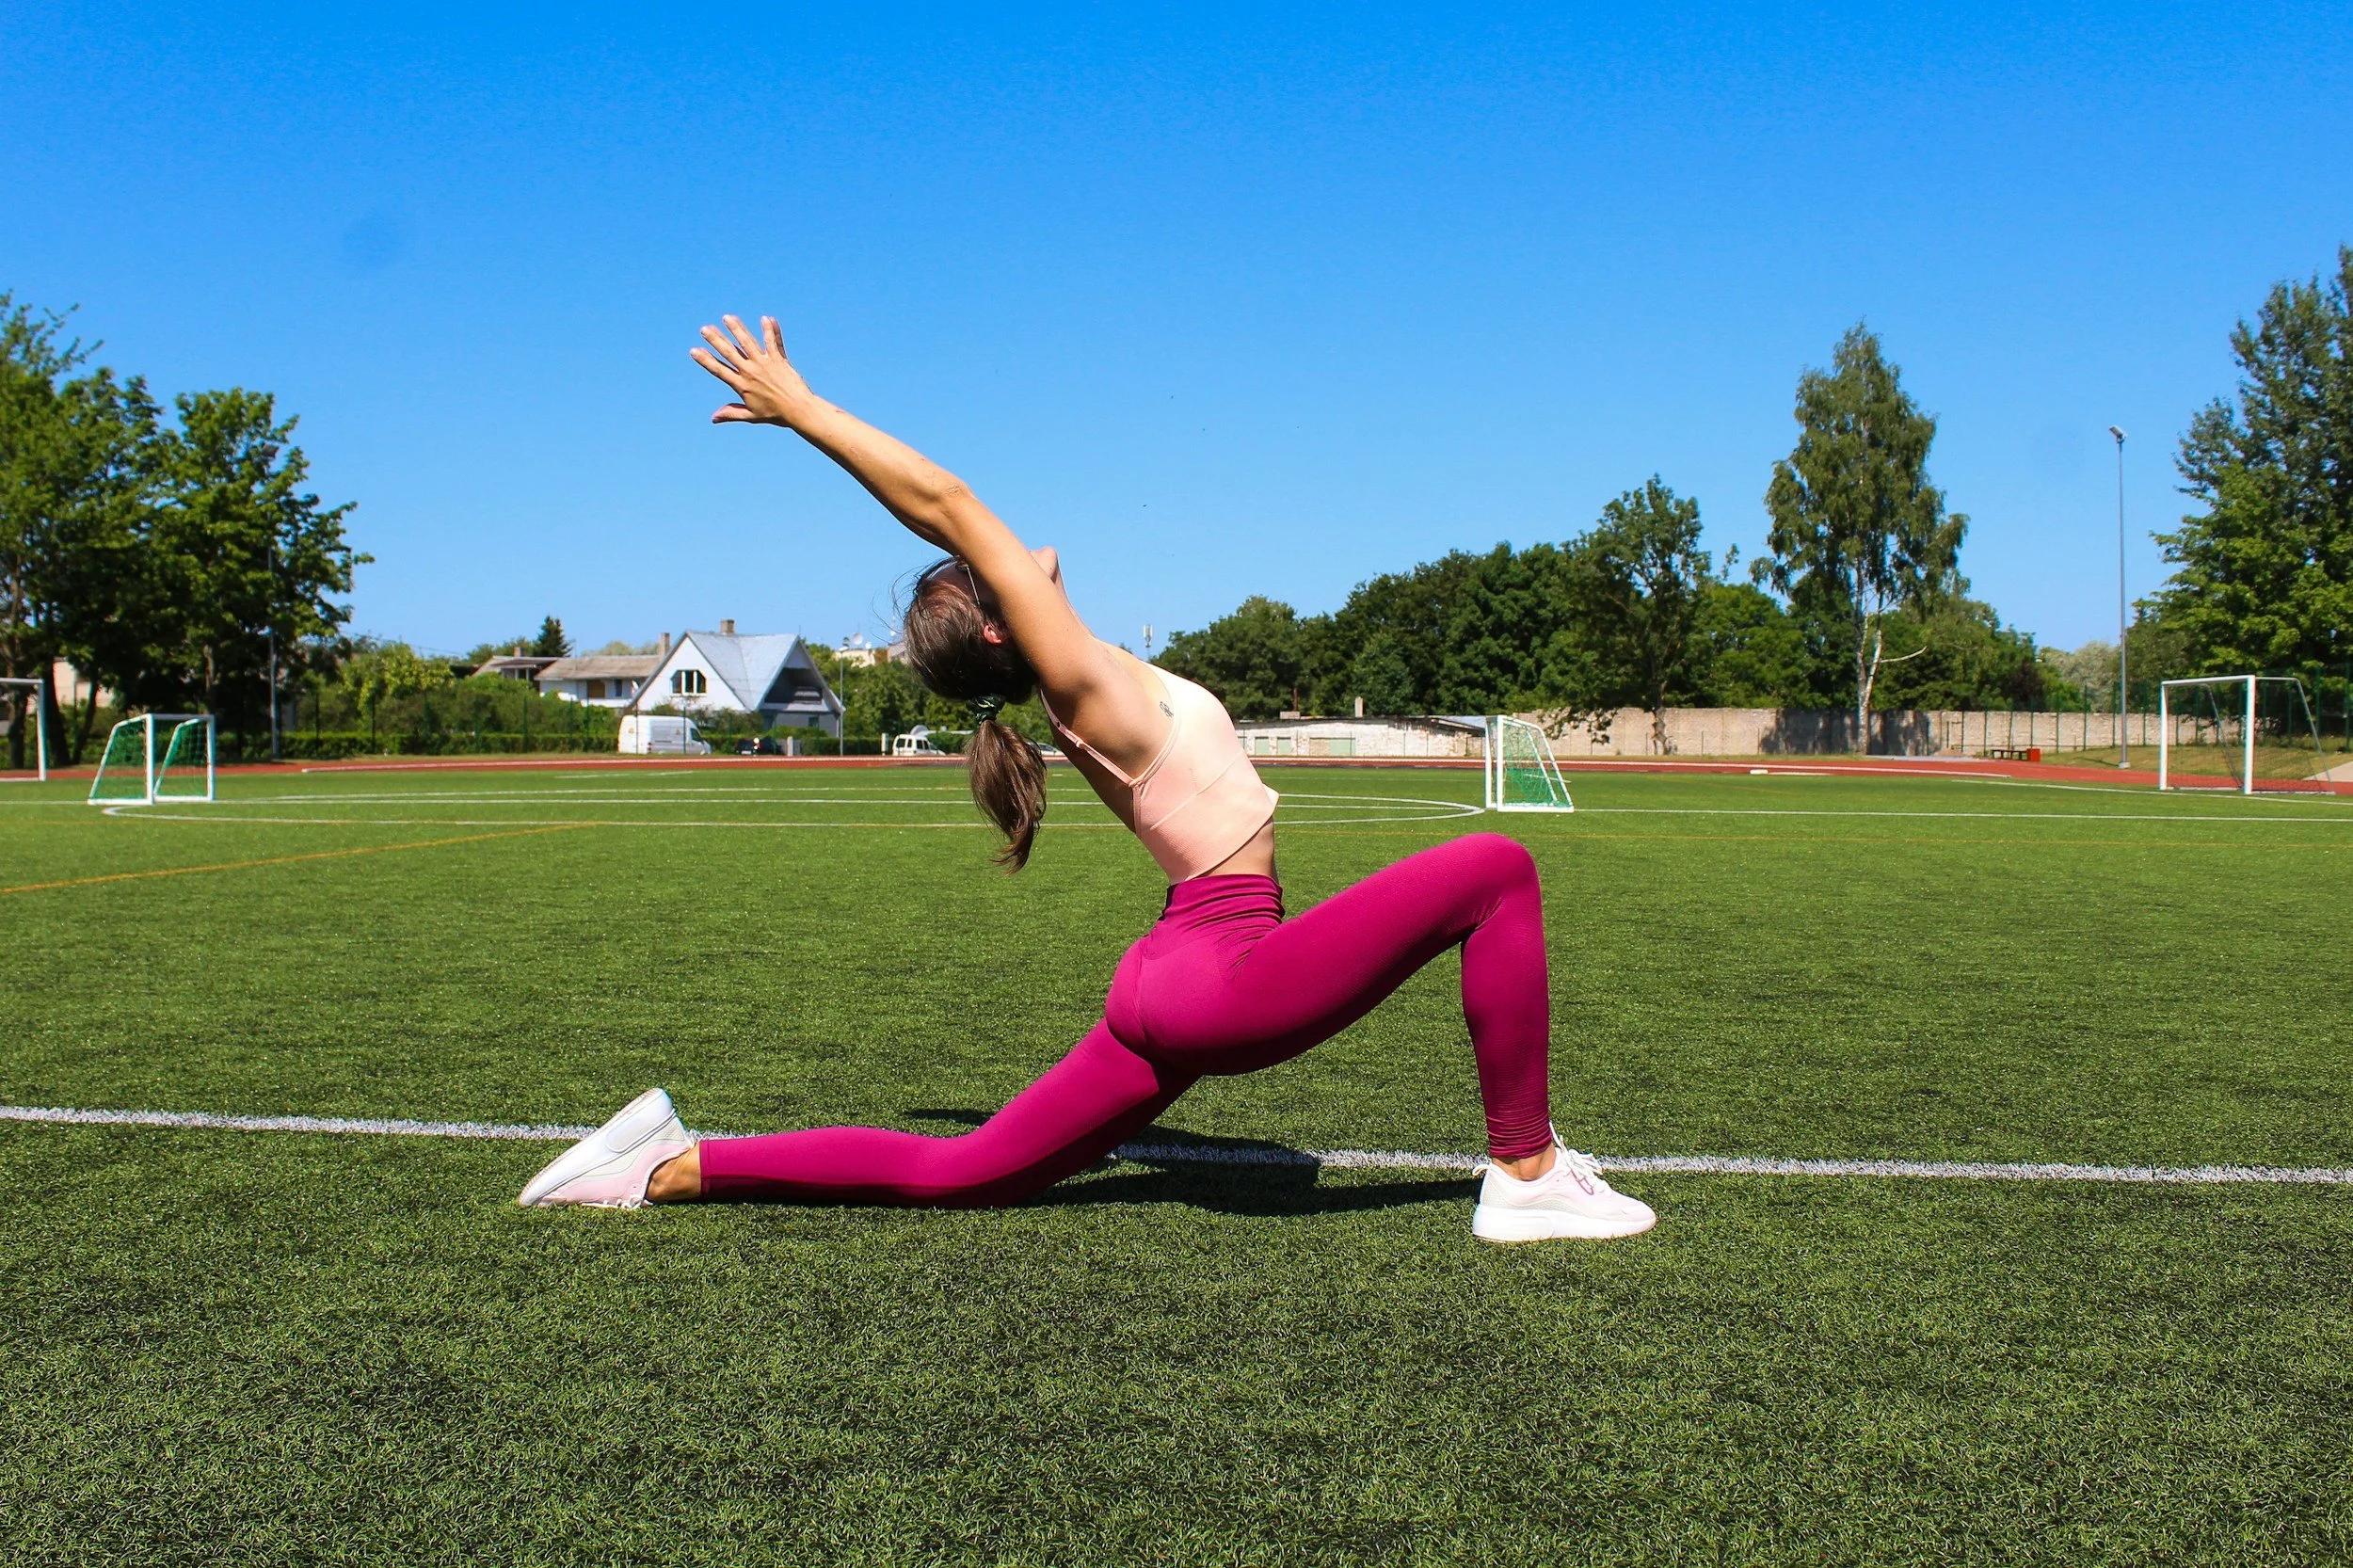
Lunge with arm and spine rotation
2- Establish routine & be proactive not reactive. You need to act consistently and with purpose. Don’t wait until your pain is crippling to decide you need to try some exercises to relieve it. Even if you’re feeling okay find a rhythm that allows structured gentle movement and exercise to be part of your daily routine ideally multiple times a day. Frequent exercise micro breaks to interrupt static postures will reduce the build up of pressure and stiffness and are more desirable than trying to undo hours of sedentary behaviour with a single bout of exercise. Think 2-3 minutes activity every hour rather than a 30 minute blast at the end of the day. Use a timer to remind you.
3- Accept responsibility & seek guidance. It is your body and your back and you need to find a way forward, nobody can do it for you. Don’t pass responsibility onto any therapist (no matter what some ‘Guru’ promises) and assume that by chucking money at it that will be enough to fix you. Do find help from someone you trust who has your best interests at heart and involves you in all aspects of any treatment or rehab plan. Passive treatments such as massage, acupuncture, and manipulation can be great for pain relief but long term are only as good as the agreed exercise plan and responsibility you take in changing your lifestyle. Be wary of any therapist promising to fix you but providing no education or prescription of exercises you can use to help yourself.
4- Exercise for fun. Find a form of exercise you genuinely enjoy and commit regularly to it. Don’t drag yourself to the gym if you hate every minute of it, exercise should be enjoyable and a way to relax your mind as well as your body. Try new things and see what you enjoy. Ultimately your long term compliance will wain if you pursue something because you feel you have to rather than because you really want to.

Back Strengthening - Extensions on the GHD machine
5- Manage stress. One of the biggest silent assassins to any life goal is high stress levels. You can have all the good intent in the world in changing lifestyle and exercising more but if you are under high levels of stress you can easily sabotage any progress. I realise this is a broad blanket statement and stress management is a big topic beyond the scope of this article but at the very least be aware of how it contributes and can damage your progress, then start to look for solutions.
6- Be patient. You won’t change things overnight and chances are you will have many peaks and troughs in your recovery. This is normal. Try to be patient and remember a backward step with increasing pain symptoms is not the end of the world, try to continually adapt but keep taking positive actions even when you feel frustrated and annoyed. If you follow the steps above you should see over time the more severe episodes of back pain decrease while your ability to manage and recover from any acute episodes will improve.
Picking Exercises - Where to start?
It’s imperative to get moving ASAP with pretty much every kind of back pain or injury but the exact type of exercise or stretch you choose to get started with will differ depending on your level of pain, stiffness and disability. Below is a back mobility exercise flow covering a multitude of different exercises and positions. Try it but STOP if you feel any specific movement aggravates your pain. At most a slight awareness of stiffness or aching is permissible but do not force anything and take it slowly and gently.
You may decide that only a couple of these exercises work for you in your current situation and that is fine, identify what you can do and exclude what you can’t. That will be your start point and I would advise doing these exercises a minimum of 3 times per day but ideally more frequently at least initially. As you become more comfortable hopefully you can add more of the movements to your repertoire.
Long term most people will require a combination of strength and flexibility exercises but it is important that these are specific to your own individual requirements. The routine below is provided as a starting point but is not all encompassing so please seek advice on your own needs but do use these stretches to try and initiate positive change through movement. The exercises are broken down individually in the pictures below the video & you can download a PDF cheatsheet to keep for your reference at the end of this blog.
Back Mobility Flow Video:
Seeking Guidance? We Can Help
Our experienced team at Physio Effect Glasgow are specialists in back pain and have helped 1000s of people recover and get back their quality of life. We talk the talk and walk the walk and will combine exercise based rehab with highly skilled hands on therapies to ensure you get the best possible treatment.
Most importantly we will listen and work with you in partnership to identify your specific issues and formulate an agreed unique treatment plan. We will relieve your back pain and give you long term self management strategies to strengthen your back and reduce the chance of pain relapse.
Please contact us if you have questions or to book an appointment and get your journey to back pain recovery under way.
Exercise Breakdown:
Here is a breakdown of each of the exercises included in the back mobility flow video. These are available in a handy PDF download from the Subscription box at bottom of the page.
Exercise 1
Cat & Camel Stretch
Begin in all 4s position. Cat posture - Allow your spine to soften and hollow along its entire length. Tilt your tailbone gently to the ceiling. Relax you lower back, rib cage, shoulders and neck
Camel Posture - Arch your whole spine slowly and gently to the ceiling in one large ‘C’ shape. Tuck your tailbone between your legs
Hold each position for around 10 seconds. Transition from one to the other 6-8 times.

1- Cat Pose

2- Camel Pose
Exercise 2
Childs Pose to Cobra
Begin in all 4s position. Childs pose - Gently sit bottom back towards heels as far as is comfortable opening knees and hips softly and as required
Cobra Pose - Allow weight to come forward and lower hips gently to floor. Stay relaxed in hips and lower back and if required bend elbows slightly so that hips can rest in contact with floor.
Hold each position for around 10 seconds. Transition from one to the other 6-8 times

1- Childs Pose

2- Cobra Pose
Exercise 3
Childs Pose Side Bend
Begin in Childs Pose - Walk you hands around to one side into side bend aiming for at least a 45 degree angle, you should feel a good stretch down your side. Hold 20-30 seconds.
Walk hands around in same way to other side and again hold 20-30 seconds in side bend.
Repeat 2-3 times on each side
1- Childs Pose

2- Side Bend Right

3- Side Bend Left
Exercise 4
Lunge Hip Flexor Opener
Begin in Lunge position. Gently engage your lower tummy muscles and tuck your pelvis in. Aim to feel a stretch in the front of your hip and top of thigh
Gently engage your buttock muscles and lean slightly forward taking care not to arch your lower back
Hold the position 30-60 seconds. Repeat 1-2 times left and right

1- Lunge Hip Flexor Opener

2- Lunge Hip Flexor Opener - Forward Lean
Exercise 5 - Part 1
Lunge Hip Opener with Alternate Arm Rotations
From Lunge position reach hands forward and rest on floor beside front foot. Take outside arm and reach under and between legs ‘threading the needle’ holding for a few seconds
With the same arm rotate outward and upward toward ceiling trying to get arm to a straight vertical position, hold for a few seconds then return to ‘thread the needle’
Repeat this 10 times

1- Lunge Position Hands Forward on Floor

2- Lunge Position Hands Forward ‘Thread The Needle’

3- Lunge Position Hands Forward - Rotate arm vertically reaching for ceiling
Exercise 5 - Part 2
Lunge Hip Opener with Alternate Arm Rotations
After completing Part 1 of this series stay in the same position but extend out your back leg as far as is comfortable
Take inside arm now and rotate upward to the ceiling trying to achieve the straight arm vertical position, Hold for a few seconds
Bring the same arm down and with bent elbow drive your elbow towards the floor down the inside of your shin. Hold for a few seconds then rotate back to the vertical arm position
Repeat this 10 times

4- Lunge Position Extend Back Leg

5- Lunge Position Inside Arm Rotate to Ceiling

6- Lunge Position Inside Elbow Drive to Floor
Exercise 6
A-Frame Walk to Squat
From the all 4s position drive your hips into the air with straight knees and gentle lower your heels towards the floor into the A-Frame (it does not matter if you can’t fully extend knees or reach the floor with your heels). Hold for 10 seconds feeling stretch in back of legs
Keeping hands on floor slowly walk feet in towards hands and slowly sit down into a squat, hold for 10 seconds
Walk back to A-Frame position and hold for another 10 seconds
Repeat 4-6 times

1- A-Frame Position

2- A-Frame Walk to Squat

3- A-Frame Walk to Squat 2

4- Finish in Squat
Thank You
Thank you for taking the time to read this post, we sincerely hope that you find it useful and can use it to implement some positive changes and reduce your back pain. Take your time and work at your own level but be persistent and try to gradually improve on your own baseline.
Please download your own FREE PDF Cheatsheet to keep and to help with your practice and share this post with anyone who could benefit. If you have any questions or comments please just ask we would love to hear from you. Stay healthy and move well.

A Guide On Returning To Running After Pregnancy
Running after having a baby is the obvious choice for many new mums wanting to begin or return to exercise. There are however some important things to consider in order to safely return to running and any other high impact exercise after having your baby. Returning too soon can cause long term implications including pelvic floor dysfunction, pelvic girdle pain and other musculoskeletal issues. This guide outlines the impact pregnancy and birth has on your body and important healing time-frames you must be aware of before returning to running. You will also find 2 free Pilates strength videos to give you an idea of the kinds of exercise that will help prepare your postnatal body for the demands of running
Written by Mariam Kilpatrick - Physio, Clinical Pilates Instructor, Mum and Ultra-marathon runner
One of the most common questions I hear from new mums after giving birth is, “When can I start running?” A fair question, as it’s one of the simplest forms of exercise to fit in around your baby, no gym membership required and a good way to burn off that extra baby weight. We’ve all been there.
There are however some important things to consider in order to safely return to running and any other high impact exercise after having your baby. Returning too soon can cause long term implications causing pelvic floor dysfunction, pelvic girdle pain and other musculoskeletal issues. This usually happens because you haven’t adequately rehabilitated your body following the huge stresses placed upon it during pregnancy and childbirth. Giving birth (either vaginal or C-section) can be considered equal to a major sports injury which would require the same attention, specific rehab and a graded return to any sport. It is just as important to work on muscles affected by pregnancy and childbirth (such as the pelvic floor and abdominals) as it is to work on the muscles around your knee if you’ve had a knee injury/surgery.
My baby is 6 weeks old now so I’m good to go…right?!
Healing of the body after childbirth goes well beyond the traditional 6-week timescale that many health professionals go by.
Did you know…
The levator hiatus, the opening between the levator ani muscles (which forms part of your Pelvic Floor) stretches and widens significantly during pregnancy and childbirth. This can take between 4-6 months to recover (Stær-Jensen et al 2015)
After a C-section, the abdominals only regains 50% of its original strength by 6 weeks postpartum and 73%-93% of original strength by 6-7 months postpartum (Ceydeli et al 2005)
Up to 30% of first time mums will experience urinary incontinence (Milsom et al 2004)
Up to 56% of new mothers between 3-6 months postpartum demonstrate pelvic organ prolapse where one or more of the pelvic organs (bowel, bladder or uterus) descends downwards to the vaginal opening (Bø et al 2017). This can result in incontinence issues and the feeling of heaviness/dragging in the vagina.
You can’t go wrong with strong!
Your Pelvic Floor is a hugely important part of your body. It is made up of layers of muscle and connective tissue. These layers stretch like a hammock from the tailbone at the back, to the pubic bone in the front. They support your pelvic organs and control your bladder and bowel movements. The front passage (pee hole), the vagina and the back passage (poo hole) all pass through the pelvic floor muscles. Throughout your pregnancy, your pelvic floor has carried the weight of your baby, the placenta and a 50% increase in blood volume! As such, this will greatly affect its ability to do its job properly compared to pre-pregnancy function. It is therefore vital to work on these muscles after having a baby, regardless of the type of birth you had (whether vaginal or C-section).
In the latter stages of pregnancy, the connective tissue or fascia between your outermost abdominal wall (your six-pack muscles) can thin out/stretch to allow for a growing baby bump. After giving birth, you can be left with a gap between the two sides and sometimes it can look like you are still pregnant i.e. the dreaded “mum-tum”. This is called a Diastasis Recti or abdominal separation, a common condition that causes a lot of grief for many mums. However, like any muscle in the body, these can be addressed and worked on with specific corrective exercises targeting your deep abdominals.
When you are running, multiple times your body-weight in the form of ground reaction force is produced on impact with the ground. This has to be absorbed and controlled by the tendons, muscles and joints in the legs. Strengthening the muscles of the lower legs and core help prevent injury and increase the muscles’ load bearing capabilities.


Guidelines for postnatal exercise progression
Week 0-2: Walking, pelvic floor muscle strength and endurance exercises, basic abdominal exercises
Week 2-4: Introduce functional body weight exercises such as squats and lunges
Week 4-6: Introduce low impact cardio such as static bike, rowing machine or X-trainer
Week 6+: Progress to resistance training such as Pilates for pelvic floor/core and weights training
Week 12+: Graded/progressive return to running (e.g. Couch to 5K)
Some expert physiotherapists have developed a free guidance to help health and fitness professionals who work with postnatal runners which can be found here.
Postnatal Pilates
Pilates is a great form of rehabilitation to target the working relationships of your pelvic floor and core muscles (abdominals and diaphragm) especially in the first few months after having your baby. The benefits of Pilates include:
Strengthening your Pelvic Floor
Targeting your deep abdominal muscles to help heal Diastasis Recti (abdominal separation)
Addressing muscle imbalances that may be contributing to lower back pain or pelvic girdle pain
Targeting postural muscles of the back, neck and shoulder girdle

Postnatal Pilates Class at Physio Effect
Pilates for Runners
Try these free sample routines for strengthening your legs and gluts:
Pilates legs workout
Pilates Gluts Workout
We Want To Help You Get Your Body Back On Track
Physio Effect specialises in helping mums recover their health, fitness and confidence after having a baby. Our Cry-Baby Pilates classes where new mums attend with their babies has been a great success and very popular!
Want to read some REVIEWS about our classes from other mums? Click the links & read below: Yell.Com Reviews or Facebook Reviews
The cry baby Pilates classes led by Mariam were an absolute highlight of my maternity leave. They offered important rehab for all the changes to my body left by pregnancy and a c-section and the strengthening work got me back safely running sooner than I expected - yay! The classes were warm, friendly and supportive and my baby Helena loved meeting the other babies too (as well as getting cheeky cuddles from Mariam). Couldn’t recommend more highly to new mums!
Katherine C via Facebook reviews
I’ve recently completed 2 blocks of Crybaby Pilates with Mariam & would highly recommend it for postnatal recovery. Mariam was great at making you feel relaxed, gradually building up the intensity of the exercises over the weeks so it wasn’t too daunting in the beginning. I liked how the exercises also allowed you to interact with your baby. The classes are small enough that you get the opportunity to get to know the other mums & babies, which helps you feel completely at ease in the class too. I now feel back to my pre-baby self & body, ready to start running & hitting the gym! Thank you!
Keri. L.K via Facebook reviews
Seek Help & Advice Sooner Rather Than Later
As with everything in life, there isn’t a one size fits all when it comes to returning to running after pregnancy. Factors that need to be considered include:
Type of birth you had; was it a straightforward vaginal birth, a vaginal birth with complications such as forceps delivery/episiotomy/tears, a C-section? The timescales may be different for each case!
Previous level of exercise (e.g. were you a runner before pregnancy?)
Experiencing symptoms of lower back pain, pelvic or pubic pain, leakage and/or feeling of vaginal heaviness (which could be a sign of pelvic organ prolapse), coccyx/tailbone pain (which could be a sign of a hypertonic or tight pelvic floor)
Are you currently breast-feeding? Pregnancy hormones stay in the body for about three months postpartum, continuing to loosen joints, muscles, tendons and ligaments as they did in preparation for delivery. For those breast-feeding, hormones can still have a loosening effect even months after you stop.
Lifestyle changes such as sleep deprivation, lack of routine, demands of breastfeeding and altered eating habits which can cause energy deficiency and fatigue.
If you are unsure, it is advisable to seek help from a specialist trained physiotherapist or a pelvic health practitioner.
If you would like to chat to one of our physiotherapists you can use the link below to book an appointment. Or if you prefer send us a message with any questions you have and we will get back to you as soon as we can.
Thank You
Thanks for taking the time to read this guide, we hope you find it useful. Please share with anyone else who might benefit and if you have any questions comment and let us know. Please subscribe for regular updates and advice on everything health and fitness related - Zero spam promise.

Postnatal Pilates at Physio Effect

Animal flows - What, How and Why?
Animal flows are a great addition to any exercise plan, warm up routine or injury prevention plan. Learning to move like a monkey, frog, or bear helps to build full body strength, mobility and motor control which in turn will make you a more awesome human and less prone to injury. This blog with video tutorials will explain what these movements are, how to utilise them and why you should should be doing them
What are Animal Flows?
Animal flows essentially refer to movement and exercise patterns where we imitate different types of animals such as bears, monkeys, frogs or lizards. Moving in these patterns can be very challenging, especially for the stiff & inflexible among us, but can also be really fun & provide significant benefits.

Deep Squat
Practicing animal flows can help improve strength, flexibility, mobility and overall motor control which in turn will help to make you a better functioning human and less at risk of injury. These movements can really challenge us in unconventional ways demanding our joints and muscles learn to control movement in patterns and ranges we would rarely otherwise practice. They can provide a great way to warm the body up in preparation for other forms of exercise or can even act as a stand alone training session. Once you have tried some of these movements for a few minutes you will understand why!
Where do I start?
As with all areas of training and exercise when attempting something new or different our advice is always start slow and work safely within your own levels of capability. Never push through pain or injury and if in doubt about whether this is appropriate for you please seek advice from a qualified professional.
Very few people will be able to perform controlled animal flow movements perfectly or even well at the beginning. When incorporating these kinds of exercises with my patients it’s essential we first establish their base level where they feel safe to practice but also feel that it is challenging. I would advise starting with getting comfortable in the static positions required as the foundation for the movement. In this post we will look at 2 positions - Deep Squat & A-Frame (Downward dog). These are the foundation starting postures for progression onto the animal movements monkey, frog and bear.
Deep Squat
The squat is a great foundation exercise for strength and mobility in the lower limbs and yet for so many people it is a real area of weakness and frustration. A lot of us slowly lose our ability to sit into a deep squat mainly through neglect and lack of practice combined with our static and sedentary western lifestyles. We become weak, stiff and tight and can no longer control the range of motion required to allow a deep squat. We rarely challenge ourselves to sit into a deep squat position let alone spend time exploring and improving on our range and control in this position. So first things first lets get a measure of your baseline squat function - check out this video and see how you get on.
It may take weeks or months of work to improve your squat mobility and that’s okay. For a more detailed look at improving your hip and back mobility please click the links to see our previous blog posts on these areas. You can use these routines alongside your deep squat holds to improve your squat function.
If you feel up to increasing the mobility challenge of your deep squat lets check out this next video requiring some active hip rotation movements at the bottom of the squat - a great way to improve your range of motion and strength.
I would recommend slowly building these exercises into your routines, aim for 20-30 second rounds initially performed for 3-4 sets thereby accumulating 2-3 minutes in the deep squat. Try this at least 2-3 times per week. Long term the idea is to become comfortable spending longer periods in the deep squat and find it relatively easy to perform movements from this position. Try to build up to 5 minutes total in the deep squat per day of practice over several weeks.
Monkey & Frog Mobility
These animal flow progressions are suitable once you have a comfortable squat allowing you to sit at least to parallel depth without the need of hand support. Don’t worry if you’re not there yet, keep practicing the squat, back and hip mobility exercises and you can move on to these once you feel confident.
These exercises are difficult and physically demanding but the pay off of regular practice will be improved squat mobility, increased lower limb strength and motor control with an associated reduced injury risk in these areas. Give each of these a try and see how you get on.
Add these to your regular practice at least 2-3 times per week initially
Begin with 20-30 second rounds aiming to build up to 1-2 minutes or longer
Look to accumulate time in the positions - Try a 5 minute timer & while stopping for breaks when required, try to spend as much time actively moving in these flows
Ideally we want to develop a relaxed freedom of movement where you can drop comfortably into a deep squat and easily move through monkey and frog patterns. You can mix and match the movements to create variation in the flow and challenge your strength and mobility through mixed planes of movement. Don’t expect overnight success but as with all training with hard work and consistent practice you should be able to improve allowing you to move better and feel better.
A-Frame (Downward Dog)
This stretch position is probably best known in yoga circles, most people will of at least heard of the Downward Dog. Another term we will use is A-Frame which refers literally to the fact we are trying to get our body into a position whereby it looks the a capital letter ‘A’. This position is another staple in many exercise forms and for good reason, it challenges the flexibility and strength of our body in many areas. The shoulders, back, hips, knees and ankle joints will be tested and for many people deficiencies in strength and range of movement will limit the quality and range available in attempting this position.
For many of us just attempting this posture will be tough and tiring. A lot of you will be feeling significant resistance in the backs of the legs (hamstrings and calves) and through the shoulders and upper back. Build slowly and increase the time spent in the stretch as you feel able, again looking to improve on your own current baseline level. Before attempting bear movements from this position we can work on a couple of simple variations which are shown in the video - slow marching on the spot and active shoulder extension pushing the head and shoulders through. Let’s give it a try and see how you get on.
Bear Movement Flows
The bear crawl can be utilised as a full body exercise to develop strength, flexibility and control in many areas. It is challenging and will take time to develop the skill and movement control required to perform it well but as with all these exercises your only goal should be to steadily improve on your own current baseline level. Once you have developed some comfort and control with the A-Frame stretch the first Bear Crawl movement we will try is with straight arms and straight legs as demonstrated in the video below. The key here is control so take your time and just do what you can, even if it’s only a few seconds initially, you can build on that. Let’s give it a go.
In the next video we demonstrate a number of bear crawl variations to give you some more options to explore. Depending on your own levels of mobility and strength you may find some options easier and others harder but it is great to play around and explore a variety of positions to find any weaknesses or restrictions and ensure a variety of stimulus is achieved. The key is to safely work on your own issues and don’t be afraid to explore positions that are challenging as long as you do so gradually.
Add these to your regular practice at least 2-3 times per week initially
Try:
Straight arms & legs
Bent arms, straight legs
Bent arms, bent legs
Straight arms, bent legs
Begin with 20-30 second rounds aiming to build up to 1-2 minutes or longer
Move forwards, backwards and sideways
Look to accumulate time in the positions - Try a 5 minute timer & while stopping for breaks when required, try to spend as much time actively moving in these flows
Summary
In summary adding animal flow movement practice into your regular exercise routines or habits can have significant physical benefits by helping to improve full body strength, mobility and motor control. It is a challenging but fun way to mix up your normal exercise routines and pushes your body to explore a variety of joint postures and positions that are not routinely trained or strengthened. This variety of stimulus will help to ensure strong and healthy muscle and joint function. Enjoy exploring and playing with these movements and ultimately you can learn to move better & feel better.
Thank You
Thanks for taking the time to read this guide, we hope you find it useful. Please share with anyone who might benefit and if you have any questions comment and let us know. Please subscribe to our mailing list to receive more interesting and useful blogs. Good luck and remember to move better & feel better

Restore your core after pregnancy: A safe return to exercise
Returning to exercise after having a baby can be daunting & difficult. It is possible to cause yourself more harm than good if you return too soon or to the wrong type of exercise. This blog looks at the evidence and guidelines for returning safely to post-natal exercise and the specific benefits of Post-natal Pilates in restoring your Pelvic Floor muscle function, reducing Diastasis Recti and rebuilding your core strength and function. A FREE 30 minute Post-natal Pilates class is linked for you to try.
Written by Mariam Kilpatrick - Physio, Clinical Pilates Instructor, Ultra-marathon runner & Awesome mum
After 9 long months, finally, your cute little bundle of joy has arrived! Goodbye to feeling like a bloated whale and goodbye heartburn. Say hello to sleeping on your tummy and to eating stinky cheese & sushi again. You’re keen to get back to exercise, get that endorphin rush and reclaim your pre-pregnancy body! You’ve had your 6 week check-up and your doctor has given you the all clear to exercise. Yay! BUT…yes there is a but. You can sometimes do more harm than good if you push your body beyond what it is ready for. Here we review the guidelines for returning safely to postnatal exercise and look at the specific benefits of Postnatal Pilates which include improved Pelvic Floor function and reduced Diastasis Recti (abdominal separation). Read on for more….
As the saying goes, you shouldn’t build a house on a weak foundation.
For many women, it has become a common thing to accept “a little bit of wee escaping” with a sneeze or running for the bus, just because you’ve had a baby. But no matter what age your baby is, either 6 weeks or 6 years, this should not be the perceived norm. Some women may feel embarrassed to raise their concerns around continence and other intimate issues but this should never be the case. Please seek professional advice early, as with the right help and guidance, these issues can and should be addressed.

The Pelvic Floor Muscles
Your Pelvic Floor is a hugely important part of your body. It is made up of layers of muscle and connective tissue. These layers stretch like a hammock from the tailbone at the back, to the pubic bone in the front. They support your pelvic organs and control your bladder and bowel movements. The front passage (pee hole), the vagina and the back passage (poo hole) all pass through the pelvic floor muscles. Throughout your pregnancy, your pelvic floor has carried the weight of your baby, the placenta and a 50% increase in blood volume! As such, this will greatly affect its ability to do its job properly compared to pre-pregnancy function. It is therefore vital to work on these muscles after having a baby, regardless of the type of birth you had (whether vaginal or C-section).
Let’s practice how to correctly engage your pelvic floor…
Take a deep breath in, fill your lungs completely and allow your pelvic floor to relax.
As you breathe OUT, close your back passage as if you were holding in a fart, then pull upwards and inwards towards your front passage to close it, as if you were holding in a pee.
Visualise trying to "squish" your anus (poo hole) to your urethra (pee hole) towards your pubic bone.
Do this without clenching your butt cheeks, your jaw or tensing your neck and shoulders (tricky, huh?)
Let everything relax again as you breathe in.
Repeat x 10Now try and engage your pelvic floor as above in 10 x quick flicks on and off.
*Practice turning your pelvic floor on in both sitting and standing positions
**Practice turning your pelvic floor on when doing things at the same time like picking your baby up from his/her cot or picking a toy up from the floor.
Why do I still look pregnant months after giving birth?
In the latter stages of pregnancy, the connective tissue or fascia between your outermost abdominal wall (your six-pack muscles) can thin out/stretch to allow for a growing baby bump. After giving birth, you can be left with a gap between the two sides and sometimes it can look like you are still pregnant i.e. the dreaded “mum-tum”. This is called a Diastasis Recti or abdominal separation, a common condition that causes a lot of grief for many mums. However, like any muscle in the body, these can be addressed and worked on with specific corrective exercises - all hope is not lost! The key is to target the deep layer of abdominal muscles. This may mean avoiding certain traditional core stability exercises initially (e.g. sit ups and planks). Your deep abdominal muscles have functional connections to - guess what - the pelvic floor…so it’s a win-win situation all round!

Postnatal Pilates
Pilates is a great form of exercise to target the working relationships of your pelvic floor and core muscles (abdominals and diaphragm) especially in the first few months after having your baby. The benefits of Pilates include:
Strengthening your Pelvic Floor
Targeting your deep abdominal muscles to help heal Diastasis Recti
Addressing muscle imbalances that may be contributing to lower back pain or pelvic girdle pain
Targeting postural muscles of the back, neck and shoulder girdle
Postnatal Pilates Class at Physio Effect
Here is a short taster video of a postnatal Pilates workout:
We Want To Help You Get Your Body Back On Track
Physio Effect specialises in helping mums recover their health, fitness and confidence after having a baby. Our Cry-Baby Pilates classes where new mums attend with their babies has been a great success and very popular. We are working hard to bring this content to full digital online form so that all mums everywhere can enjoy and benefit from this safe, structured and fun specialist postnatal program. For advanced notice of when this course is available and for special early-bird promotional rates please register for your free sample class below and we will keep you informed.
Want to read some REVIEWS about our classes from other mums? Click the links & read below: Yell.Com Reviews or Facebook Reviews
The cry baby Pilates classes led by Mariam were an absolute highlight of my maternity leave. They offered important rehab for all the changes to my body left by pregnancy and a c-section and the strengthening work got me back safely running sooner than I expected - yay! The classes were warm, friendly and supportive and my baby Helena loved meeting the other babies too (as well as getting cheeky cuddles from Mariam). Couldn’t recommend more highly to new mums!
Katherine C via Facebook reviews
I’ve recently completed 2 blocks of Crybaby Pilates with Mariam & would highly recommend it for postnatal recovery. Mariam was great at making you feel relaxed, gradually building up the intensity of the exercises over the weeks so it wasn’t too daunting in the beginning. I liked how the exercises also allowed you to interact with your baby. The classes are small enough that you get the opportunity to get to know the other mums & babies, which helps you feel completely at ease in the class too. I now feel back to my pre-baby self & body, ready to start running & hitting the gym! Thank you!
Keri. L.K via Facebook reviews
Would you like a FREE 30 minute Specialist Postnatal Pilates class to try?
Please Click the following link to register & we will send you a video link to enjoy
Returning to Exercise - What do the guidelines say?
In the first six weeks after giving birth and when you feel you are able, you may commence your pelvic floor and abdominal exercises, functional bodyweight movements, as well as low impact cardiovascular exercise such as walking.
From six weeks onwards (or a little longer if you’ve had a C-section), you may commence light resistance exercise such as Pilates and light weights training.
The earliest you should start high impact exercise such as Running/HIIT/Bootcamp is between 3-6 months after having your baby. This of course may differ from person to person depending on the type of birth you had. A recent study for guidance in returning to running post pregnancy by some expert pelvic health physiotherapists can be found here

Seek Help & Advice Sooner Rather Than Later
As with everything in life, there isn’t a one size fits all when it comes to returning to exercise after pregnancy. Factors that need to be considered include:
Type of birth you had; was it a straightforward vaginal birth, a vaginal birth with complications such as forceps delivery/episiotomy/tears, a C-section? The timescales may be different for each case!
Previous level of exercise (e.g. were you a runner/gym-bunny/Crossfitter before pregnancy?)
Experiencing symptoms of lower back pain, pelvic or pubic pain, leakage and/or feeling of vaginal heaviness (which could be a sign of pelvic organ prolapse), coccyx/tailbone pain (which could be a sign of a hypertonic or tight pelvic floor)
Are you currently breast-feeding? Pregnancy hormones stay in the body for about three months postpartum, continuing to loosen joints, muscles, tendons and ligaments as they did in preparation for delivery. For those breast-feeding, hormones can still have a loosening effect even months after you stop.
If you are unsure, it is advisable to seek help from a specialist trained physiotherapist or a pelvic health practitioner.
If you would like to chat to one of our physiotherapists you can use the link below to book an appointment. Or if you prefer send us a message with any questions you have and we will get back to you as soon as we can.
Thank You
Thanks for taking the time to read this guide, we hope you find it useful. Please share with anyone else who might benefit and if you have any questions comment and let us know. Please subscribe for regular updates and advice on everything health and fitness related - Zero spam promise.
Postnatal Pilates at Physio Effect

Stiff back? Try our simple six step mobility routine
6 step mobility stretch routine to ease back stiffness and relieve back pain. Practice daily and you will see improvements in your range of movement and alleviate tension, stiffness and pain in your back.
Back Pain?
We’ve all been there…..
What’s up with my back?
We’ve probably all struggled with a stiff achy back at some point. The reality is that our modern lifestyles are often dictated by technology and we just don’t move enough to maintain healthy joints and soft tissues. If you truthfully counted up how many hours per day or week you spend in sedentary / static positions whether working from a computer, driving, or binge watching TV and social media what would that number look like? How would it compare with hours spent being active, stretching, moving and getting some exercise? Chances are you are in the majority with your results skewed in the wrong direction and sedentary hours winning hands down.
Even for those of us who do exercise regularly it’s often at the back of a long day of not moving much. There is often a misconception that working out a few times a week should be adequate to ward off the stiffness and tightness that comes from our daily work routines. While of course some exercise is better than none what most of us need to do is work harder at incorporating small amounts of varied regular movement into our everyday routines. Micro breaks of several minutes every hour are a great way to break up the day & if you can practice a few hip and back movements and stretches with these then that’s a winning combination.
Familiar hunchback posture?
Most of the back pain we suffer is not serious (but do ensure you have checked with a medical professional) even when the pain and stiffness reach fairly extreme and debilitating levels. It is most often a cumulative and gradual process which results in reduced joint and tissue flexibility and a lower threshold or tolerance for simple tasks.
You may have a sensation of achy stiffness and tightness in your back and feel the need to fidget and change position constantly just to get comfortable. Sometimes acute painful events occur as the result of a simple daily task like putting on your socks and you can feel trapped in a cycle of stiffness, pain and vulnerability.
These symptoms most often aren’t indicative of something seriously wrong but rather your body is sensing changes it doesn’t like and is giving warning that something needs to change. X-rays and MRI scans aren’t normally helpful, unless being used by a medical professional to exclude other suspected pathology, and more often than not can cause confusion and fear which can negatively impact behaviour and recovery.
What can I do?
All is not lost and it’s never too late to make positive change. For most of us that can be very simple in the form of developing strategies that encourage us to move more in our daily routines. Try these pointers:
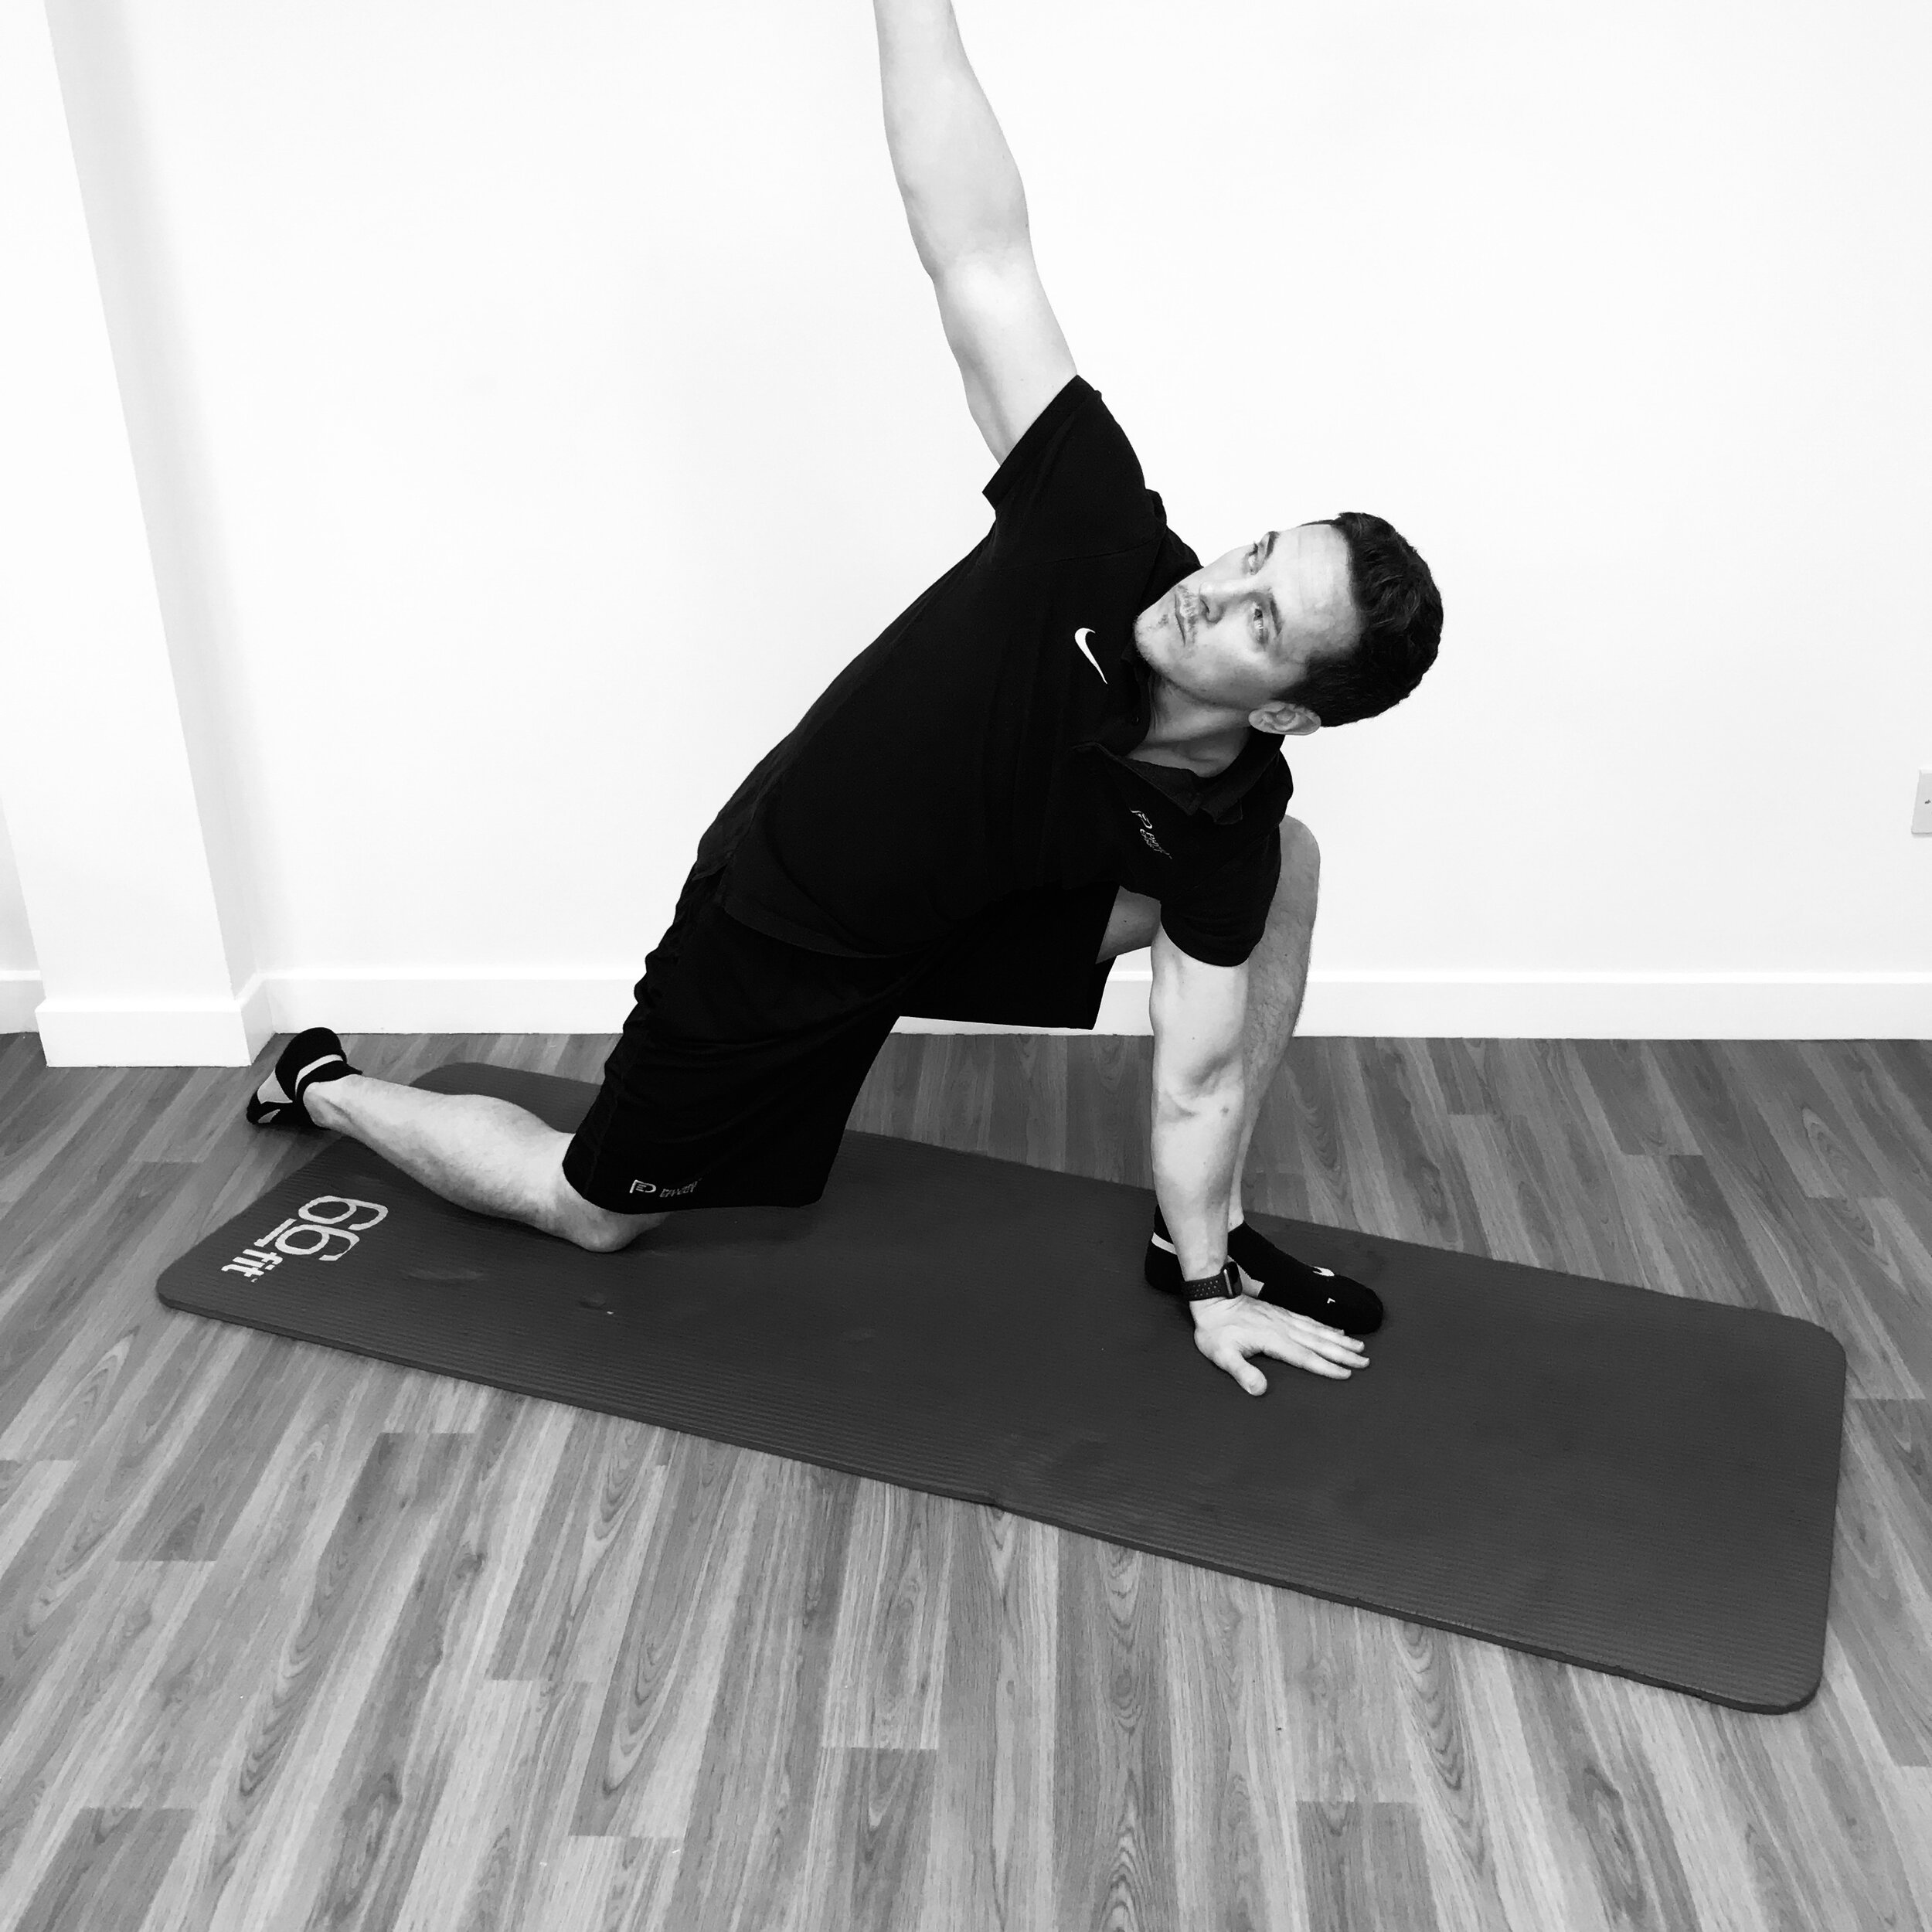
Be positive and take action of some kind. Note anything that seems to help or has a positive effect on how you feel and work to develop that
Focus on what is within your control to change and don’t worry or get hung up on the things you cannot do or cannot change
Develop simple daily habits and routines that encourage an increase in regular movement, exercise, and stretching
If you plan on being static/sedentary for extended periods plan micro-breaks of 2-3 minutes at least every 60 minutes and include some walking and simple stretching movements
Try to find a physical activity or exercise that you enjoy and doesn’t feel like a chore as you are much more likely to perform it regularly and achieve a long term change
Consider other lifestyle factors where you can implement simple change - e.g. drink more water, increase sleep, meditate or practice deep breathing & reduce daily screen time usage.
Let’s get started!
Below is a mobility routine for your back of 6 different exercises performed as a movement flow to get you started. Always begin slowly and gently and work within your own comfort limits. If you can only do part of the movement or a modified / reduced range that is fine, just do what you can. Try them every day and perhaps even multiple times per day if you’re able and you will gradually start to feel better and move better. Ideally try the whole routine or you can divide it up into single exercises and see which ones you find give you the most relief but aim to practice all the movements every day.
Back Mobility Flow Video:
Exercise 1
Cat & Camel Stretch
Begin in all 4s position. Cat posture - Allow your spine to soften and hollow along its entire length. Tilt your tailbone gently to the ceiling. Relax you lower back, rib cage, shoulders and neck
Camel Posture - Arch your whole spine slowly and gently to the ceiling in one large ‘C’ shape. Tuck your tailbone between your legs
Hold each position for around 10 seconds. Transition from one to the other 6-8 times.
1- Cat Pose
2- Camel Pose
Exercise 2
Childs Pose to Cobra
Begin in all 4s position. Childs pose - Gently sit bottom back towards heels as far as is comfortable opening knees and hips softly and as required
Cobra Pose - Allow weight to come forward and lower hips gently to floor. Stay relaxed in hips and lower back and if required bend elbows slightly so that hips can rest in contact with floor.
Hold each position for around 10 seconds. Transition from one to the other 6-8 times
1- Childs Pose
2- Cobra Pose
Exercise 3
Childs Pose Side Bend
Begin in Childs Pose - Walk you hands around to one side into side bend aiming for at least a 45 degree angle, you should feel a good stretch down your side. Hold 20-30 seconds.
Walk hands around in same way to other side and again hold 20-30 seconds in side bend.
Repeat 2-3 times on each side
1- Childs Pose
2- Side Bend Right
3- Side Bend Left
Exercise 4
Lunge Hip Flexor Opener
Begin in Lunge position. Gently engage your lower tummy muscles and tuck your pelvis in. Aim to feel a stretch in the front of your hip and top of thigh
Gently engage your buttock muscles and lean slightly forward taking care not to arch your lower back
Hold the position 30-60 seconds. Repeat 1-2 times left and right
1- Lunge Hip Flexor Opener
2- Lunge Hip Flexor Opener - Forward Lean
Exercise 5 - Part 1
Lunge Hip Opener with Alternate Arm Rotations
From Lunge position reach hands forward and rest on floor beside front foot. Take outside arm and reach under and between legs ‘threading the needle’ holding for a few seconds
With the same arm rotate outward and upward toward ceiling trying to get arm to a straight vertical position, hold for a few seconds then return to ‘thread the needle’
Repeat this 10 times
1- Lunge Position Hands Forward on Floor
2- Lunge Position Hands Forward ‘Thread The Needle’
3- Lunge Position Hands Forward - Rotate arm vertically reaching for ceiling
Exercise 5 - Part 2
Lunge Hip Opener with Alternate Arm Rotations
After completing Part 1 of this series stay in the same position but extend out your back leg as far as is comfortable
Take inside arm now and rotate upward to the ceiling trying to achieve the straight arm vertical position, Hold for a few seconds
Bring the same arm down and with bent elbow drive your elbow towards the floor down the inside of your shin. Hold for a few seconds then rotate back to the vertical arm position
Repeat this 10 times
4- Lunge Position Extend Back Leg
5- Lunge Position Inside Arm Rotate to Ceiling
6- Lunge Position Inside Elbow Drive to Floor
Exercise 6
A-Frame Walk to Squat
From the all 4s position drive your hips into the air with straight knees and gentle lower your heels towards the floor into the A-Frame (it does not matter if you can’t fully extend knees or reach the floor with your heels). Hold for 10 seconds feeling stretch in back of legs
Keeping hands on floor slowly walk feet in towards hands and slowly sit down into a squat, hold for 10 seconds
Walk back to A-Frame position and hold for another 10 seconds
Repeat 4-6 times
1- A-Frame Position
2- A-Frame Walk to Squat
3- A-Frame Walk to Squat 2
4- Finish in Squat
Thank You
Thank you for taking the time to read this post, we sincerely hope that you find it useful and can use it to implement some positive changes in your daily routines. Take your time and work at your own level but be persistent and try to slowly improve on your own baseline. Please download your own FREE Cheatsheet to keep and to help with you practice and share this post with anyone who could benefit. If you have any questions or comments please just ask we would love to hear from you. Stay healthy and move well.

Childs Pose

Stiff achy hips? Tightness or weakness and what can you do about it?
Complete hip mobility routine to increase range of motion, reduce pain and improve function. Explore your own limitations and work to improve them with daily practice of this routine. Rid yourself of stiff achy hips and restore strong, healthy movement while improving athletic ability.
Why are my hips sore?
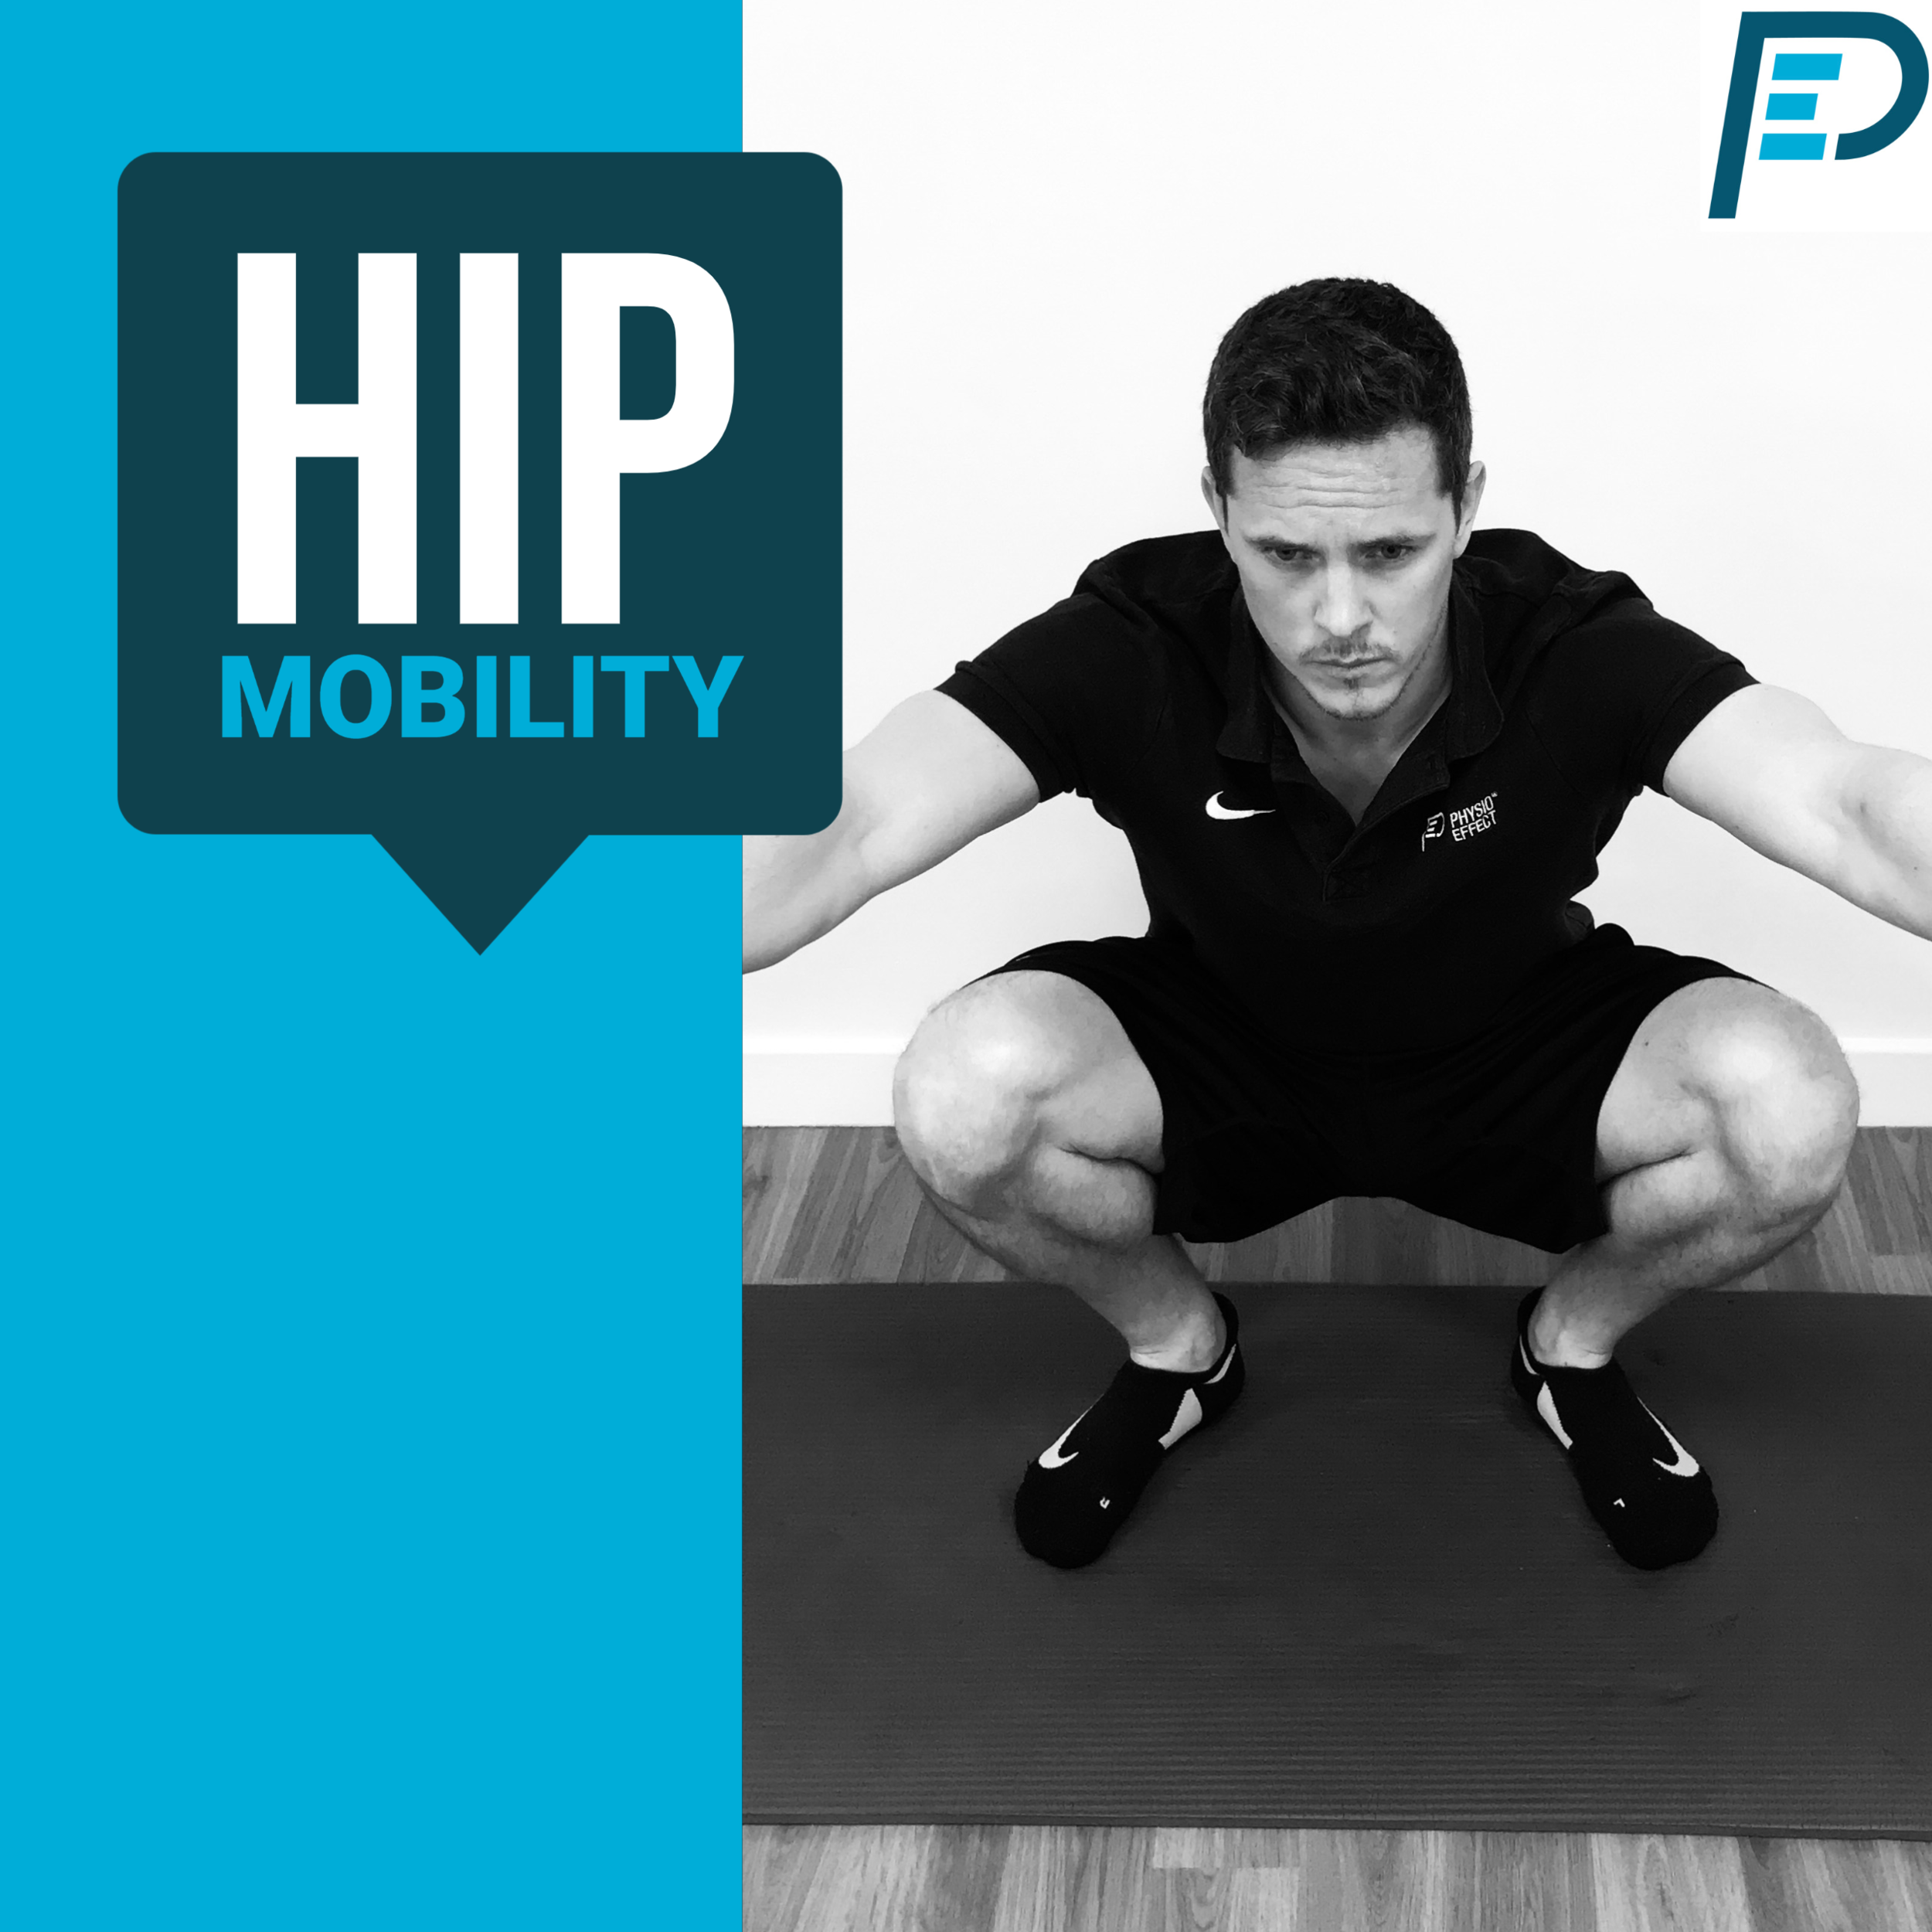
Deep Squat
Chances are if you’re reading this you have at least one hip and at some point it has given you trouble. Hip pain or stiffness has likely gotten in the way of your daily activities or restricted your ability to exercise on more than a few occasions. Our hips are at the centre of our body’s movement, so if they are functioning poorly then our ability to move freely and unrestricted will be compromised. Poor hip function can cause local issues around the hip but often contributes to pain and dysfunction in other areas like the lower back and knees.
The primary reason for developing hip pain for most people is a lack of movement and excessive sedentary behaviour, an all too common theme in our modern lives. You may workout regularly but chances are you still accumulate a lot of static postures through work or leisure and it’s unlikely that your exercise habits routinely explore and work the hip joints and muscles to anywhere near their full range or capacity. Though most hip pain is not serious and can be helped with the right exercise, we recommend consulting a health professional if you are worried or have persistent symptoms.

Modified Pigeon with Active Hip Internal Rotation
Am I Stiff or Weak?
Most likely it’s a combination of both. There is a lot of confusion out there around the terminology of flexibility, mobility and strength. Essentially flexibility can be considered passive and is about the soft tissues (muscles, tendons and ligaments) ability to temporarily elongate to allow movement through a range while mobility centers around our ability to move through a range of motion with control before becoming restricted. Mobility requires strength to control your flexibility.
Take for example someone who can squat 200 kilos to a parallel depth. This would obviously be considered strong in that range. However if the same individual cannot perform a body-weight squat below parallel depth without falling over or requiring support then we could say they have poor squat mobility. Passively if they can still achieve a deep squat position using some support we can say that they have reasonable flexibility in their soft tissues to allow this. Ideally this individual will work to improve their mobility so that they have better strength to control a greater degree of flexibility i.e they can drop comfortably and controlled into a deep body weight squat without assistance.
Should I Stretch or Strengthen
Again for most people the answer here is both but the key is identifying exercises that allow you to improve on both simultaneously whilst also offering functional value. Being inflexible is not great as your natural joint range of motion may be restricted and eventually painful. Inflexibility can lead to struggles with basic everyday activities like bending to pick something up or getting in and out of bed or your car. If you are weak then as discussed before you will not be able to control your flexibility or movement again making you more vulnerable to injury and pain.
This is where we need to be smart and specific in identifying our own needs and training with functional goals and targets in mind. You may have great flexibility and touching your toes is a breeze but when asked to do a basic lunge you lack the strength, balance and co-ordination. Conversely as with our example above you may have great strength for lifting weight but only in a limited range and the idea of touching your toes or sitting in a deep squat seems ridiculous. There is no single one recipe to fix all here but in essence mobility training will work both our strength and flexibility needs, we just need to identify the right exercises.
Try this mobility routine we have created to help identify your own personal problem areas. What to you find most difficult and are you struggling due to tightness, weakness or a combination of both?
Up for a challenge? Try this routine a few times and note the 3 exercises or positions which you find most restricted or difficult to perform. Now practice them consistently at lease 3 times per week for the next 4-6 weeks and see what changes and improvements you can achieve
At the bottom of this blog you can see each of the individual exercises that make up our hip mobility routine. Click the link below to download your FREE PDF copy of these exercises including some key tips .
Challenge to Change
For the vast majority of people our lives and even our exercise or training keep us moving in basic linear patterns (up and down). We don’t often (if ever) challenge our hips with lateral or rotational exercises and most people end up weak and unstable in these positions compromising their hip health and function. That’s why we designed these routines to explore and challenge these less common positions.
This next video demonstrates 3 more advanced hip mobility exercises that you can try. Please only attempt what you feel able and do not work into pain or through injury. Try the exercises in the video below and see how you feel. Chances are you will find this very tough but they are great exercises to improve overall hip mobility and function so if you feel able add them to your regular routine and with consistent practice you should see real improvements.
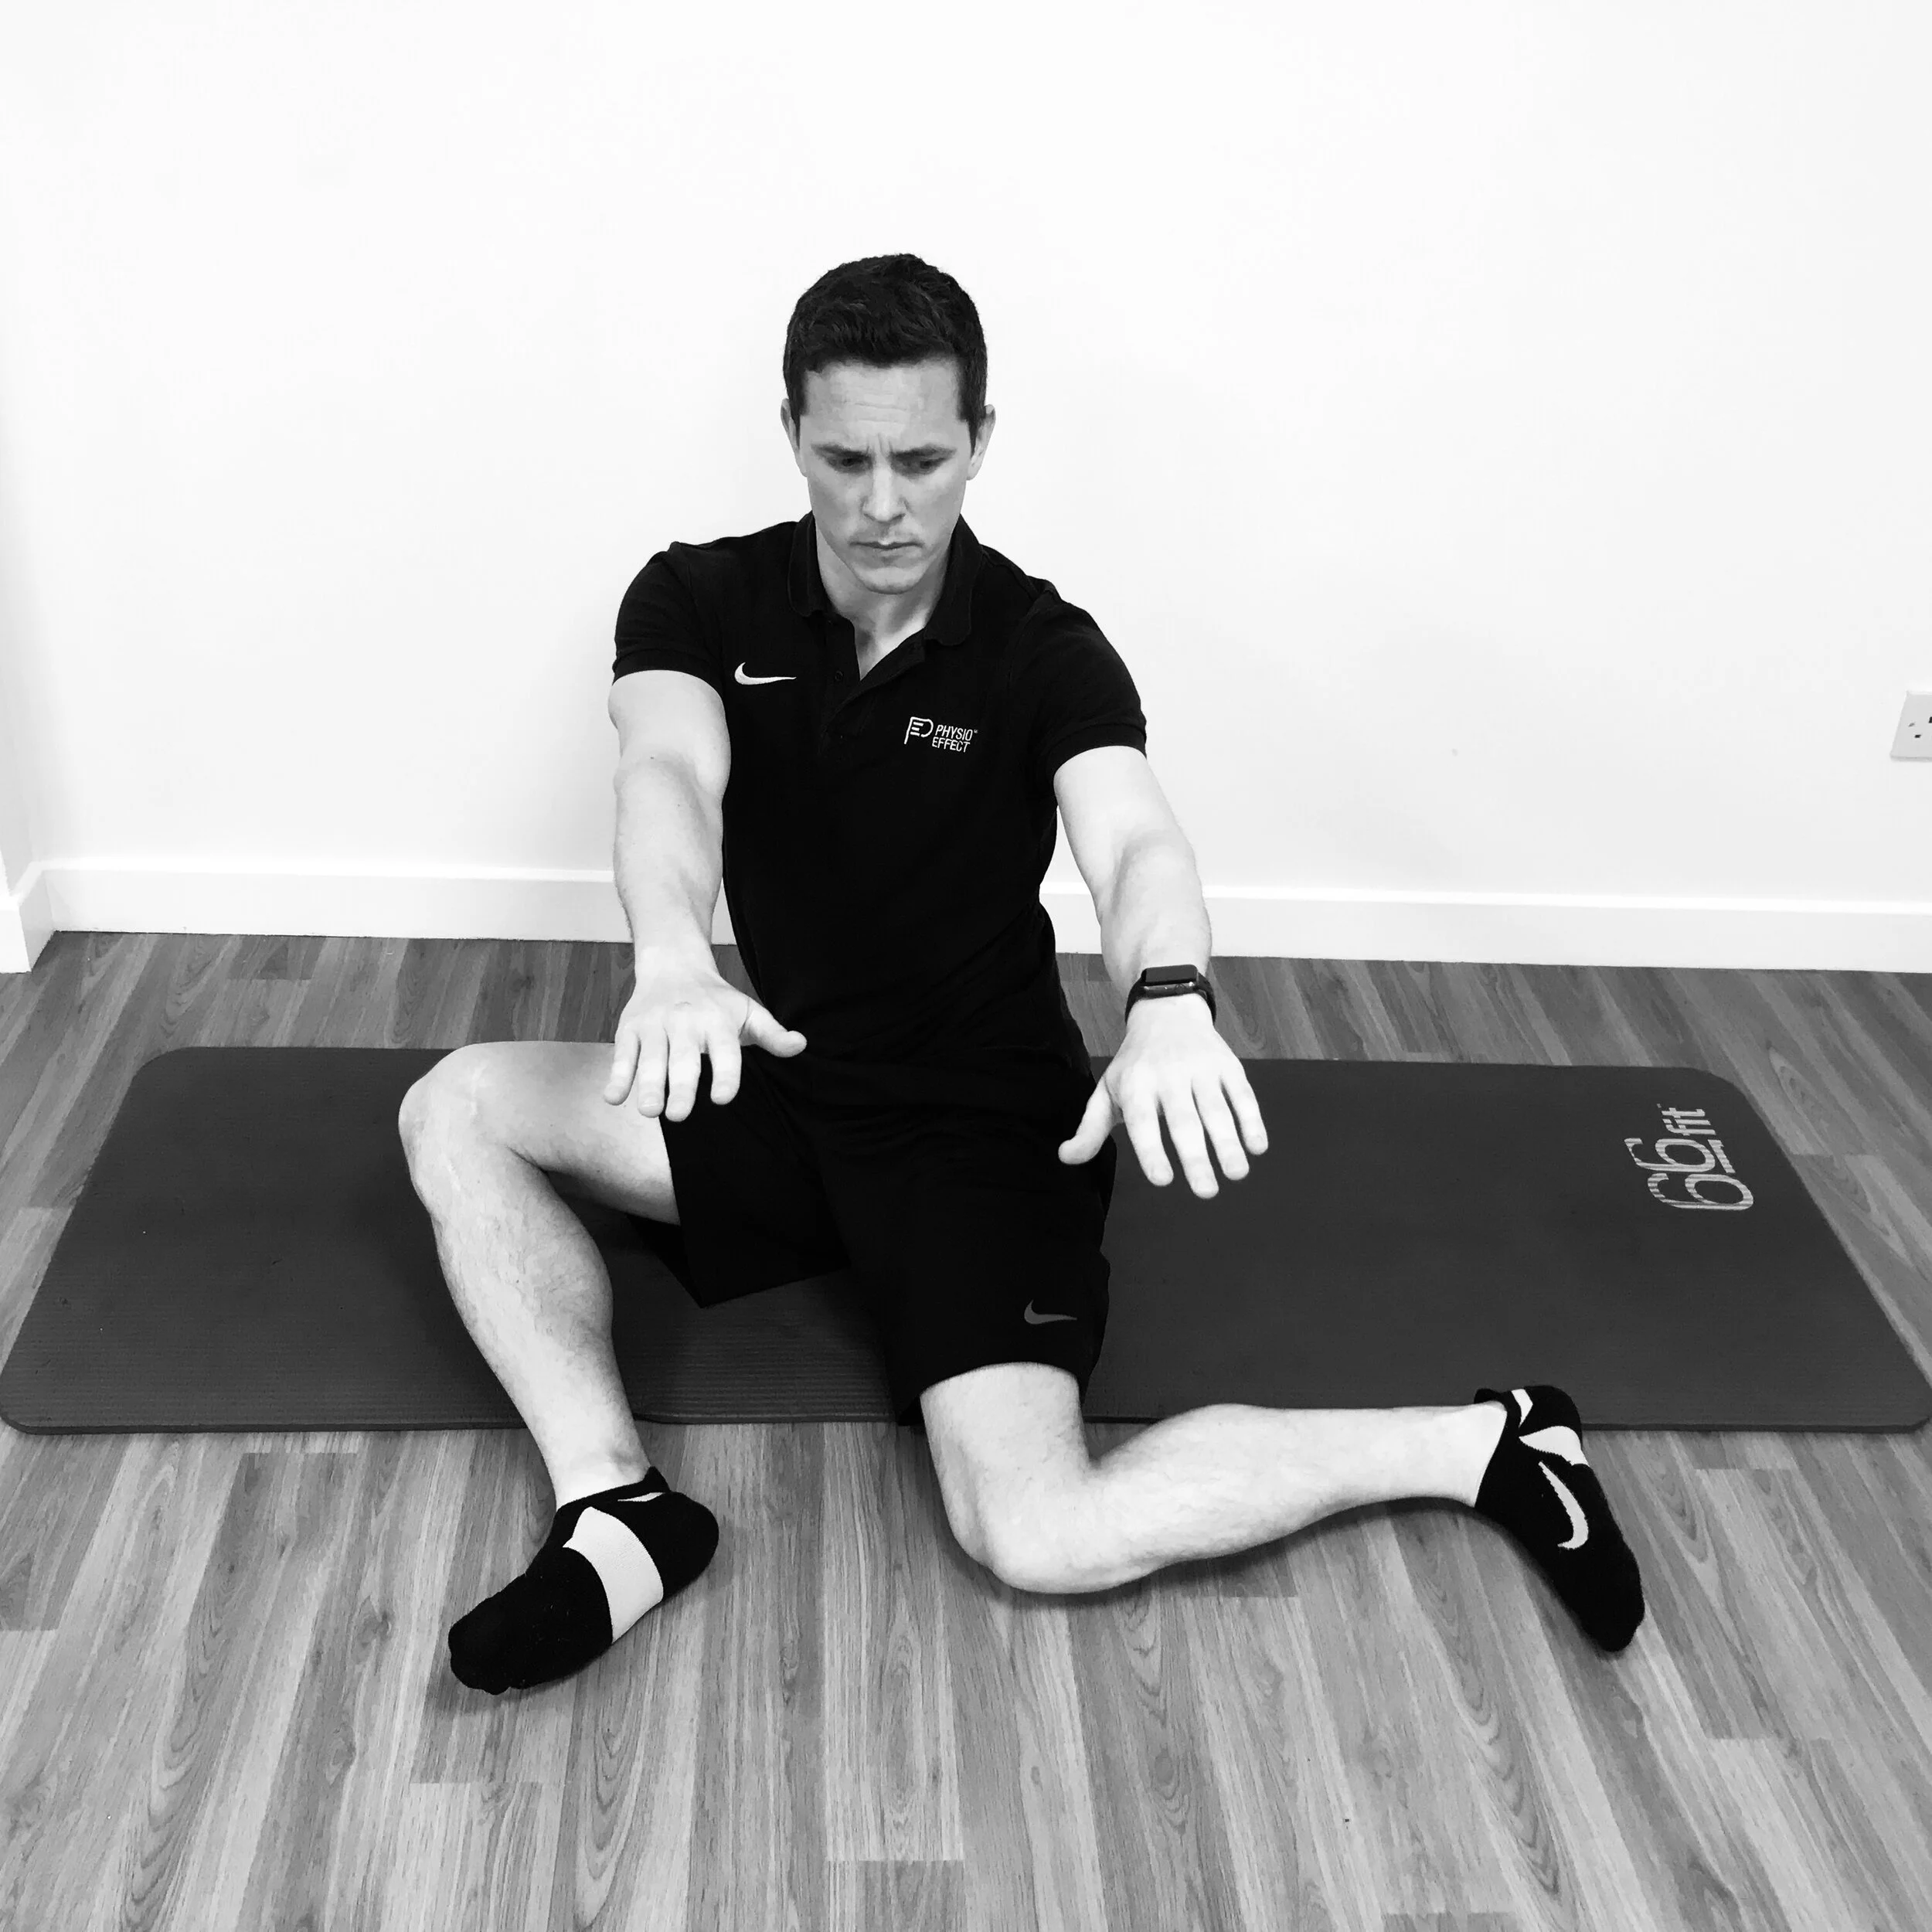
Exercise 1
Seated hip Internal / External Rotation
Begin in sitting leaning back on straight arms, knees and hips bent and relaxed shoulder width apart with feet flat on floor.
Gently and with control lower both legs to one side trying to touch the outside of one knee and inside of the other knee to the floor. Don’t worry if this range is too much, just work as far as you feel is challenging but comfortable. Return to start and repeat to opposite side.
Perform this movement for 60 seconds

1- Floor Sitting, Lean back on hands, high chest

2- Slowly Rotate Both Legs to one side
Exercise 2
Deep Squat Hip Internal / External Rotation (Advanced Option)
Begin in a deep squat. Ensure heels remain in contact with the floor
Slowly rotate one knee across mid-line aiming to touch knee to floor in front of opposite foot which should remain flat with heel on floor. Allow moving leg to rotate up onto toes. Static leg should remain open and avoid any inward collapse of knee/hip position.
Return leg to starting deep squat position and repeat with opposite leg.
Repeat with alternate legs for 60 seconds

1- Deep Squat, Heels on floor

2- Deep Squat- Active Hip Rotations
Exercise 3
Modified Pigeon
Begin in 90/90 hip and knee position. Gently rotate and square hips up facing forwards
Gently lean chest forwards through your hips and rotate slowly leaning over the forward knee
Option to gently contract front leg pushing knee into floor, hold 5-10 seconds and release. Repeat 5-10 times.
Work into and explore stretch for at least 60 seconds

1- Modified Pigeon 90/90 Sitting

2- Modified Pigeon- forward lean & rotate over front knee
Exercise 4
Modified Pigeon Active Hip Internal Rotation Lift
Begin in the modified pigeon 90/90 sit with slight forward lean supporting weight on hands
Gently lift back foot off the floor. Squeeze and hold for 5 seconds. Repeat for at least 5 contractions
You will repeat this exercise for the opposite side once you’ve completed the routine on one side

1- Modified Pigeon Forward Lean on Hands

2- Modified Pigeon Active Hip Internal Rotation
Exercise 5
Modified Pigeon Hip Active External Rotation
Begin in the modified pigeon 90/90 sit with torso rotated facing forward leaning weight back with hands behind you
Gently lift the knee (with inside touching floor) & rotate outward through hip. Squeeze and hold for 5 seconds. Repeat for at least 5 contractions. Ensure opposite leg remains still with outside knee resting on floor
You will repeat this exercise for the opposite side once you’ve completed the routine on one side

1- Modified Pigeon Chest Open

2- Modified Pigeon Active Hip External Rotation
Exercise 6
90/90 Sitting Lift to High Kneeling
Begin in approximate 90/90 sitting as shown, use hands to maintain balance without leaning on floor
Gently lift through the hips into controlled high kneel. Squeeze the buttocks and hold for a few seconds. Return to start position and repeat 30-60 seconds
Switch legs so back leg begins as forward leg and vice versa. Repeat active sitting movement 30-60 seconds.
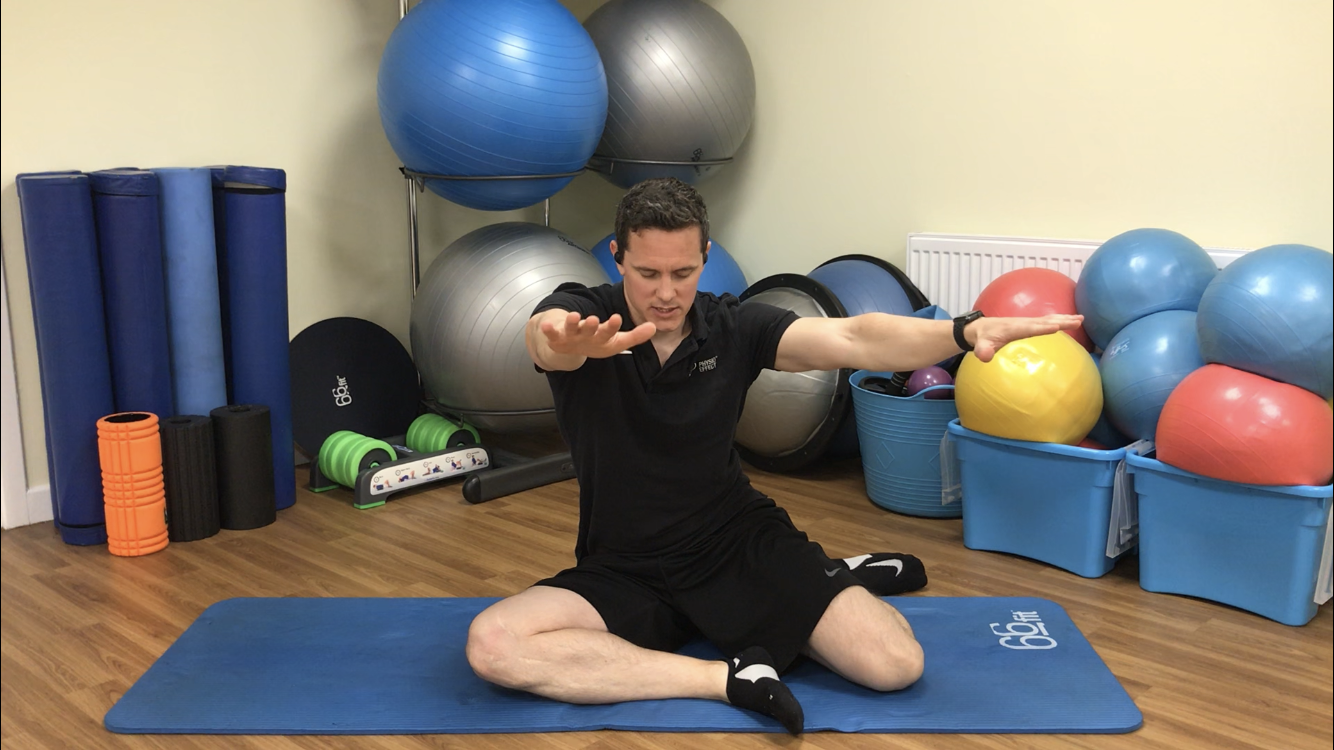
1 - 90/90 Sitting on floor (no hand support)

2 - High Kneeling
Exercise 7
Frogger
Begin in all 4s, forearms on floor. Walk knees open keeping insteps of feet and inside shins rotated inward in contact with floor
Gently rock back through hips/pelvis as if taking bum closer to heels, squeeze knees into the floor and hold/release for 5-10 second repetitions.
Gently work into and explore stretch for at least 60 seconds

1 - Frogger Start Position

2 - Frogger Rock Back Position
Exercise 8
Deep Lunge Hip Opener with Arm Rotations
Begin in lunge position, extend out back leg as far as is comfortable. Lean forward and try to come to rest on forearms. Actively drive open front knee/hip rotating out onto outside border of foot.
Take inside arm next to front leg and rotate upwards to ceiling with a straight arm. Stretch open through shoulder, chest and spine. Hold for 5 seconds at top position, return to start driving elbow back to the floor and repeat for 10 repetitions.
Switch legs front to back and vice versa. Repeat process.

1 - Deep Lunge, Forearms to floor, drive front knee open

2 - Deep Lunge Arm Rotations
Thank You
Thanks for taking the time to read this guide, we hope you find it useful. Please share with anyone else who might benefit and if you have any questions comment and let us know. Don’t forget to download your free hip mobility cheatsheet. Good luck and enjoy your improved hip health.

Deep Lunge with Arm Rotation
Tight shoulders? This routine will fix you up
5 step shoulder stretch routine to relieve stiffness and tension. Discover a new range of motion and rid yourself of nagging tightness in your shoulders and upper back
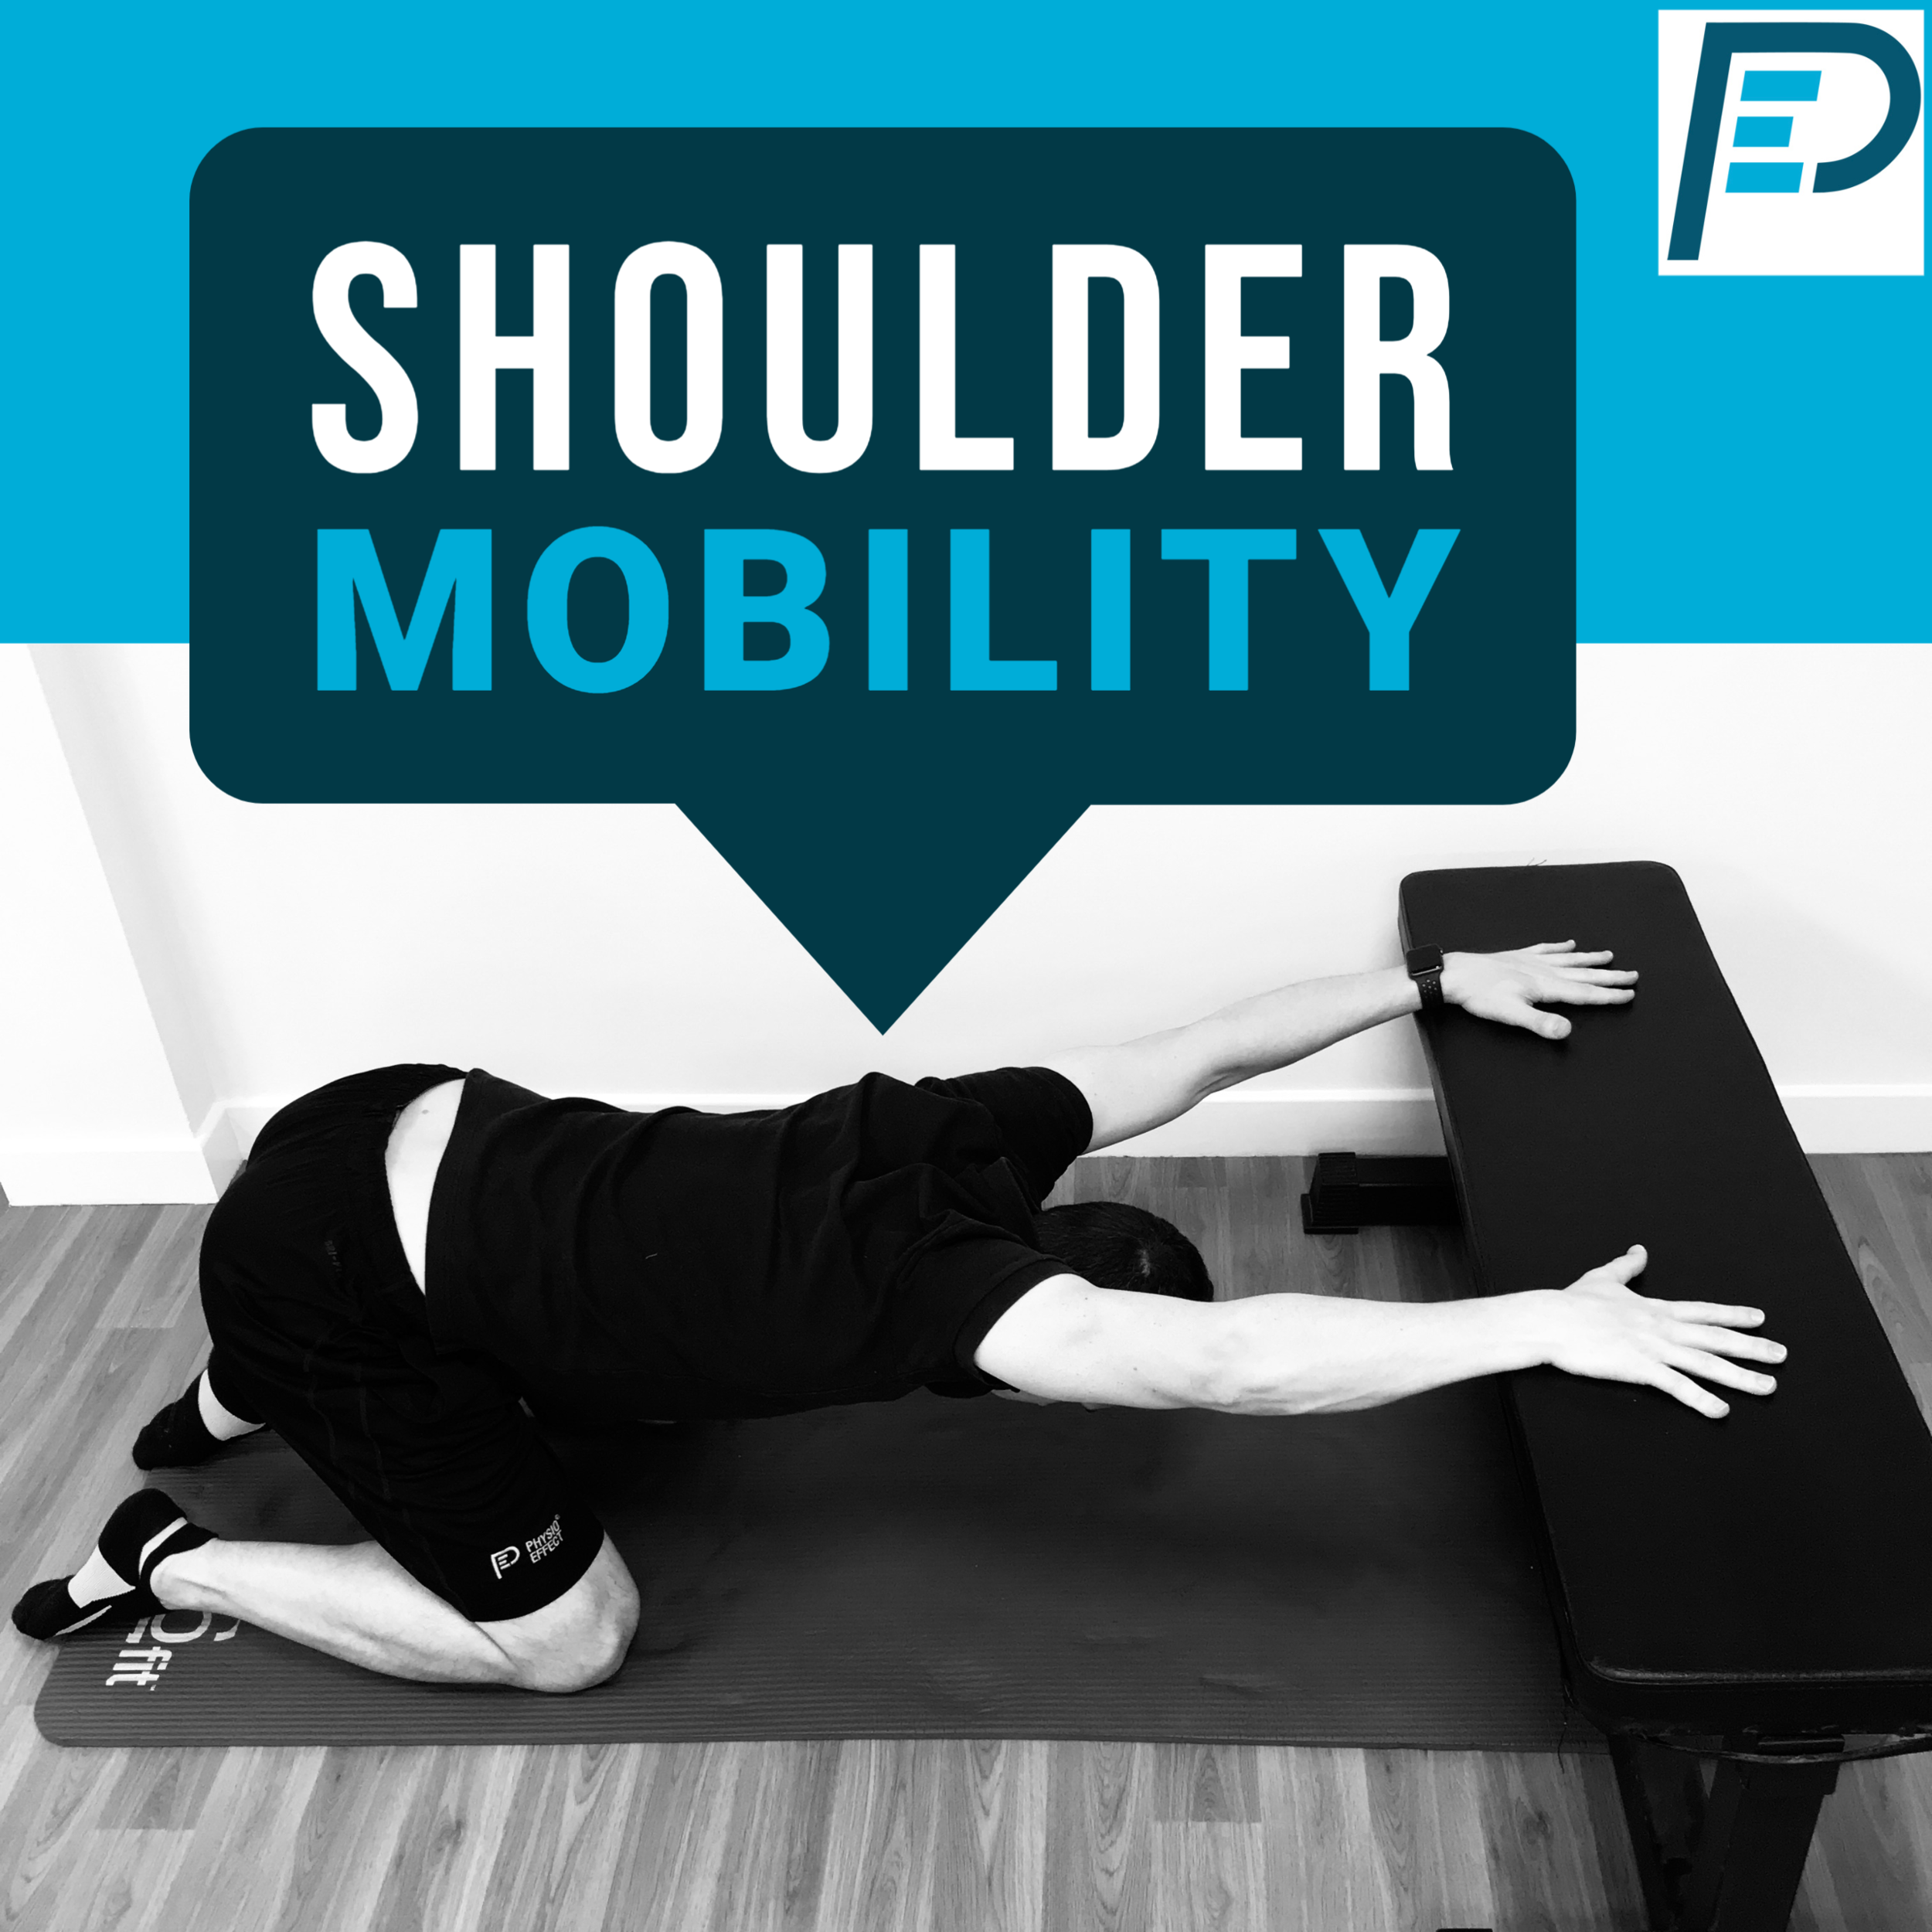
Why are my shoulders so tight?
Familiar Hunchback Posture?
Shoulders are a big sticking point for many of us. We constantly assess and help people with long histories of stiff, tight, achy shoulders and upper backs. More often than not there is no significant injury history but very commonly there is a base of sedentary behaviour, such as office work and driving, and a significant lack of any structured stretching or mobility exercise. Welcome to our modern lives!
Most shoulder pain can be fixed without the need for invasive surgery but it can take time to undo a lifetime of poor habits which have lead to soft tissue adaptations with weakness in some areas and tightness or stiffness in others.
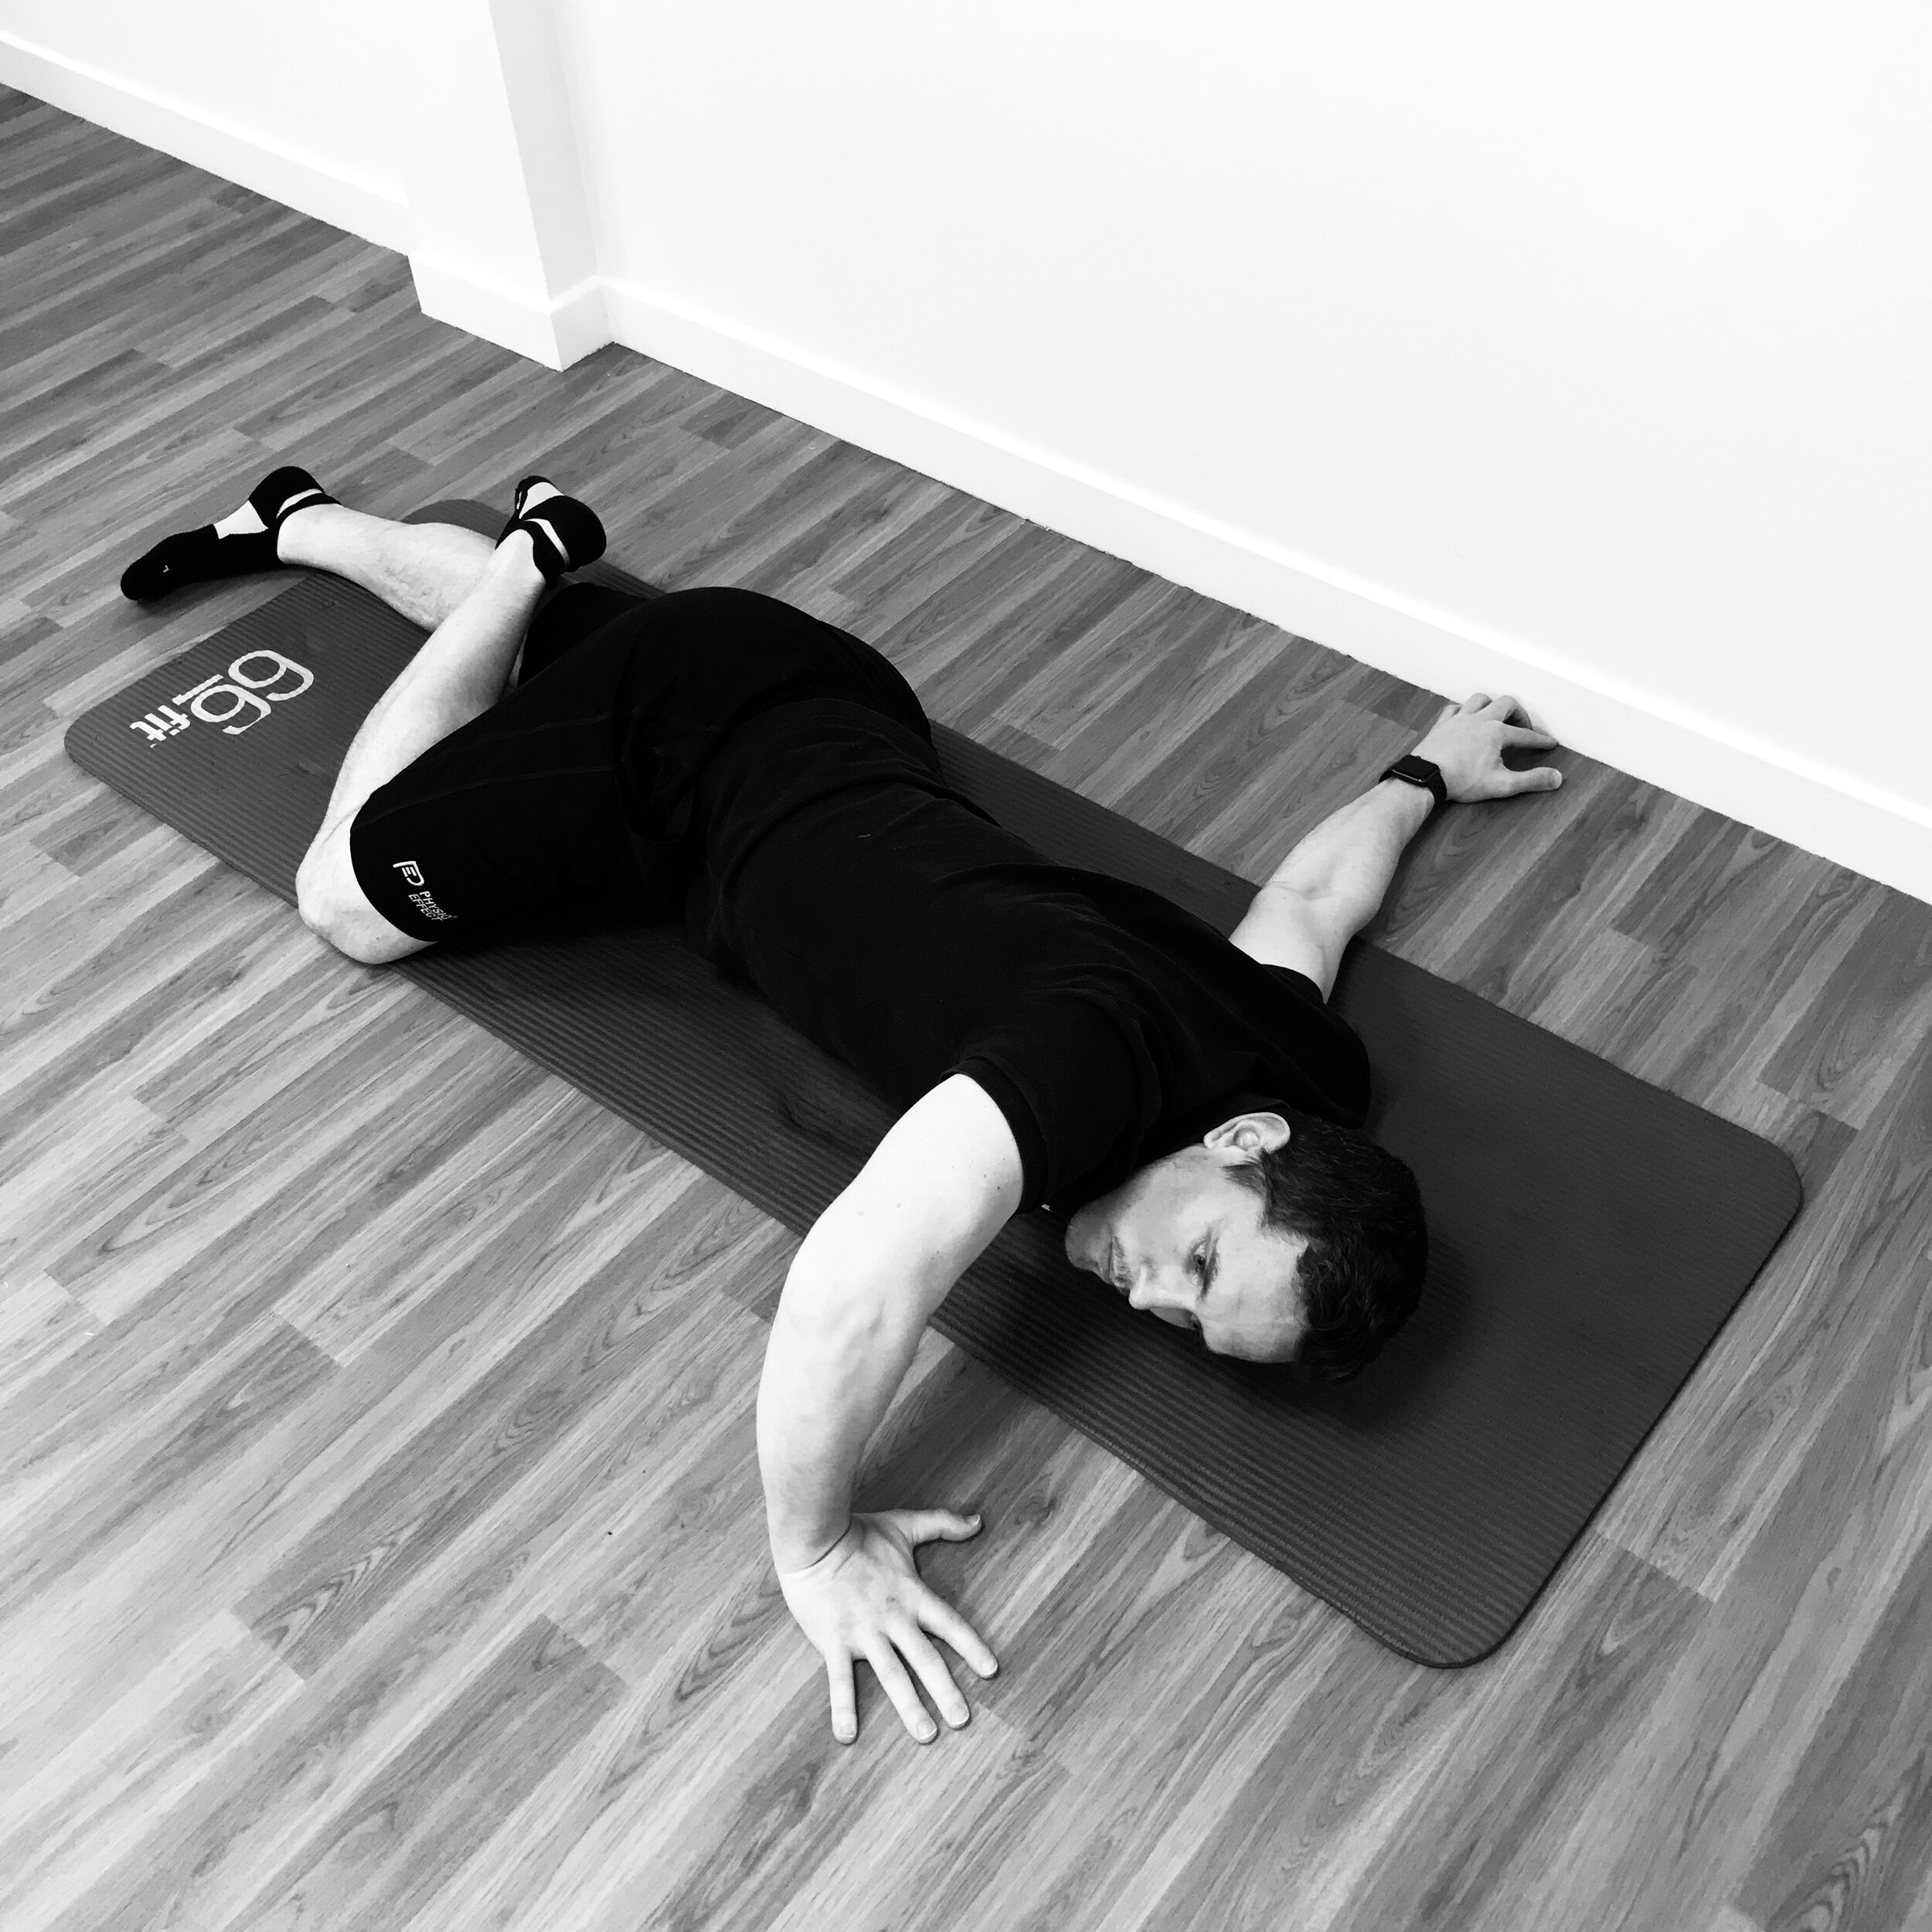
1/2 Crucifix Chest Stretch
Shoulders are very mobile and we put them through a lot over our lifetime with an expectation they will be fine with no real consideration given to tuning or maintenance work. Tightness and pain can easily creep in and often presents initially as discomfort reaching overhead, pain opening a door, or a struggle to weight bear through our arms. This can develop to more constant nagging pain and stiffness and a reduced ability to perform daily tasks or enjoy physical exercise or activities.
Many people just put up with having a dodgy shoulder and accept it as a new norm but with the right guidance and exercises most situations can be at least significantly improved if not completely fixed. Like everything in life though you won’t get something for nothing and commitment to changes in habit and daily routines will be required. A balance of stretching and strengthening exercises is normally key and we have provided a great starting point here with our 5 point stretching routine.

Let’s get started!
We must bear in mind that every body is different as is each individuals unique history and circumstances so please use this routine as a guide to start improving your shoulder health and flexibility but do so carefully. Start slowly and gently and never push in to pain. Work to better your own range of motion but do not compare yourself to the video or anyone else. Practice daily and be patient but also persistent. If you can only do part of the movement or a modified / reduced range that is fine, just do what you can. Of course as with all advice please consult with a health professional if you have significant pain or loss of normal function.
Mobility Flow Video:
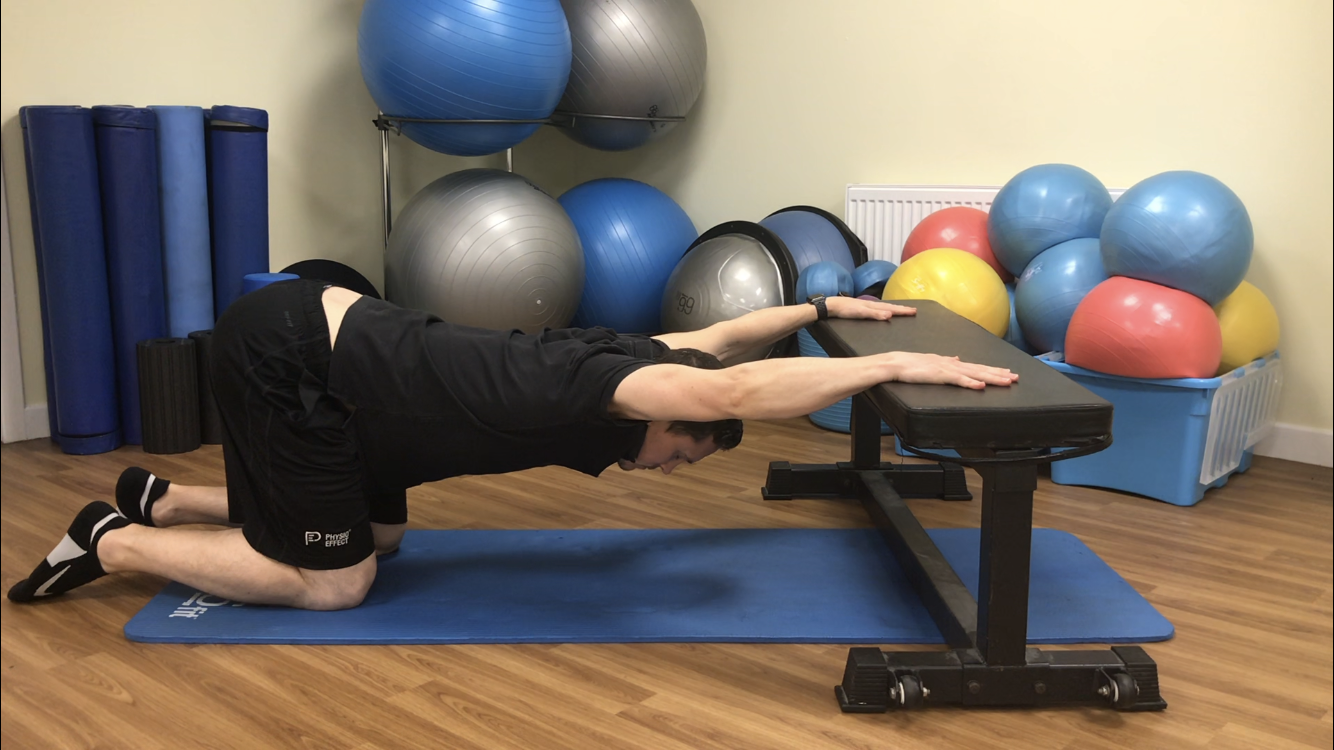
Exercise 1
Shoulder rolls / Scapular circles
Begin in all 4s position.Hands fixed under shoulders shrug shoulders to ears thenslide back and down and release. Then spread shoulder blades apart stretching across upper back, relax and allow shoulders and back to hollow.
Try to perform this as a slow circular rolling motion working in various directions
Perform this movement for 60 seconds

1- Shoulder shrug
2- Shoulder spread
Exercise 2
Elevated Arms to Partial Childs Pose / Prayer Stretch
Begin in all 4s position with arms straight out elevated on flat surface. Gently sit bottom back towards heels and let weight drop down between shoulder blades and through upper back
When in position try gently squeezing shoulders together and releasing and light pressing through the hands with slight twist/rotation movement
Try breathing in deeply and coming out of the stretch slightly then breathing out slowly and dropping deeper into stretch
Explore the stretch position with subtle movements and breathing for 60 seconds +

1- 4 point kneel arms elevated

2- Sit weight back and down between shoulders
Prayer Stretch (Option 2)
Perform stretch as above but move to have elbows resting on flat surface with arms positioned in ‘Prayer’ posture
Sit weight gently back and down relaxing between shoulder blades and across upper back. Try to let head bypass the bench (surface)
Try breathing in deeply and coming out of the stretch slightly then breathing out slowly and dropping deeper into stretch
Explore the stretch position with subtle movements and breathing for 60 seconds +

Prayer Stretch Start Posture

Prayer Stretch - Sit back position
Exercise 3
Shoulder Dislocates (Stick or Band)
Begin in high kneeling or standing - Holding a stick or band keep arms straight and core tight, slowly bring arms straight overhead and around down towards lower back. Allow shoulder blades to gently shrug then rotate and slide down as you circle arms overhead
Return to start point slowly ensuring not to over-arch through lower back
Repeat for 10-15 repetitions

1- Shoulder Dislocates - Stick (Overhead)

2- Shoulder Dislocates Stick (behind back)
Exercise 4
‘L’ Position Prone Shoulder Stretch
Begin lying on your front. Gently reach with shoulder to be stretched under and across your body at shoulder height with palm facing up. Allow other arm to stretch straight overhead forming an ‘L’ shape with your arms
Gently rotate into the stretch as if trying to square up shoulder blades increasing the pull/stretch felt in back of the shoulder reaching across body. Hold and release this motion for several repetitions
Work in this position for 60 seconds + on each arm

1- ‘L’ Position Shoulder Stretch Part 1
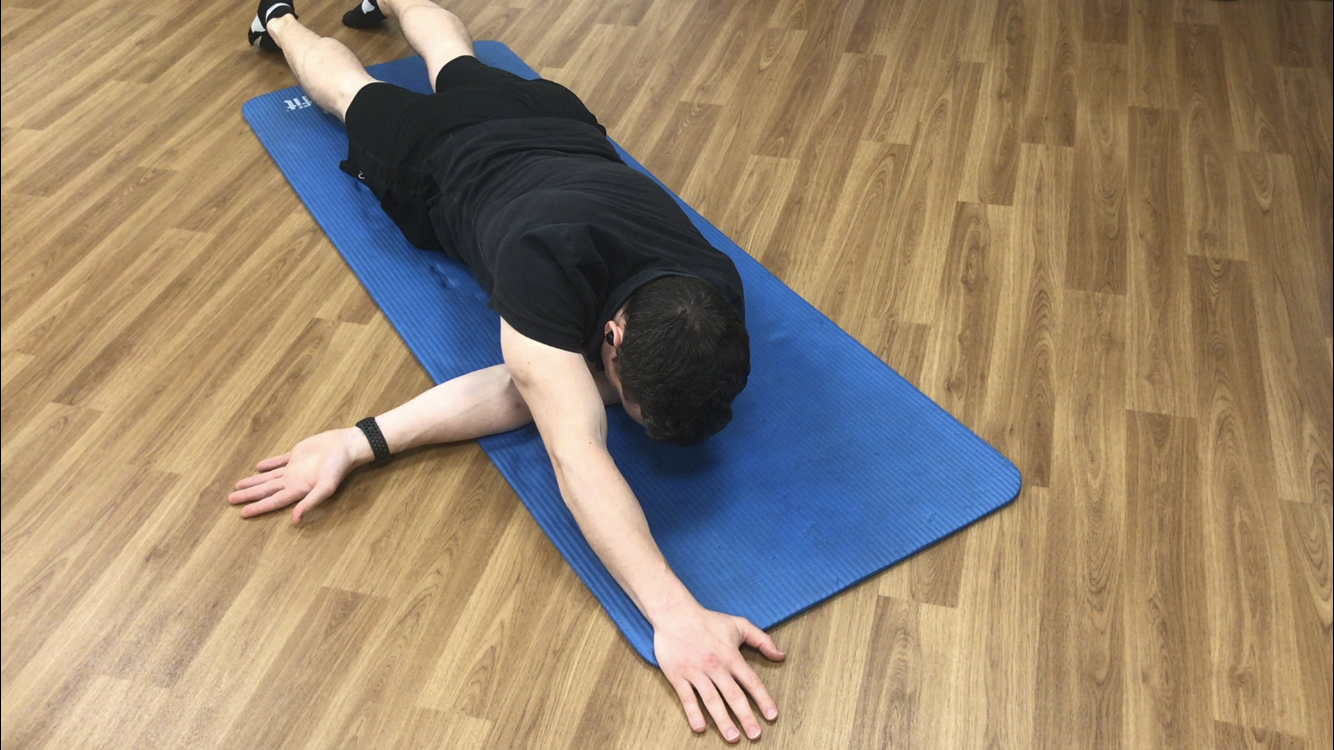
2- ‘L’ Position Shoulder Stretch Part 2
Exercise 5
1/2 Crucifix Chest Stretch
Start face down with side to be stretched arm extended fully out at shoulder height palm down. Opposite arm is bent at 90 degrees at elbow hand at shoulder height ready to push into stretch
Gently push with bent arm while rolling weight of legs over to create a strong opening stretch of the chest of the straight arm
Gently push in and out of the stretch holding for a few seconds then releasing and repeat
Explore this stretch for 60 seconds + on each arm

1- 1/2 Cucifix Start Posture

2- 1/2 Crucifix Chest Opening
Thanks for taking the time to read this guide, we hope you find it useful. Please share with anyone else who might benefit and if you have any questions comment and let us know. Don’t forget to download your free mobility cheatsheet. Good luck and enjoy your improved shoulder health.
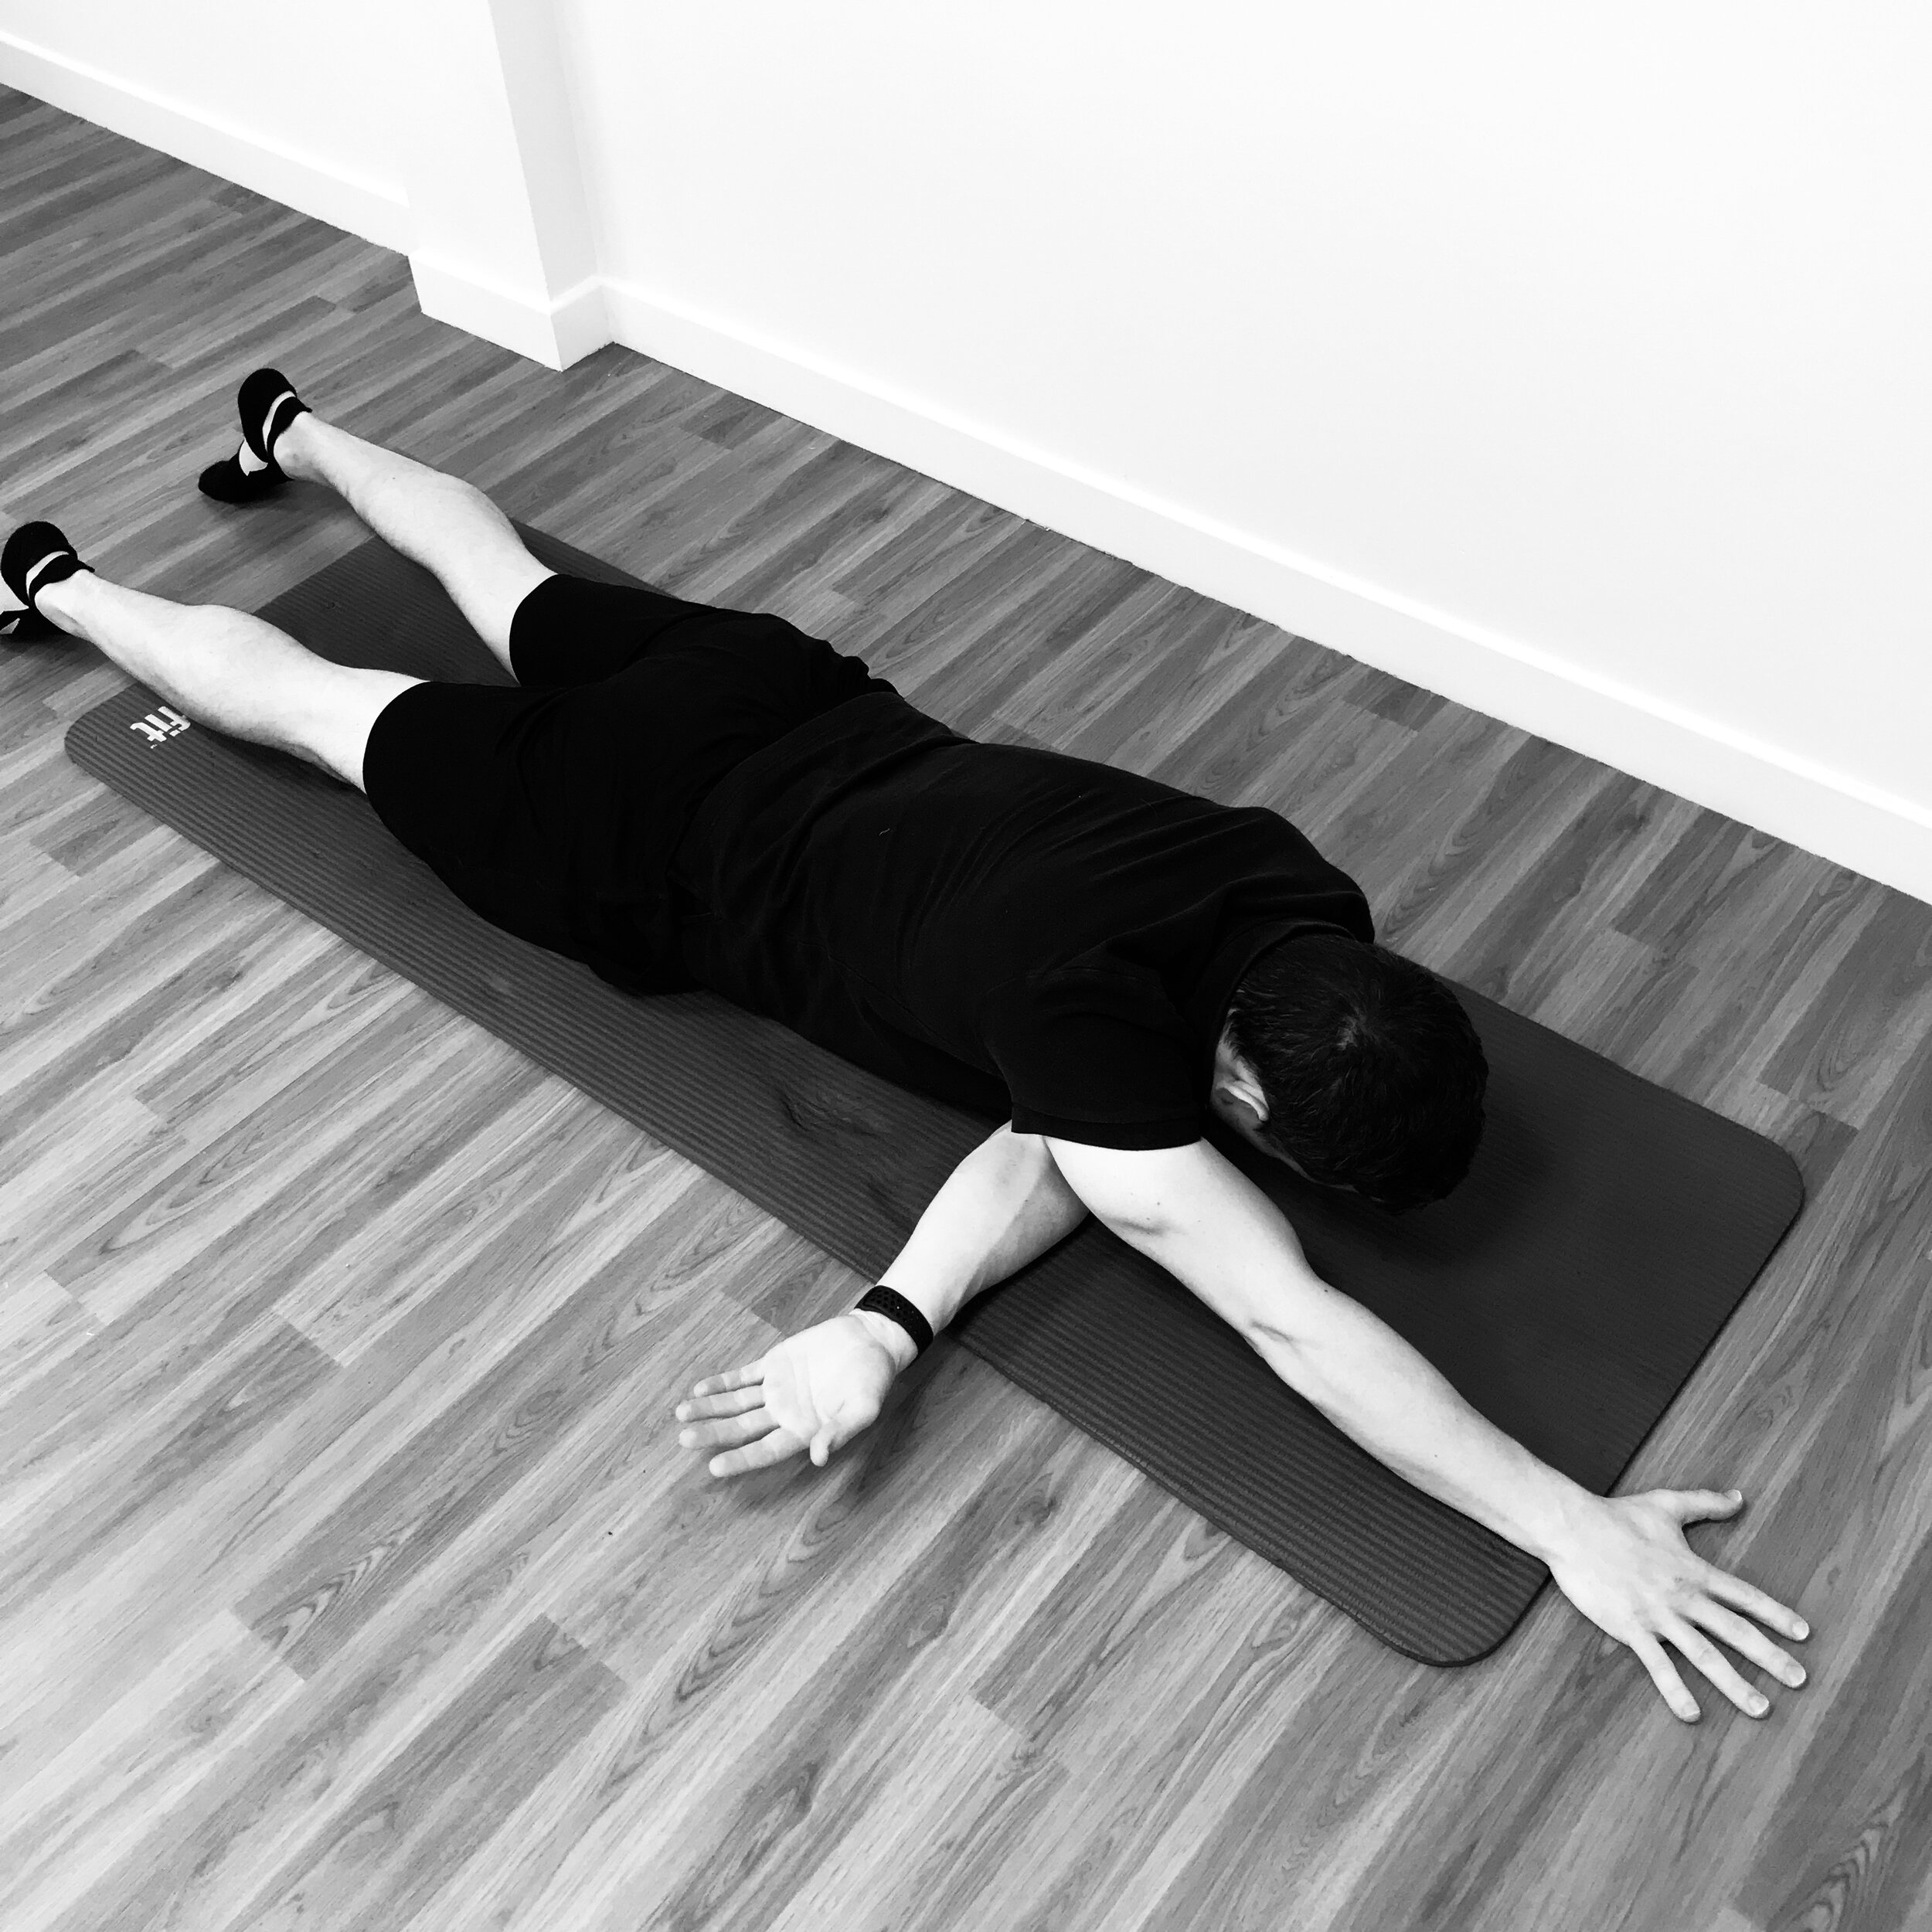
‘L’ Position Prone Posterior Shoulder Stretch
Guest Blog - Reactive Training Gym
This week we have a guest blog from Robert Clarkson who runs Reactive Training Gym in Glasgow. Robert discusses the complexities of training men and women at different stages of their fitness journeys. He also outlines why he often recommends physiotherapy for prevention as much as a cure.
Train Safe
This week we have a guest blog from Robert Clarkson who runs Reactive Training Gym in Glasgow. Robert discusses the complexities of training men and women at different stages of their fitness journeys. He also outlines why he often recommends physiotherapy for prevention as much as a cure.
Meeting clients in the middle
Reactive is a private gym in the east end of Glasgow. We offer group coaching to men and women that is mainly strength training. Clients get a level of personal coaching that allows them to take on the ‘big weights’ area with confidence; something they might have avoided in bigger, more commercial gyms.
The challenge for me as a coach is to make sure the sessions cater to everyone's level in this setting. By testing clients every six weeks, I gauge what they can lift, swing, push, press and pull. This allows me to split them into smaller groups so that they can work safely for another six weeks.
All ages and abilities
One of the things I am most proud of is the range of ages and abilities Reactive caters to. Again, this isn't without its challenges. In coaching men and women from 20-75 years of age (yes, 75!) we have to be mindful of not only their individual goals but their general health and injury history.
A young client that has never set foot in a gym in their life might be more vulnerable than someone who is older but has trained on and off over the years. Because someone has a niggling hip injury doesn't mean they are less able than the client that is younger but sedentary until they join. It's a case of constant observation and meeting people in the middle. Pushing them, but not to the point where you risk setting them back through injury.
What clients do outside the gym matters
What clients do outside the gym counts. Reactive members receive support outside the gym via our app. It includes nutritional advice, at home exercise and they can chat to coaching staff via the app if they have questions about their training. There's also a closed Facebook group, I regularly hold live Q&A's via Facebook Live too and members themselves provide peer to peer support. It is a thriving community. But training can come undone outside the gym.
Encouraging clients to look after themselves outside the sessions isn't easy. They all have busy lives. They are often used to putting themselves last. It can be why they end up having to make a change and why their health and well-being has suffered. And after they've come to three or four sessions a week, there's not much time for anything else! Physiotherapy is often something clients would only consider if they were injured.
If a client has anxiety about injuring themselves or if they need a helping hand with their mobility, I recommend physiotherapy.
It's my job to address improper technique. As a gym owner, I also invest in good quality equipment and upgrade it regularly. I emphasise the importance of rest days and there are often two coaches at each session, both with the client's safety in mind. But I believe in clients helping themselves too. I tell them that by seeing a reputable Physiotherapist, they can develop their own injury prevention strategy. This will help them to gain confidence when it comes to pushing themselves and moving forward with their training.
Prevention is better than cure
The main point I want clients to take away is that prevention is better than cure. Taking all possible steps to prevent injury will ensure clients are in the best position to maintain consistency needed to be successful in their training.
To learn more about what small group coaching and strength training, see: reactivetraining.co.uk
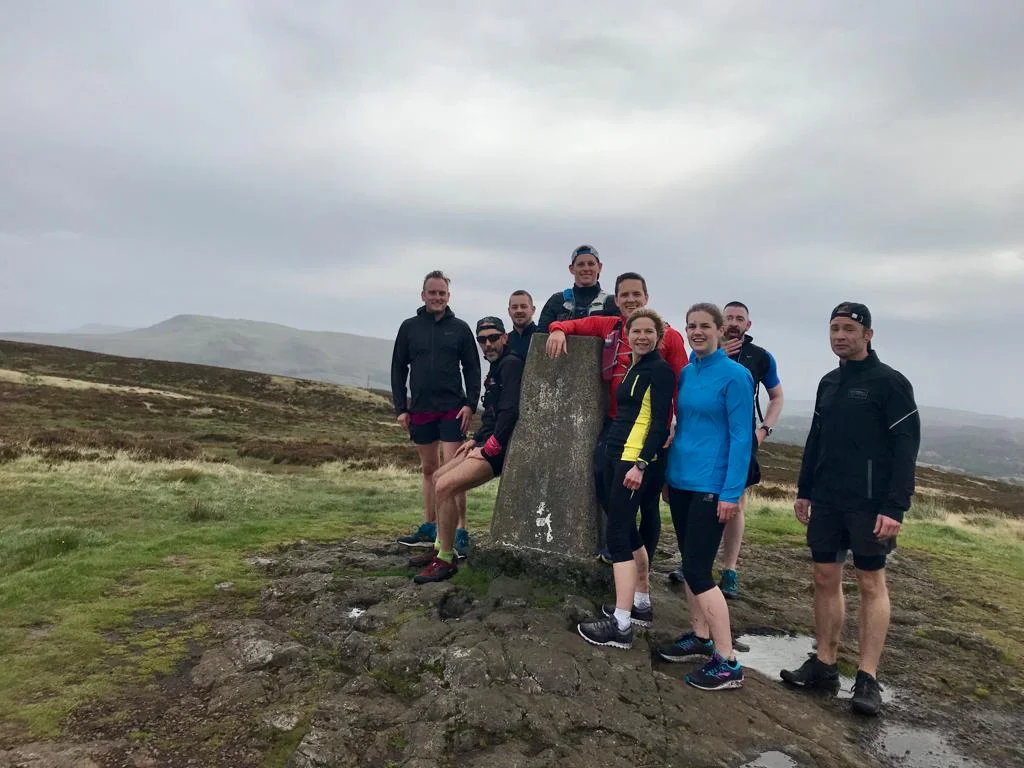
Run report - Trail With Us - Physio Effect Trail Running/ Walking Group - Sunday 15th September
This month we planned a trail session combining the well-known route up to the Whangie from the Queens View Car Park (10 minutes past Bearsden) with a short section of the John Muir Way and a loop of the Burncrooks Reservoir.
This month we planned a trail session combining the well-known route up to the Whangie from the Queens View Car Park (10 minutes past Bearsden) with a short section of the John Muir Way and a loop of the Burncrooks Reservoir. We had another decent turnout of new and familiar faces and headed up the hill at about 0910 after meeting at 0900. Although a little cold in the wind initially, we soon warmed up by the hill run and treated to nice views back East of the Earl’s Seat and Dumgoyne in the Campsies as well as North providing views of Loch Lomond.
It was muddy enough on the way up the hill but everyone seemed to handle that well and made steady pace with running and power hiking. We went through the Whangie which is always a nice photo opportunity and hard to believe this cracking rock formation is just on our door steps. Another short climb followed and we took an obligatory group picture at the trig point before pushing on over the boggy top down through the bracken-lined single track to reach the John Muir Way. Everyone seemed to enjoy the muddy single track and big Euan even treated us to some fairly special gymnastic type twists and turns in the slope when his road shoes took him for a ride.
Once back on the hardpacked trail of the John Muir Way, Euan’s Adidas Boost road shoes came into their own and we didn’t see the big man for dust; well, I didn’t anyway. The loop around the Burncrooks Reservoir is just such a great bit of trail with it’s rollercoaster of a path and feeling of complete isolation wedged being between the Kilpatrick Hills and the Campsies. It was awesome seeing the group working their way around it as we were the only ones on the trail. On finishing the loop we were back on the John Muir Way to retrace our steps back up to the Whangie. Well, everyone except Danny (the other owner of Physio Effect) who left us before the muddy climb back up and continued along the John Muir Way round the back of Eden Mill and joined the West Highland Way where he was able to run back to his house in Milngavie. This allowed him to complete a long run of 18 miles for his marathon next month. I just think it’s brilliant how easy it is to link Scotland together with trails and paths.
After a leg sapping slog back up the single track to the trig point, we were able to get another run through the Whangie and then a sustained 15 minute descent back to the car park. All in all we were done and dusted in 1.5 hours with 1300ft of ascent and descent giving everyone a decent workout and a new route to go running on. I’ll look forward to planning up next month’s run and hope to see a good turn out again.
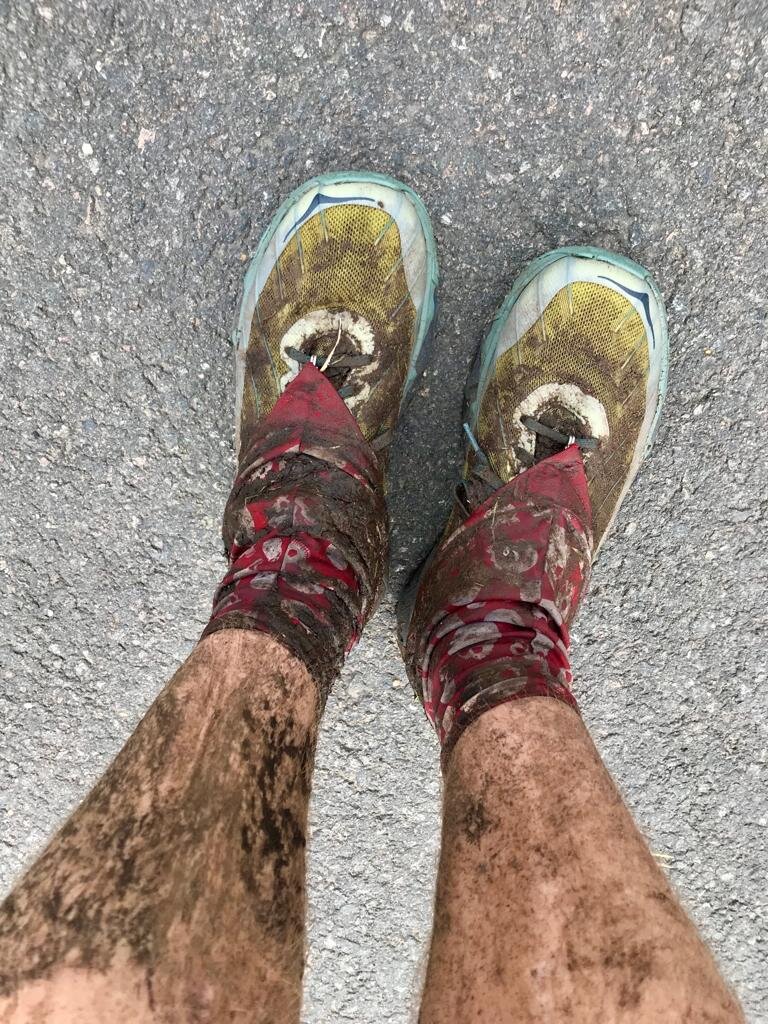

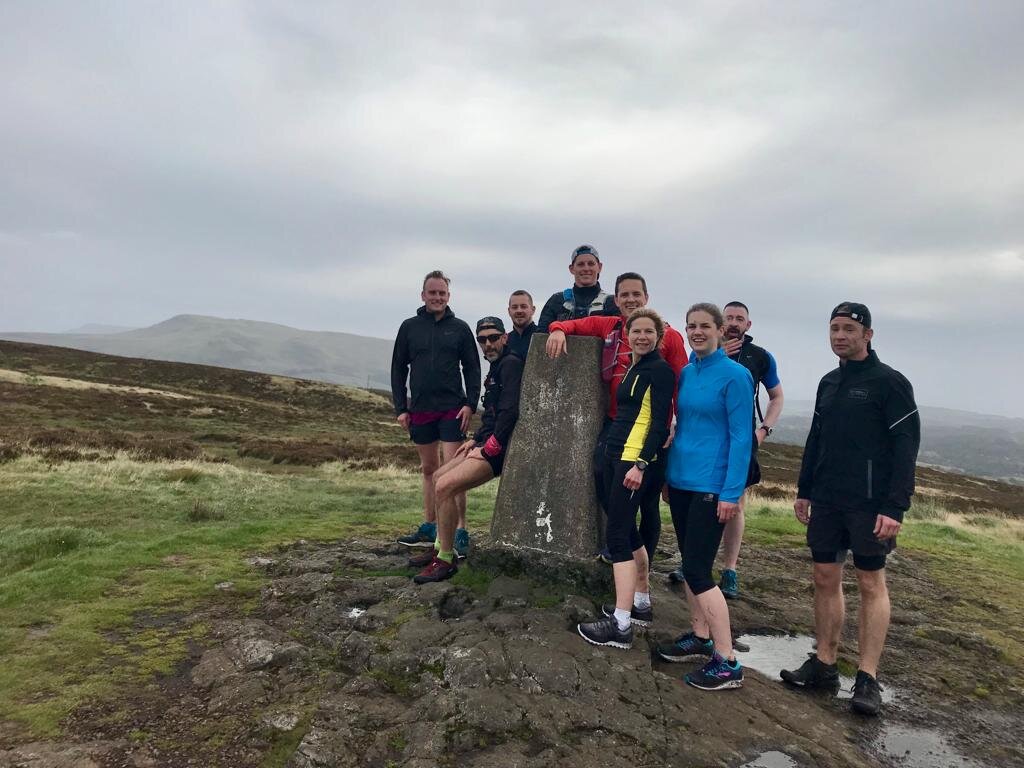

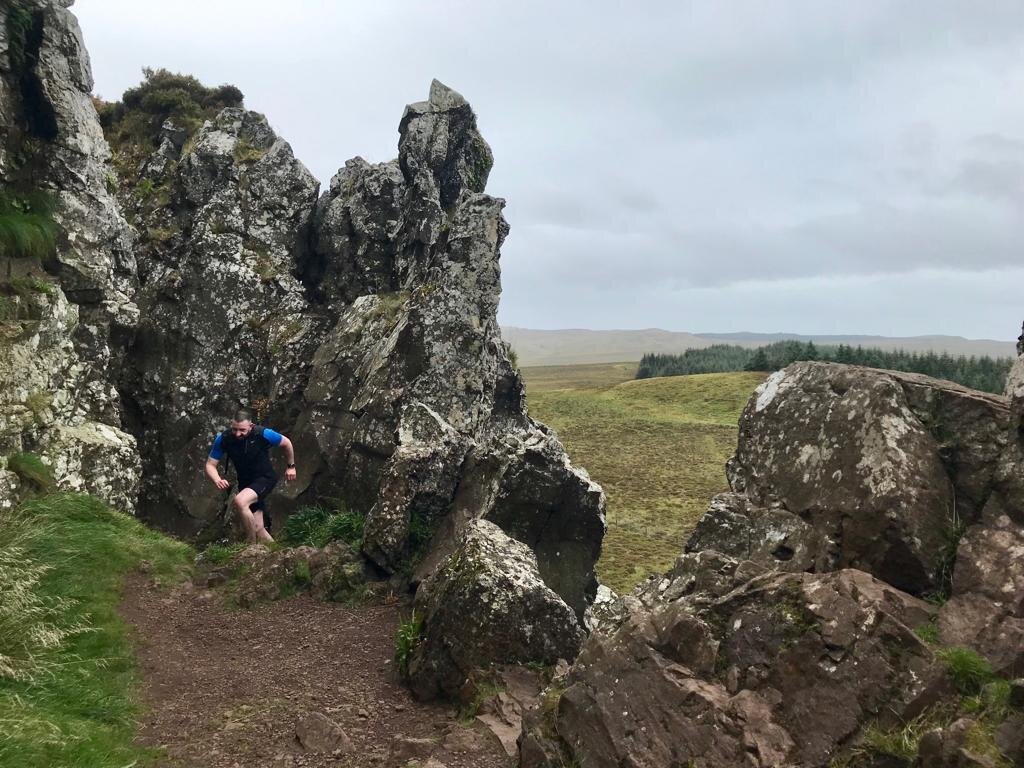

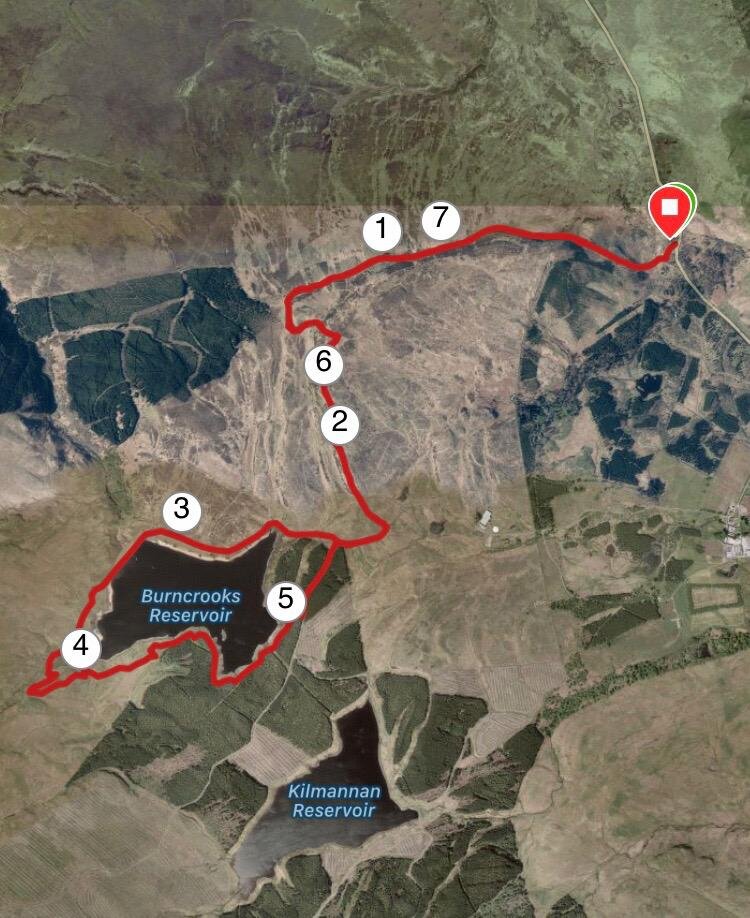

How Physio Effect helped me on my Journey to the London Marathon - a Customer's Testimonial
I started a 16-week marathon training program in January, only to get a recurring calf injury in the second week, but thanks to treatment and advice from Jonny, I was able to get back to training in a couple of weeks and back to running properly is a couple more, but it was a less than ideal start.
I started a 16-week marathon training program in January, only to get a recurring calf injury in the second week, but thanks to treatment and advice from Jonny, I was able to get back to training in a couple of weeks and back to running properly is a couple more, but it was a less than ideal start.
Then life got in the way a bit as it does, as did two snowboarding holidays a few weeks apart, the last one being the week before the marathon! I know; planning, eh?
So I found myself at the start line: nervous, carrying a few extra kilos I'd rather not have and feeling a bit under-trained - but nevertheless committed to do my level best.
At no point in the race did I experience any asymmetric pain whatsoever. Neither calf so much as murmured nor did my right ITB, all which are known to do so. I'm not saying everything didn't hurt like buggery from the halfway point onward but that was just muscle fatigue from the pace and duration. I saw so many people pulling up all over the place to limp or stretch and passed (apparently) a good few thousand forced to walk or slow right down.
The point of this is despite all of the above, the only regular thing I did for the entire lead up to the race was to get proactive sports massage from Nicki at Physio Effect with some dry needling for the stubborn knots and also massages from Melanie too.
I totally attribute my successful and injury free day to this and would heartily recommend anyone to do the same in undertaking any sporting endeavour.
And my time? 3:59:21 since you asked :-)

Scott Cherry - Physio Effect client and all-round good guy!

2019 Highland Fling 53 mile Ultra-Marathon Race Report

The night before a race is always a stressful period for me. I’m usually a nervous ball of energy, overthinking everything from what to wear and what I’m going to eat (an absolute delight for my coach and husband Jonny!). So the night before, I had my outfit set out, my dropbags ready and had written down everything I was going to eat and drink during the race – possibly a little overkill, but that’s just my personality! Jonny had given me approximate split times for Drymen, Balmaha and Rowardennan. Beyond Rowardennan was all up to me. Time to get some sleep.

4am alarm for a 6am race start. I woke up at 3:55am. I was grateful for my mother staying as she was in charge of our 2 year old. We drove to Milngavie as Jonny gave me a final pep-talk. Two nervous pees later and an obligatory photo next to the Australian flag as I couldn’t see a New Zealand flag anywhere (sorry fellow Kiwis!), I was stood at the start line in the 10-12 hour pen. The clouds were grey but the temperature was mild. The forecast was to be “some rain” which suited me having lived in Scotland for a number of years now.
The plan was to get to Drymen (12.6 miles) in 1:55hr which meant an average of 9min/mi. I knew the push through Mugdock would be slow with the crowd (nearly 800 starters) so I just relaxed and enjoyed the atmosphere and the chat. Having done the entire route at least 3-4 times in parts during my training, I knew the trail like the back of my hand and I knew the rolling down-hill stretches towards the Beech Tree Inn was where I could pick up my pace. After 30 minutes, I tucked into my first bit of food (half a salted caramel Chia bar). My nutrition for this race was an exact science. I was to take 300 cals per hour no matter what and I had to stick to it.

I arrived at Drymen and after a quick kit check from the marshals, I looked at my watch: 1:53hr. Brilliant. I felt great, legs and lungs were good and in my excitement I passed the checkpoint drinking 2 cups of water but forgot to re-fill my flasks (oops). The next checkpoint was Balmaha at 19.8 miles which included a climb up Conic Hill. The aim was to be there in 3:20hrs. In my head, I could hear Jonny’s voice: Get to the steps at the bottom of the hill, take a gel and power hike the whole way. The whole way. Don’t run it and let your HR peak, save your lungs and your legs for the lochside.

Conic Hill ascent
By this stage the rain had set. The ground was getting slippier but I was thankful that there wasn’t much wind. As I approached the top of the hill, the views opened up of Loch Lomond shrouded in some mist, which only added to the beautifully dramatic atmosphere. No matter how many times I’ve run this section, the views of this place never fail to amaze me. I also recognised a familiar face. There was Jonny waiting (in the cold and rain!). I ran towards him and gave him the biggest kiss and cuddle, “Take it really easy” he said to me. He and I knew I was slightly ahead of schedule so there was no need to beast it down hill. I cruised it and just enjoyed the views but also careful of my footing due to the wet rock. I arrived at the Balmaha checkpoint at 3:14hrs. The marshals there were incredible and were full of smiles and cheer. I chose not to have a dropbag at this section and instead had my flasks re-filled with water and quickly went on my way. One marshal asked if I wanted some Buckfast mixed into one – I must admit, I was slightly tempted but decided against it for fear of my tummy possibly protesting later on. I also saw some porta-loos and for a split second I thought about using the facilities but decided against this, thinking there may be some in Rowardennan (I would regret this later).

Conic Hill Descent

The views down to Loch Lomond
Rowardennan checkpoint would be at 27.2 miles. I was to hopefully get there in 4:50hrs. I quite enjoy this section. Sheltered for most part and I love the views of the Loch to my left, all mostly runnable. I relaxed into a pace and let my mind wander a little and I thought about what I wanted to eat when I got to Rowardennan. Before I knew it, I was there and I looked at my watch: 4:48hrs. Bang on. The marshals there were swift. My dropbag was already waiting and a lovely lady helped me re-fill my flasks one with Tailwind and one with water, “Let me fill them and you just concentrate on getting some food into you, you’re doing great.” I wanted to hug her. I stuffed my face with white chocolate Tim Tams (thanks mum for bringing them from Australia!), ate some dried mango, dates and apricots and drank a bottle of flat coke.
From here on in, it was all up to me. I was to go by feel. Push if I could, ease back if I didn’t feel right. Eat, drink - control the controllables. Jonny’s voice in my head saying this over and over. The next checkpoint was Inversnaid at 34.4 miles. I don’t remember much of this section. I was too busy thinking about how much I needed to pee and how there were no porta-loos in Rowardennan after all (oops!). I chatted to a few folk. I met a guy from England who had returned to do the Fling this year after a DNF last year. He commented on how he loved that I colour co-ordinated my outfit but I just needed to maybe sort out the shoes as they were purple and not blue like the rest of it – thank you whoever you are for making me smile!
I arrived at Inversnaid. I was wet and cold and a lovely man helped me with my dropbag and refilled my water (I cannot tell you how amazing every marshal was during this race. They were all angels.) Another lady kept telling me I was doing great and I could have a little rest from running for the next section as this was to be the technical stretch. I knew this stretch very well. In my last long training run, I did an out-and-back along this route so I knew how slow it was going to be scrambling and climbing over rocks and roots on a narrow path. The wet weather would make them slippery so I HAD to take good care here. I’d like to say that I came into my own on this section. Having been an avid hill-walker before I took up trail-running, I was used to scrambling and I was able to gain some good ground passing a few people along the lochside as I scrambled up and over boulders. It was actually mentally as well as physically tiring. It took a lot of concentration and when the end came I couldn’t help but shout, “THANK YOU GOD!”
The next checkpoint would be Beinglas at 40.9 miles. I still felt good albeit wet and cold and just as I approached the checkpoint – lo and behold – a porta-loo! The rain was relentless and I really felt for all the marshals waiting for us to arrive standing in this cold. I would be forever grateful to them and the way they lifted my spirits up each time I arrived at a checkpoint. After stuffing food in my face and drinking another bottle of flat coke, off I went. Only a half marathon to go and I still felt good. That elation did not last long, unfortunately. You could say, from Beinglas, everything went a little downhill for me apart from the actual course…which was 7 miles of UPHILL. Gah!!! When you’ve just run 40 miles and your legs are so fatigued - this was hell. It was from here I could feel my right hip flexor seize up with every steep incline. I took a couple of salt tabs but it didn’t really help. I decided to put my physiotherapist hat on and see what I could do to ease the pain. I tested out “The Pain Gate Theory” whereby you would introduce a different pain stimulus to block the nerve signals to your brain from the other pain stimulus that is bothering you. In my case, every time I needed to lift my leg on a climb, I would bite my finger really really hard so that the pain of my biting my finger would distract me from the pain in my hip. Sounds a bit nuts right? Anyway, it seemed to work for a while and I pushed on.
The Bogle Glen checkpoint was near which meant only 6 miles…i.e 10km left till the finish!! The rain was unrelenting. I was so cold I could barely feel my hands now. This was the start of the roller-coaster of the Crianlarich Forest. I got a lovely surprise at the top of the first hill, two ladies sheltered in the trees playing accordions and a bowl of jelly babies waiting. Absolute angels. My spirits were lifted and with a smile I pushed on as I listened to the sound of their music. Up and down and up and down of rolling hills followed, that seemed to take forever. 10km might as well have been another 100km! I did surprise myself and I managed to pass a few people and before I knew it, I was out of the forest and hitting the road-crossing and the final 3 miles to the finish line.
I passed a smiling spectator standing under an umbrella, “you’re doing great, only 500m to go.” That’s when I heard the bagpipes. The tears started here and finally the red-carpet finish was within reach. As I ran along that beautiful red carpet, I saw Jonny holding our daughter Aria. She was squealing with delight, “Mummy!” The tears kept flowing. As I passed them, I heard Jonny yell, “she wants to run with you to the finish!” I knew if I halted to “run”at my 2 year old’s pace, my legs would seize so instead I grabbed her in my arms and carried her across. I’ll never forget that moment as I crossed the line with her and I was met with cheers, hugs and kisses from the finish-line marshals, one of them being our friend Gavin Bussey.

Carrying our daughter Aria along the red carpet to the Finish Line.
Finish time 11:15:39
Thank you to all the organisers and volunteers of this epic race! Incredible organisation, support and friendly faces throughout and the scenery of the course is out of this world. I would highly recommend it to anyone to give it a go. It is one that will be forever etched in my mind.

Jonny, Mariam & Aria Kilpatrick

5 Tips To Keep Your Health & Fitness Goals On Track
5 Tips To Keep Your Health & Fitness Goals On Track - Physio Effect Director Danny Wray shares his advice on how to keep those New Year’s Resolutions going for the whole of 2019 and beyond!
1 - Plan Ahead
Failure to plan is planning to fail. It’s an old cliche but the message is important. Most people fail to stick with plans or goals in any aspect of life when there is a failure to set out realistic and measurable targets. If you’re new to exercise it’s unlikely you can suddenly manage 5 sessions a week of high intensity training. If you start out on this path you are likely to become overwhelmed or exhausted in a matter of weeks leading you to feel like you have failed and ultimately away from the initial goal of increasing your exercise output.
Try to diarise exercise as you would any other important aspect of your life and don’t see it as optional or something to be missed or moved as soon as you get too busy. I don’t believe anyone is ever too busy to exercise, it is just that they have failed to plan or make exercise a priority. Forming any habit takes repetition and consistency over many weeks or even months and exercise is no different. Make your exercise plan realistic, you are better to stick with 2-3 sessions per week consistently as a lifestyle choice than front load 5+ sessions a week in the short term and end up injured or unable to stick with your plan.
Be willing to adapt your plan as you go and react positively to the unexpected. Ultimately life happens and we will all receive the occasional curveball that disrupts our best laid plans. If you have missed a planned gym session or exercise class try and make up for it with a brisk walk or some light exercise at home even if it can only be a short session of simple movements or stretches. Your body and mind will thank you.
2 - Have Fun
Making healthier lifestyle choices and getting regular exercise can be challenging especially in our busy modern day lives. You are much more likely to commit to change if it is enjoyable. If the only driver to change is feelings of guilt or inadequacy then your commitment will quickly wain. Endeavour to make changes that, while challenging, are also fun and enjoyable.
Surround yourself with like-minded positive people and find a supportive environment for both exercise and lifestyle changes. Going to a gym or exercise class should be something to look forward to rather than dread and when you find the right setup for your needs it soon won’t seem like any effort at all and in fact should become a highlight of your routine.
When considering nutrition and lifestyle choices remember it is easier to change when supported by others who care and have similar interests so seek out groups and environments that support your goals in a relaxed and realistic way. You don’t need to give up all vices overnight but moderation and balance is key so work on gradual changes while remembering a little of what you enjoy is important and won’t compromise your long term progress.
When taking positive steps to improve your health and lifestyle it’s important to be open to trying new things as you may find a new passion you didn’t know you had which makes the whole process easier and more rewarding. Remember to stay true to your own goals and targets and make sure to distance yourself from negativity or anyone who belittles or criticises your efforts. Look for fun in the little things and the everyday stuff. Get outdoors more and try some new activities even if just to take a walk and appreciate our beautiful country.
3 - Eat Well and Drink Water
You can’t outrun a rubbish diet. A true statement for sure but it doesn’t provide any substance on what we should be doing. Planning your nutrition needs can be daunting with a minefield of information out there often providing confusing and conflicting advice. I am not a qualified nutritionist so the first thing I should say here is seek advice from someone who is qualified to give it and someone who understands your unique circumstances and goals.
Take simple, gradual steps to change your nutrition habits as a full overhaul or massive shift in eating habits overnight will generally be unsustainable. Stay clear of crash diets or supplements that use fancy advertising and fitness models to sell their products. Most of it is expensive junk. You can achieve fitness and health goals without starving yourself and while eating good, nutritious, whole food. Seek out solid sensible advice from a qualified health professional and put a plan in place
Drink more water. Simple, right? You would think this should be easy for us to get right but it's staggering how often people are chronically dehydrated. The average man needs around 2.5 litres of water a day and women 2 litres per day with these figures increasing significantly when balancing fluid loss from exercise. While water does of course come from multiple sources in our food and drinks, including tea and coffee, intake is best and most easily measured in its purest form when drunk straight from the tap. Get yourself a nice reusable water bottle and start keeping track of how much you are consuming. Try to sip regularly through the day and increase intake before, during and after exercise. Increasing water intake can be a simple solution for fatigue, irritability and muscle aches and pains.
4 - Sleep
How much sleep do you average per night? It’s recommended that adults aim for a minimum of 7-9 hours per night which many of us will routinely fail to hit. Sleep is a time for repair and recovery particularly if you have been exercising. Sleep deprivation has been linked with reduced strength and muscle mass and will leave you much more susceptible to illness while recovery from injury or illness will take longer. Regularly sleeping less than the recommended amount can have several negative effects on our hormones which regulate hunger and appetite. This can lead us to make poorer food choices and consume more calories.
How can we sleep more? Number one here for most adults will be go to bed earlier. With busy work and family lives most people will struggle to find extra hours for sleep in the morning so try getting routinely to your bed 1-2 hours earlier than your usual. The majority of us will be guilty of watching TV, checking our phones or using electronics in bed. This stimulation can make getting over to sleep more difficult and may negatively affect the quality of sleep we can achieve. Kill the electronics an hour before bed and leave the phone out of your bedroom.
5 - Manage Stress
All of the above factors will be easily undermined with increased stress levels and your best efforts can be quickly derailed if you don’t have strategies in place to manage this. Equally following the above points can help to reduce and minimise stress so ultimately we can conclude that stress and its potential impact is closely intertwined in all that we do.
Modern lives constantly throw us micro-stresses whether it’s rushing to get out in the morning, the nagging email you’ve forgotten to reply to, the endless traffic you seem to battle through or simply the constant battle to balance your work and personal life. Stress can creep up on anyone and often we fail to realise it is happening. Signs can include low energy and mood, headaches, increased aches and pains, an upset stomach or the seemingly never ending cold or flu. Any of these factors can easily lead us off path in our efforts to improve our health and lifestyle so be mindful.
Tackling and reducing stress takes us full circle again with regular exercise topping the list closely followed by ensuring adequate sleep and working to improve those nutrition and water targets. Many people will find using daily relaxation or mindfulness techniques help to reset the balance and prevent stress levels from elevating. Therapies such as massage, reflexology or craniosacral therapy can help promote relaxation and wellbeing or why not try a yoga class or use a meditation or relaxation application to help you along.
Work hard to manage your time through better planning remembering that exercise and time to relax and socialise are of equal importance to personal and professional obligations and should be diarised as such. Remember that there are events outwith your control & spending time worrying about these is ultimately pointless, focus on what is within your control and what you can change.
Talk with friends and family about how you are feeling and if necessary seek professional advice from your Doctor or a health professional you can trust. Early identification and recognition of increasing stress can reduce the impact on your health and help keep you on track.

Clinical Yoga - from a client perspective
When Raz Leonard, one of our Physio Team, suggested developing Clinical Yoga to create a platform for her to be able to help Physio Effect clients have another options through which to achieve their goals, we thought it was a great, and really interesting idea! Read more to find out how our Clinic Manager, Sarah, got on!
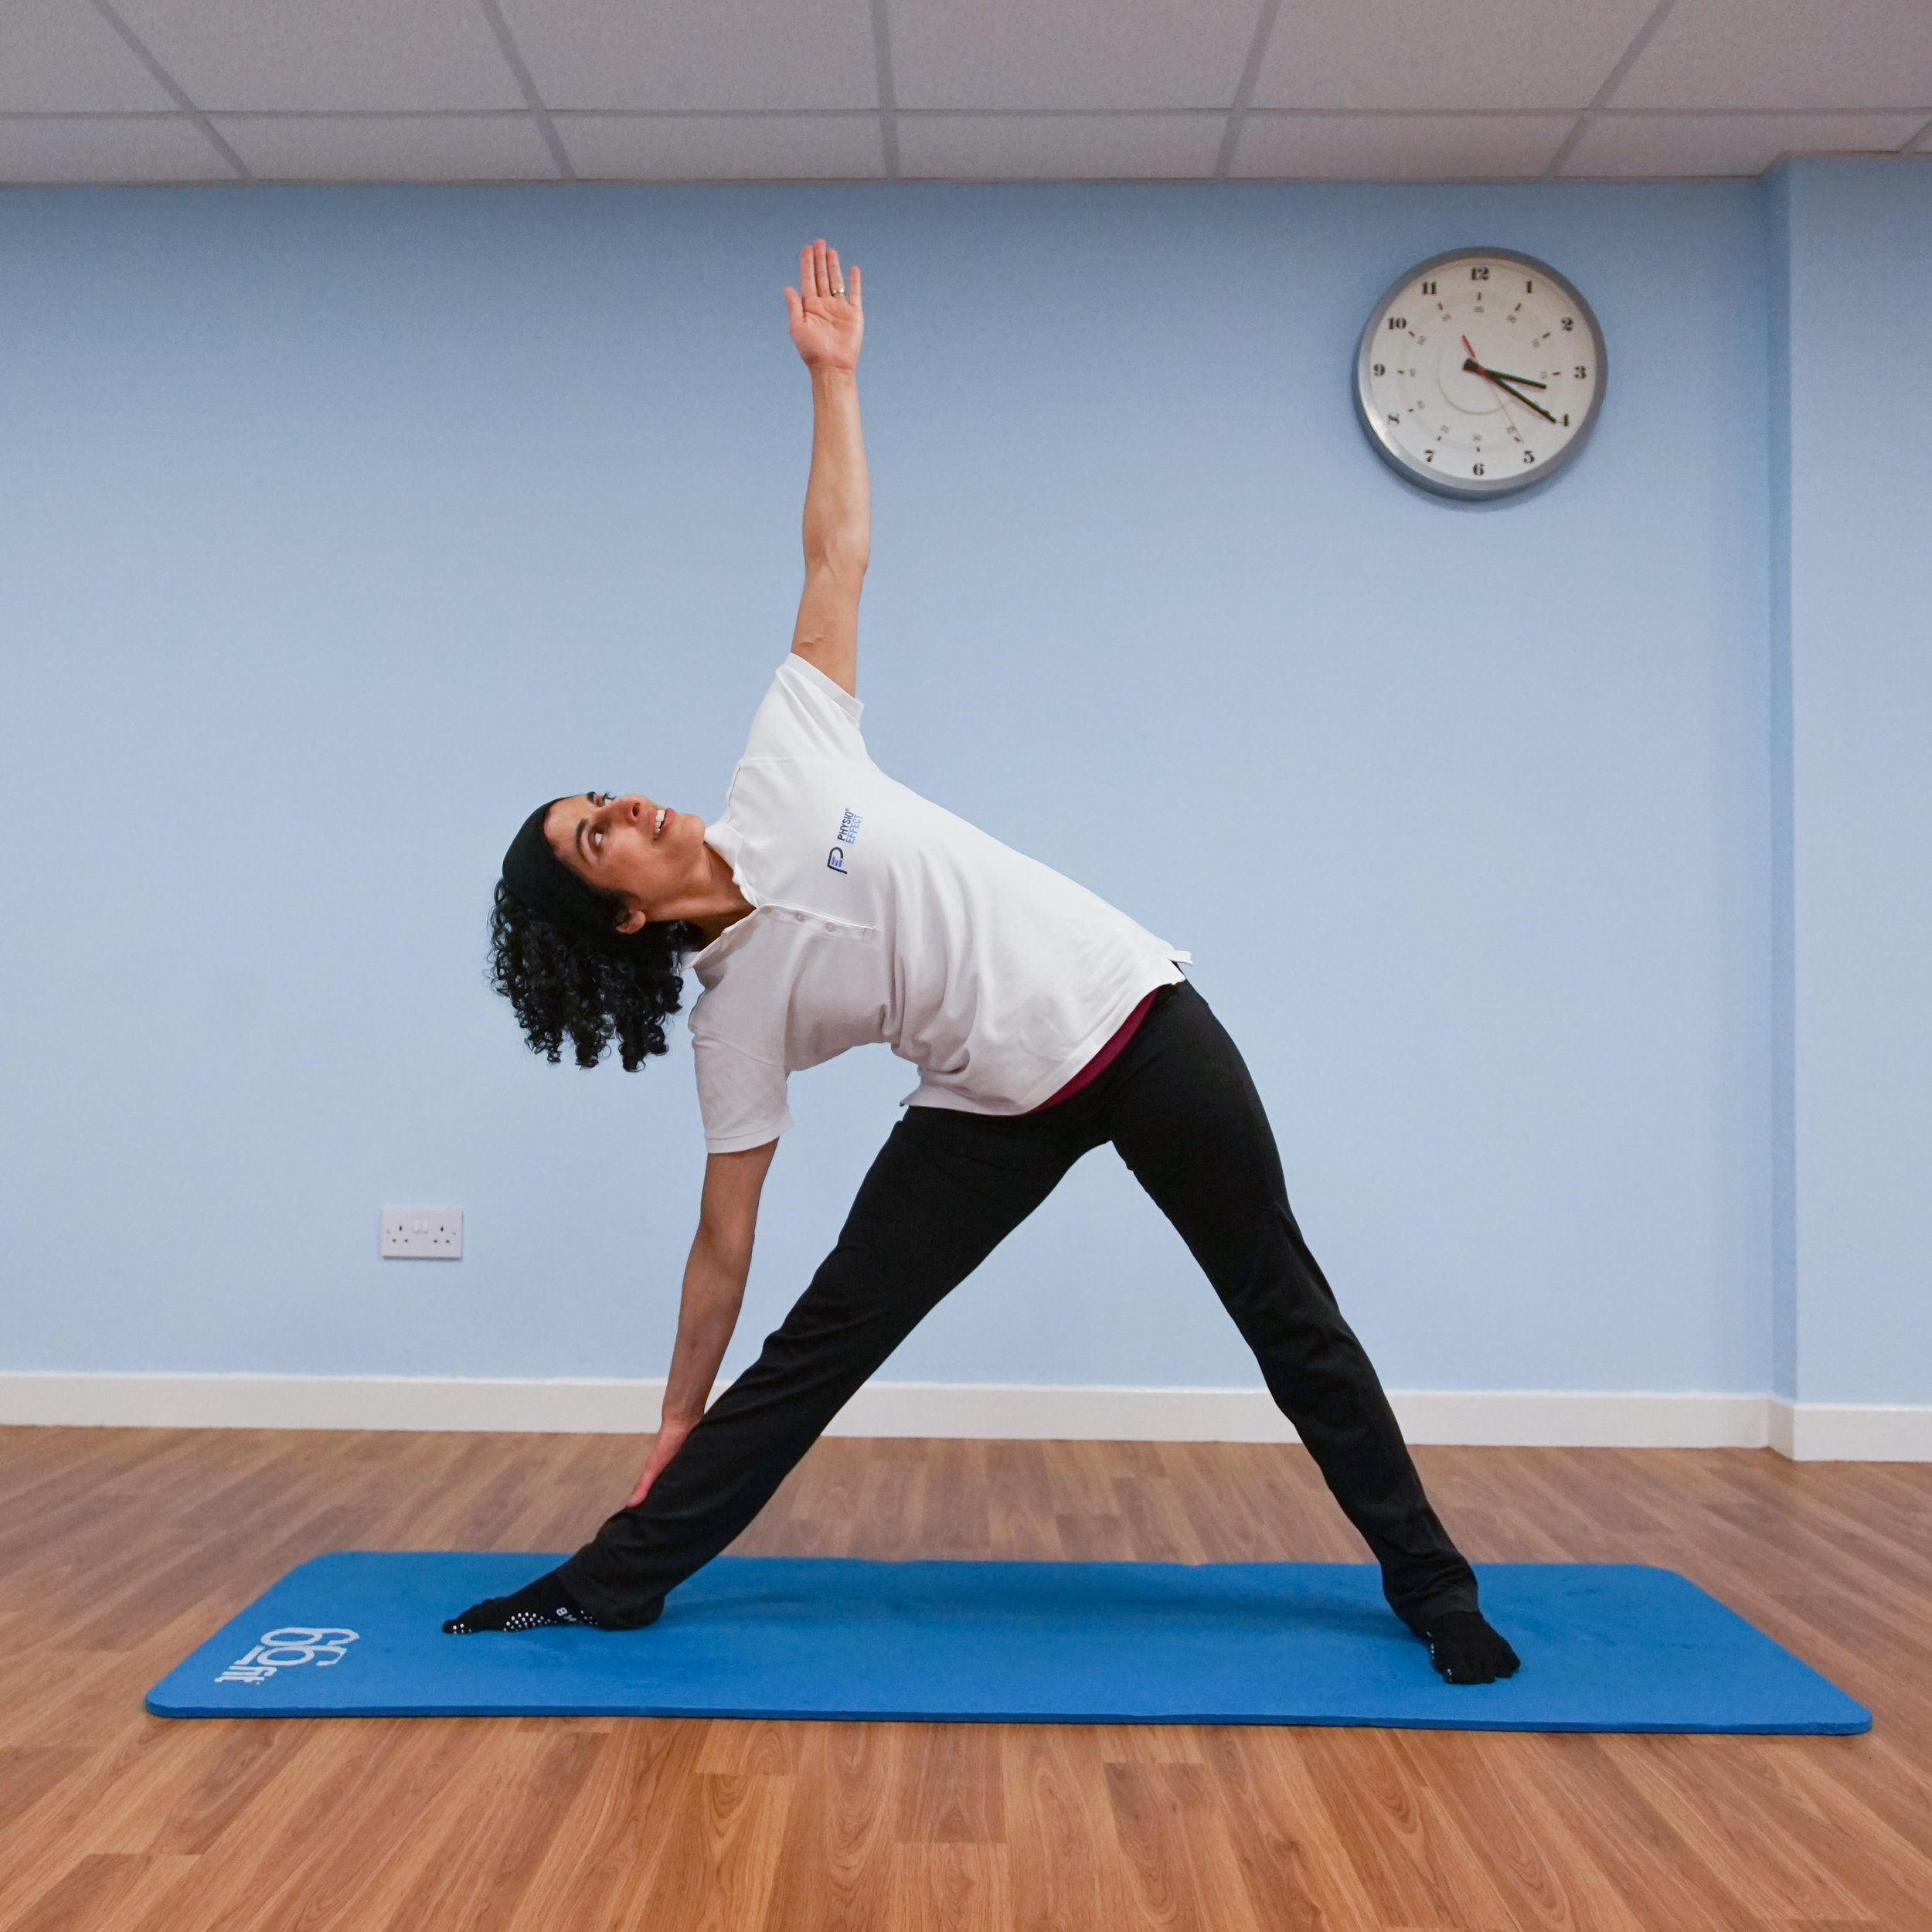
Physio and Clinical Yoga Instructor Raz demonstrating how it’s really done!
Introduction
Physio Effect has run specialist Clinical Pilates services for a number of years now; the way i explain clinical services as opposed to ‘regular’ services is that with the clinical option, you’re being instructed by a Pilates instructor who is also a qualified physiotherapist and who uses that amalgamation of learning to structure the service. We offer 1:1, 1:2 or classes here in our Northside Studio. The classes are small - maximum five people, and, whatever session size you choose, you have a clinical assessment with that physio before you start. They go through a specific assessment with you and work with you to identify your physical needs and ultimate goals for the outcome of the Clinical Pilates sessions.
I guess the Clinical sessions could be seen as bespoke rehabilitation (or prehabilitation) sessions which last a full hour and use a variety of our equipment here in the studio - everything from resistance bands to our reformer (see here for more!)
So, when Raz Leonard, one of our Physio Team, suggested developing Clinical Yoga to create a platform for her to be able to help Physio Effect clients have another options through which to achieve their goals, we thought it was a great, and really interesting idea!
Fast forward a month or two and I thought I’d try it out!
My Background
I’m Sarah, the Clinic Manager here at Physio Effect (hi!). I’ve done yoga on and off for around 20 years, sometimes very intensively and sometimes (more often than not!) much more sporadically. I’ve been to classes (Hatha, Ayengar, Ashtanga and Bikram) and done some at home. My brother is even a yoga teacher and yoga teacher trainer, so I know I should do more of it and really do understand the benefits. It’s just, you know, making the time (same old!).
The kind of yoga I always enjoyed was the more fast-paced, ‘power yoga’ where one posture flows into the next and I always thought I had a really good basis for this as I had a strong history of all the static postures initially.
What I hoped to achieve
As with most of us, I don’t spend enough time before or after exercise (or even independently to be honest) doing all the restorative things I should be doing - stretching being the big one here. So I hoped my yoga class would provide some balance to all the other physical aspects of my lifestyle.
How it all worked - 1:1, booking in for the block etc
Raz and I had a 1:1 session where Raz asked me about my lifestyle, goals for the class and where she asked me to do a range of movements to determine where I had limitations. This was really interesting as it identified a lot of things I was unaware of!
How the classes went
The classes were 60 minute sessions which, like any yoga class I’ve been to, started with standing postures and moved to sedentary and then lying down. That’s pretty much the only similarity as Raz had created a programme for me using yoga postures in a way that would help address my physical limitations - for example, I have, it turns out, very tight hips, so, in one session, we tested my squat depth and determined where I felt the strain, worked on that with a specific yoga posture, re-tested the squat, figured out what was the next limitation, did the next posture for that issue, and so on. It was really effective!

It’s not all lying down, I can assure you!
In addition to this, as I’ve mentioned above, I was under the impression before I did these sessions that my experience in yoga over the years had left me with pretty good posture and form in the yoga poses. Boy, was I wrong! When in a class where the instructor has the time and attention to detail to make sure you’re as aligned as you should be, it can make a massive difference with no option for those muscles that tend to overcompensate to do that.
Overall feeling and summary
I gained a real insight into how yoga can support and push my training as well as improve my recovery and flexibility. Clinical Yoga can be used to identify issues and give us the tools we need to overcome them as well as helping overall performance in a variety of ways.
The classes are great fun and I’d heartily recommend you consider signing up, if you like the sound of it!
“I thought I would just drop a short note about my experience in the 6 week yoga course.
I have to admit that before I attended a class I did not give yoga a moment’s thought because I did not know anything about it. When you said that you were running a course at the same time a friend on facebook who runs a boxercise class posted that he had just completed a yoga course and was singing the praises of it so I thought well if I don’t try it I will never know. I am glad I did and having attended all of the classes in the course I can feel the benefit of this.
Stretching to improve mobility is one thing but knowing which stretches are most beneficial and how to do them correctly to get the best results are very important. When doing stretches at home I believe that I am doing them correctly but that was in my own eye. “Oh wad some power the giftie gie us, To see oursels as other see us”. The benefits and results from the course greatly exceed anything that I could have achieved at home.
I have also found that when exercising at home there are too many distractions around. Being committed to attend the course provided focus on what I had to do in a controlled environment devoid of distractions. Maximising results from my efforts.
Thanks again”


Case Study: Frontal Knee Pain (Part 3)
Single leg exercises should be incorporated in strength and conditioning sessions as it is the best way to mimic the single leg work required in running with landing and push-off. It is also a good way to identify any imbalances from one side to the other. In the final part of this series, Jonny’s pain had largely settled and his rehab focused on single leg control. He also practiced a more efficient running technique to minimise loads placed on the knee.