Thoracic Mobility - The Key To A Pain Free Spine!
When your thoracic spine isn't moving as it should, it creates a domino effect throughout your body. This can contribute to neck, shoulder & lower back pain. Let’s drill down into how to take better care of your back and get that thoracic spine moving!
Unlock Your Movement Potential: Why Your Thoracic Spine is a Game-Changer! 😀
Written by Daniel Wray (Senior Physiotherapist & Mobility Coach)
Back pain is very common - Thoracic spine stiffness is often to blame
As someone who's spent over two decades in the clinic as a sports physiotherapist, I've seen first-hand how often seemingly unrelated aches and pains can be traced back to one crucial area: your thoracic spine. You know, that middle section of your back, between your neck and your lower back? It might not get as much attention as your neck or lower back, but trust me, it's a true unsung hero when it comes to keeping you moving freely and comfortably, no matter your age or activity level.
Think of your thoracic spine as the command centre for so much of your upper body movement. It's designed for rotation and extension, allowing you to twist, reach, and stand tall. But in our modern lives, spent often hunched over desks, phones, or even just relaxing on the couch, this vital area can become stiff and restricted. And when that happens, other parts of your body have to pick up the slack, often leading to problems!
The Ripple Effect: How a Stiff Thoracic Spine Causes Trouble
When your thoracic spine isn't moving as it should, it creates a domino effect throughout your body. Here's how it can contribute to those annoying aches and pains:
Familiar hunching over your desk increases thoracic spine rounding and stiffness
Neck Pain: If your mid-back is stiff, your neck has to work overtime to compensate for head rotation and movement. This extra strain can lead to tightness, headaches, and that familiar crick in your neck.
Shoulder Pain: Your shoulder blade sits right on top of your rib cage, which is connected to your thoracic spine. If your mid-back is locked up, your shoulder blade can't move properly, impacting your shoulder joint mechanics and potentially causing impingement or rotator cuff issues.
Lower Back Pain: When your thoracic spine lacks mobility, your lower back (lumbar spine) might try to compensate by over-rotating or extending, putting excessive stress on discs and joints, leading to that nagging lower back discomfort.
Move Freely, Live Fully: The Benefits of Thoracic Mobility
Thoracic Rotation Mobility can help improve back pain and stiffness
The good news is, improving your thoracic spine mobility can have a profound impact on your overall well-being. By restoring natural movement to this area, you can:
Reduce Pain: Alleviate strain on your neck, shoulders, and lower back.
Improve Posture: Stand taller and reduce that "hunched over" feeling.
Enhance Performance: Whether you're an athlete or just enjoy daily activities, better thoracic mobility can improve your ability to rotate, reach, and lift.
Breathe Easier: Your ribs attach to your thoracic spine, so improved mobility can even enhance your breathing mechanics!
Easy Moves for a More Mobile You!
Ready to get started? Here are some simple yet effective exercises you can incorporate into your daily routine to unlock your thoracic spine's potential. Remember to listen to your body and move gently. Consistent daily practice is your key to progress.
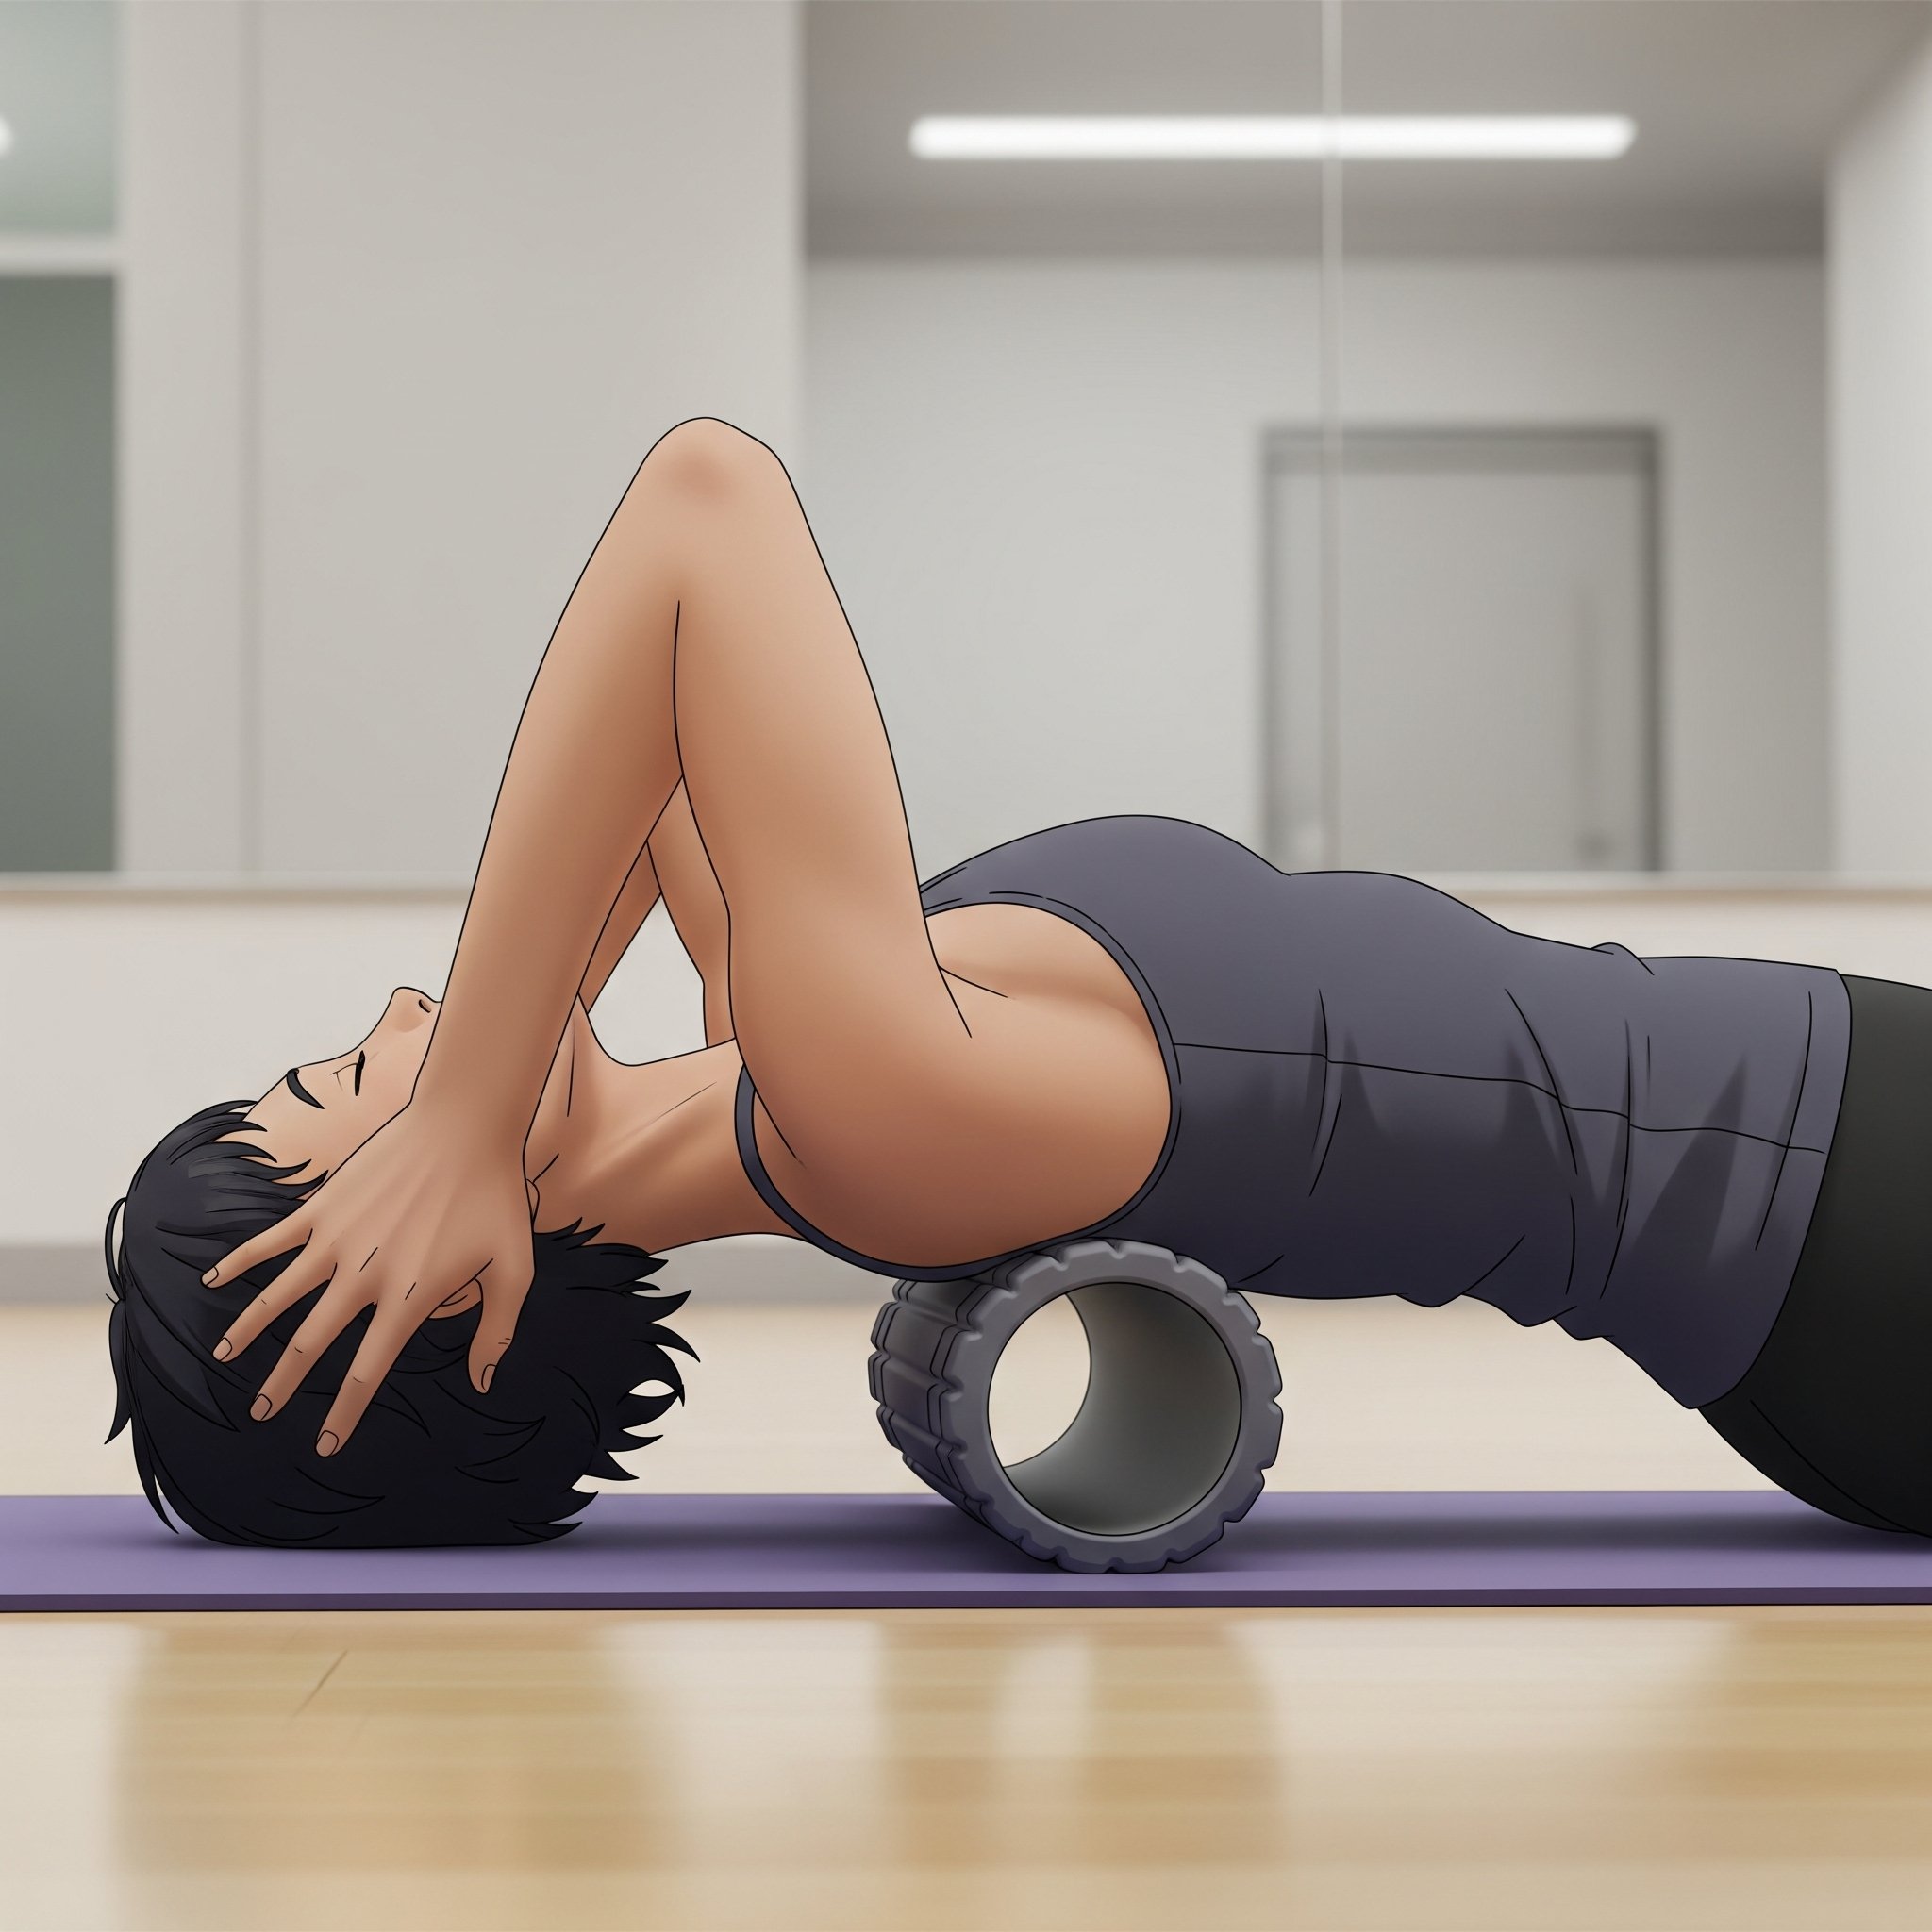
Foam Roller Thoracic Extension
Thoracic Extension Over a Foam Roller:
Lie on your back with a foam roller positioned horizontally across your mid-back.
Place your hands behind your head for support.
Gently extend your upper back over the roller, allowing your head to drop towards the floor.
Slowly roll up and down your mid-back, focusing on areas of stiffness.
Seated Thoracic Rotations
Seated Thoracic Rotations:
Sit comfortably in a chair with your feet flat on the floor.
Cross your arms over your chest or place your hands behind your head.
Gently rotate your upper body to one side, leading with your rib cage.
Hold briefly, then return to the center and rotate to the other side.
As you rotate try gently lifting your elbow to he ceiling adding side opening to rotation
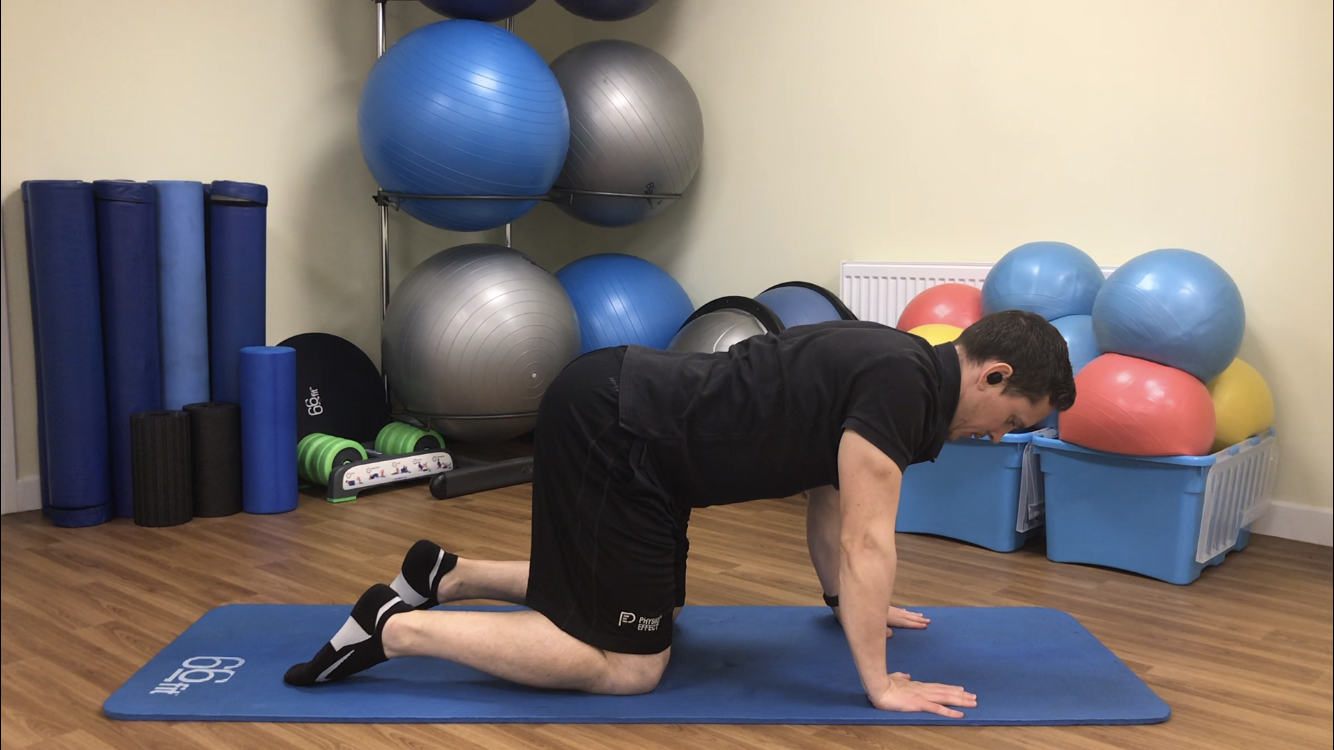
Cat-Cow Stretch:
Start on your hands and knees, with your wrists under your shoulders and knees under your hips.
Cat: Exhale as you round your spine towards the ceiling, tucking your chin to your chest.
Cow: Inhale as you drop your belly towards the floor, lifting your head and tailbone.
Flow smoothly between these two positions 1-2 minutes
Cat - Rounded back
Cow -hollow back
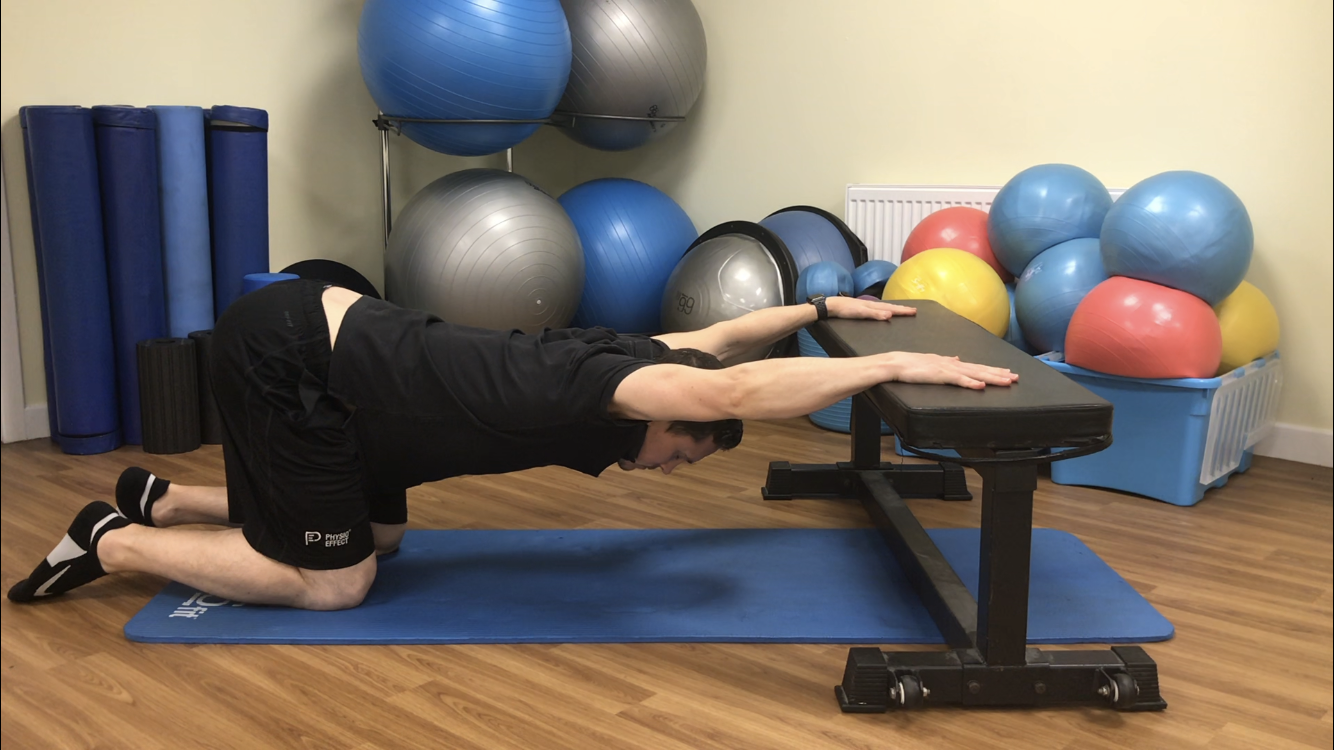
Elevated Arms Thoracic Extension
Similar to cat-cow motion performed with your arms elevated & resting on a chair or bench.
Breathe in as you round up lifting your head and shoulders
Exhale as you sit down and back relaxing across your back and shoulder blades
Repeat slowly for 10-15 deep breath cycles
Breathe in as you round your upper back and shoulders
Exhale as you relax and sit back extending through your back and shoulders
Deep Squat Spine Rotations:
This is more advanced, please avoid if you are not comfortable or able to maintain a deep squat position
Get into a deep squat and hold, Block one knee on the inside with your elbow
With the opposite arm straight rotate and lengthen towards the ceiling
Follow the movement with your head and actively rotate your ribcage and sternum
Hold for a few seconds at the top position then return & repeat on the opposite side.
Work side to side for 30-60 seconds
Deep Squat - Spinal Rotations
Incorporating these exercises regularly can make a world of difference in how you feel and move. It's amazing what a little attention to your thoracic spine can do for your overall comfort and vitality!
Looking for something a little more challenging?
If you are physically able these videos below can help you progress your spinal mobility and can be done routinely to increase range of movement and reduce back ache and discomfort.
Like most things worth having mobility improvements are earnt by consistency of practice. Show up everyday and work on your areas of stiffness & weakness and you will reap the rewards of moving better & reducing pain!
Downward dog - Calves, hamstrings and Thoracic/Shoulder Stretch
3 Point Bridge- Full body mobility including hips, spine and shoulders
Thoracic Spine Windmills & rotations
thank you
Thanks for reading, please share with any friends, family or colleagues who could benefit.
We are always here to listen & help. Our specialist team can help you navigate and manage any ache, pain or injury.
5 Signs You Are Overtraining 😫
Getting fit is great but more isn’t always better. Learn to recognise the signs and indicators that you are overtraining
You are Probably Overtraining 😲 Follow this advice to train smarter, reduce injuries & Feel better 😀
Written by Daniel Wray (Senior Physiotherapist)
One of the most common causes of injury is poorly structured and executed training plans. We see a lot of injuries caused by excessive stress on the body due to no real planning around exercise type, intensity & volume. While it is admirable to get out there and get fit the tendency for most is to overreach and often exercise is too sporadic, random & intense. We have previously looked at common signs of overtraining so here we give practical and simple strategies you can implement to reduce this risk, take control & start implementing goal orientated, structured training.
Confusion around training & exercise is common
With increasing frequency we are seeing people in clinic who are getting injured from overtraining. The boom in hybrid style fitness like CrossFit & Hyrox means the demands people are putting on their bodies are constantly increasing. It’s natural to want it all but trying to serve 2 masters simultaneously, with strength training one side and cardio on the other, often results in injury & failure to really progress on either front.
5 Tips to Prevent Overtraining
Listen to Your Body
Pay attention to physical and mental signals. Fatigue, decreased performance, and persistent soreness may indicate that you need to rest.Incorporate Rest Days
Schedule regular rest days into your training regimen. Adequate recovery allows your muscles to repair and helps to avoid burnout.Vary Your Workouts
Include a mix of training modalities to prevent overuse injuries and mental fatigue. Cross-training can help maintain fitness while reducing strain on specific muscle groups.Monitor Training Volume
Keep track of the intensity, duration, and frequency of your workouts. Gradually increase these parameters and avoid sudden spikes in training load.Ensure Proper Nutrition and Hydration
Fuel your body with a balanced diet and stay hydrated. Proper nutrition supports recovery and overall performance, minimising the risk of overtraining.
5 Signs of Overtraining
Persistent Fatigue 🥱🥱
Experiencing constant fatigue, despite getting adequate rest, can be a sign of overtraining. If workouts begin to feel unusually exhausting and recovery seems difficult, it may indicate your body is not coping with the stress.Decreased Performance ⬇⬇⬇
A noticeable drop in performance levels, such as reduced strength, endurance, or speed, can signal that your body is struggling to recover. If previously manageable training sessions start to feel increasingly challenging, consider reassessing your training load.Increased Injuries ⬆⬆⬆
Frequent injuries or recurring muscle strains are common indicators of overtraining. Overworking your body can lead to a higher risk of injuries, affecting your ability to train effectively.Mood Changes 😰😰
Emotional fluctuations, such as increased irritability, anxiety, or depression, may occur with overtraining. These mood disturbances often stem from the physical stress your body is undergoing and can impact overall well-being.Sleep Disturbances 😪😪
Problems with sleep, such as insomnia or disrupted sleep patterns, can also indicate overtraining. A body under stress may struggle to relax, affecting both sleep quality and quantity, which are crucial for recovery.
Feeling Constantly Tired Can be A Sign of Overtraining
TIME TO TAKE STOCK
If any or all of the above points resonate with you then you are probably overtraining and risking injury and reduced performance. It’s good to remember that quality and structure are more important than quantity when it comes to training, fitness & progression. You probably aren’t an elite level athlete with the opportunity to train (& recover) full time so don’t try and train like you are. Exercise shouldn’t be punishment & a mindset like this will lead you to injury.
If you need help with injury or understanding training for your own unique needs then speak to a qualified trainer. Our team at Physio Effect can help you recover from injury and set realistic training goals helping you progress consistently and avoid the boom to bust crashes we see so often with no structure.
thank you
Thanks for reading, please share with any friends, family or colleagues who could benefit.
We are always here to listen & help. Our specialist team can help you navigate and manage any ache, pain or injury.
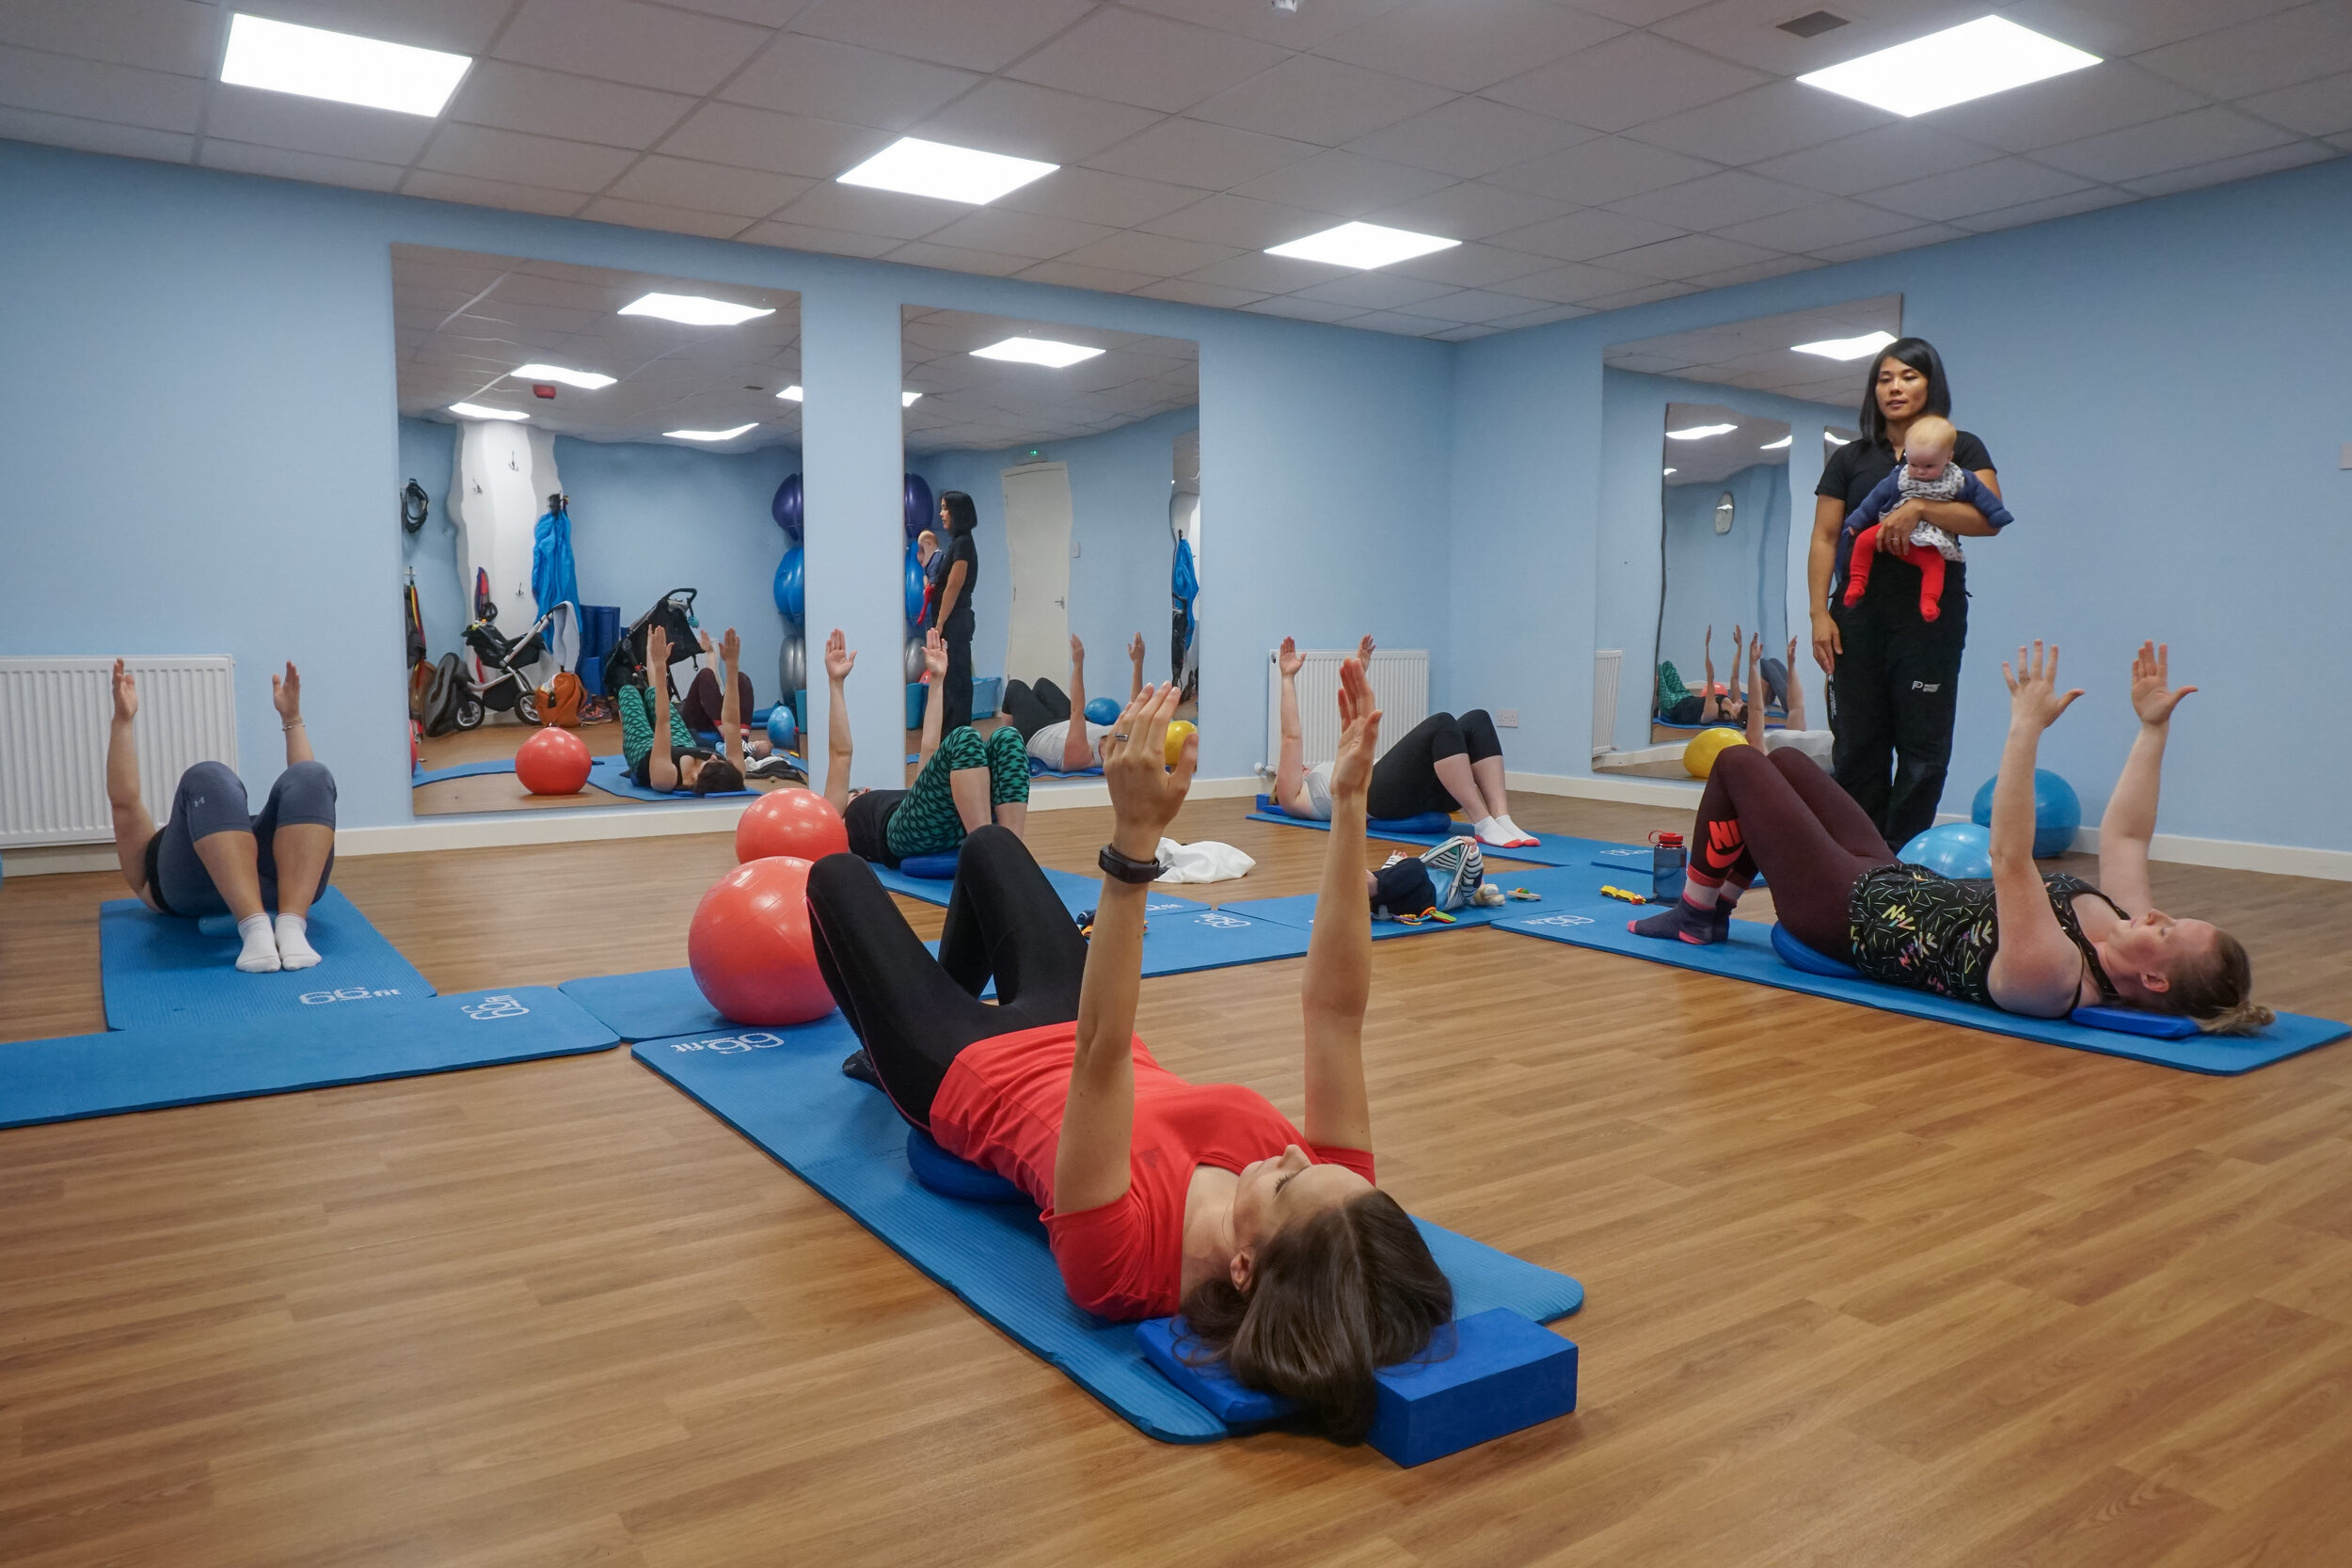
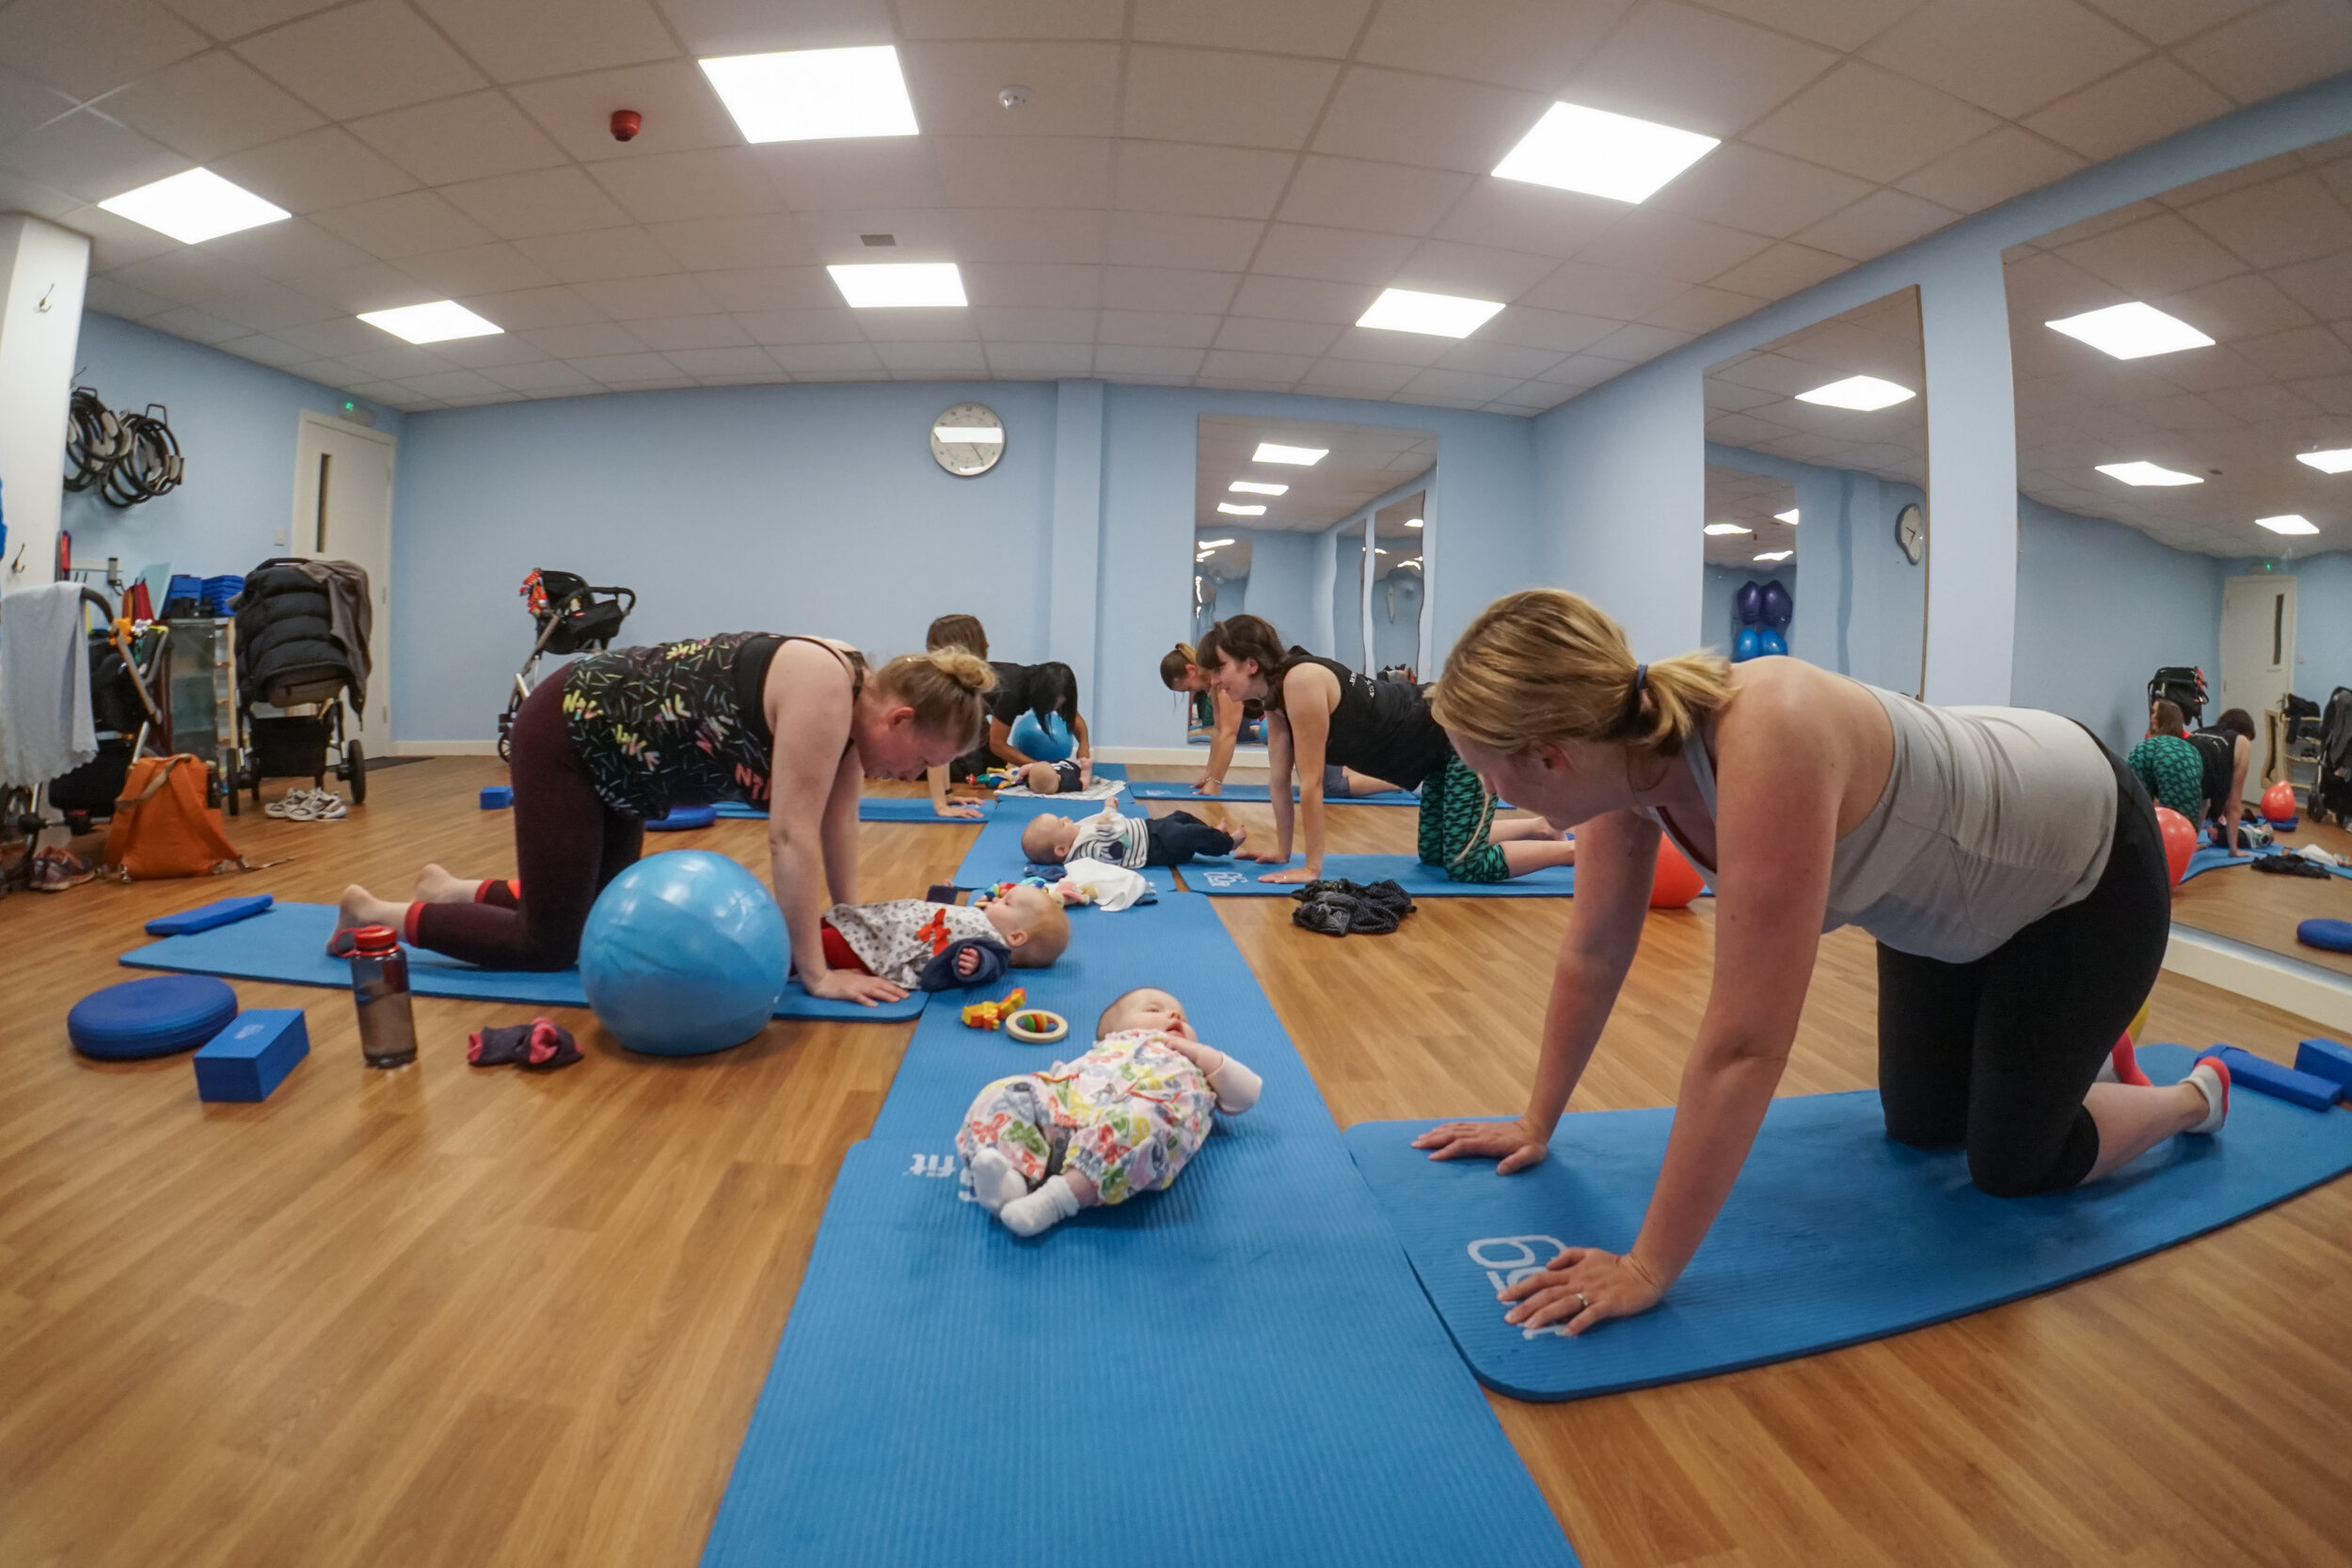
Postnatal Pilates Classes at Physio Effect
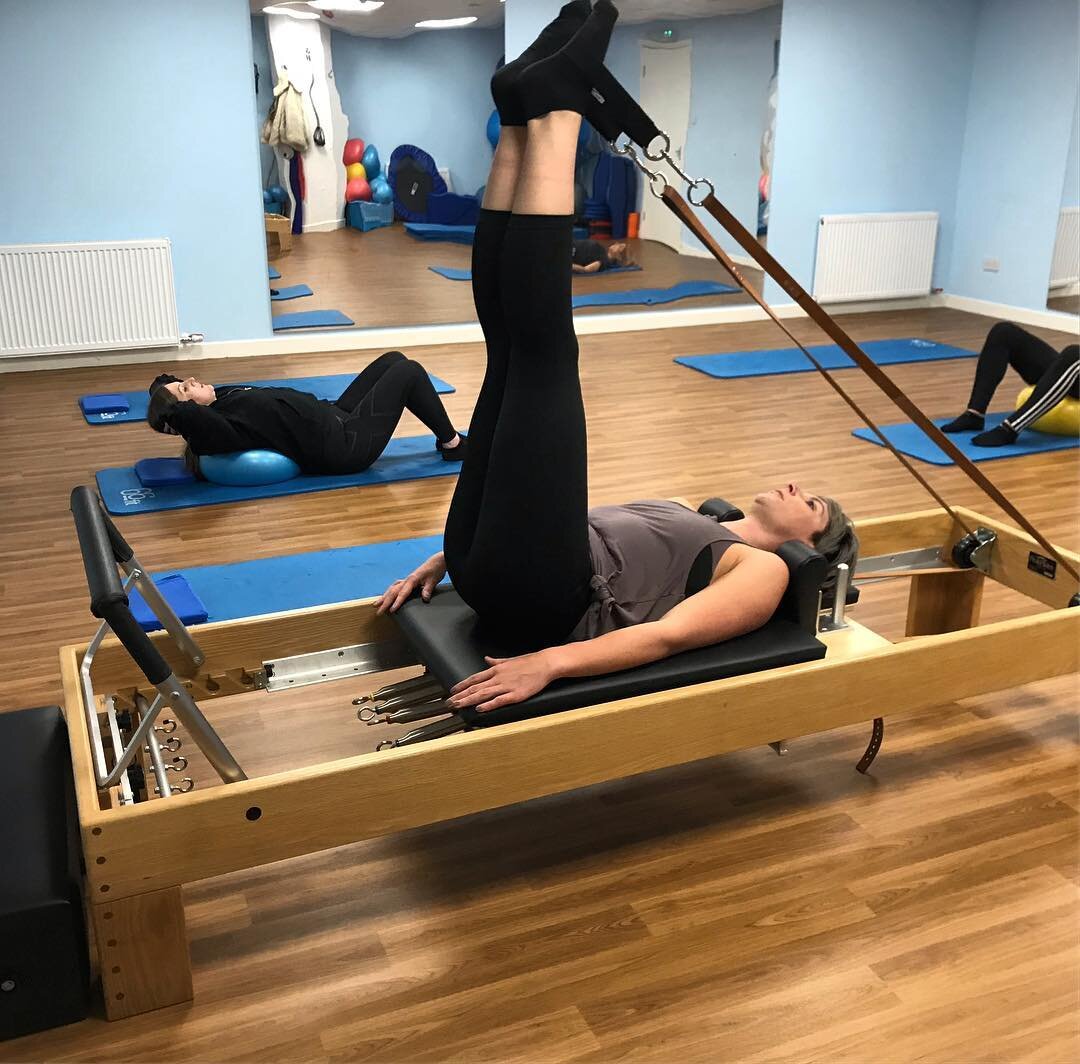
This is our Postnatal Pilates class which you can begin from 6 weeks postpartum if you had a straightforward vaginal delivery or 8 weeks after a C-section or assisted vaginal delivery (with any complications)
The class is designed to help heal and strengthen muscles affected after pregnancy and delivery such as your pelvic floor and abdominals.
We are very excited to announce that we are starting our very popular Crybaby Postnatal Pilates classes again in our Pilates studio within our Northside clinic in Borron Street. This is our physiotherapy-led rehabilitation class for new mums.
Due to the current Covid guidelines and to maintain social-distancing protocols, we are having smaller sized classes with a maximum of 6 participants only.
To join this class, you must be a minimum of 6 weeks postpartum if you had a straightforward vaginal delivery/8 weeks after a C-section or assisted vaginal delivery with any other complications (which can be discussed at your initial postnatal physiotherapy appointment).
NEW CLASS STARTING!
Mondays at 12noon
Duration: 1 hour
The next block will begin on MONDAY 30TH NOVEMBER 2020
Please get in touch below if you would like to sign up. Spaces are limited!
HOW DO I GET STARTED?
If you are starting our classes for the first time since having your baby, you will be required to have a 1:1 Postnatal Physiotherapy Appointment with one of our physiotherapists and you must be a minimum of 6 weeks postpartum for this to take place. This is a pre-screening appointment where you will also be able to discuss your pregnancy, labour and set some goals you’d like to achieve after having your baby. The physiotherapist will assess your pelvic floor and abdominal function and go over some basic, fundamental exercises in preparation to starting the classes. This appointment will take up to 45 minutes.
HOW MUCH DOES IT COST?
Physiotherapy Postnatal Appointment: £49 (you must be a minimum of 6 weeks postpartum)
6-week block: £75
CORONAVIRUS (COVID-19) SAFETY PROCEDURES
The class size will be smaller than usual to allow adequate social distancing (maximum of 6 participants).
Please bring your own mat to the class as well as a mat (and toys) for your baby to lay next to you or they may remain in their carseat next to you. Buggies will have to be left in our reception area outside the studio to allow for more space.
Pilates equipment such as circles, balls, bands, weights etc. will be provided for the class with strict cleaning measures in place before and after use.
A face-mask/covering is required to enter and leave the building and Pilates studio. Once you are allocated your floor space in the studio, you may remove your mask for the duration of the class if you wish.
Hand sanitising gel is provided for entering and leaving the building.
Unfortunately, the EDA Gym lounge area is closed for use however the Coorie Cafe is located in the 100 Borron Street Business Park above the gym which has delicious food, good coffee and outdoor seating. They have also very kindly offered to reserve a space for you all to have a chat and lunch after the class!
You are not your MRI: A Rehab Story.
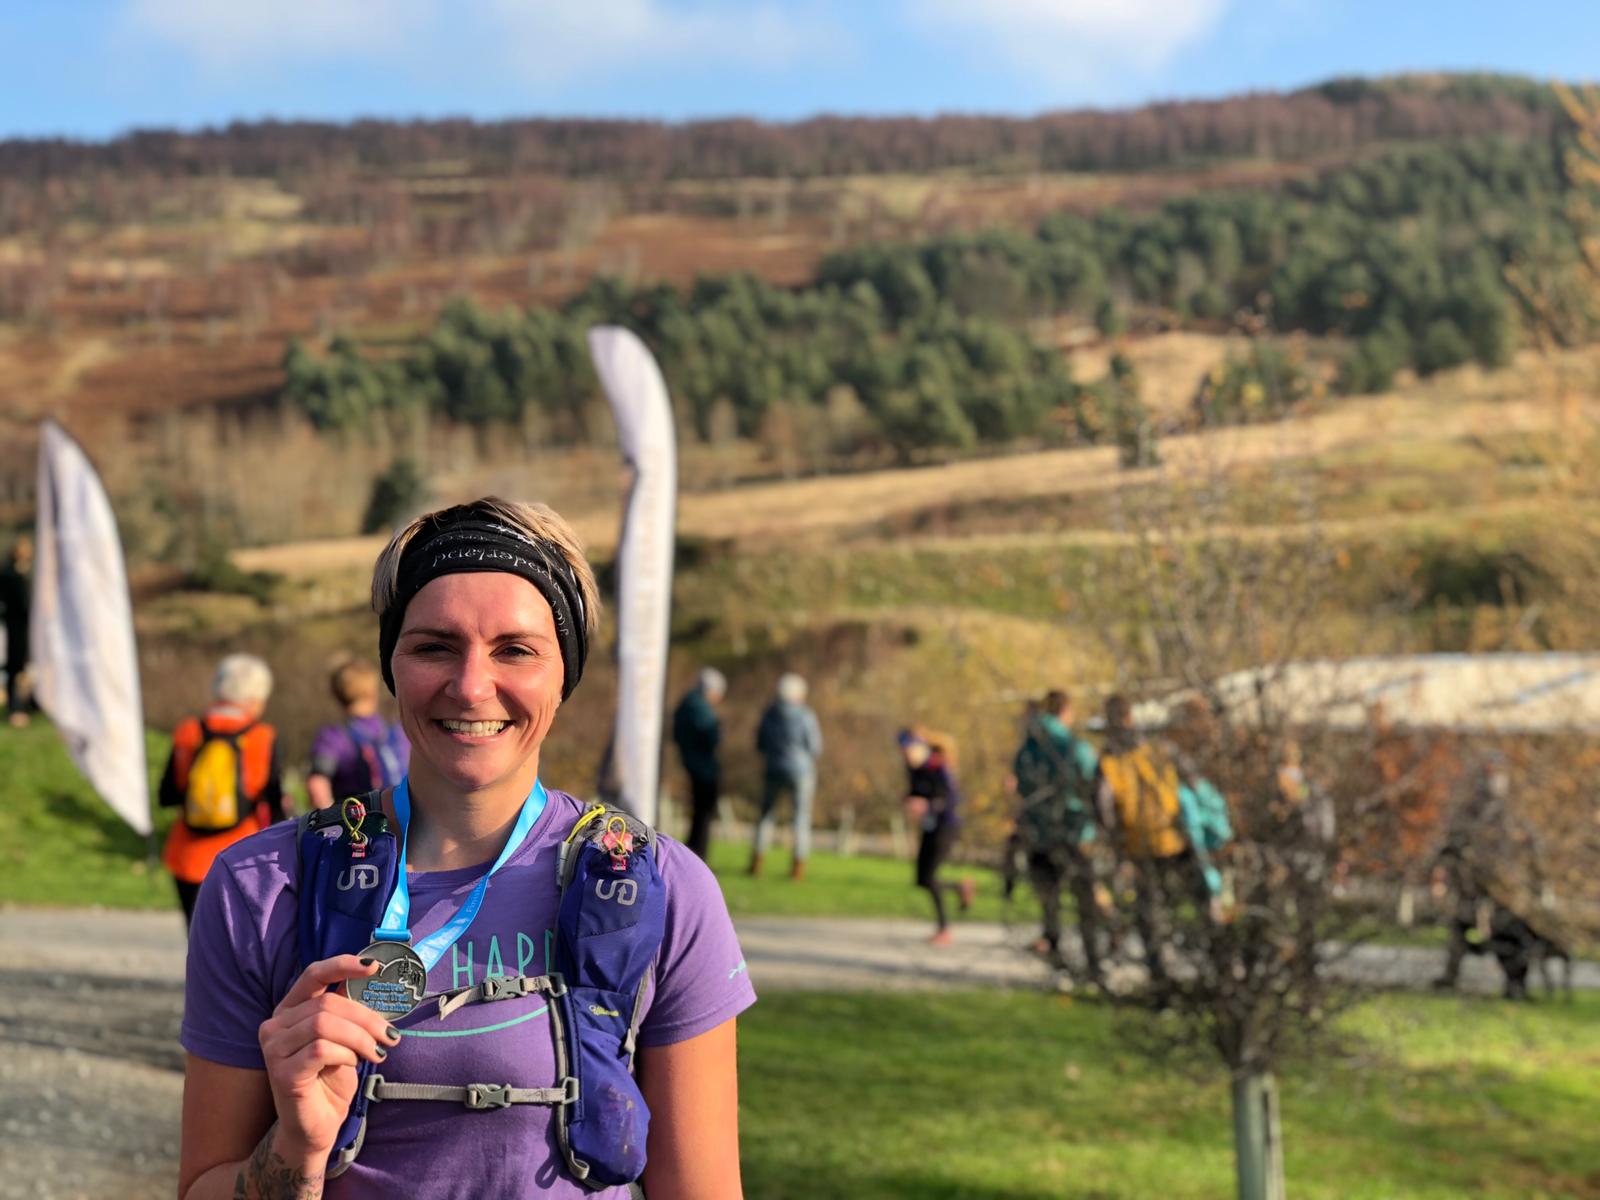
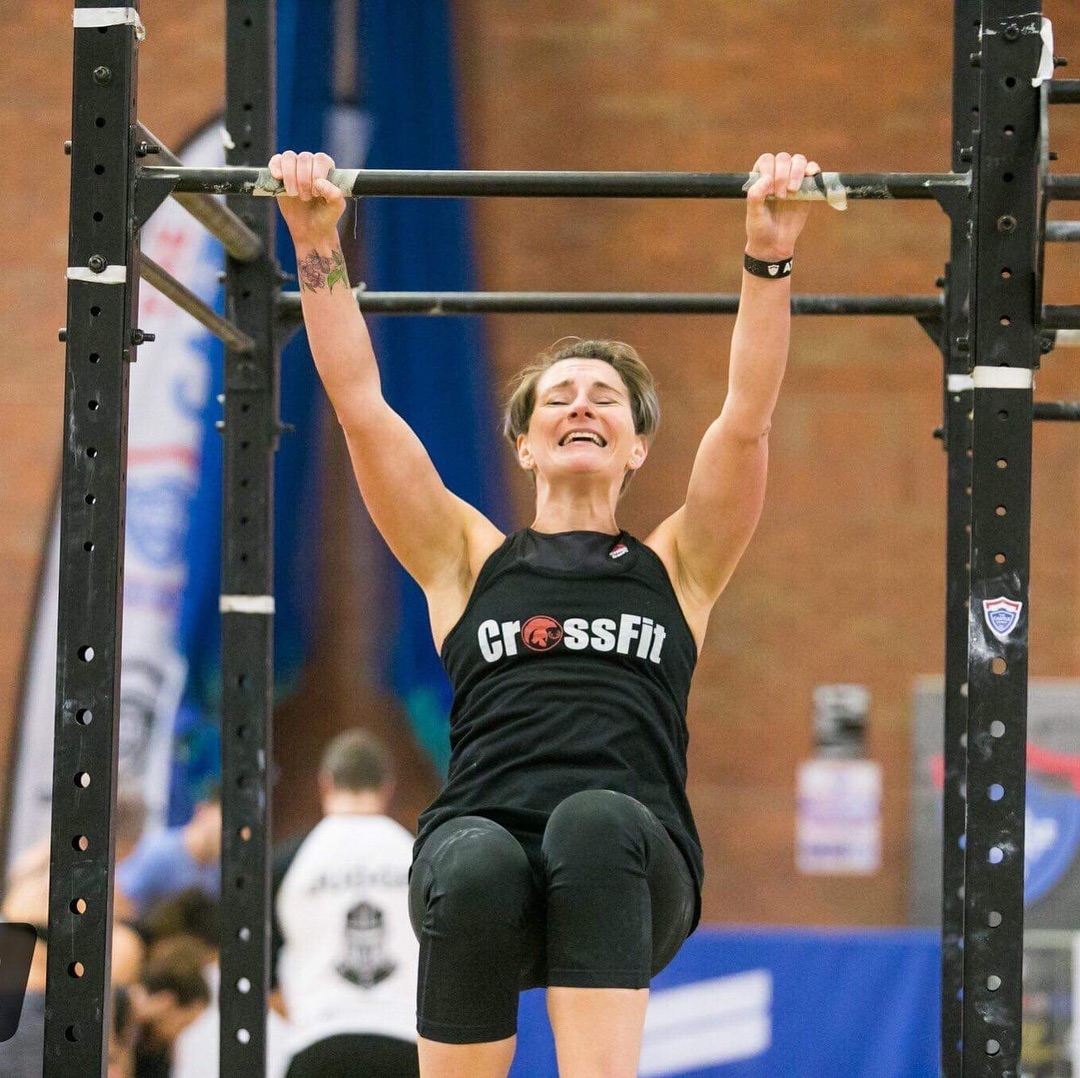
Fiona Callan is a CrossFitter and Ultra-marathoner who injured her back in 2017. She had an MRI which showed an “L5/S1 disc bulge with nerve root irritation”. In this interview we discussed how she chose to avoid surgery and returned to the things she loved doing best.
Written by Mariam Kilpatrick, Physiotherapist and Clinical Pilates Lead at Physio Effect
Fiona Callan is a CrossFitter and Ultra-marathoner who injured her back in 2017. She had an MRI which showed an “L5/S1 disc bulge with nerve root irritation”. In this interview we discussed how she chose to avoid surgery and returned to the things she loved doing best.
Hi Fiona, thank you for taking the time to share your experience with us. Before we begin, tell us a bit about yourself…
I work in the NHS, primarily an office based job. Preceding my injury I was also studying for an MSc so basically spent all day and night sitting at a desk.
I started running in 2008, mainly 5k and 10k distance on roads but I wasn’t very good and didn’t enjoy it so moved to trail and hill running instead when I started gradually to increase my distance. I met some really cool people to run with as well. In 2012, I was talked into a trip to Nepal by a friend but it wasn’t until around 4 weeks to go that I found out he had signed me up to an ultra marathon. I didn’t even know what that was! It was sheer determination that got me through that and I really caught the ultra marathon bug.
In 2014 I started CrossFit as I thought some strength and conditioning type training would help with my running and I had no idea what I was doing in a conventional gym. The coaching and set workout approach has really worked for me and made me use muscles I didn’t know I had.
So the key question… how did you injure your back?
To be honest I’ve always had a bit of a lower back niggle, probably postural, but thought it would just go away. It was definitely something I started to feel more when I started CrossFit as I really had to use my back and core more than I had been doing running. Slowly I noticed it had started to affect my running, I had pain in my right buttock that shot down my leg now and again and my leg generally felt heavy. If I left it a few days it would go away but it meant I couldn’t really run or CrossFit as much as I wanted to.
It started affecting my job as I couldn’t sit comfortably for any period of time. I was travelling by train to Edinburgh at least twice a week which became difficult. On one journey I had to get off the train and go back to Glasgow as I couldn’t face sitting for an hour.
Then during a workout involving a barbell I cried so much I had to admit that something wasn’t right.
My initial symptoms were primarily in my lower back, there was a build up of pressure around my stomach and back even when I bent over the sink to wash my face. I tried to keep active but really scaled back on what I was doing. I kept up my hill walking as this is an activity I love doing with my nephew – I used poles and made Ewan carry my bag as he’s the young one! I tried running but could only manage 1k before I felt my back stiffen.
One Saturday I went walking with Dad and Ewan in the Lake District. It was an amazing day. The hill wasn’t too hard; we took our time and enjoyed it. It was the shooting pain in my right leg that woke me up early on the Sunday morning. I tried to stand up but my leg just wouldn’t work. I limped to the bathroom hanging onto the wall and at that point I knew there was something seriously wrong. It sounds dramatic but I genuinely felt paralysed down that whole side of my lower body, first thoughts were ‘I’ll never run again!’ and panicked. My boyfriend called NHS24 and a nurse managed to calm me down and suggested I took paracetamol with ibuprofen and try find a comfortable position until a doctor could get to me. A few hours and one injection later the pain had dulled. He said it was my sciatic nerve; I should try to relax and spend less time sitting down!
What treatment did you seek initially?
I got an appointment with Jonny who did some needling on my lower back/ glutes and gave me some exercises to do. I am the most impatient person and after a week of exercises I didn’t feel any different so I saw another physio (sorry!) who basically told me the same thing and gave me the same exercises. I really was in denial about how serious it was. I spoke to coaches in the gym, chatted to other runners and did a lot of Googling but all the answers were the same.
It was the mental part I actually found the toughest to deal with. I have made so many friends through running and CrossFit and my social media is full of it too so I was always seeing and hearing about all these amazing runs and PBs. I just felt stuck and disconnected. I saw my GP as I really felt like I was struggling to cope. People were always asking how I am and telling me I should ‘do this and do that’ and eventually I just got fed up talking about it. My GP didn’t really help me; she referred me to her physio friend but I didn’t go.
At the same time, Jonny had referred me to see Mariam for Clinical Pilates and it was during my consultation that she suggested some short term medication for my nerve problem in my right leg. I went to another GP for this and as well as giving me the medication, he was really keen to get me back running and to the gym so he referred me for an MRI.
What happened after your MRI?
I was really lucky in that I got an MRI pretty quickly. A few weeks after the scan. I received a letter with a hospital appointment but with no other information. Frustrating and worrying. I thought well there must be something not quite right and because of my problem with patience, I called the GP and asked him to give me a brief overview of the scan. He said he could see a disc bulge and I should continue doing my physio exercises until my appointment (with the consultant). I had just started with the Clinical Pilates class so I let Mariam know the issue and she tailored exercises for me until I found out more about the problem.
How did you feel after speaking to the neurosurgeon?
I remember getting a phone call from a surgeon in the spinal unit and it made me feel sick. I actually don’t remember what he said to me as the idea of back surgery just terrified me. I wasn’t exactly in crippling pain so the idea of surgery just felt a bit extreme to me. This was something I definitely wanted to avoid. I just really trusted my physios and they really believed I could get better without it. I didn’t feel that my pain was bad enough for surgery – for me this was the last resort.
At the appointment, the doctor went through my scan which I found fascinating. I actually felt a bit of weight come off my shoulders when I could physically see the issue. It had been hard to accept when I didn’t know for sure what the problem was but there it was clear in front of me. She then told me that they would do surgical intervention if I was getting sharp pains down the top of my leg. I told her I had that a few weeks before but it had been getting much better. We left it at that and I was told to get in touch if anything changed.
I had so many conversations with my boyfriend, my parents (and myself) and decided that it wasn’t the end of the world if I couldn’t run 50 miles or couldn’t deadlift 100kg as long as I could stay active. I would just scale back what I was doing.
You've spent the best part of a year doing some serious rehab with Clinical Pilates. In your own words, what is it and how did it help you?
I had done a bit of Pilates before as I’d read and heard it was good for runners. It was one of those things I struggled to stick to because I never left the class feeling like I’d worked hard and my issue with patience didn’t help. When I told my boyfriend about it he signed me up for 6 weeks because he knew I’d have to go if he paid for it! I noticed a huge difference after these 6 weeks.
It is basically pilates but physio-led so your exercises are all tailored to whatever issue you may have so we’re all doing something different generally. It’s a small class but everyone is in the same boat and really friendly. Mariam checks in with you regularly during the class and pushes you when you’re ready but also changing exercises if something isn’t quite feeling good.
I expected my exercises to all be lower back focused as that’s where my injury was but actually they’ve been full body movements. As well as having a stronger back, I feel stronger and much improved posture. Mariam also spent some time working on my legs, particularly my right leg as the nerve had been affected and I had limited movement and very little strength.
Eventually you returned to CrossFit and trail-running. How long did that take from when you first injured yourself?
I was always doing a scaled back version of CrossFit and a bit of trail running while I was injured but I was mindful of undoing my hard work. It was important to me mentally that I kept in touch with coaches/ friends in the gym and my runner friends.
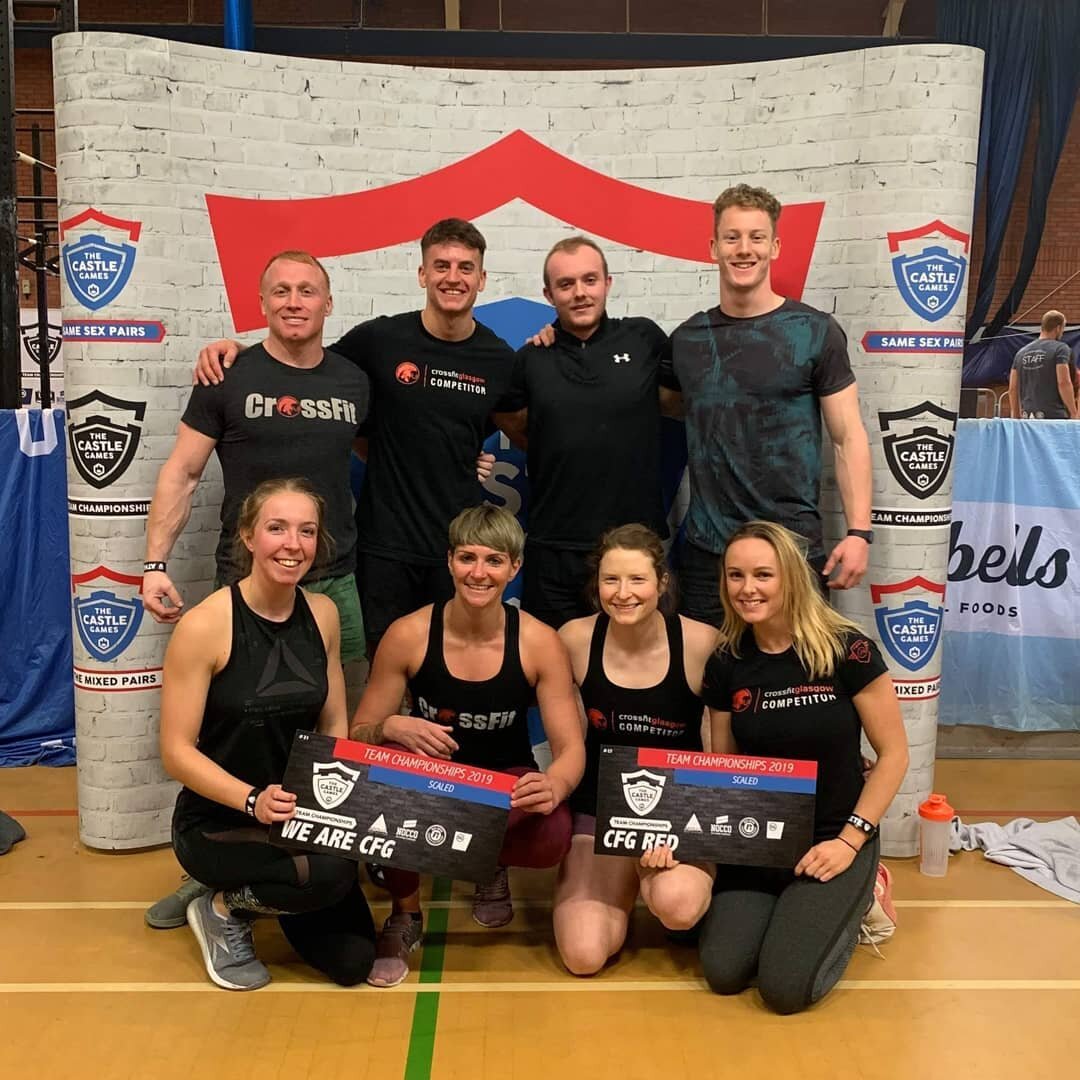
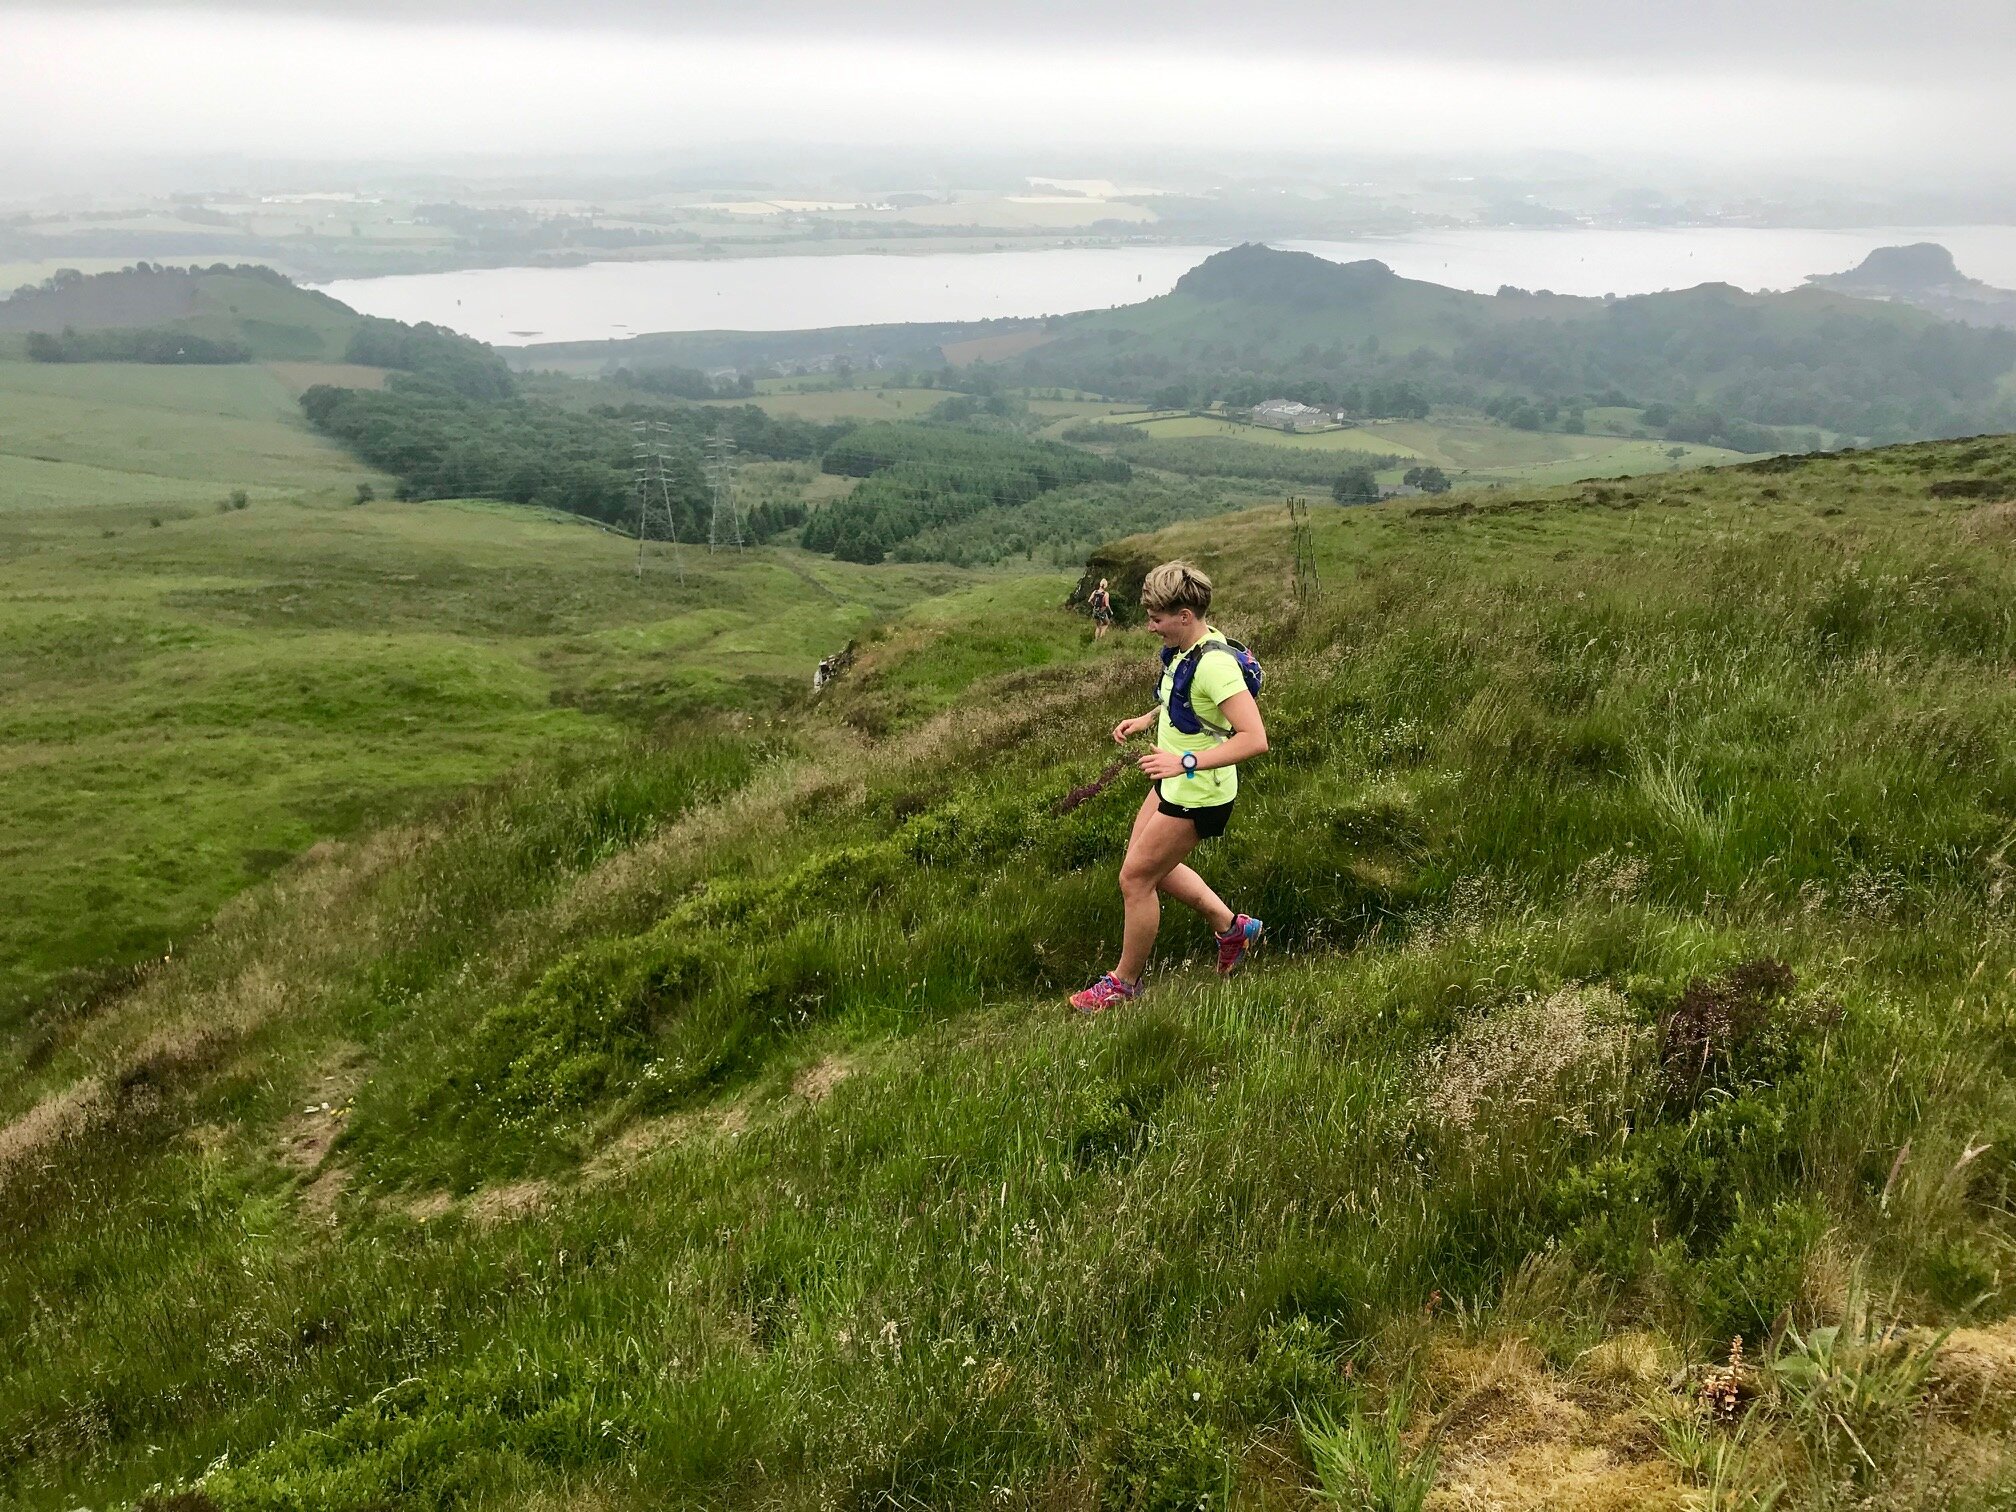
I accepted my injury in May 2017 and started Clinical Pilates in the October. In May 2018 I was a more confident runner so decided to train for a race following a plan, building up in distance and I finished the Mad Hatters Half Marathon and the Glentress Half Marathon with a PB and no back or leg pain. Not quite back at ultra marathon distance but I’m actually enjoying the shorter runs at the moment. In June 2018 I started back at CrossFit and noticed that I’m better at a lot of the movements as I actually use my back and core as I should. I’m always conscious of loading too much weight on bars and I know certain movements still aggravate my back but I know when to stop and I just need to gradually build my strength back up. I was asked if I’d like to be part of a team from the gym for a CrossFit competition, I said yes why not I can try and we finished in 3rd place with no back pain!
Most people seek the "quick-fix" or miracle cure. What advice would you give them?
Your back is such a major part of your body so decisions on surgery should never be made lightly. Unless a professional is telling you there is no other option, I would encourage people to commit to the exercises and rehab, spend less time being sedentary and stay active by doing anything you find fun.
Working through this injury has taught me so much about my body and my lifestyle as well as making me a better runner and CrossFitter. This is all coming from the most impatient person!
SEEKING GUIDANCE? WE CAN HELP
Our experienced team at Physio Effect Glasgow are specialists in back pain and have helped 1000s of people recover and get back their quality of life. We talk the talk and walk the walk and will combine exercise based rehab such as Clinical Pilates with highly skilled hands on therapies to ensure you get the best possible treatment.
Most importantly we will listen and work with you in partnership to identify your specific issues and formulate an agreed unique treatment plan. We will relieve your back pain and give you long term self management strategies to strengthen your back and reduce the chance of pain relapse.
Please contact us if you have questions about our physiotherapy and Clinical Pilates services. Book an appointment and get your journey to back pain recovery under way.
Back Pain - A Self Help Guide
Back pain is very common. It’s frustrating at best and debilitating at worst. This guide will help you develop strategies for long term change to get rid of back pain and stay pain free long term. No magic bullet or ‘Guru’ advice here, just sensible and actionable tips allowing you to take control and start your journey to a pain free back.
Written by Daniel Wray (BSc Hons Physio/ PG Dip Sports Physio)
Back Pain?
We’ve all been there…..
Why does my back hurt?
Back pain is common, if you’re reading this i’m sure you have suffered at least one episode of back pain in your lifetime and in all likelihood more than that. It’s frustrating and restricting and can have a huge negative impact on your quality of life.
There are many reasons for back pain and unfortunately it’s rarely a quick fix. The most common form of back pain is often referred to as mechanical pain which is an umbrella term describing dysfunction in the soft tissues and joints preventing or impeding normal function. This may be stiffness, weakness, muscle shortening, joint wear and tear or any combination of these plus other factors.
In the absence of acute trauma back pain rarely appears suddenly or overnight and for most it’s a gradual and cumulative process related to lifestyle. Our modern lifestyles are simply too sedentary with too many hours spent in static positions meaning our joints and muscles don’t get the movement stimulus they need to stay flexible, hydrated and healthy.
For many people what began as a minor back ache or stiffness spirals steadily into chronic pain and disability and it can seem like you’re stuck in a repetitive cycle of injury and pain. We try to make changes but the daily grind means we continue to rack up hours of sedentary, static, and repetitive behavior trapping us in this negative cycle. The pain can force further lifestyle changes meaning less movement and exercise which reinforces the negative cycle and it can seem impossible to break free. Having a dodgy sore back slowly becomes the norm and we just accept it and carry on.
It’s not all bad news - here’s what you can do…
It all seems pretty grim and depressing right? Well the good news is that for the most part the majority of back pain, even when extremely painful and debilitating, is not due to serious pathology and it can get better. There are of course exceptions to this and we would always advise you seek advice from a qualified health professional if you have serious concerns about your back pain.
The bad news, if you look at it that way, is that the fix is rarely instant and usually requires significant effort on your part to make lifestyle changes and prioritise time every single day to look after your back. Of course if you Google hard enough (we’ve all done it) you will find some ‘Guru’ promising an overnight fix in exchange for a significant amount of your hard earned cash but truthfully the magic bullet doesn’t exist. Below we have listed some strategies you can implement to make a real difference.
6 self help strategies to help manage back pain:
1- Keep moving. Complete rest is not going to help and generally increases stiffness, pain and fear avoidance behaviors. Of course we must adapt our movement depending on the level of pain and there may be a need to avoid certain postures, positions or movements for a short period of time which is fine. I don’t recall any scenario with a patient where we couldn’t find at least one simple movement they could do to keep some gentle activity in their back to promote healing and relaxation while building confidence that they are not going to stuck in pain forever. Experiment with different movements and stretches (see below video) gently and slowly and see what you can manage comfortably and that will give you a starting point which you can gradually add other movements to as your pain allows.
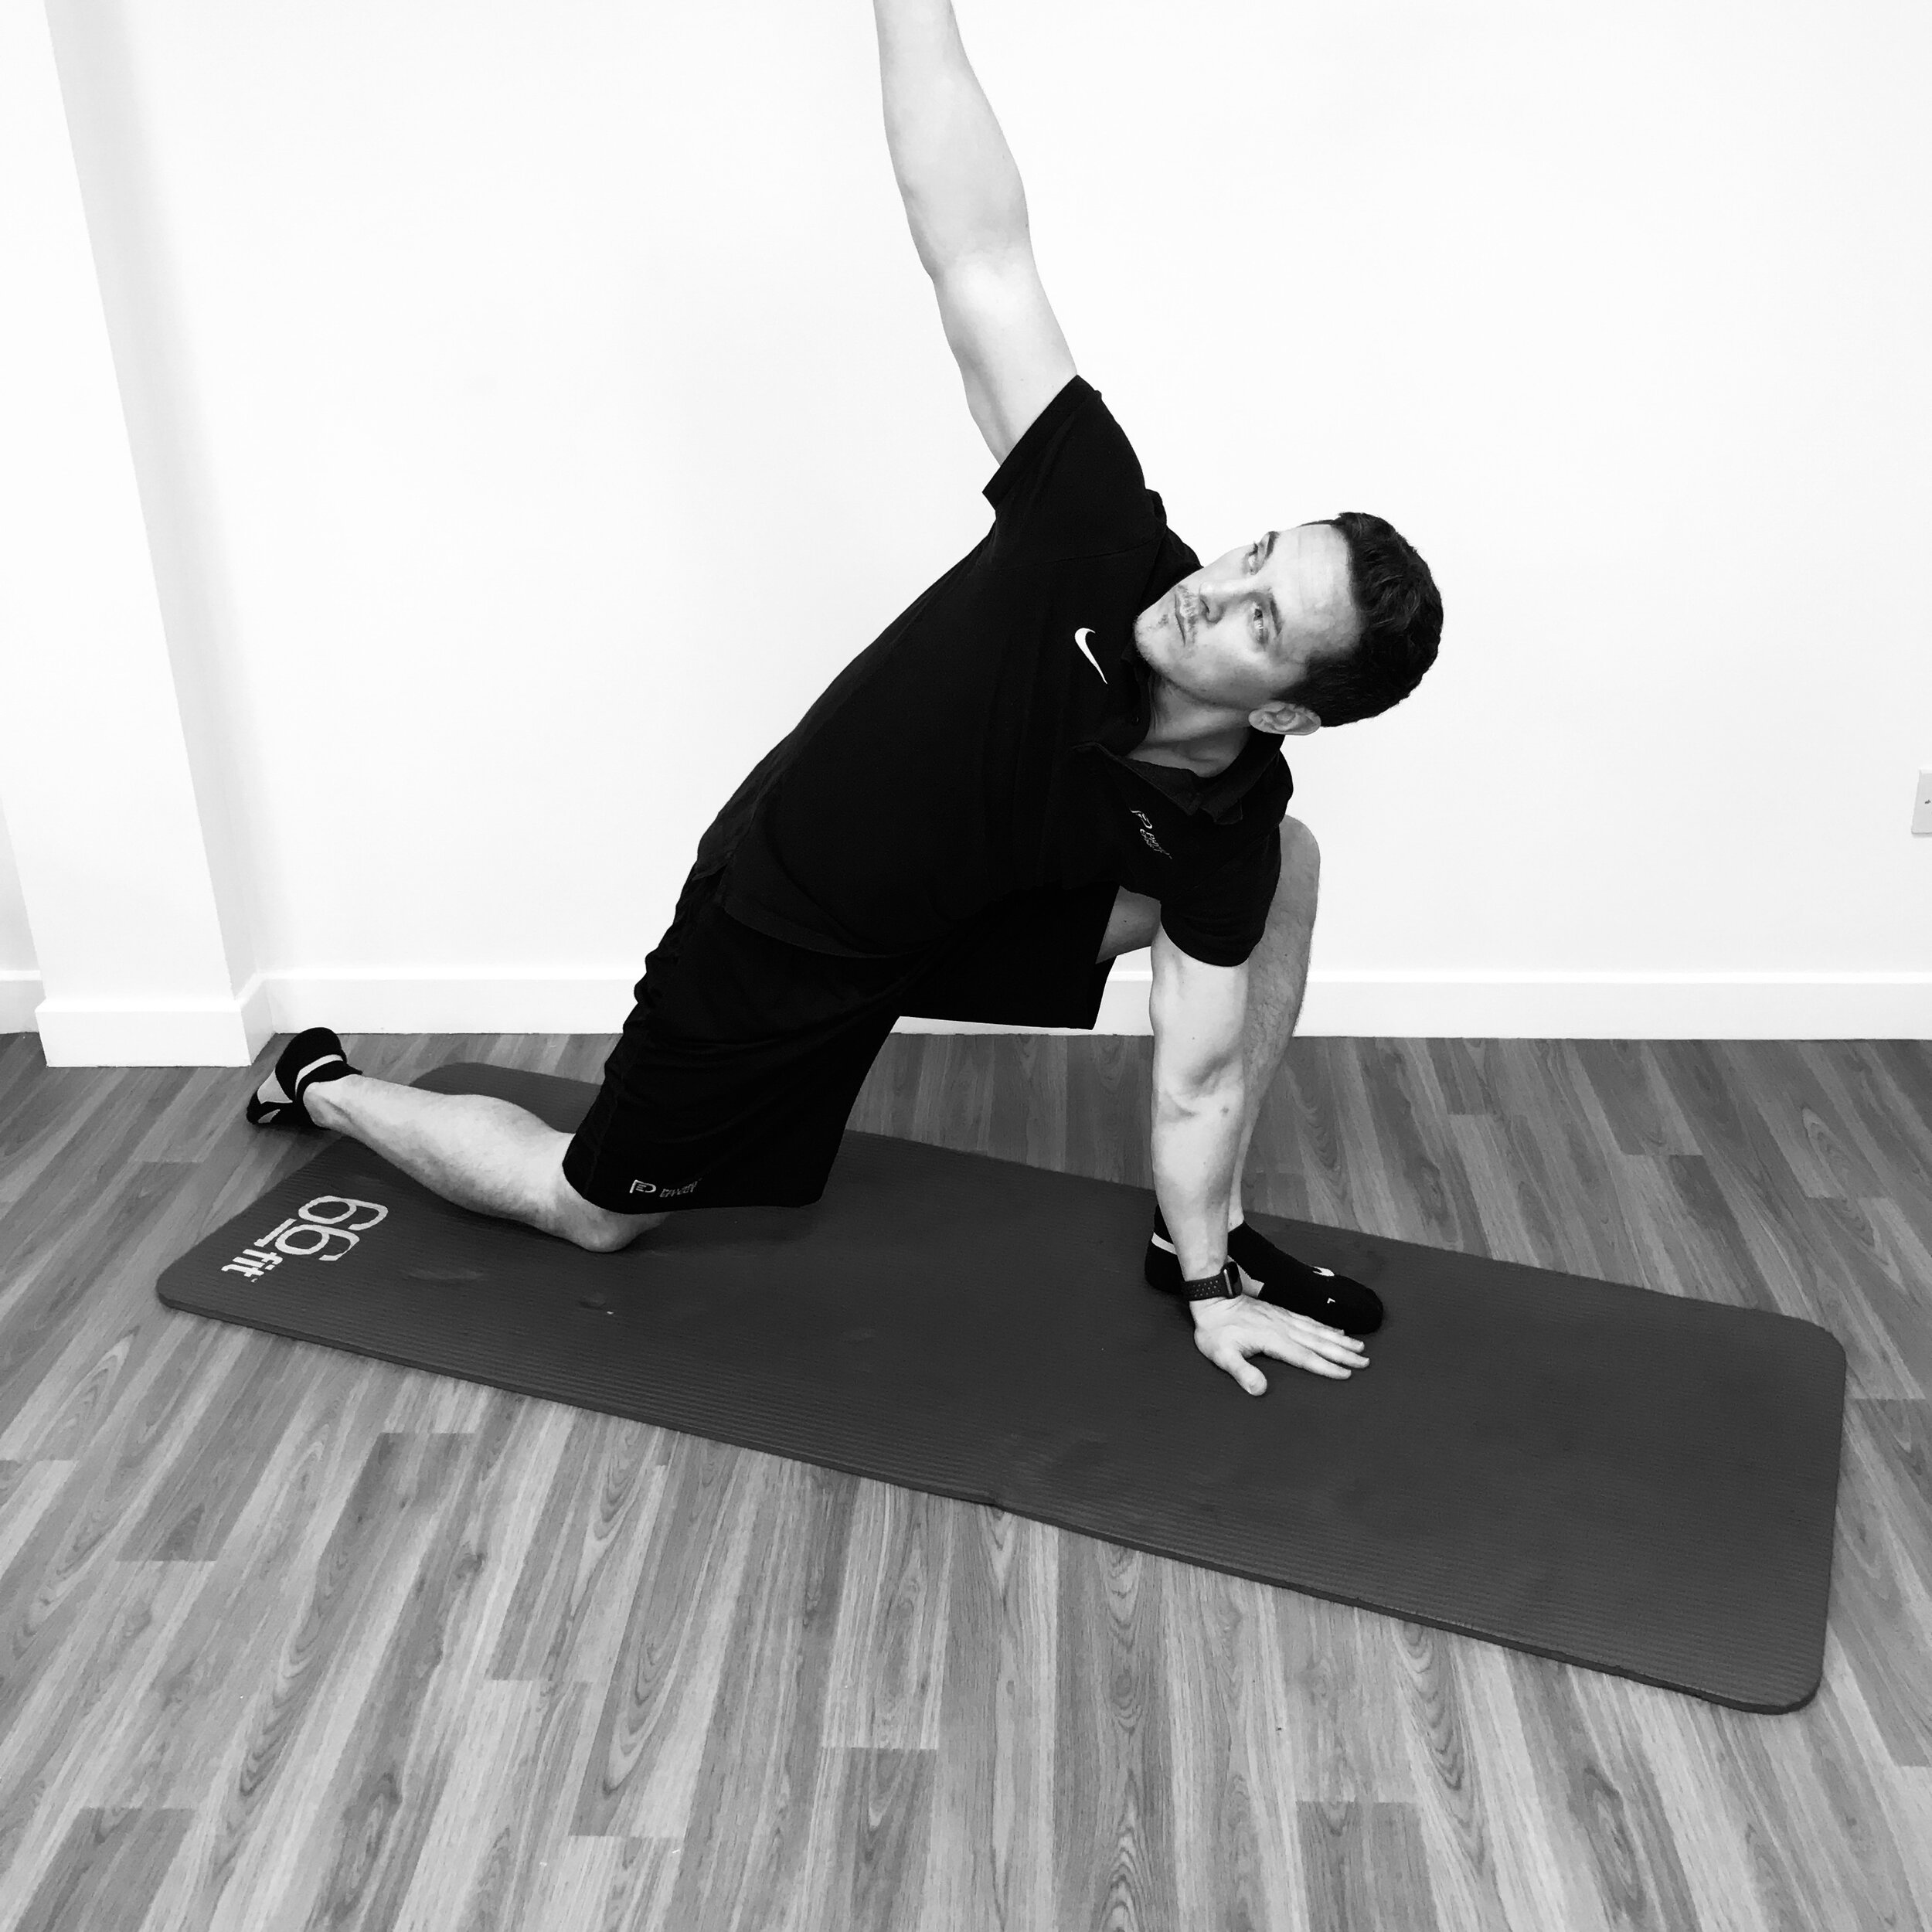
Lunge with arm and spine rotation
2- Establish routine & be proactive not reactive. You need to act consistently and with purpose. Don’t wait until your pain is crippling to decide you need to try some exercises to relieve it. Even if you’re feeling okay find a rhythm that allows structured gentle movement and exercise to be part of your daily routine ideally multiple times a day. Frequent exercise micro breaks to interrupt static postures will reduce the build up of pressure and stiffness and are more desirable than trying to undo hours of sedentary behaviour with a single bout of exercise. Think 2-3 minutes activity every hour rather than a 30 minute blast at the end of the day. Use a timer to remind you.
3- Accept responsibility & seek guidance. It is your body and your back and you need to find a way forward, nobody can do it for you. Don’t pass responsibility onto any therapist (no matter what some ‘Guru’ promises) and assume that by chucking money at it that will be enough to fix you. Do find help from someone you trust who has your best interests at heart and involves you in all aspects of any treatment or rehab plan. Passive treatments such as massage, acupuncture, and manipulation can be great for pain relief but long term are only as good as the agreed exercise plan and responsibility you take in changing your lifestyle. Be wary of any therapist promising to fix you but providing no education or prescription of exercises you can use to help yourself.
4- Exercise for fun. Find a form of exercise you genuinely enjoy and commit regularly to it. Don’t drag yourself to the gym if you hate every minute of it, exercise should be enjoyable and a way to relax your mind as well as your body. Try new things and see what you enjoy. Ultimately your long term compliance will wain if you pursue something because you feel you have to rather than because you really want to.
Back Strengthening - Extensions on the GHD machine
5- Manage stress. One of the biggest silent assassins to any life goal is high stress levels. You can have all the good intent in the world in changing lifestyle and exercising more but if you are under high levels of stress you can easily sabotage any progress. I realise this is a broad blanket statement and stress management is a big topic beyond the scope of this article but at the very least be aware of how it contributes and can damage your progress, then start to look for solutions.
6- Be patient. You won’t change things overnight and chances are you will have many peaks and troughs in your recovery. This is normal. Try to be patient and remember a backward step with increasing pain symptoms is not the end of the world, try to continually adapt but keep taking positive actions even when you feel frustrated and annoyed. If you follow the steps above you should see over time the more severe episodes of back pain decrease while your ability to manage and recover from any acute episodes will improve.
Picking Exercises - Where to start?
It’s imperative to get moving ASAP with pretty much every kind of back pain or injury but the exact type of exercise or stretch you choose to get started with will differ depending on your level of pain, stiffness and disability. Below is a back mobility exercise flow covering a multitude of different exercises and positions. Try it but STOP if you feel any specific movement aggravates your pain. At most a slight awareness of stiffness or aching is permissible but do not force anything and take it slowly and gently.
You may decide that only a couple of these exercises work for you in your current situation and that is fine, identify what you can do and exclude what you can’t. That will be your start point and I would advise doing these exercises a minimum of 3 times per day but ideally more frequently at least initially. As you become more comfortable hopefully you can add more of the movements to your repertoire.
Long term most people will require a combination of strength and flexibility exercises but it is important that these are specific to your own individual requirements. The routine below is provided as a starting point but is not all encompassing so please seek advice on your own needs but do use these stretches to try and initiate positive change through movement. The exercises are broken down individually in the pictures below the video & you can download a PDF cheatsheet to keep for your reference at the end of this blog.
Back Mobility Flow Video:
Seeking Guidance? We Can Help
Our experienced team at Physio Effect Glasgow are specialists in back pain and have helped 1000s of people recover and get back their quality of life. We talk the talk and walk the walk and will combine exercise based rehab with highly skilled hands on therapies to ensure you get the best possible treatment.
Most importantly we will listen and work with you in partnership to identify your specific issues and formulate an agreed unique treatment plan. We will relieve your back pain and give you long term self management strategies to strengthen your back and reduce the chance of pain relapse.
Please contact us if you have questions or to book an appointment and get your journey to back pain recovery under way.
Exercise Breakdown:
Here is a breakdown of each of the exercises included in the back mobility flow video. These are available in a handy PDF download from the Subscription box at bottom of the page.
Exercise 1
Cat & Camel Stretch
Begin in all 4s position. Cat posture - Allow your spine to soften and hollow along its entire length. Tilt your tailbone gently to the ceiling. Relax you lower back, rib cage, shoulders and neck
Camel Posture - Arch your whole spine slowly and gently to the ceiling in one large ‘C’ shape. Tuck your tailbone between your legs
Hold each position for around 10 seconds. Transition from one to the other 6-8 times.
1- Cat Pose
2- Camel Pose
Exercise 2
Childs Pose to Cobra
Begin in all 4s position. Childs pose - Gently sit bottom back towards heels as far as is comfortable opening knees and hips softly and as required
Cobra Pose - Allow weight to come forward and lower hips gently to floor. Stay relaxed in hips and lower back and if required bend elbows slightly so that hips can rest in contact with floor.
Hold each position for around 10 seconds. Transition from one to the other 6-8 times
1- Childs Pose
2- Cobra Pose
Exercise 3
Childs Pose Side Bend
Begin in Childs Pose - Walk you hands around to one side into side bend aiming for at least a 45 degree angle, you should feel a good stretch down your side. Hold 20-30 seconds.
Walk hands around in same way to other side and again hold 20-30 seconds in side bend.
Repeat 2-3 times on each side
1- Childs Pose
2- Side Bend Right
3- Side Bend Left
Exercise 4
Lunge Hip Flexor Opener
Begin in Lunge position. Gently engage your lower tummy muscles and tuck your pelvis in. Aim to feel a stretch in the front of your hip and top of thigh
Gently engage your buttock muscles and lean slightly forward taking care not to arch your lower back
Hold the position 30-60 seconds. Repeat 1-2 times left and right
1- Lunge Hip Flexor Opener
2- Lunge Hip Flexor Opener - Forward Lean
Exercise 5 - Part 1
Lunge Hip Opener with Alternate Arm Rotations
From Lunge position reach hands forward and rest on floor beside front foot. Take outside arm and reach under and between legs ‘threading the needle’ holding for a few seconds
With the same arm rotate outward and upward toward ceiling trying to get arm to a straight vertical position, hold for a few seconds then return to ‘thread the needle’
Repeat this 10 times
1- Lunge Position Hands Forward on Floor
2- Lunge Position Hands Forward ‘Thread The Needle’
3- Lunge Position Hands Forward - Rotate arm vertically reaching for ceiling
Exercise 5 - Part 2
Lunge Hip Opener with Alternate Arm Rotations
After completing Part 1 of this series stay in the same position but extend out your back leg as far as is comfortable
Take inside arm now and rotate upward to the ceiling trying to achieve the straight arm vertical position, Hold for a few seconds
Bring the same arm down and with bent elbow drive your elbow towards the floor down the inside of your shin. Hold for a few seconds then rotate back to the vertical arm position
Repeat this 10 times
4- Lunge Position Extend Back Leg
5- Lunge Position Inside Arm Rotate to Ceiling
6- Lunge Position Inside Elbow Drive to Floor
Exercise 6
A-Frame Walk to Squat
From the all 4s position drive your hips into the air with straight knees and gentle lower your heels towards the floor into the A-Frame (it does not matter if you can’t fully extend knees or reach the floor with your heels). Hold for 10 seconds feeling stretch in back of legs
Keeping hands on floor slowly walk feet in towards hands and slowly sit down into a squat, hold for 10 seconds
Walk back to A-Frame position and hold for another 10 seconds
Repeat 4-6 times
1- A-Frame Position
2- A-Frame Walk to Squat
3- A-Frame Walk to Squat 2
4- Finish in Squat
Thank You
Thank you for taking the time to read this post, we sincerely hope that you find it useful and can use it to implement some positive changes and reduce your back pain. Take your time and work at your own level but be persistent and try to gradually improve on your own baseline.
Please download your own FREE PDF Cheatsheet to keep and to help with your practice and share this post with anyone who could benefit. If you have any questions or comments please just ask we would love to hear from you. Stay healthy and move well.
Animal flows - What, How and Why?
Animal flows are a great addition to any exercise plan, warm up routine or injury prevention plan. Learning to move like a monkey, frog, or bear helps to build full body strength, mobility and motor control which in turn will make you a more awesome human and less prone to injury. This blog with video tutorials will explain what these movements are, how to utilise them and why you should should be doing them
What are Animal Flows?
Animal flows essentially refer to movement and exercise patterns where we imitate different types of animals such as bears, monkeys, frogs or lizards. Moving in these patterns can be very challenging, especially for the stiff & inflexible among us, but can also be really fun & provide significant benefits.
Deep Squat
Practicing animal flows can help improve strength, flexibility, mobility and overall motor control which in turn will help to make you a better functioning human and less at risk of injury. These movements can really challenge us in unconventional ways demanding our joints and muscles learn to control movement in patterns and ranges we would rarely otherwise practice. They can provide a great way to warm the body up in preparation for other forms of exercise or can even act as a stand alone training session. Once you have tried some of these movements for a few minutes you will understand why!
Where do I start?
As with all areas of training and exercise when attempting something new or different our advice is always start slow and work safely within your own levels of capability. Never push through pain or injury and if in doubt about whether this is appropriate for you please seek advice from a qualified professional.
Very few people will be able to perform controlled animal flow movements perfectly or even well at the beginning. When incorporating these kinds of exercises with my patients it’s essential we first establish their base level where they feel safe to practice but also feel that it is challenging. I would advise starting with getting comfortable in the static positions required as the foundation for the movement. In this post we will look at 2 positions - Deep Squat & A-Frame (Downward dog). These are the foundation starting postures for progression onto the animal movements monkey, frog and bear.
Deep Squat
The squat is a great foundation exercise for strength and mobility in the lower limbs and yet for so many people it is a real area of weakness and frustration. A lot of us slowly lose our ability to sit into a deep squat mainly through neglect and lack of practice combined with our static and sedentary western lifestyles. We become weak, stiff and tight and can no longer control the range of motion required to allow a deep squat. We rarely challenge ourselves to sit into a deep squat position let alone spend time exploring and improving on our range and control in this position. So first things first lets get a measure of your baseline squat function - check out this video and see how you get on.
It may take weeks or months of work to improve your squat mobility and that’s okay. For a more detailed look at improving your hip and back mobility please click the links to see our previous blog posts on these areas. You can use these routines alongside your deep squat holds to improve your squat function.
If you feel up to increasing the mobility challenge of your deep squat lets check out this next video requiring some active hip rotation movements at the bottom of the squat - a great way to improve your range of motion and strength.
I would recommend slowly building these exercises into your routines, aim for 20-30 second rounds initially performed for 3-4 sets thereby accumulating 2-3 minutes in the deep squat. Try this at least 2-3 times per week. Long term the idea is to become comfortable spending longer periods in the deep squat and find it relatively easy to perform movements from this position. Try to build up to 5 minutes total in the deep squat per day of practice over several weeks.
Monkey & Frog Mobility
These animal flow progressions are suitable once you have a comfortable squat allowing you to sit at least to parallel depth without the need of hand support. Don’t worry if you’re not there yet, keep practicing the squat, back and hip mobility exercises and you can move on to these once you feel confident.
These exercises are difficult and physically demanding but the pay off of regular practice will be improved squat mobility, increased lower limb strength and motor control with an associated reduced injury risk in these areas. Give each of these a try and see how you get on.
Add these to your regular practice at least 2-3 times per week initially
Begin with 20-30 second rounds aiming to build up to 1-2 minutes or longer
Look to accumulate time in the positions - Try a 5 minute timer & while stopping for breaks when required, try to spend as much time actively moving in these flows
Ideally we want to develop a relaxed freedom of movement where you can drop comfortably into a deep squat and easily move through monkey and frog patterns. You can mix and match the movements to create variation in the flow and challenge your strength and mobility through mixed planes of movement. Don’t expect overnight success but as with all training with hard work and consistent practice you should be able to improve allowing you to move better and feel better.
A-Frame (Downward Dog)
This stretch position is probably best known in yoga circles, most people will of at least heard of the Downward Dog. Another term we will use is A-Frame which refers literally to the fact we are trying to get our body into a position whereby it looks the a capital letter ‘A’. This position is another staple in many exercise forms and for good reason, it challenges the flexibility and strength of our body in many areas. The shoulders, back, hips, knees and ankle joints will be tested and for many people deficiencies in strength and range of movement will limit the quality and range available in attempting this position.
For many of us just attempting this posture will be tough and tiring. A lot of you will be feeling significant resistance in the backs of the legs (hamstrings and calves) and through the shoulders and upper back. Build slowly and increase the time spent in the stretch as you feel able, again looking to improve on your own current baseline level. Before attempting bear movements from this position we can work on a couple of simple variations which are shown in the video - slow marching on the spot and active shoulder extension pushing the head and shoulders through. Let’s give it a try and see how you get on.
Bear Movement Flows
The bear crawl can be utilised as a full body exercise to develop strength, flexibility and control in many areas. It is challenging and will take time to develop the skill and movement control required to perform it well but as with all these exercises your only goal should be to steadily improve on your own current baseline level. Once you have developed some comfort and control with the A-Frame stretch the first Bear Crawl movement we will try is with straight arms and straight legs as demonstrated in the video below. The key here is control so take your time and just do what you can, even if it’s only a few seconds initially, you can build on that. Let’s give it a go.
In the next video we demonstrate a number of bear crawl variations to give you some more options to explore. Depending on your own levels of mobility and strength you may find some options easier and others harder but it is great to play around and explore a variety of positions to find any weaknesses or restrictions and ensure a variety of stimulus is achieved. The key is to safely work on your own issues and don’t be afraid to explore positions that are challenging as long as you do so gradually.
Add these to your regular practice at least 2-3 times per week initially
Try:
Straight arms & legs
Bent arms, straight legs
Bent arms, bent legs
Straight arms, bent legs
Begin with 20-30 second rounds aiming to build up to 1-2 minutes or longer
Move forwards, backwards and sideways
Look to accumulate time in the positions - Try a 5 minute timer & while stopping for breaks when required, try to spend as much time actively moving in these flows
Summary
In summary adding animal flow movement practice into your regular exercise routines or habits can have significant physical benefits by helping to improve full body strength, mobility and motor control. It is a challenging but fun way to mix up your normal exercise routines and pushes your body to explore a variety of joint postures and positions that are not routinely trained or strengthened. This variety of stimulus will help to ensure strong and healthy muscle and joint function. Enjoy exploring and playing with these movements and ultimately you can learn to move better & feel better.
Thank You
Thanks for taking the time to read this guide, we hope you find it useful. Please share with anyone who might benefit and if you have any questions comment and let us know. Please subscribe to our mailing list to receive more interesting and useful blogs. Good luck and remember to move better & feel better
Our simple 7 point strategy to keep you injury free in your new found love of running!
New runners are often the most vulnerable to injury. Your body needs time to adapt to the new loads and demands that running puts on your tissues and joints. This blog provides expert advice on preventing overload and injury through planning, awareness and patience as well as tips on how to maintain tissue strength and flexibility to minimise injury risk.
I Can’t believe it, I’ve only just taken up running and I’m injured already!
Unfortunately it is an all too common occurrence for us have a disappointed runner sat in front of us for assessment of a new injury from recently taking up running. More recently with the restrictions on the forms of exercise we can do during the Coronavirus pandemic, combined with the excellent weather during that period, this has become very common with many more people trying out and enjoying more outdoor running.
It has been shown that novice runners face a much greater risk of injury than recreational or competitive runners. This is due to a combination of overload in their tendons and muscles as well as technique and fatigue issues that unduly overload certain areas.
When you are running, multiple times your body-weight in the form of ground reaction force is produced on impact with the ground. This has to be absorbed and controlled by the tendons, muscles and joints in the legs. Over time and with progressive increases in running mileage and duration, the tendons in the lower limbs adapt and strengthen to this, making them less prone to injuries such as acute muscle tears or tendinopathy. Running technique and fitness are also shown to improve which can decrease the adverse and destructive repetitive loading on the joints as well as improve running economy.
The most common injuries we see in new runners, or those runners returning from a lay off tend to be at the front of the knee in the form of a patellofemoral joint irritation (under the knee cap) or patellar tendinopathy (the tendon below the knee cap). It is also very common to see a tear of the calf muscle or pain at the achilles tendon in the form of a tendinopathy. In a runner these are all overuse and overload issues and some of them depending on the severity can result in a lengthy time off running to settle and fix them.
What can I do to prevent these issues?
Most running issues and injuries are really preventable as they are nearly all as a result of overuse. It has been suggested that between 60-70% of all running injuries can be attributed to training errors. Novice runners are the most prone to injury but they are also a group who can easily adapt their training to limit exposure to common injuries and “start as the mean to go on”. Here are 7 simple suggestions for someone who is new to or has recently started running to lessen their likelihood of developing a running related injury.
Be realistic about your current running experience and plan your training to be conservative in the first few weeks with progressive increases in your distance by 10-15% per week.
Initially give yourself a day of rest after each run to allow any tendon or muscle overload to recover a little before your next run.
Don’t be hesitant to adapt your training to something non-impact based like cycling or take a rest day if you feel a niggle in your knee or achilles/calf/foot. This one day of change or rest from running impact may be enough to stop you causing a worse problem and it will likely result in a much shorter time off running.
Do adequate recovery work between runs to release tightness and restore normal muscle and joint range. This can include stretching, soft tissue release such as self-massage or equipment assisted massage like foam rolling.
Strengthen the muscles of the lower legs and core to help prevent muscle tears or tendinopathy and increase the muscles load bearing capabilities
Wear running shoes that you find comfortable. Shoes that do not feel comfortable when running such as when the toes feel squished or the cushioning feels too much or too little is likely to result in you offloading any discomfort and then abnormally loading your soft tissue and joints. Don’t get caught up in the marketing and hype of certain shoes or brands; try on a number of shoes and brands and go with your gut instinct as to which feel most comfortable to you.
Most of your runs should be at easy pace. With greater speed comes greater peak forces and also fatigue. You cannot expose your body to this too often otherwise you will acutely overload the legs and injuries may arise. I’d recommend a 2:1 ratio of easy to hard efforts, where if you do 3 runs a week, then 2 of them should be at your easy pace and one of them at a moderate to difficult effort. For an easy pace you should feel like you could speak normally or if you have a heart rate monitor watch, your heart rate should be at or below a value of 180-your age (eg. 180-36yrs = easy pace of <144 beats per minute). For the remaining session this can be ran a little faster or include variations in speed such as intervals. This approach will also give your musculoskeletal system and your cardiovascular system a chance to adapt well to your running.
Home Exercises to Try - Stretch, Strengthen & Release
Below are some basic strengthening, stretching and muscle release exercises that will benefit most people starting out running. Always work within your own comfort limits on these as they will improve gradually over time and you want to take a consistent and not a torturous approach that you dread the next time. If you can only do part of the movement or a modified / reduced range then that is fine, just do what you can. Try them twice a week to begin with and you should gradually start to feel better and move better.
Exercise 1 and Exercise 2 below are video links to some self-administered soft tissue massage and release for the thigh and calf muscles respectively
Foam rolling technique for the outer thigh
Calf release using a ball
Exercise 3
Couch Stretch
In a lunge position have the top of the foot or ankle on the left leg back against a wall or your couch making sure to have some padding underneath the knee left knee.
Pull your lower stomach muscles and belly button inwards while also engaging or contracting the buttock muscles on the left side and imagine lengthening your left thigh bone and knee downwards toward the floor.
This should produce a stretch along the front of the left thigh and up to the front of the left hip. Make sure to keep the tummy in and buttock contracted as this will keep the stretch focused on the front of the thigh and hip and stop you overarching your lower back as can bee seen in picture 2 below.
Hold this position for 1 minute and swap to the other leg. Repeat twice, making sure to ease yourself a little further into the stretch each time.
1- Couch Stretch
2- Over Arched Couch Stretch
Exercise 4
Calf Raises
Begin with the ball of the foot on the edge of a step. Using your calf muscles lift your weight up, raising the heel above the level of the step. (Image 1)
Slowly over 2-3 seconds lower the heel below the level of the step (Image 2)
Repeat this movement for 2 sets of 8-15 reps on each side depending on your strength.
If this is too difficult to begin with, you can do the same movement using both feet on the step and aim to progress to using a single leg over a number of weeks.
This movement can also be performed with the knee bent the entire time. This will primarily strengthen the lower portion of the calf (soleus muscle) which is also important in running (Images 3 and 4 below)
1. Calf Raise
2- Calf Lowering
3. Knee Bent Calf Raise
4. Knee Bent Calf Lowering
Exercise 5
Figure 4 Stretch
Begin by placing your left leg on the wall at 70-90 degrees of hip flexion (knee towards chest)
Place the right ankle just above the knee of the left leg and drop the right knee outwards
You should feel a stretch on the right outer hip and buttock
Hold for 1-2 minutes and repeat on each side twice
Figure 4 Stretch
Seek Help & Advice Sooner Rather Than Later
If you find yourself injured and unable to run it’s advisable to get your injury seen to and diagnosed as quickly as possible. Getting the right advice early with an injury will significantly decrease the amount of time you will have to take off from your running and it will likely decrease your levels of pain and the stress you experience associated with it.
At Physio Effect our therapists are experienced and highly skilled in advising and managing running related injuries and we will be able to help you reach a diagnosis and an understanding of your injury, including why this likely happened in the first place. We will be able to offer you advice on alternative forms of cardiovascular exercise as well as specific strength training to address your issue so you don’t feel like training has stagnated or regressed. All treatment plans can be time graded and clear to you, with milestones to achieve that not only address your current levels of pain associated with the injury but also the issues that may have contributed to you developing the injury in the first place.
Thank You
Thanks for taking the time to read this guide, we hope you find it useful. Please share with anyone else who might benefit and if you have any questions comment and let us know. Please subscribe if you would like to receive regular updates and advice on everything health and fitness related - Zero spam promise. Good luck and enjoy your running
Stiff back? Try our simple six step mobility routine
6 step mobility stretch routine to ease back stiffness and relieve back pain. Practice daily and you will see improvements in your range of movement and alleviate tension, stiffness and pain in your back.
Back Pain?
We’ve all been there…..
What’s up with my back?
We’ve probably all struggled with a stiff achy back at some point. The reality is that our modern lifestyles are often dictated by technology and we just don’t move enough to maintain healthy joints and soft tissues. If you truthfully counted up how many hours per day or week you spend in sedentary / static positions whether working from a computer, driving, or binge watching TV and social media what would that number look like? How would it compare with hours spent being active, stretching, moving and getting some exercise? Chances are you are in the majority with your results skewed in the wrong direction and sedentary hours winning hands down.
Even for those of us who do exercise regularly it’s often at the back of a long day of not moving much. There is often a misconception that working out a few times a week should be adequate to ward off the stiffness and tightness that comes from our daily work routines. While of course some exercise is better than none what most of us need to do is work harder at incorporating small amounts of varied regular movement into our everyday routines. Micro breaks of several minutes every hour are a great way to break up the day & if you can practice a few hip and back movements and stretches with these then that’s a winning combination.
Most of the back pain we suffer is not serious (but do ensure you have checked with a medical professional) even when the pain and stiffness reach fairly extreme and debilitating levels. It is most often a cumulative and gradual process which results in reduced joint and tissue flexibility and a lower threshold or tolerance for simple tasks.
You may have a sensation of achy stiffness and tightness in your back and feel the need to fidget and change position constantly just to get comfortable. Sometimes acute painful events occur as the result of a simple daily task like putting on your socks and you can feel trapped in a cycle of stiffness, pain and vulnerability.
These symptoms most often aren’t indicative of something seriously wrong but rather your body is sensing changes it doesn’t like and is giving warning that something needs to change. X-rays and MRI scans aren’t normally helpful, unless being used by a medical professional to exclude other suspected pathology, and more often than not can cause confusion and fear which can negatively impact behaviour and recovery.
What can I do?
All is not lost and it’s never too late to make positive change. For most of us that can be very simple in the form of developing strategies that encourage us to move more in our daily routines. Try these pointers:
Be positive and take action of some kind. Note anything that seems to help or has a positive effect on how you feel and work to develop that
Focus on what is within your control to change and don’t worry or get hung up on the things you cannot do or cannot change
Develop simple daily habits and routines that encourage an increase in regular movement, exercise, and stretching
If you plan on being static/sedentary for extended periods plan micro-breaks of 2-3 minutes at least every 60 minutes and include some walking and simple stretching movements
Try to find a physical activity or exercise that you enjoy and doesn’t feel like a chore as you are much more likely to perform it regularly and achieve a long term change
Consider other lifestyle factors where you can implement simple change - e.g. drink more water, increase sleep, meditate or practice deep breathing & reduce daily screen time usage.
Let’s get started!
Below is a mobility routine for your back of 6 different exercises performed as a movement flow to get you started. Always begin slowly and gently and work within your own comfort limits. If you can only do part of the movement or a modified / reduced range that is fine, just do what you can. Try them every day and perhaps even multiple times per day if you’re able and you will gradually start to feel better and move better. Ideally try the whole routine or you can divide it up into single exercises and see which ones you find give you the most relief but aim to practice all the movements every day.
Back Mobility Flow Video:
Exercise 1
Cat & Camel Stretch
Begin in all 4s position. Cat posture - Allow your spine to soften and hollow along its entire length. Tilt your tailbone gently to the ceiling. Relax you lower back, rib cage, shoulders and neck
Camel Posture - Arch your whole spine slowly and gently to the ceiling in one large ‘C’ shape. Tuck your tailbone between your legs
Hold each position for around 10 seconds. Transition from one to the other 6-8 times.
1- Cat Pose
2- Camel Pose
Exercise 2
Childs Pose to Cobra
Begin in all 4s position. Childs pose - Gently sit bottom back towards heels as far as is comfortable opening knees and hips softly and as required
Cobra Pose - Allow weight to come forward and lower hips gently to floor. Stay relaxed in hips and lower back and if required bend elbows slightly so that hips can rest in contact with floor.
Hold each position for around 10 seconds. Transition from one to the other 6-8 times
1- Childs Pose
2- Cobra Pose
Exercise 3
Childs Pose Side Bend
Begin in Childs Pose - Walk you hands around to one side into side bend aiming for at least a 45 degree angle, you should feel a good stretch down your side. Hold 20-30 seconds.
Walk hands around in same way to other side and again hold 20-30 seconds in side bend.
Repeat 2-3 times on each side
1- Childs Pose
2- Side Bend Right
3- Side Bend Left
Exercise 4
Lunge Hip Flexor Opener
Begin in Lunge position. Gently engage your lower tummy muscles and tuck your pelvis in. Aim to feel a stretch in the front of your hip and top of thigh
Gently engage your buttock muscles and lean slightly forward taking care not to arch your lower back
Hold the position 30-60 seconds. Repeat 1-2 times left and right
1- Lunge Hip Flexor Opener
2- Lunge Hip Flexor Opener - Forward Lean
Exercise 5 - Part 1
Lunge Hip Opener with Alternate Arm Rotations
From Lunge position reach hands forward and rest on floor beside front foot. Take outside arm and reach under and between legs ‘threading the needle’ holding for a few seconds
With the same arm rotate outward and upward toward ceiling trying to get arm to a straight vertical position, hold for a few seconds then return to ‘thread the needle’
Repeat this 10 times
1- Lunge Position Hands Forward on Floor
2- Lunge Position Hands Forward ‘Thread The Needle’
3- Lunge Position Hands Forward - Rotate arm vertically reaching for ceiling
Exercise 5 - Part 2
Lunge Hip Opener with Alternate Arm Rotations
After completing Part 1 of this series stay in the same position but extend out your back leg as far as is comfortable
Take inside arm now and rotate upward to the ceiling trying to achieve the straight arm vertical position, Hold for a few seconds
Bring the same arm down and with bent elbow drive your elbow towards the floor down the inside of your shin. Hold for a few seconds then rotate back to the vertical arm position
Repeat this 10 times
4- Lunge Position Extend Back Leg
5- Lunge Position Inside Arm Rotate to Ceiling
6- Lunge Position Inside Elbow Drive to Floor
Exercise 6
A-Frame Walk to Squat
From the all 4s position drive your hips into the air with straight knees and gentle lower your heels towards the floor into the A-Frame (it does not matter if you can’t fully extend knees or reach the floor with your heels). Hold for 10 seconds feeling stretch in back of legs
Keeping hands on floor slowly walk feet in towards hands and slowly sit down into a squat, hold for 10 seconds
Walk back to A-Frame position and hold for another 10 seconds
Repeat 4-6 times
1- A-Frame Position
2- A-Frame Walk to Squat
3- A-Frame Walk to Squat 2
4- Finish in Squat
Thank You
Thank you for taking the time to read this post, we sincerely hope that you find it useful and can use it to implement some positive changes in your daily routines. Take your time and work at your own level but be persistent and try to slowly improve on your own baseline. Please download your own FREE Cheatsheet to keep and to help with you practice and share this post with anyone who could benefit. If you have any questions or comments please just ask we would love to hear from you. Stay healthy and move well.
Childs Pose
Stiff achy hips? Tightness or weakness and what can you do about it?
Complete hip mobility routine to increase range of motion, reduce pain and improve function. Explore your own limitations and work to improve them with daily practice of this routine. Rid yourself of stiff achy hips and restore strong, healthy movement while improving athletic ability.
Why are my hips sore?
Deep Squat
Chances are if you’re reading this you have at least one hip and at some point it has given you trouble. Hip pain or stiffness has likely gotten in the way of your daily activities or restricted your ability to exercise on more than a few occasions. Our hips are at the centre of our body’s movement, so if they are functioning poorly then our ability to move freely and unrestricted will be compromised. Poor hip function can cause local issues around the hip but often contributes to pain and dysfunction in other areas like the lower back and knees.
The primary reason for developing hip pain for most people is a lack of movement and excessive sedentary behaviour, an all too common theme in our modern lives. You may workout regularly but chances are you still accumulate a lot of static postures through work or leisure and it’s unlikely that your exercise habits routinely explore and work the hip joints and muscles to anywhere near their full range or capacity. Though most hip pain is not serious and can be helped with the right exercise, we recommend consulting a health professional if you are worried or have persistent symptoms.
Modified Pigeon with Active Hip Internal Rotation
Am I Stiff or Weak?
Most likely it’s a combination of both. There is a lot of confusion out there around the terminology of flexibility, mobility and strength. Essentially flexibility can be considered passive and is about the soft tissues (muscles, tendons and ligaments) ability to temporarily elongate to allow movement through a range while mobility centers around our ability to move through a range of motion with control before becoming restricted. Mobility requires strength to control your flexibility.
Take for example someone who can squat 200 kilos to a parallel depth. This would obviously be considered strong in that range. However if the same individual cannot perform a body-weight squat below parallel depth without falling over or requiring support then we could say they have poor squat mobility. Passively if they can still achieve a deep squat position using some support we can say that they have reasonable flexibility in their soft tissues to allow this. Ideally this individual will work to improve their mobility so that they have better strength to control a greater degree of flexibility i.e they can drop comfortably and controlled into a deep body weight squat without assistance.
Should I Stretch or Strengthen
Again for most people the answer here is both but the key is identifying exercises that allow you to improve on both simultaneously whilst also offering functional value. Being inflexible is not great as your natural joint range of motion may be restricted and eventually painful. Inflexibility can lead to struggles with basic everyday activities like bending to pick something up or getting in and out of bed or your car. If you are weak then as discussed before you will not be able to control your flexibility or movement again making you more vulnerable to injury and pain.
This is where we need to be smart and specific in identifying our own needs and training with functional goals and targets in mind. You may have great flexibility and touching your toes is a breeze but when asked to do a basic lunge you lack the strength, balance and co-ordination. Conversely as with our example above you may have great strength for lifting weight but only in a limited range and the idea of touching your toes or sitting in a deep squat seems ridiculous. There is no single one recipe to fix all here but in essence mobility training will work both our strength and flexibility needs, we just need to identify the right exercises.
Try this mobility routine we have created to help identify your own personal problem areas. What to you find most difficult and are you struggling due to tightness, weakness or a combination of both?
Up for a challenge? Try this routine a few times and note the 3 exercises or positions which you find most restricted or difficult to perform. Now practice them consistently at lease 3 times per week for the next 4-6 weeks and see what changes and improvements you can achieve
At the bottom of this blog you can see each of the individual exercises that make up our hip mobility routine. Click the link below to download your FREE PDF copy of these exercises including some key tips .
Challenge to Change
For the vast majority of people our lives and even our exercise or training keep us moving in basic linear patterns (up and down). We don’t often (if ever) challenge our hips with lateral or rotational exercises and most people end up weak and unstable in these positions compromising their hip health and function. That’s why we designed these routines to explore and challenge these less common positions.
This next video demonstrates 3 more advanced hip mobility exercises that you can try. Please only attempt what you feel able and do not work into pain or through injury. Try the exercises in the video below and see how you feel. Chances are you will find this very tough but they are great exercises to improve overall hip mobility and function so if you feel able add them to your regular routine and with consistent practice you should see real improvements.
Exercise 1
Seated hip Internal / External Rotation
Begin in sitting leaning back on straight arms, knees and hips bent and relaxed shoulder width apart with feet flat on floor.
Gently and with control lower both legs to one side trying to touch the outside of one knee and inside of the other knee to the floor. Don’t worry if this range is too much, just work as far as you feel is challenging but comfortable. Return to start and repeat to opposite side.
Perform this movement for 60 seconds
1- Floor Sitting, Lean back on hands, high chest
2- Slowly Rotate Both Legs to one side
Exercise 2
Deep Squat Hip Internal / External Rotation (Advanced Option)
Begin in a deep squat. Ensure heels remain in contact with the floor
Slowly rotate one knee across mid-line aiming to touch knee to floor in front of opposite foot which should remain flat with heel on floor. Allow moving leg to rotate up onto toes. Static leg should remain open and avoid any inward collapse of knee/hip position.
Return leg to starting deep squat position and repeat with opposite leg.
Repeat with alternate legs for 60 seconds
1- Deep Squat, Heels on floor
2- Deep Squat- Active Hip Rotations
Exercise 3
Modified Pigeon
Begin in 90/90 hip and knee position. Gently rotate and square hips up facing forwards
Gently lean chest forwards through your hips and rotate slowly leaning over the forward knee
Option to gently contract front leg pushing knee into floor, hold 5-10 seconds and release. Repeat 5-10 times.
Work into and explore stretch for at least 60 seconds
1- Modified Pigeon 90/90 Sitting
2- Modified Pigeon- forward lean & rotate over front knee
Exercise 4
Modified Pigeon Active Hip Internal Rotation Lift
Begin in the modified pigeon 90/90 sit with slight forward lean supporting weight on hands
Gently lift back foot off the floor. Squeeze and hold for 5 seconds. Repeat for at least 5 contractions
You will repeat this exercise for the opposite side once you’ve completed the routine on one side
1- Modified Pigeon Forward Lean on Hands
2- Modified Pigeon Active Hip Internal Rotation
Exercise 5
Modified Pigeon Hip Active External Rotation
Begin in the modified pigeon 90/90 sit with torso rotated facing forward leaning weight back with hands behind you
Gently lift the knee (with inside touching floor) & rotate outward through hip. Squeeze and hold for 5 seconds. Repeat for at least 5 contractions. Ensure opposite leg remains still with outside knee resting on floor
You will repeat this exercise for the opposite side once you’ve completed the routine on one side
1- Modified Pigeon Chest Open
2- Modified Pigeon Active Hip External Rotation
Exercise 6
90/90 Sitting Lift to High Kneeling
Begin in approximate 90/90 sitting as shown, use hands to maintain balance without leaning on floor
Gently lift through the hips into controlled high kneel. Squeeze the buttocks and hold for a few seconds. Return to start position and repeat 30-60 seconds
Switch legs so back leg begins as forward leg and vice versa. Repeat active sitting movement 30-60 seconds.
1 - 90/90 Sitting on floor (no hand support)
2 - High Kneeling
Exercise 7
Frogger
Begin in all 4s, forearms on floor. Walk knees open keeping insteps of feet and inside shins rotated inward in contact with floor
Gently rock back through hips/pelvis as if taking bum closer to heels, squeeze knees into the floor and hold/release for 5-10 second repetitions.
Gently work into and explore stretch for at least 60 seconds
1 - Frogger Start Position
2 - Frogger Rock Back Position
Exercise 8
Deep Lunge Hip Opener with Arm Rotations
Begin in lunge position, extend out back leg as far as is comfortable. Lean forward and try to come to rest on forearms. Actively drive open front knee/hip rotating out onto outside border of foot.
Take inside arm next to front leg and rotate upwards to ceiling with a straight arm. Stretch open through shoulder, chest and spine. Hold for 5 seconds at top position, return to start driving elbow back to the floor and repeat for 10 repetitions.
Switch legs front to back and vice versa. Repeat process.
1 - Deep Lunge, Forearms to floor, drive front knee open
2 - Deep Lunge Arm Rotations
Thank You
Thanks for taking the time to read this guide, we hope you find it useful. Please share with anyone else who might benefit and if you have any questions comment and let us know. Don’t forget to download your free hip mobility cheatsheet. Good luck and enjoy your improved hip health.
Deep Lunge with Arm Rotation
Tight shoulders? This routine will fix you up
5 step shoulder stretch routine to relieve stiffness and tension. Discover a new range of motion and rid yourself of nagging tightness in your shoulders and upper back
Why are my shoulders so tight?
Familiar Hunchback Posture?
Shoulders are a big sticking point for many of us. We constantly assess and help people with long histories of stiff, tight, achy shoulders and upper backs. More often than not there is no significant injury history but very commonly there is a base of sedentary behaviour, such as office work and driving, and a significant lack of any structured stretching or mobility exercise. Welcome to our modern lives!
Most shoulder pain can be fixed without the need for invasive surgery but it can take time to undo a lifetime of poor habits which have lead to soft tissue adaptations with weakness in some areas and tightness or stiffness in others.
1/2 Crucifix Chest Stretch
Shoulders are very mobile and we put them through a lot over our lifetime with an expectation they will be fine with no real consideration given to tuning or maintenance work. Tightness and pain can easily creep in and often presents initially as discomfort reaching overhead, pain opening a door, or a struggle to weight bear through our arms. This can develop to more constant nagging pain and stiffness and a reduced ability to perform daily tasks or enjoy physical exercise or activities.
Many people just put up with having a dodgy shoulder and accept it as a new norm but with the right guidance and exercises most situations can be at least significantly improved if not completely fixed. Like everything in life though you won’t get something for nothing and commitment to changes in habit and daily routines will be required. A balance of stretching and strengthening exercises is normally key and we have provided a great starting point here with our 5 point stretching routine.
Let’s get started!
We must bear in mind that every body is different as is each individuals unique history and circumstances so please use this routine as a guide to start improving your shoulder health and flexibility but do so carefully. Start slowly and gently and never push in to pain. Work to better your own range of motion but do not compare yourself to the video or anyone else. Practice daily and be patient but also persistent. If you can only do part of the movement or a modified / reduced range that is fine, just do what you can. Of course as with all advice please consult with a health professional if you have significant pain or loss of normal function.
Mobility Flow Video:
Exercise 1
Shoulder rolls / Scapular circles
Begin in all 4s position.Hands fixed under shoulders shrug shoulders to ears thenslide back and down and release. Then spread shoulder blades apart stretching across upper back, relax and allow shoulders and back to hollow.
Try to perform this as a slow circular rolling motion working in various directions
Perform this movement for 60 seconds
1- Shoulder shrug
2- Shoulder spread
Exercise 2
Elevated Arms to Partial Childs Pose / Prayer Stretch
Begin in all 4s position with arms straight out elevated on flat surface. Gently sit bottom back towards heels and let weight drop down between shoulder blades and through upper back
When in position try gently squeezing shoulders together and releasing and light pressing through the hands with slight twist/rotation movement
Try breathing in deeply and coming out of the stretch slightly then breathing out slowly and dropping deeper into stretch
Explore the stretch position with subtle movements and breathing for 60 seconds +
1- 4 point kneel arms elevated
2- Sit weight back and down between shoulders
Prayer Stretch (Option 2)
Perform stretch as above but move to have elbows resting on flat surface with arms positioned in ‘Prayer’ posture
Sit weight gently back and down relaxing between shoulder blades and across upper back. Try to let head bypass the bench (surface)
Try breathing in deeply and coming out of the stretch slightly then breathing out slowly and dropping deeper into stretch
Explore the stretch position with subtle movements and breathing for 60 seconds +
Prayer Stretch Start Posture
Prayer Stretch - Sit back position
Exercise 3
Shoulder Dislocates (Stick or Band)
Begin in high kneeling or standing - Holding a stick or band keep arms straight and core tight, slowly bring arms straight overhead and around down towards lower back. Allow shoulder blades to gently shrug then rotate and slide down as you circle arms overhead
Return to start point slowly ensuring not to over-arch through lower back
Repeat for 10-15 repetitions
1- Shoulder Dislocates - Stick (Overhead)
2- Shoulder Dislocates Stick (behind back)
Exercise 4
‘L’ Position Prone Shoulder Stretch
Begin lying on your front. Gently reach with shoulder to be stretched under and across your body at shoulder height with palm facing up. Allow other arm to stretch straight overhead forming an ‘L’ shape with your arms
Gently rotate into the stretch as if trying to square up shoulder blades increasing the pull/stretch felt in back of the shoulder reaching across body. Hold and release this motion for several repetitions
Work in this position for 60 seconds + on each arm
1- ‘L’ Position Shoulder Stretch Part 1
2- ‘L’ Position Shoulder Stretch Part 2
Exercise 5
1/2 Crucifix Chest Stretch
Start face down with side to be stretched arm extended fully out at shoulder height palm down. Opposite arm is bent at 90 degrees at elbow hand at shoulder height ready to push into stretch
Gently push with bent arm while rolling weight of legs over to create a strong opening stretch of the chest of the straight arm
Gently push in and out of the stretch holding for a few seconds then releasing and repeat
Explore this stretch for 60 seconds + on each arm
1- 1/2 Cucifix Start Posture
2- 1/2 Crucifix Chest Opening
Thanks for taking the time to read this guide, we hope you find it useful. Please share with anyone else who might benefit and if you have any questions comment and let us know. Don’t forget to download your free mobility cheatsheet. Good luck and enjoy your improved shoulder health.
‘L’ Position Prone Posterior Shoulder Stretch
Check yourself before you wreck yourself - Injury prevention for knees and hips
Injury prevention is obviously preferable to injury cure. It is common for people to adapt their work desks and equipment to improve their posture as a form of injury prevention. It is also common for gym-goers and athletes to practice good form when using weights as a means of injury prevention. What is uncommon is paying attention to and correcting our most frequently used movements that arguably have some of the more devastating effects on joints if performed badly over a lifetime.
By Jonny Kilpatrick of Physio Effect
Injury prevention is obviously preferable to injury cure. It is common for people to adapt their work desks and equipment to improve their posture as a form of injury prevention. It is also common for gym-goers and athletes to practice good form when using weights as a means of injury prevention. What is uncommon is paying attention to and correcting our most frequently used movements that arguably have some of the more devastating effects on joints if performed badly over a lifetime.
With almost all leg injuries, as physiotherapists, we will assess basic movement patterns. Two of these are frequently found to be faulty and likely to either have contributed to an injury or are likely to hinder a speedy recovery. These movements are:
Standing to Sitting / Sitting to Standing
Step Up / Step Down
We perform each of these movements numerous times each day, hundreds of times each week and thousands of times each year. Little attention is paid to our “form” on these movements and commonly we will see people putting their knee joint under uneven stretching and compressional forces that over time will strain on ligaments and degenerate joint surfaces. Almost always the fault seen in both movements involves the person’s knees or knee drifting inwards once the hips are lowered. This puts the knee into a position known as genu valgum, which is associated with the following conditions:
Patello-femoral (knee cap) joint osteoarthritis
Inner knee pain from overstretching the medial collateral ligament
Outer knee pain from increased tension on the Iliotibial Band and compressional wear and tear to the lateral meniscus and joint surfaces
Osteoarthritis of the knee joint
Increased risk of knee trauma in sports such as ACL rupture
Poor movement pattern with Sit to Stand and Step-Ups fig.1
Poor movement pattern with Sit to Stand and Step-Ups fig.2
The reason this knee position and movement pattern has such a destructive effect on the knee is to do with the way our knee has been designed to move. There are various interlocking grooves and troughs within our knee that require a certain movement pattern to align correctly and provide stability. This movement is called the screw home movement and it involves the femur (thigh bone) rotating approximately 10 degrees inwards on the tibia (shin bone) to achieve a fully straightened position. Conversely when the knee is bending the femur should rotate outwards on the tibia to keep everything aligned correctly and avoid excessive forces to one area. This in practice means that your knees should stay out over your feet when bending and the hips flexing. This can be achieved by rotating your femur outwards by using your Gluteal Muscles (Butt).
We have seen this movement problem much more prevalently in women who also tend to suffer higher rates of frontal knee pain and knee trauma in sport than men. This is thought to be in part because of women having a wider pelvis than men which results in an increased angle (Q Angle) from the outside of their hips to the knee cap in normal standing. We also believe the cultural expectation of sitting in a “lady-like” way with their thighs closed rather than open may have contributed to women sitting and stepping in a manner that switches off their glutes and allows their knees to track inwards. With this consistently poor movement pattern during a “functional squat” such as sit to stand over a lifetime it is unrealistic to expect ourselves to move well when the task requires greater control and strength such as during single leg step-ups when going up or downstairs or running which is actually just a series of single leg hops.
Correct movement pattern on Sit to Stand and Step-Ups fig.1
Correct movement pattern on Sit to Stand and Step-Ups fig.2
A common phrase within a gym or weights room when discussing form and technique is “check yourself, before you wreck yourself”. This, we would argue, is equally, if not much more, important with everyday movements as over a lifetime the wear and tear you inflict on your joints may not be reversible or easily rehabilitated in the same way as a minor muscle strain or postural stiffness. In the instance of these movements we would really recommend making time to practice some squats to and from a chair and step ups where you keep your knee from moving inwards of your foot. This should in turn help with how you move in everyday life if you are mindful of it.
At Physio Effect you can expect physiotherapy, massage and holistic services that address your unique needs. We will always strive to exceed your expectations through our honest and results-driven approach, delivered by our team of specialised practitioners.
You’ll be empowered to address your injuries and any associated lifestyle issues with a diagnosis and treatment plan that has been logically explained and is achievable for you.
Find out more and book online at PhysioEffect.co.uk
Real Life Stories: Recovering from a disc injury
Fiona Callan is a CrossFitter and Ultra-marathoner who injured her back in 2017. She had an MRI which confirmed an L5/S1 disc bulge with nerve root irritation. In this interview we discussed how she avoided surgery and returned to the things she loved doing best.
Hi Fiona, thank you for taking the time to share your experience with us. We know you've come a long way from a pretty bad back injury. Before we begin, tell us a bit about yourself! What type of work do you do and what's your sport/exercise/fitness background?
I work in the NHS, primarily an office based job. Preceding my injury I was also studying for an MSc so basically spent all day and night sitting at a desk.
I started running in 2008, mainly 5k and 10k distance on roads but I wasn’t very good and didn’t enjoy it so moved to trail and hill running instead when I started gradually to increase my distance. I met some really cool people to run with as well. In 2012, I was talked into a trip to Nepal by a friend but it wasn’t until around 4 weeks to go that I found out he had signed me up to an ultra marathon. I didn’t even know what that was! It was sheer determination that got me through that and I really caught the ultra marathon bug.
In 2014 I started CrossFit as I thought some strength and conditioning type training would help with my running and I had no idea what I was doing in a conventional gym. The coaching and set workout approach has really worked for me and made me use muscles I didn’t know I had.
So the big question, when and how did you injure your back? Was it after one incident or was it something that gradually built up and got worse? What were your symptoms (i.e. back pain? leg pain? numbness etc...)
To be honest I’ve always had a bit of a lower back niggle, probably postural, but thought it would just go away. It was definitely something I started to feel more when I started CrossFit as I really had to use my back and core more than I had been doing running. Slowly I noticed it had started to affect my running, I had pain in my right buttock that shot down my leg now and again and my leg generally felt heavy. If I left it a few days it would go away but it meant I couldn’t really run or CrossFit as much as I wanted to.
It started affecting my job as I couldn’t sit comfortably for any period of time. I was travelling by train to Edinburgh at least twice a week which became difficult. On one journey I had to get off the train and go back to Glasgow as I couldn’t face sitting for an hour.
Then during a workout involving a barbell I cried so much I had to admit that something wasn’t right.
My initial symptoms were primarily in my lower back, there was a build up of pressure around my stomach and back even when I bent over the sink to wash my face. I tried to keep active but really scaled back on what I was doing. I kept up my hill walking as this is an activity I love doing with my nephew – I used poles and made Ewan carry my bag as he’s the young one! I tried running but could only manage 1k before I felt my back stiffen.
One Saturday I went walking with Dad and Ewan in the Lake District. It was an amazing day. The hill wasn’t too hard; we took our time and enjoyed it. It was the shooting pain in my right leg that woke me up early on the Sunday morning. I tried to stand up but my leg just wouldn’t work. I limped to the bathroom hanging onto the wall and at that point I knew there was something seriously wrong. It sounds dramatic but I genuinely felt paralysed down that whole side of my lower body, first thoughts were ‘I’ll never run again!’ and panicked. My boyfriend called NHS24 and a nurse managed to calm me down and suggested I took paracetamol with ibuprofen and try find a comfortable position until a doctor could get to me. A few hours and one injection later the pain had dulled. He said it was my sciatic nerve; I should try to relax and spend less time sitting down!
What was the initial management i.e. what treatment did you seek?
I got an appointment with Jonny who did some needling on my lower back/ glutes and gave me some exercises to do. I am the most impatient person and after a week of exercises I didn’t feel any different so I saw another physio (sorry!) who basically told me the same thing and gave me the same exercises. I really was in denial about how serious it was. I spoke to coaches in the gym, chatted to other runners and did a lot of Googling but all the answers were the same.
It was the mental part I actually found the toughest to deal with. I have made so many friends through running and CrossFit and my social media is full of it too so I was always seeing and hearing about all these amazing runs and PBs. I just felt stuck and disconnected. I saw my GP as I really felt like I was struggling to cope. People were always asking how I am and telling me I should ‘do this and do that’ and eventually I just got fed up talking about it. My GP didn’t really help me; she referred me to her physio friend but I didn’t go.
At the same time, Jonny had passed me onto Mariam for Clinical Pilates and it was during my consultation that she suggested some short term medication for my nerve problem in my right leg. I went to another GP for this and as well as giving me the medication, he was really keen to get me back running and to the gym so he referred me for an MRI.
Am I right in saying you ended up seeing a consultant neurosurgeon? What did the MRI show?
Yeah I was really lucky in that I got an MRI pretty quickly. I think the 2nd GP had something to do with that. A few weeks after the scan. I received a letter with a hospital appointment but with no other information. Frustrating and worrying. I thought well there must be something not quite right and because of my problem with patience, I called the GP and asked him to give me a brief overview of the scan. He said he could see a disc bulge and I should continue doing my physio exercises until my appointment. I had just started with the Clinical Pilates class so I let Mariam know the issue and she tailored exercises for me until I found out more about the problem.
So there was the prospect of having surgery? How did that make you feel? Was this something on the cards or wanting to avoid?
I remember getting a phone call from a surgeon in the spinal unit and it made me feel sick. I actually don’t remember what he said to me as the idea of back surgery just terrified me. I wasn’t exactly in crippling pain so the idea of surgery just felt a bit extreme to me. This was something I definitely wanted to avoid. I just really trusted my physios and they really believed I could get better without it. I didn’t feel that my pain was bad enough for surgery – for me this was the last resort, I’ve never heard positive stories about it.
At the appointment, the doctor went through my scan which I found fascinating. I actually felt a bit of weight come off my shoulders when I could physically see the issue. It had been hard to accept when I didn’t know for sure what the problem was but there it was clear in front of me. She then told me that they would do surgical intervention if I was getting sharp pains down the top of my leg. I told her I had that a few weeks before but it had been getting much better. We left it at that and I was told to get in touch if anything changed.
I had so many conversations with my boyfriend, my parents (and myself) and decided that it wasn’t the end of the world if I couldn’t run 50 miles or couldn’t deadlift 100kg as long as I could stay active. I would just scale back what I was doing.
You've spent the best part of a year doing some serious rehab with Clinical Pilates. In your own words can you explain what that is and how it helped you?
I had done a bit of Pilates before as I’d read and heard it was good for runners. It was one of those things I struggled to stick to because I never left the class feeling like I’d worked hard and my issue with patience didn’t help. When I told my boyfriend about it he signed me up for 6 weeks because he knew I’d have to go if he paid for it! I noticed a huge difference after these 6 weeks.
It is basically pilates but physio led so your exercises are all tailored to whatever issue you may have so we’re all doing something different generally. It’s a small class but everyone is in the same boat and really friendly. Mariam checks in with you regularly during the class and pushes you when you’re ready but also changing exercises if something isn’t quite feeling good.
I expected my exercises to all be lower back focused as that’s where my injury was but actually they’ve been full body movements. As well as having a stronger back, I have a stronger core and much improved posture. Mariam also spent some time working on my legs, particularly my right leg as the nerve had been affected and I had limited movement and very little strength.
Eventually you returned to CrossFit and trail-running. How long did that take from when you first injured yourself?
I was always doing a scaled back version of CrossFit and a bit of trail running while I was injured but I was mindful of undoing my hard work. It was important to me mentally that I kept in touch with coaches/ friends in the gym and my runner friends.
I accepted my injury in May 2017 and started Clinical Pilates in the October. In May 2018 I was a more confident runner so decided to train for a race following a plan, building up in distance and I finished the Mad Hatters Half Marathon and the Glentress Half Marathon with a PB and no back or leg pain. Not quite back at ultra marathon distance but I’m actually enjoying the shorter runs at the moment. In June 2018 I started back at CrossFit and noticed that I’m better at a lot of the movements as I actually use my back and core as I should. I’m always conscious of loading too much weight on bars and I know certain movements still aggravate my back but I know when to stop and I just need to gradually build my strength back up. I was asked if I’d like to be part of a team from the gym for a CrossFit competition, I said yes why not I can try and we finished in 3rd place with no back injury!
Most people in this day and age are seeking the "quick-fix" or miracle cure. In fact, most people in your shoes would opt for surgery given the opportunity. What advice would you give them?
Your back is such a major part of your body so decisions on surgery should never be made lightly. Unless a professional is telling you there is no other option I would encourage people to commit to the exercises, spend less time sitting down and stay active by doing anything you find fun (that’s obviously not going to hurt you)
Working through this injury has taught me so much about my body and my lifestyle as well as making me a better runner and CrossFitter. This is all coming from the most impatient person!
Case Study: Frontal Knee Pain (Part 3)
Single leg exercises should be incorporated in strength and conditioning sessions as it is the best way to mimic the single leg work required in running with landing and push-off. It is also a good way to identify any imbalances from one side to the other. In the final part of this series, Jonny’s pain had largely settled and his rehab focused on single leg control. He also practiced a more efficient running technique to minimise loads placed on the knee.
Are you taking a HIIT in Training?
In the last number of years we’ve seen a huge shift in the exercise industry towards high intensity interval training (HIIT) as a means of providing time efficient and intense workouts.
In the last number of years we’ve seen a huge shift in the exercise industry towards high intensity interval training (HIIT) as a means of providing time efficient and intense workouts.
There is no doubt that HIIT training can rapidly increase fitness and provide the numerous health benefits associated with exercise but there are also a number of pitfalls to training exclusively like this that should be considered in order to ensure this works for you.
As Sports Physiotherapists we have seen numerous patients fall into repetitive cycles of injury while training in the gym. It becomes all too easy to just suggest this is because that person does Crossfit or trains at a boot camp and attribute the blame to this.
We work closely with a number of Crossfit and Functional Fitness style gyms and, in our experience, they are providing great instruction of movement form/techniques and offer a good variety of training ranging from strength and gymnastic to HIIT training.
We feel that the problem with injury usually arises because of the individual participating in this training not fully appreciating what is involved in it and where they fit into it at any point in time. Often, intense, sweaty workouts are favoured over the more strength or technique based sessions as there is a greater association with feeling fit or losing weight.
The problem with this is that in these HIIT type session exercises are being performed quickly in order to set a time or score. This requires pushing into fatigue using weights or load that can often be disproportionately high for your current strength levels and abilities. This can cause soft tissues and joints to become overloaded and injured. To train like this at a maximal or “competition” intensity 5-6 days per week is unsustainable and unproductive on so many levels and will nearly always lead to burn-out, disappointing performances and injury.
No professional athletes would ever train at full intensity on every session; instead they will do this in limited amounts and work on the various components of their sport in order to peak for short periods only a few times per year. This ensures continual improvement and decreases their likelihood of injury.
We appreciate most people have no aspirations with their exercise to compete in anything, however in order to train consistently, safely and effectively over a number of years, the principles need to be much the same whether recreational or competitive. Class-based exercise instructors will teach technique and oversee safe performance to the best of their abilities in a large group but they cannot be expected to know each individual or monitor everyone to the same degree as a personal trainer or coach. This is why it is essential to take more of an individualised approach and responsibility within these environments in order to lessen injuries, frustration and lack of improvement.
Things to consider with your HIIT sessions:
Have you been training regularly to have built up a sufficient base of fitness and strength to attack a workout at maximum intensity?
If not, you can always modify the workout slightly by going lighter, slower or changing the exercises to something that is more appropriate for you. There’s no shame in it, the shame would be to continually miss sessions due to injury
Do you warm up appropriately for intense exercise sessions?
Most people will exercise early in the morning or after work and at both these times the body is stiff from being sedentary for long periods. It’s unrealistic to expect to move well or safely during intense bouts of exercise without preparing the joints and muscles for this.
The Coach (and mini-coach!) at our Partner Gym EveryDay Athlete leads a structured warm up appropriate to the programmed HIIT workout
What are your individual needs when warming up? Eg. do you require extra stretching for your shoulders because that day you’ve been hunched over a desk all day?
This may not be covered in a class-based environment and you should make sure to cover this yourself before the class starts.
What are your expectations?
If you plan on moving quickly and repetitively with a weight or movement, do you have the strength and skill to perform this same movement in a much more controlled manner?
If you want to get a sweat on in every session that’s okay too but this can also be achieved by training at 80% instead of 100% on some sessions.
Long Term Goals
Year in and year out exercise and training requires consistency and dedication. Similar to more extreme diets, we shouldn’t be looking for a quick fix as it is often unsustainable and doesn’t provide long term results, as this approach can be tortuously difficult and we will lose motivation quickly or get injured.
Have you discussed with your coach, instructor or physio what your individual needs and expectations are with training?
This will reduce that feeling that you’re expected to perform at full intensity on every session. They can help identify things that you may do in your own time or out with class times in the gym that should help you progress to where you want to.
Image from one of the HIIT Classes at one of our partner gyms EveryDay Athlete at our Northside Clinic and Studio in Port Dundas
