Tight shoulders? This routine will fix you up
5 step shoulder stretch routine to relieve stiffness and tension. Discover a new range of motion and rid yourself of nagging tightness in your shoulders and upper back
Why are my shoulders so tight?

Familiar Hunchback Posture?
Shoulders are a big sticking point for many of us. We constantly assess and help people with long histories of stiff, tight, achy shoulders and upper backs. More often than not there is no significant injury history but very commonly there is a base of sedentary behaviour, such as office work and driving, and a significant lack of any structured stretching or mobility exercise. Welcome to our modern lives!
Most shoulder pain can be fixed without the need for invasive surgery but it can take time to undo a lifetime of poor habits which have lead to soft tissue adaptations with weakness in some areas and tightness or stiffness in others.
1/2 Crucifix Chest Stretch
Shoulders are very mobile and we put them through a lot over our lifetime with an expectation they will be fine with no real consideration given to tuning or maintenance work. Tightness and pain can easily creep in and often presents initially as discomfort reaching overhead, pain opening a door, or a struggle to weight bear through our arms. This can develop to more constant nagging pain and stiffness and a reduced ability to perform daily tasks or enjoy physical exercise or activities.
Many people just put up with having a dodgy shoulder and accept it as a new norm but with the right guidance and exercises most situations can be at least significantly improved if not completely fixed. Like everything in life though you won’t get something for nothing and commitment to changes in habit and daily routines will be required. A balance of stretching and strengthening exercises is normally key and we have provided a great starting point here with our 5 point stretching routine.

Let’s get started!
We must bear in mind that every body is different as is each individuals unique history and circumstances so please use this routine as a guide to start improving your shoulder health and flexibility but do so carefully. Start slowly and gently and never push in to pain. Work to better your own range of motion but do not compare yourself to the video or anyone else. Practice daily and be patient but also persistent. If you can only do part of the movement or a modified / reduced range that is fine, just do what you can. Of course as with all advice please consult with a health professional if you have significant pain or loss of normal function.
Mobility Flow Video:
Exercise 1
Shoulder rolls / Scapular circles
Begin in all 4s position.Hands fixed under shoulders shrug shoulders to ears thenslide back and down and release. Then spread shoulder blades apart stretching across upper back, relax and allow shoulders and back to hollow.
Try to perform this as a slow circular rolling motion working in various directions
Perform this movement for 60 seconds

1- Shoulder shrug

2- Shoulder spread
Exercise 2
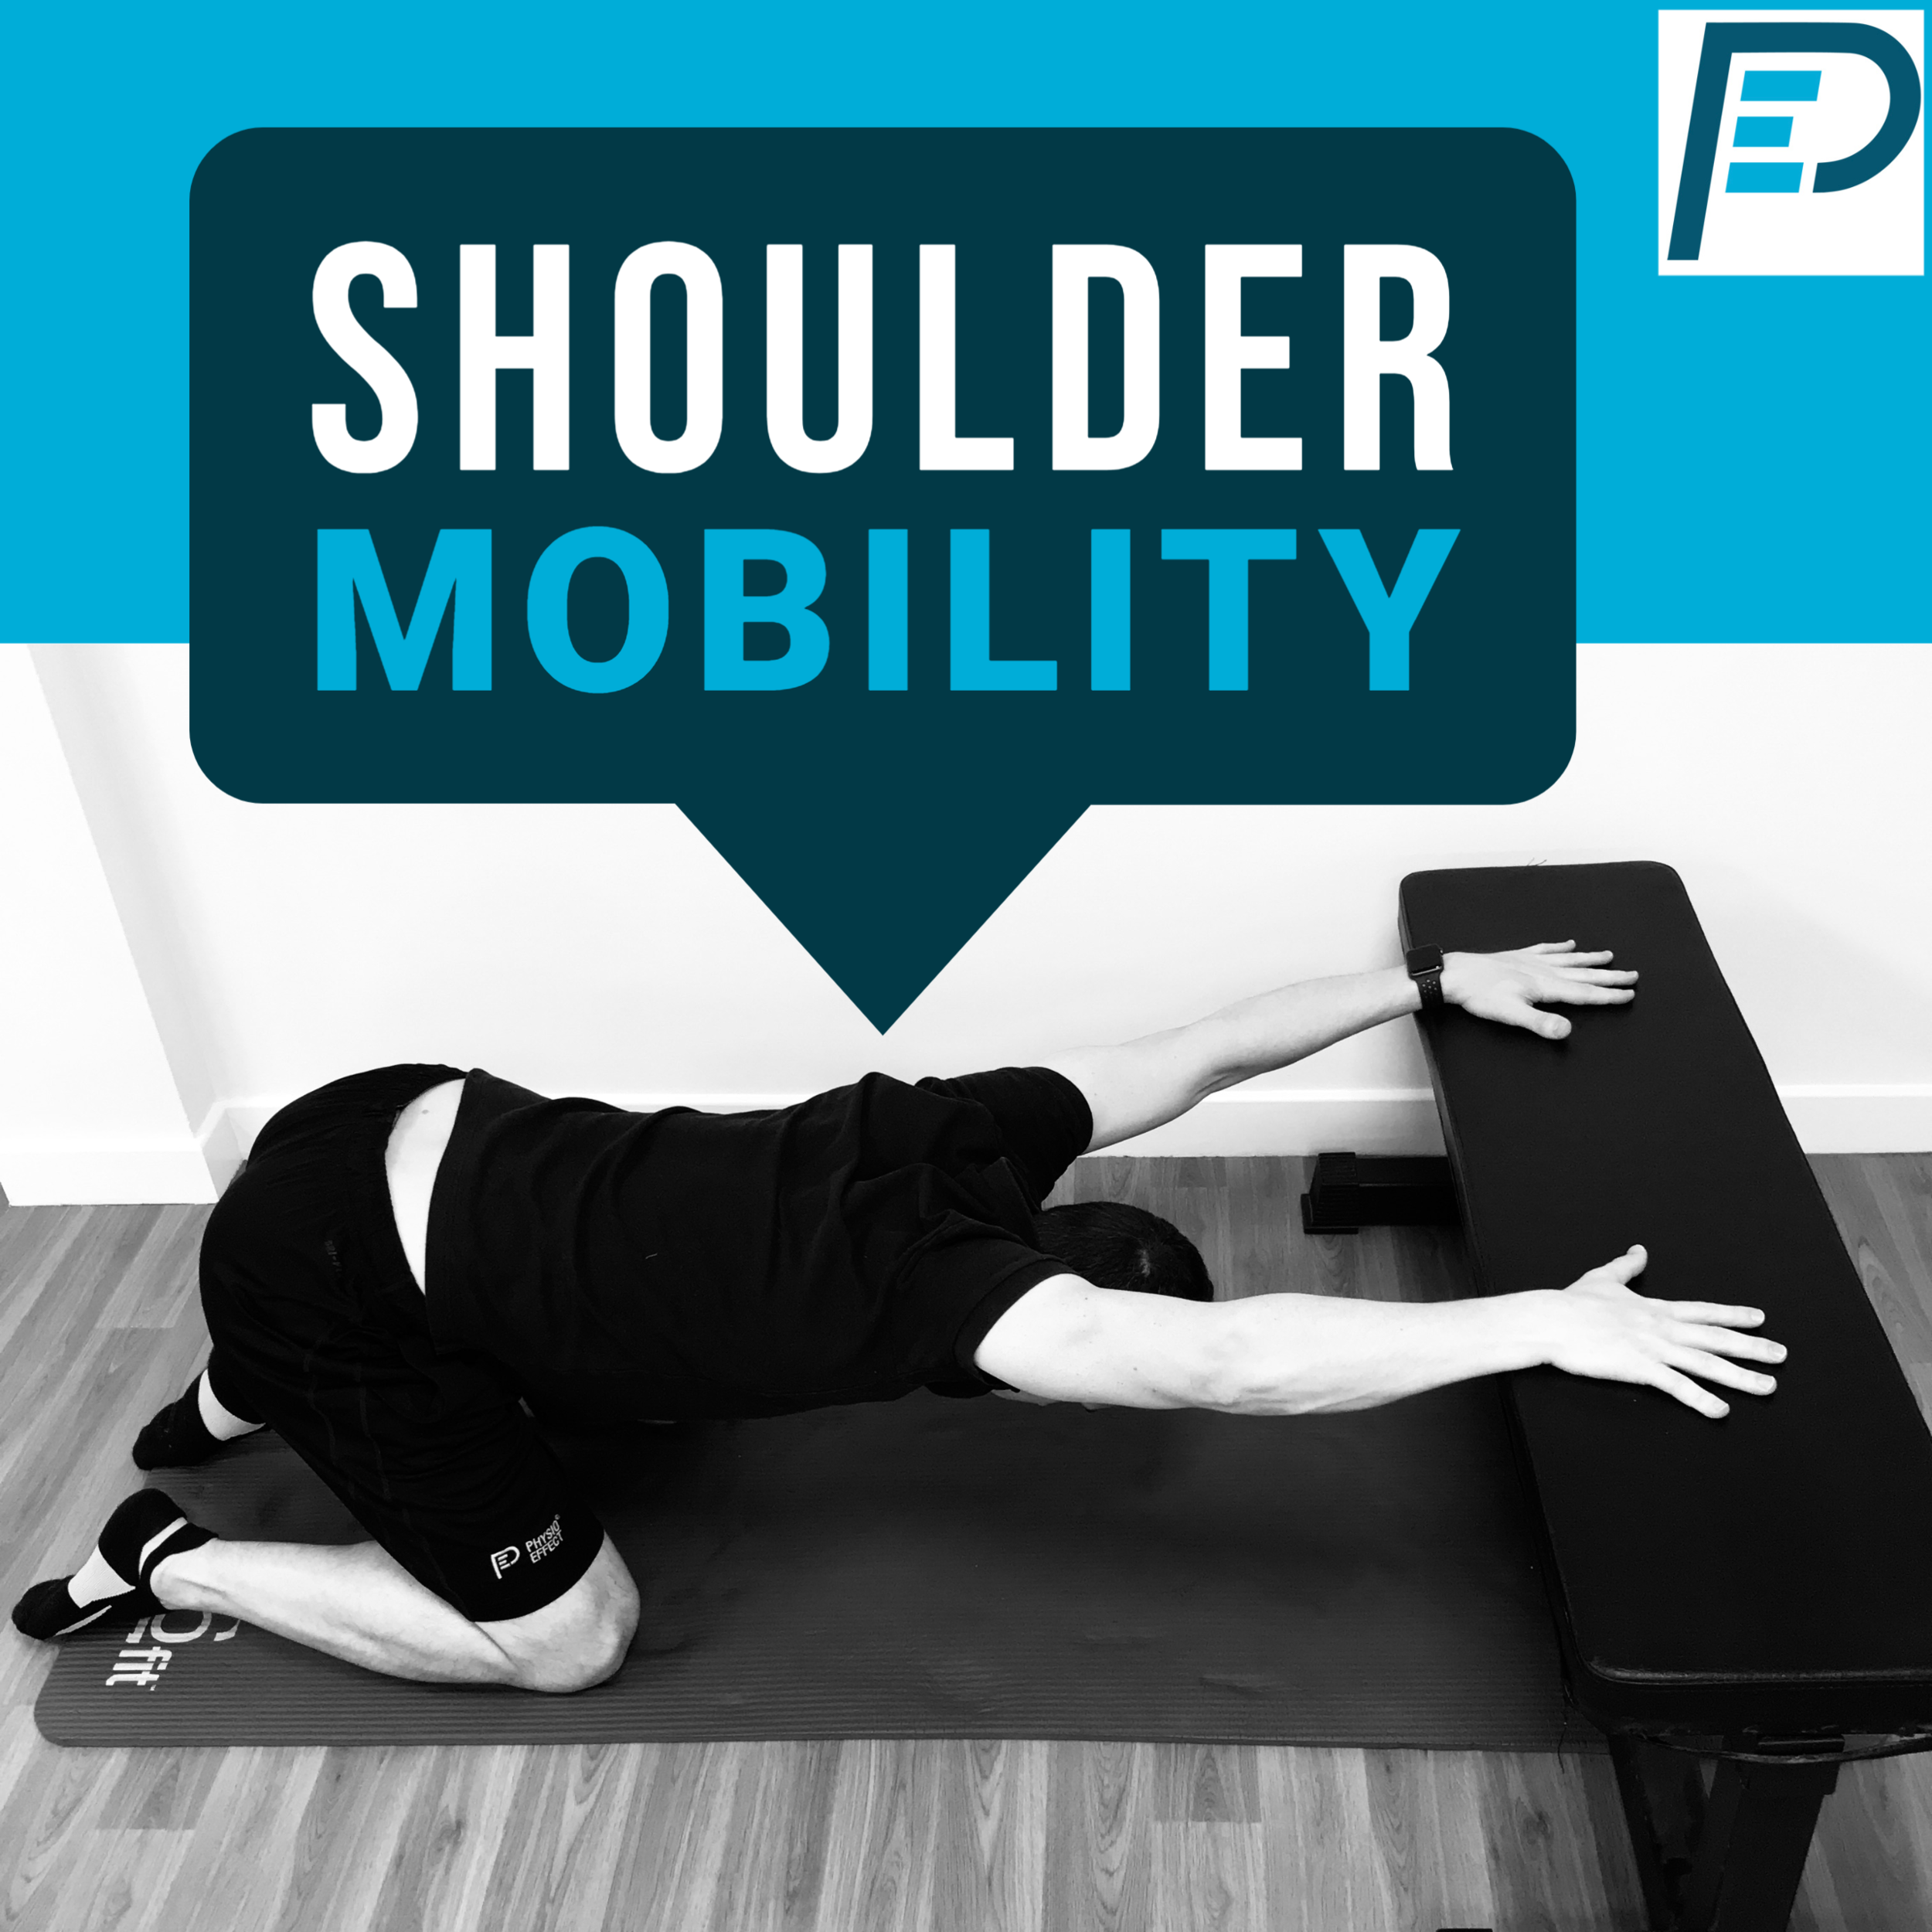
Elevated Arms to Partial Childs Pose / Prayer Stretch
Begin in all 4s position with arms straight out elevated on flat surface. Gently sit bottom back towards heels and let weight drop down between shoulder blades and through upper back
When in position try gently squeezing shoulders together and releasing and light pressing through the hands with slight twist/rotation movement
Try breathing in deeply and coming out of the stretch slightly then breathing out slowly and dropping deeper into stretch
Explore the stretch position with subtle movements and breathing for 60 seconds +

1- 4 point kneel arms elevated

2- Sit weight back and down between shoulders
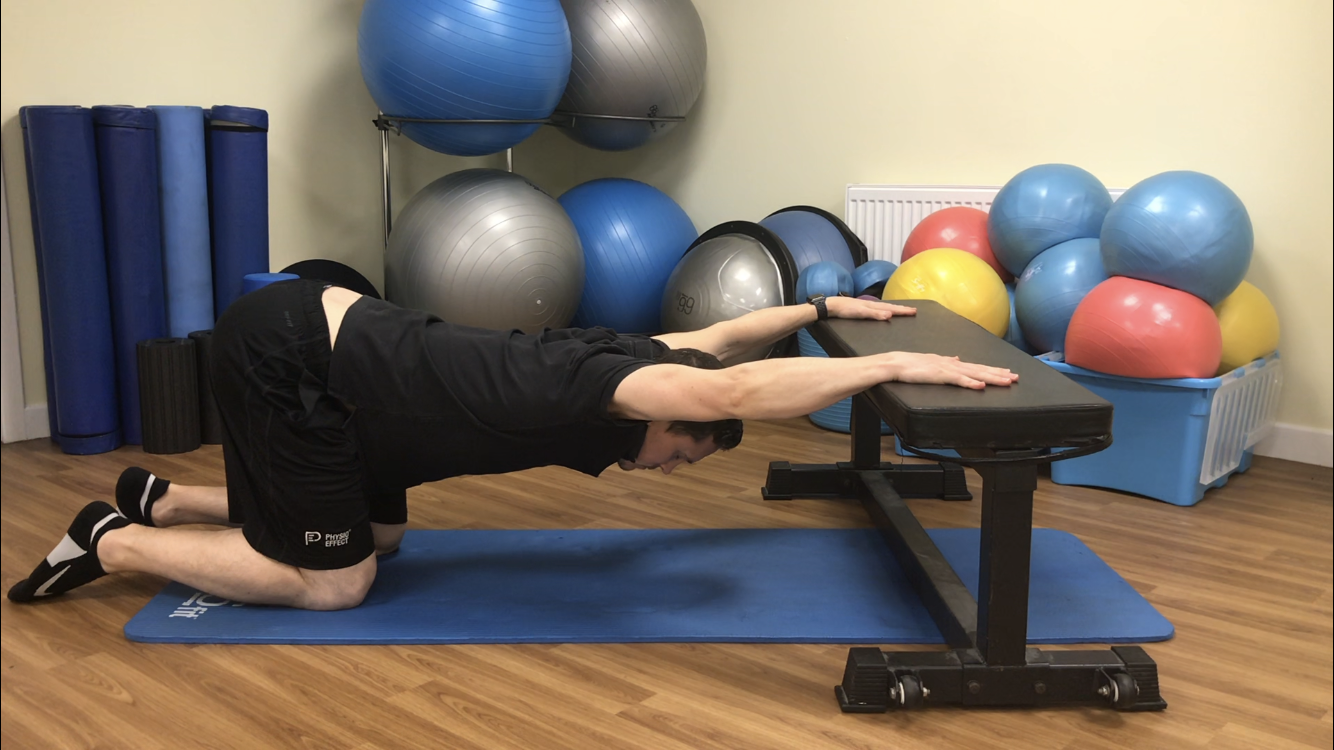
Prayer Stretch (Option 2)
Perform stretch as above but move to have elbows resting on flat surface with arms positioned in ‘Prayer’ posture
Sit weight gently back and down relaxing between shoulder blades and across upper back. Try to let head bypass the bench (surface)
Try breathing in deeply and coming out of the stretch slightly then breathing out slowly and dropping deeper into stretch
Explore the stretch position with subtle movements and breathing for 60 seconds +

Prayer Stretch Start Posture

Prayer Stretch - Sit back position
Exercise 3
Shoulder Dislocates (Stick or Band)
Begin in high kneeling or standing - Holding a stick or band keep arms straight and core tight, slowly bring arms straight overhead and around down towards lower back. Allow shoulder blades to gently shrug then rotate and slide down as you circle arms overhead
Return to start point slowly ensuring not to over-arch through lower back
Repeat for 10-15 repetitions

1- Shoulder Dislocates - Stick (Overhead)

2- Shoulder Dislocates Stick (behind back)
Exercise 4
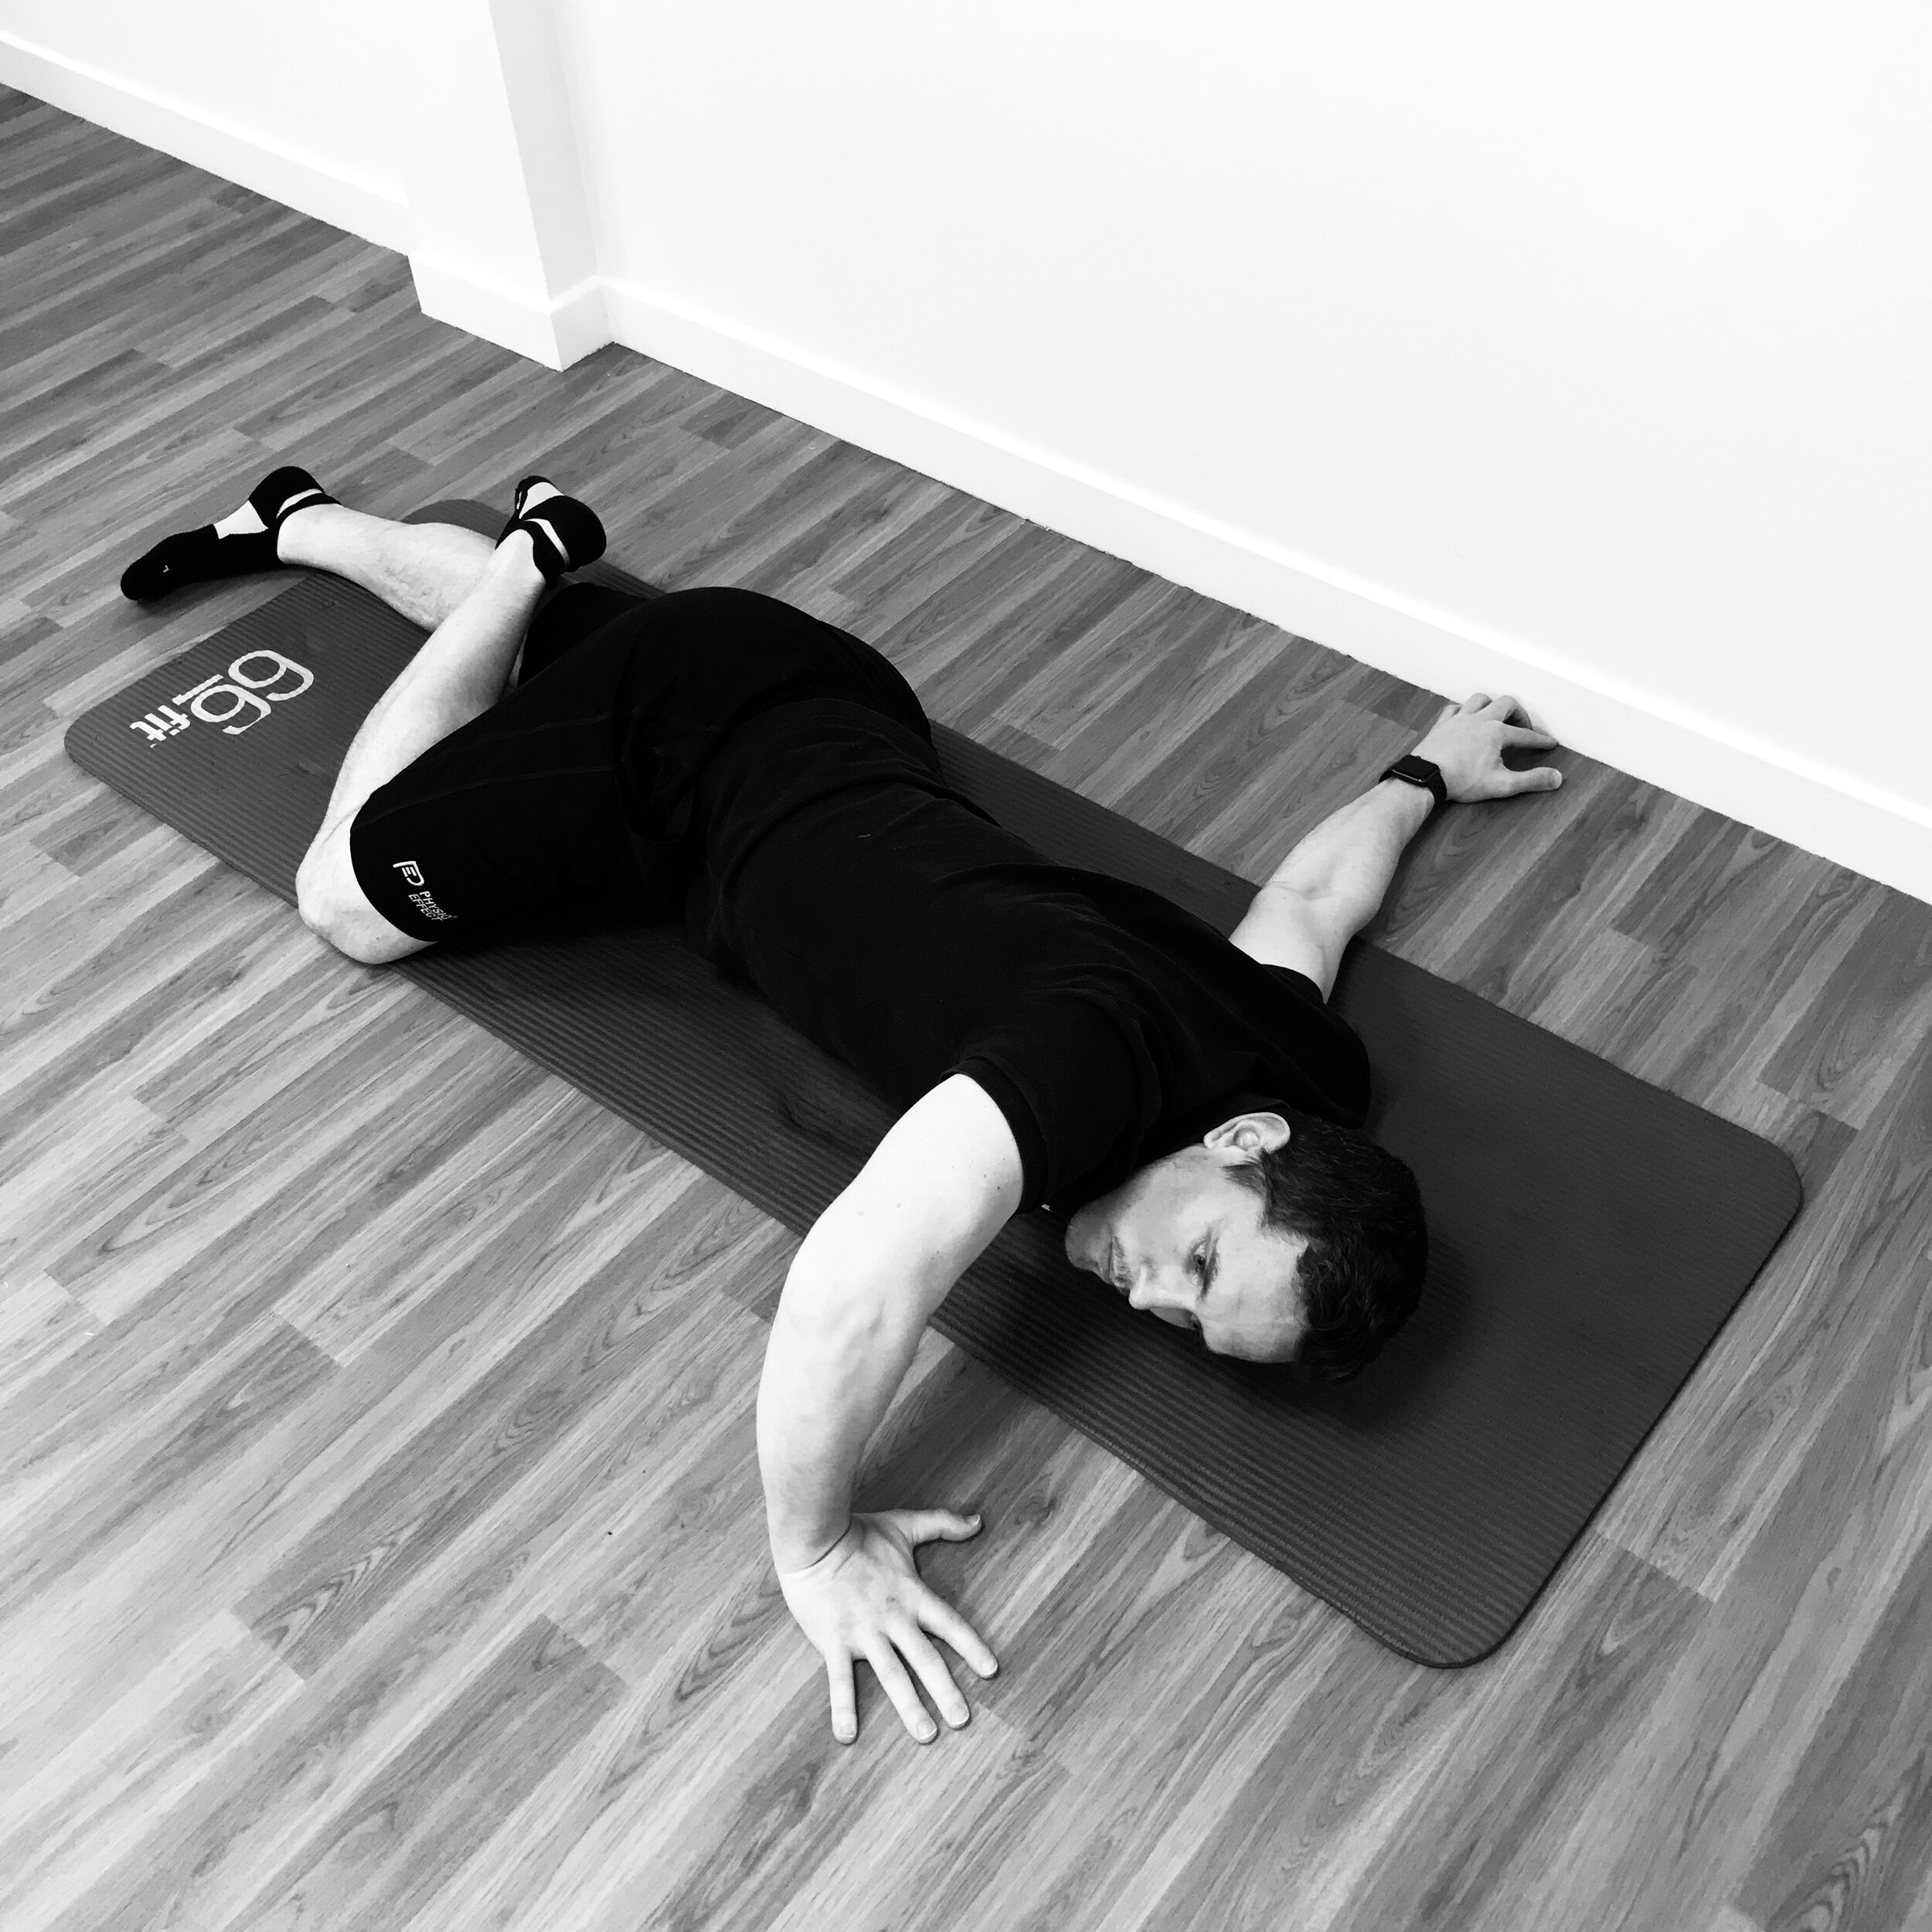
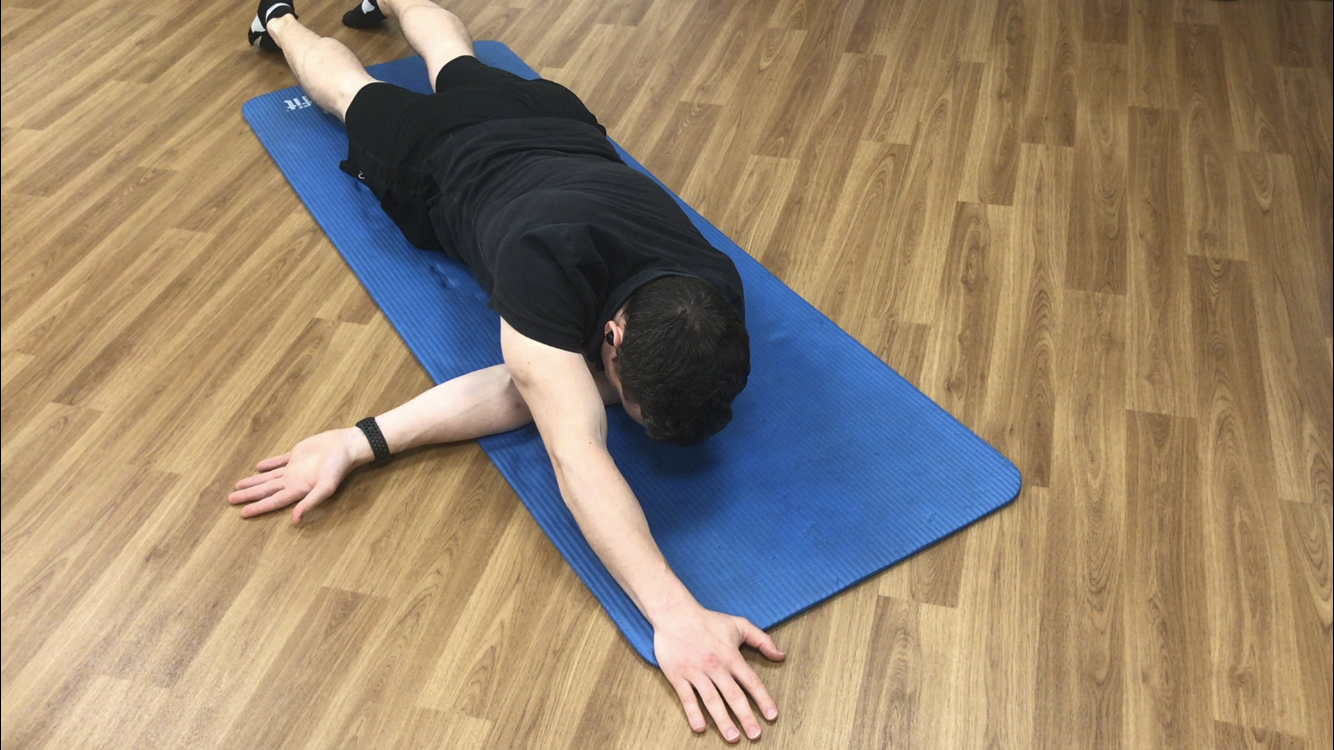
‘L’ Position Prone Shoulder Stretch
Begin lying on your front. Gently reach with shoulder to be stretched under and across your body at shoulder height with palm facing up. Allow other arm to stretch straight overhead forming an ‘L’ shape with your arms
Gently rotate into the stretch as if trying to square up shoulder blades increasing the pull/stretch felt in back of the shoulder reaching across body. Hold and release this motion for several repetitions
Work in this position for 60 seconds + on each arm

1- ‘L’ Position Shoulder Stretch Part 1
2- ‘L’ Position Shoulder Stretch Part 2
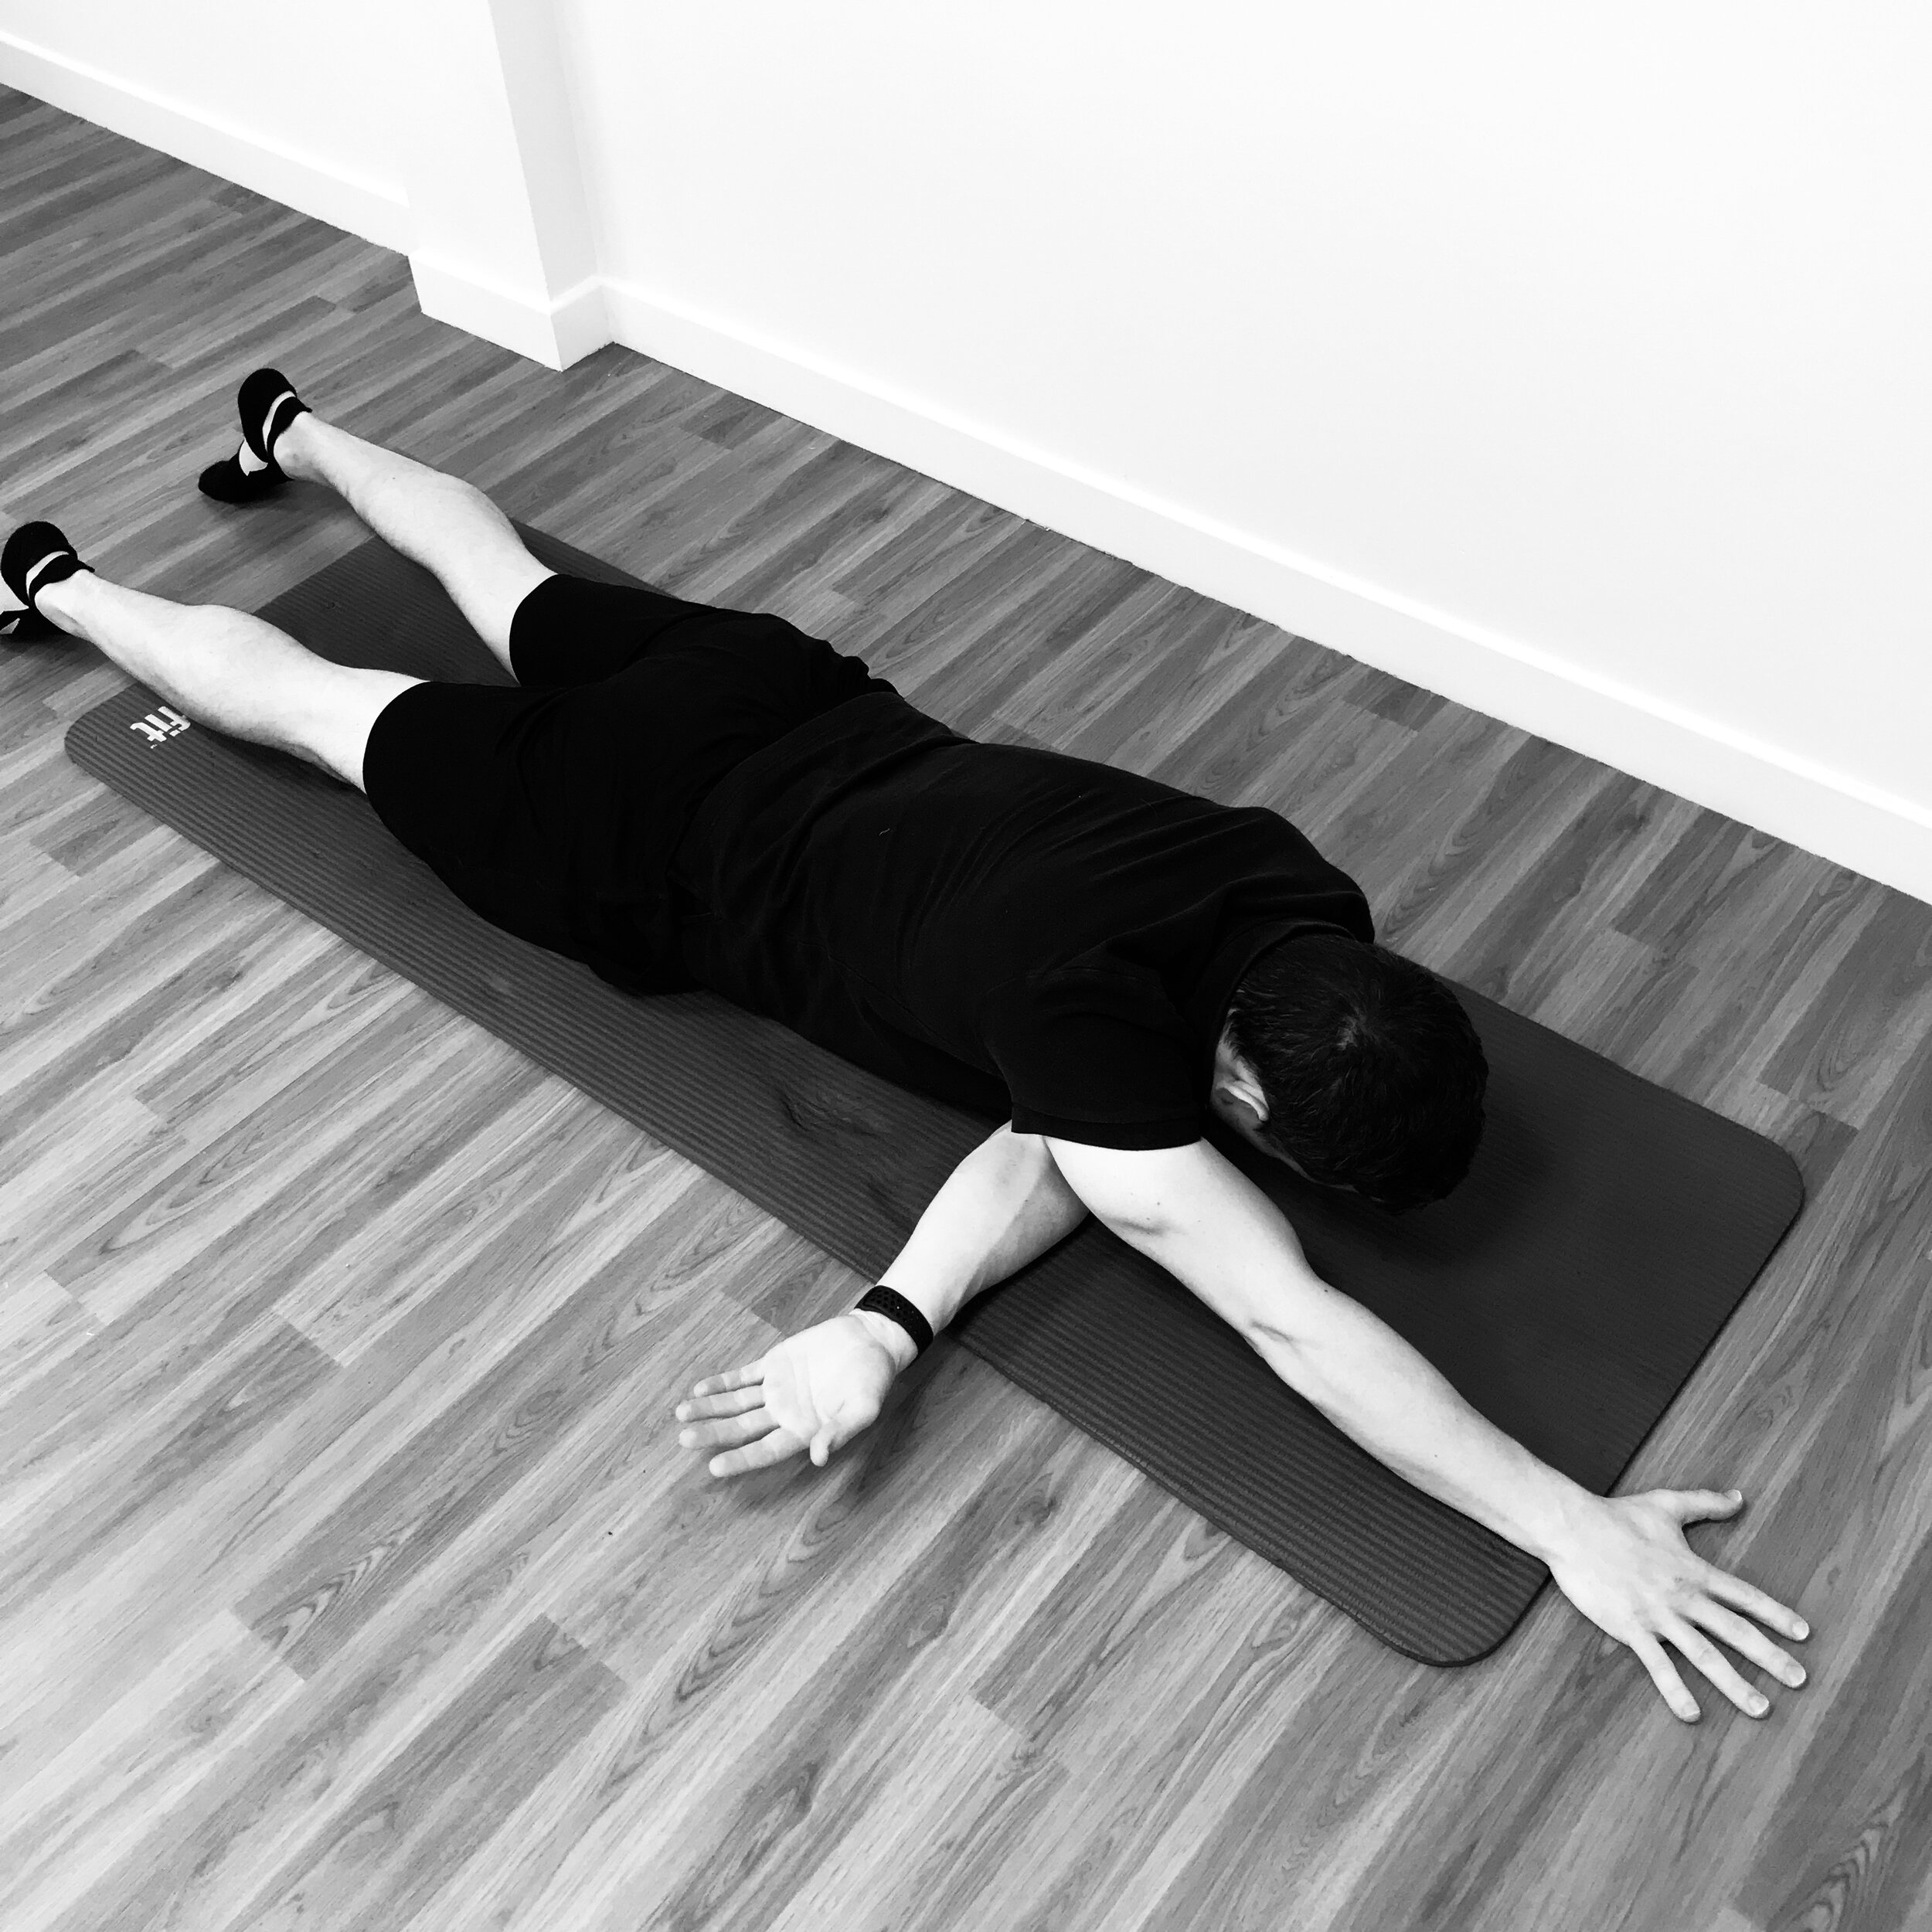
Exercise 5
1/2 Crucifix Chest Stretch
Start face down with side to be stretched arm extended fully out at shoulder height palm down. Opposite arm is bent at 90 degrees at elbow hand at shoulder height ready to push into stretch
Gently push with bent arm while rolling weight of legs over to create a strong opening stretch of the chest of the straight arm
Gently push in and out of the stretch holding for a few seconds then releasing and repeat
Explore this stretch for 60 seconds + on each arm

1- 1/2 Cucifix Start Posture

2- 1/2 Crucifix Chest Opening
Thanks for taking the time to read this guide, we hope you find it useful. Please share with anyone else who might benefit and if you have any questions comment and let us know. Don’t forget to download your free mobility cheatsheet. Good luck and enjoy your improved shoulder health.
‘L’ Position Prone Posterior Shoulder Stretch

Back Strengthening Exercises for Desk-Based Workers
Let one of our Physios, Danny Wray, take you through a set of exercises which will help to strengthen your back and hips and that help counteract the negative effects of sitting.
At Physio Effect we routinely treat the general population for injuries and pain which can be attributed to a sedentary lifestyle. We have previously discussed the risks posed by excessive hours of sitting and how this is reaching almost epidemic levels in the Western world. Today's article provides some general exercise recommendations that can go some way to reducing this risk and counteracting the negative effects of sitting.
In an ideal world, those of us who have sedentary or sitting based occupations should aim to move, stretch, and be active for at least 1-2 minutes of every hour. While some of the exercises shown here may not be suitable for your particular work environment, any effort to perform a routine of this nature for 5-10 minutes before or after work or during a lunch break would go a long way to reducing the risk of pain and injury. General exercise and safe varied movement of any kind is also highly recommended.
Exercise 1 - Thoracic Rotation

Thoracic Rotation Start
Start on all fours with one hand placed behind your head.
Slowly turn the elbow towards the ceiling allowing your trunk to rotate and stretch
Hold at top position for 3-5 seconds. Repeat x 10 with each arm
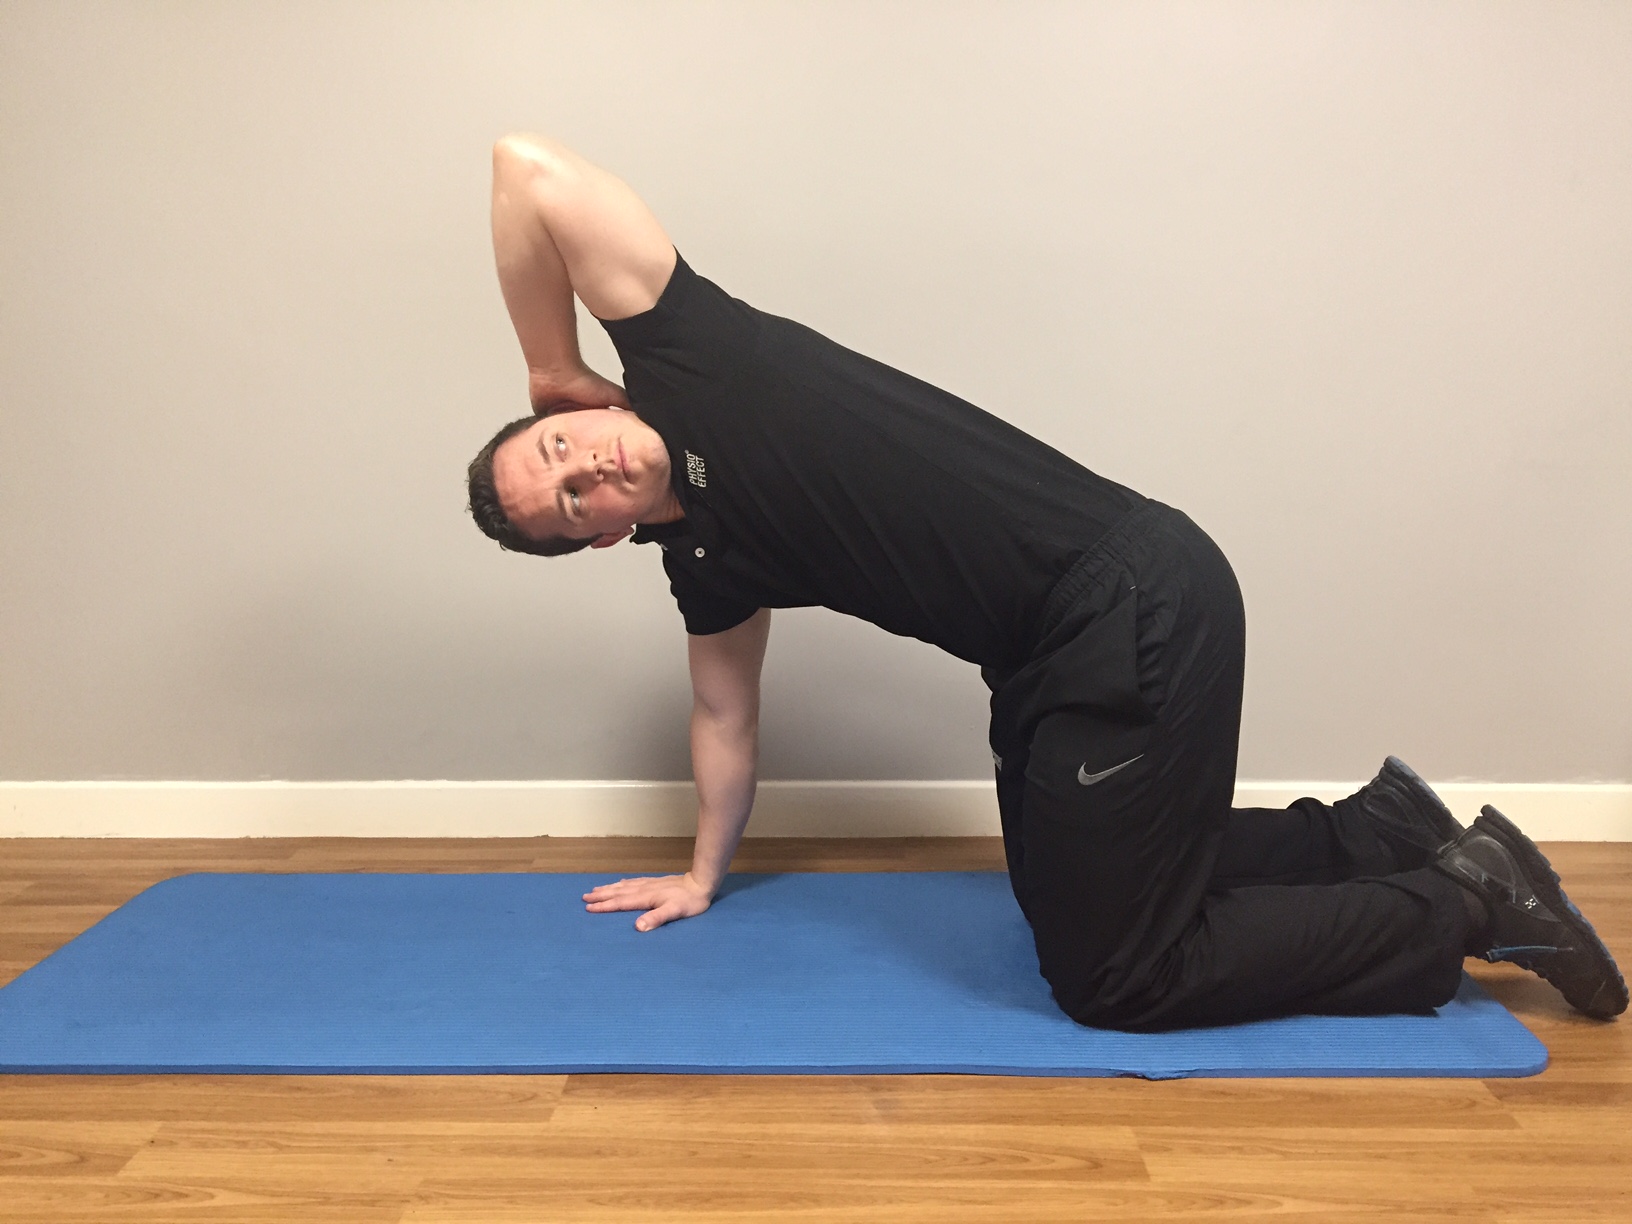
Thoracic Rotation Finish
Exercise 2 - Dart
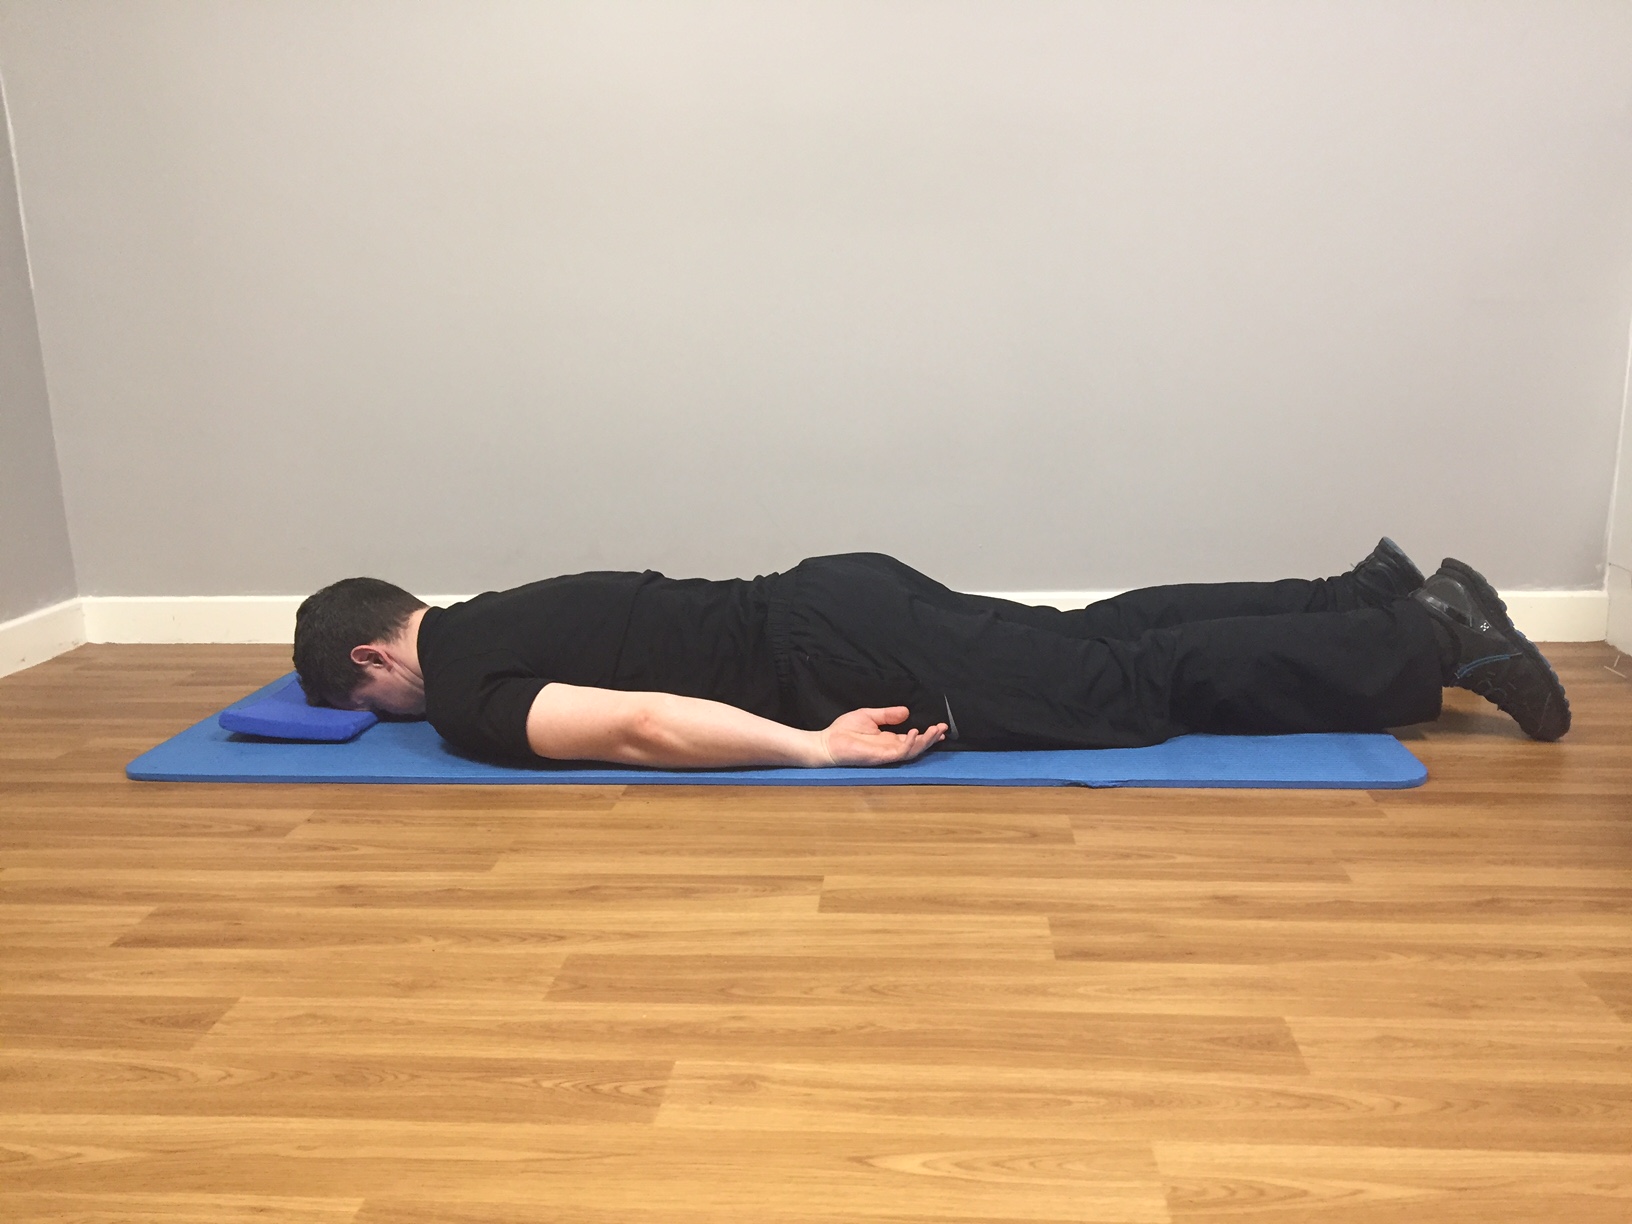
Dart - Start Position
Lay face down with thin pillow or folded towel for head support
Arms by your side, gently stretch your fingertips away from your shoulders allowing your shoulder blades to glide downward and slightly inward
Palms facing your hips, have your arms floating just off your side and not touching the floor
Keeping the back of your neck long and eyes looking to the floor, gently lift your head and upper body just off the floor - imagine lifting from your breast bone
Hold the finish position 3-5 seconds. Repeat 10 times 1-2 sets

Dart - Finish Position

Dart - Finish - Detail
Exercise 3 - Hip Flexor Stretch

Hip Flexor Stretch Start Position
Take a kneeling / lunge position as shown - use support of wall or furniture for balance if required
On the kneeling side gently engage your buttock and lower abdominal muscles - imagine you are tucking your tailbone in between your legs
You should feel a stretch at the front of your hip/ thigh. If balance allows gently raise the arm on the same side as the kneeling knee.
Hold the stretch for 30 seconds minimum and repeat 2-3 times each side.

Hip Flexor Stretch Finish Position
Exercise 4 - Cobra

Cobra Start Position
Lay face down with hands palms down about shoulder height
Using your arms slowly press out peeling your upper body slowly off the floor
Remain heavy in your hips trying to keep them in contact with the floor - relax your buttock muscles
Hold the finish position for 5-10 seconds, return to the start and repeat 5-10 times

Cobra Finish Position
Exercise 5 - Shoulder Bridge
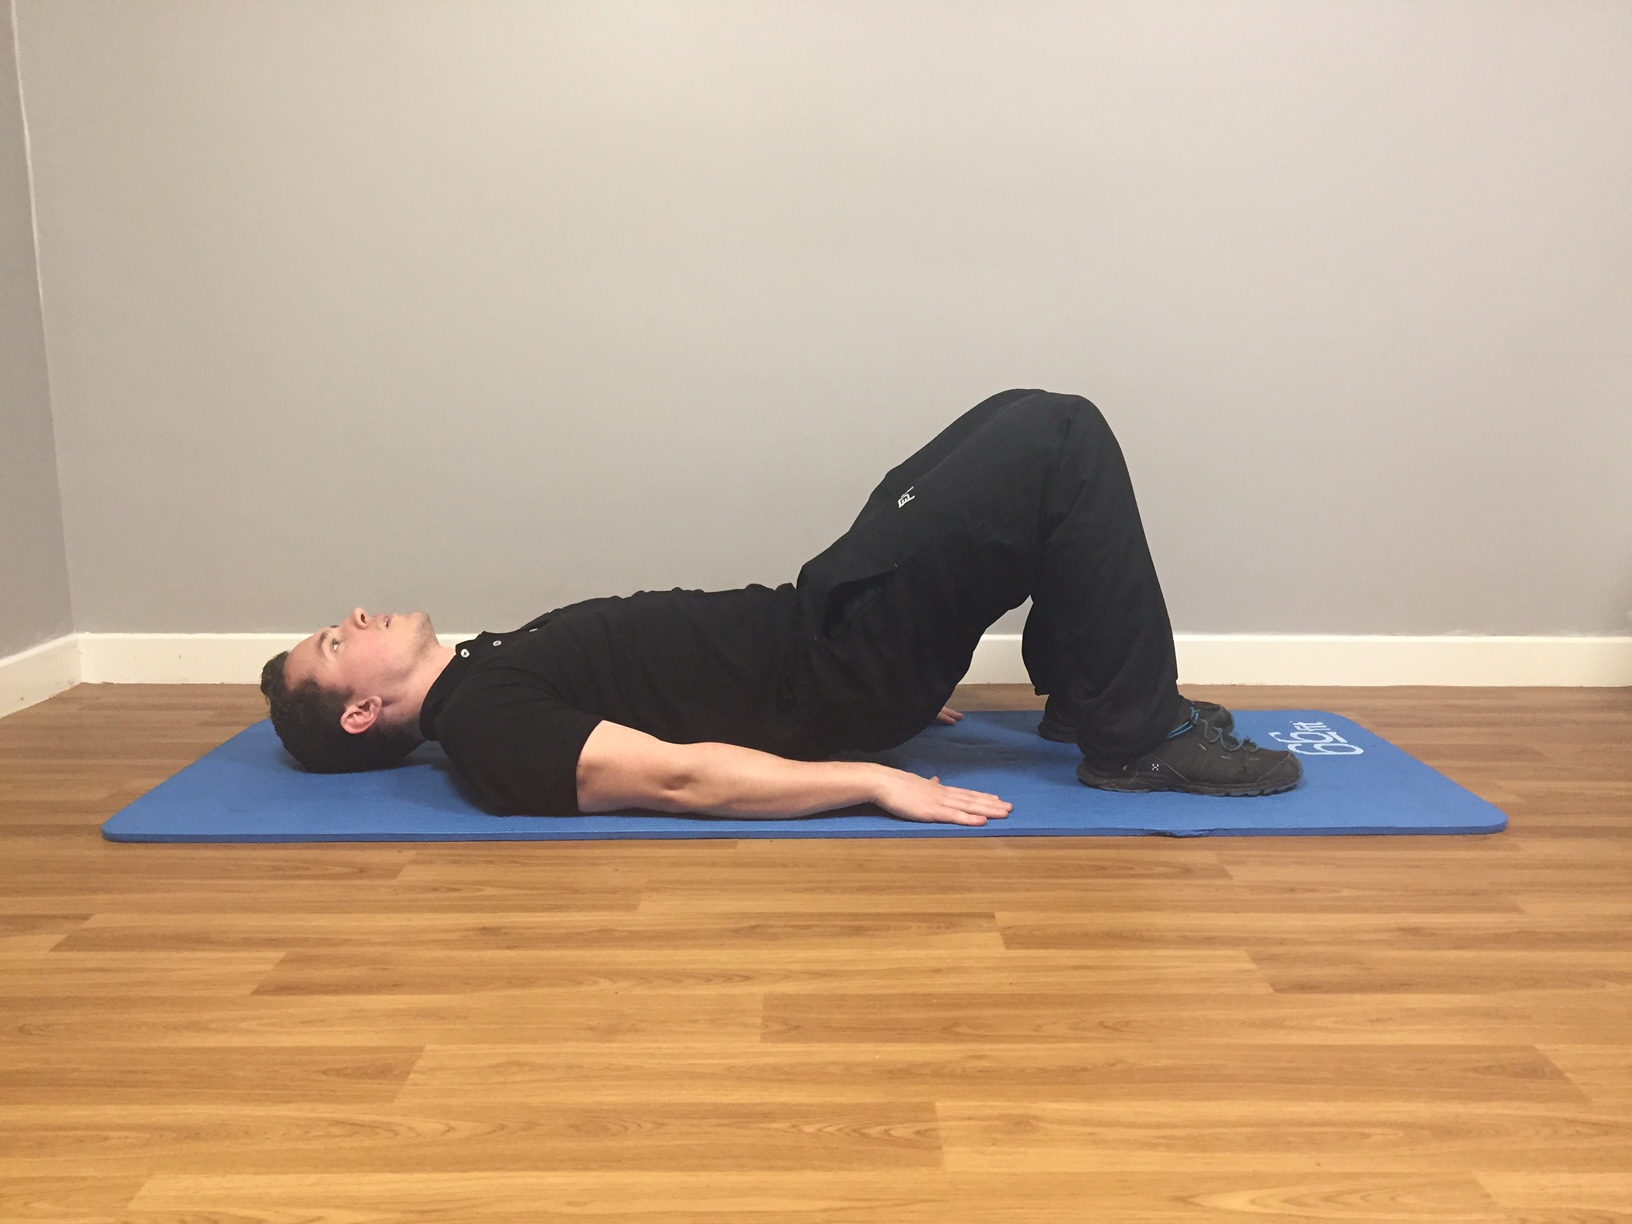
Shoulder Bridge Start Position
Lay flat on your back with feet shoulder width apart and knees bent
Using your lower abdominals gently tilt your pelvis to press your lower back flat to the floor
Pressing through your heels, using your buttock and abdominal muscles gently peel your spine up from the floor starting with your tail bone.
Finish with your weight resting across your shoulder blades and your shoulders, hips and knees in a diagonal line
Hold finish position for 3-5 seconds, return to start and repeat 10 times for 2-3 sets.
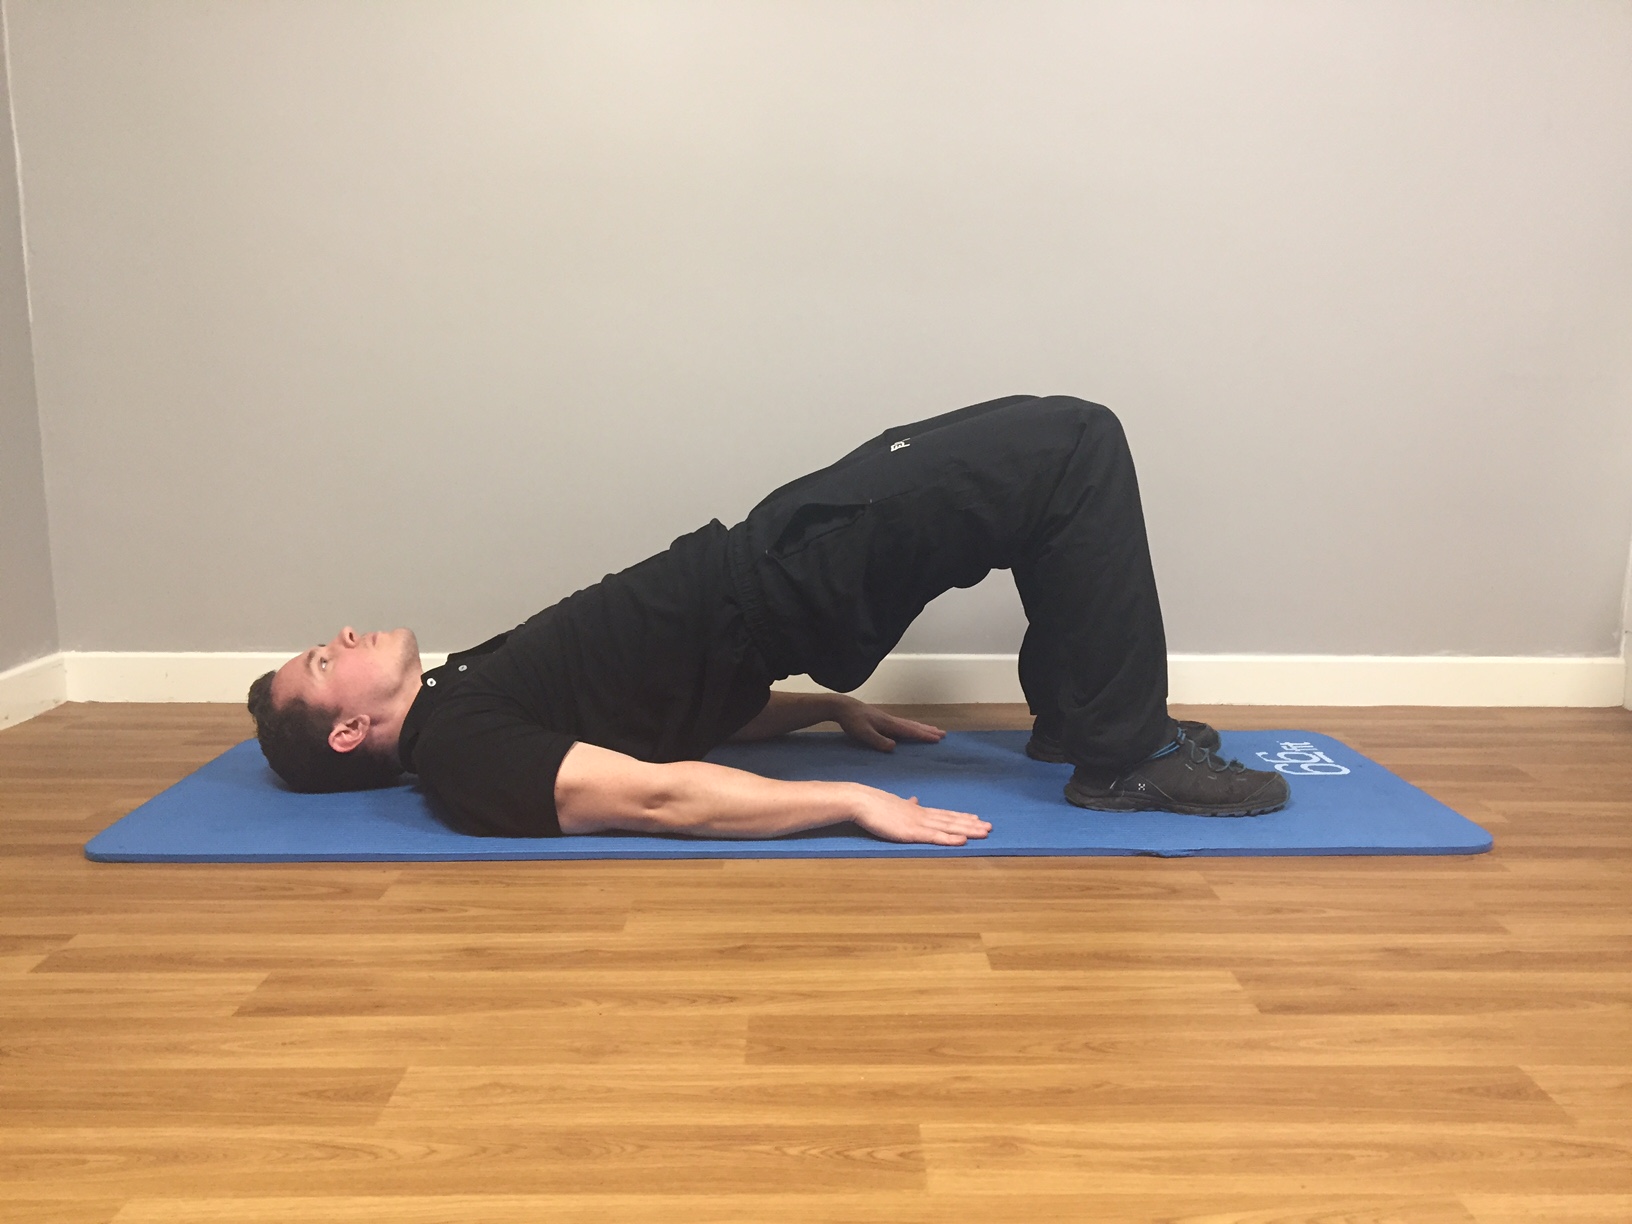
Shoulder Bridge Finish Position
Exercise 6 - Superman

Superman Start Position
Start in all fours position with knees under hips, hands under shoulders and spine relaxed
Slowly extend out opposite arm and leg pointing the toes behind and the fingertips to the front
Keep gentle tension in your lower abdominals - think about drawing your bellybutton in towards your spine
Try to maintain spinal position throughout the movement, return slowly to start position
Repeat with opposite arm and leg, try 10-12 repetitions for 2-3 sets.

Superman Finish Position
Exercise 7 - Thoracic Extension with Foam Roller

Thoracic Extension with Foam Roller Start Position
Lying on your back with knees bent and feet flat, place a foam roller under your mid-upper back as shown
Take a deep breath in and then, as you exhale, slowly extend back over the roller to stretch your back. Try to keep your lower abdominals engaged to avoid over-arching your lower back
Support your head with your hands and be careful to stay relaxed in your neck. If you find this too intense or uncomfortable, try using a pillow or pillows to rest back onto
Hold the finish position for 2-3 breath cycles, return to start position and repeat 5 times
Move the roller to another position in your mid-upper back and repeat the process, aim to work on 3-5 positions along your spine

Thoracic Extension with Foam Roller Finish Position

Thoracic Extension with Foam Roller Alternate Finish Position
Exercise 8 - Pec Stretch

Pec Stretch Start Position
Stand as shown with arm at approximately shoulder height and palm to forearm placed against the doorframe
Slowly turn your body away by stepping your feet around to open and stretch the front of your chest and shoulder
Lean gently into the stretch, keeping your neck relaxed, hold for 30 seconds+, repeat x 2 on each side
Alternatively, use a doorway to position both arms in the stretch position, step forward to feel the chest and shoulder open and stretch. Hold 30 seconds+, repeat x 2.

Double Pec Stretch Position
While these are general exercise recommendations suitable for the majority of the population they are not prescriptive for any specific pain or injury. These exercises should be performed slowly and gently in a range of movement suited to your own level of ability and flexibility. The exercises should not cause any pain and we recommend that if you are in any doubt or if you are suffering from spinal or joint pain issues you should consult a healthcare professional for advice.
At Physio Effect we provide a wide range of services allowing us to not only treat your pain or injury but ensure that you are given the best advice specific to your individual needs to prevent your problem from recurring.

What is the difference between ‘Regular’ and ‘Clinical’ Pilates?
Interested in Pilates in general but not sure what we mean by Clinical Pilates?
Regular Pilates is conducted by a Pilates instructor, whereas Clinical Pilates is prescribed and supervised by a Physiotherapist. The difference is very important because a physiotherapist has an in-depth knowledge of injury, pathology, body function and movement patterns. The physiotherapist will assess each person and determine which exercises will be the most effective for each individual. This becomes especially important if you have a history of injury such as low back pain, whiplash, hypermobility or an athlete coming back from an injury. There will be certain exercises which need to be adapted specifically for you.
For more information on our Clinical Pilates classes here at Physio Effect, have a look on our Clinical Pilates page


#KnowledgeShare – Shoulders Month – Rotator Cuff
We see a lot of clients coming to us with shoulder injuries – sometimes it’s not what they think! In this new video, Danny gives us a the basics (and a bit more!) on the rotator cuff!
23rd February 2017
We see a lot of clients coming to us with shoulder injuries – sometimes it’s not what they think! In this new video, Danny gives us a the basics (and a bit more!) on the rotator cuff!

#KnowledgeShare – Shoulders Month – Mobility Exercises
Physio Effect physiotherapist Jonny Kilpatrick demonstrates some exercises to improve overhead range of movement using small equipment you’ll find in your gym
Here's Jonny from a few years ago demonstrating some exercises to improve overhead range of movement using small equipment you'll find in your gym

#KnowledgeShare – Back Mobility
It’s back month here at Physio Effect Glasgow - how to use a foam roller to help with back pain
17th March 2017
It’s Back Month here at Physio Effect! Here’s Jonny (and Ash) showing us how to use the foam roller for a bit of mobilisation!