
Thoracic Mobility - The Key To A Pain Free Spine!
When your thoracic spine isn't moving as it should, it creates a domino effect throughout your body. This can contribute to neck, shoulder & lower back pain. Let’s drill down into how to take better care of your back and get that thoracic spine moving!
Unlock Your Movement Potential: Why Your Thoracic Spine is a Game-Changer! 😀
Written by Daniel Wray (Senior Physiotherapist & Mobility Coach)

Back pain is very common - Thoracic spine stiffness is often to blame
As someone who's spent over two decades in the clinic as a sports physiotherapist, I've seen first-hand how often seemingly unrelated aches and pains can be traced back to one crucial area: your thoracic spine. You know, that middle section of your back, between your neck and your lower back? It might not get as much attention as your neck or lower back, but trust me, it's a true unsung hero when it comes to keeping you moving freely and comfortably, no matter your age or activity level.
Think of your thoracic spine as the command centre for so much of your upper body movement. It's designed for rotation and extension, allowing you to twist, reach, and stand tall. But in our modern lives, spent often hunched over desks, phones, or even just relaxing on the couch, this vital area can become stiff and restricted. And when that happens, other parts of your body have to pick up the slack, often leading to problems!
The Ripple Effect: How a Stiff Thoracic Spine Causes Trouble
When your thoracic spine isn't moving as it should, it creates a domino effect throughout your body. Here's how it can contribute to those annoying aches and pains:

Familiar hunching over your desk increases thoracic spine rounding and stiffness
Neck Pain: If your mid-back is stiff, your neck has to work overtime to compensate for head rotation and movement. This extra strain can lead to tightness, headaches, and that familiar crick in your neck.
Shoulder Pain: Your shoulder blade sits right on top of your rib cage, which is connected to your thoracic spine. If your mid-back is locked up, your shoulder blade can't move properly, impacting your shoulder joint mechanics and potentially causing impingement or rotator cuff issues.
Lower Back Pain: When your thoracic spine lacks mobility, your lower back (lumbar spine) might try to compensate by over-rotating or extending, putting excessive stress on discs and joints, leading to that nagging lower back discomfort.
Move Freely, Live Fully: The Benefits of Thoracic Mobility

Thoracic Rotation Mobility can help improve back pain and stiffness
The good news is, improving your thoracic spine mobility can have a profound impact on your overall well-being. By restoring natural movement to this area, you can:
Reduce Pain: Alleviate strain on your neck, shoulders, and lower back.
Improve Posture: Stand taller and reduce that "hunched over" feeling.
Enhance Performance: Whether you're an athlete or just enjoy daily activities, better thoracic mobility can improve your ability to rotate, reach, and lift.
Breathe Easier: Your ribs attach to your thoracic spine, so improved mobility can even enhance your breathing mechanics!
Easy Moves for a More Mobile You!
Ready to get started? Here are some simple yet effective exercises you can incorporate into your daily routine to unlock your thoracic spine's potential. Remember to listen to your body and move gently. Consistent daily practice is your key to progress.
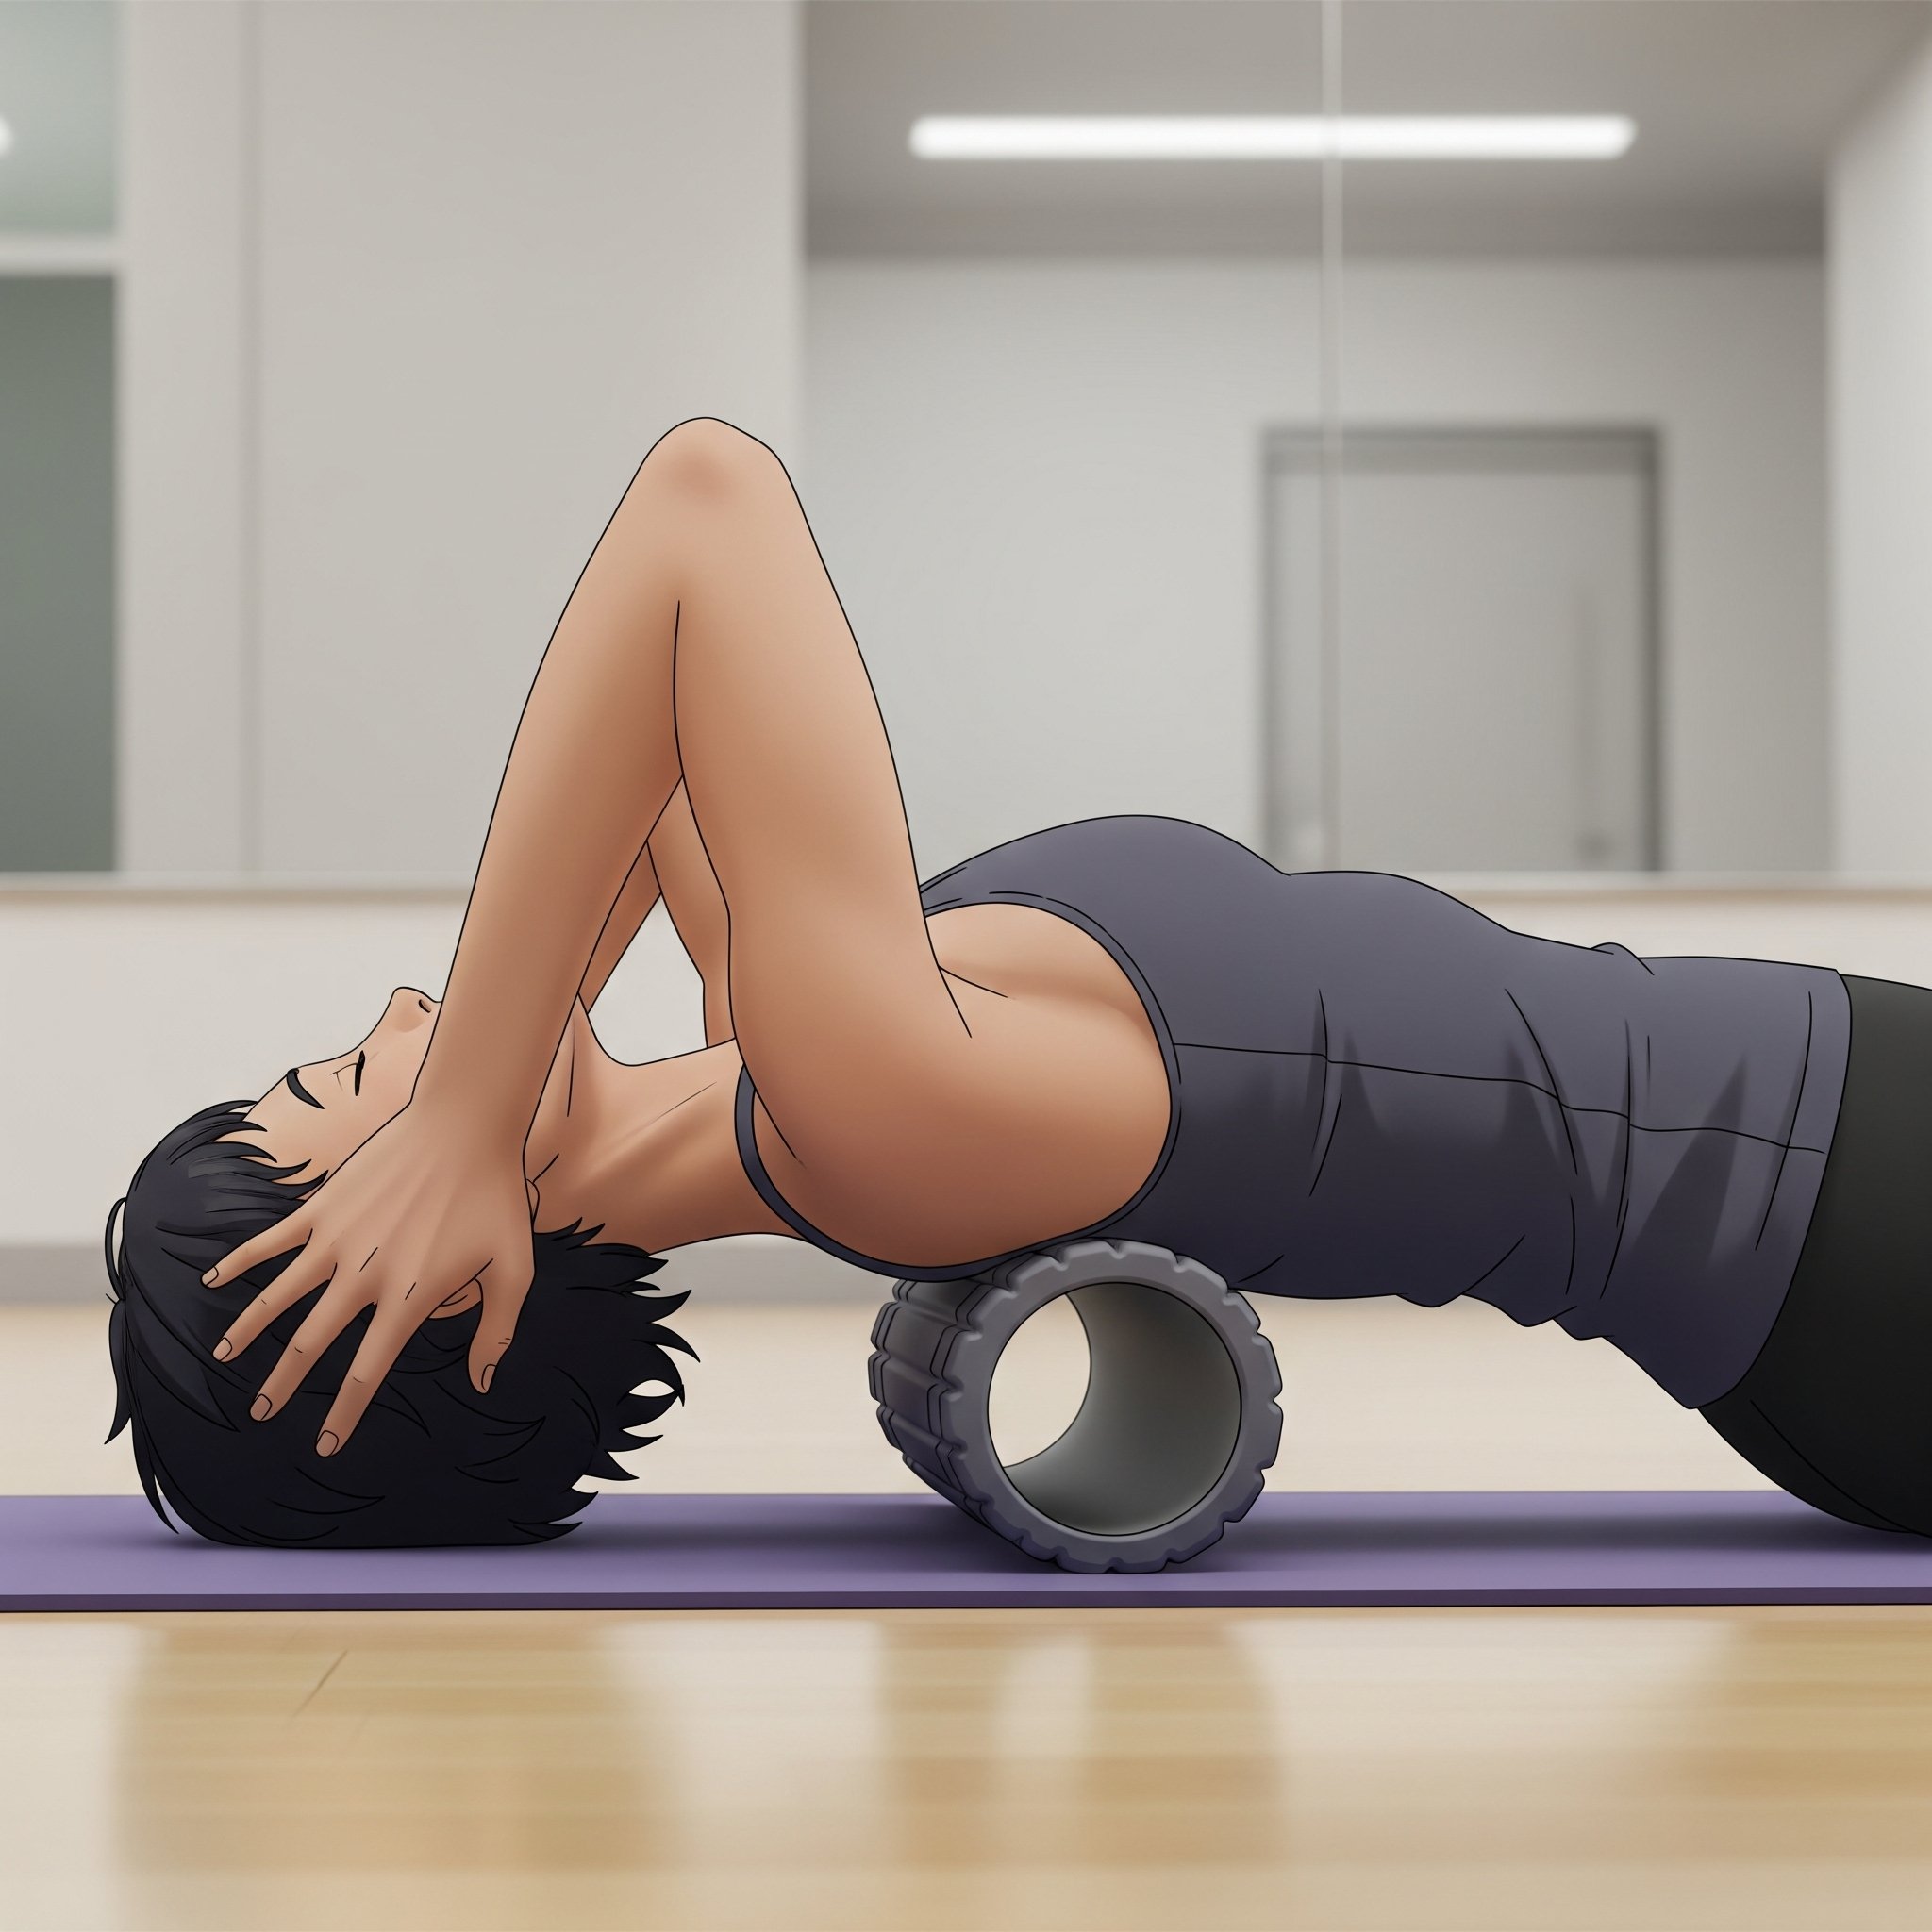
Foam Roller Thoracic Extension
Thoracic Extension Over a Foam Roller:
Lie on your back with a foam roller positioned horizontally across your mid-back.
Place your hands behind your head for support.
Gently extend your upper back over the roller, allowing your head to drop towards the floor.
Slowly roll up and down your mid-back, focusing on areas of stiffness.

Seated Thoracic Rotations
Seated Thoracic Rotations:
Sit comfortably in a chair with your feet flat on the floor.
Cross your arms over your chest or place your hands behind your head.
Gently rotate your upper body to one side, leading with your rib cage.
Hold briefly, then return to the center and rotate to the other side.
As you rotate try gently lifting your elbow to he ceiling adding side opening to rotation
Cat-Cow Stretch:
Start on your hands and knees, with your wrists under your shoulders and knees under your hips.
Cat: Exhale as you round your spine towards the ceiling, tucking your chin to your chest.
Cow: Inhale as you drop your belly towards the floor, lifting your head and tailbone.
Flow smoothly between these two positions 1-2 minutes

Cat - Rounded back
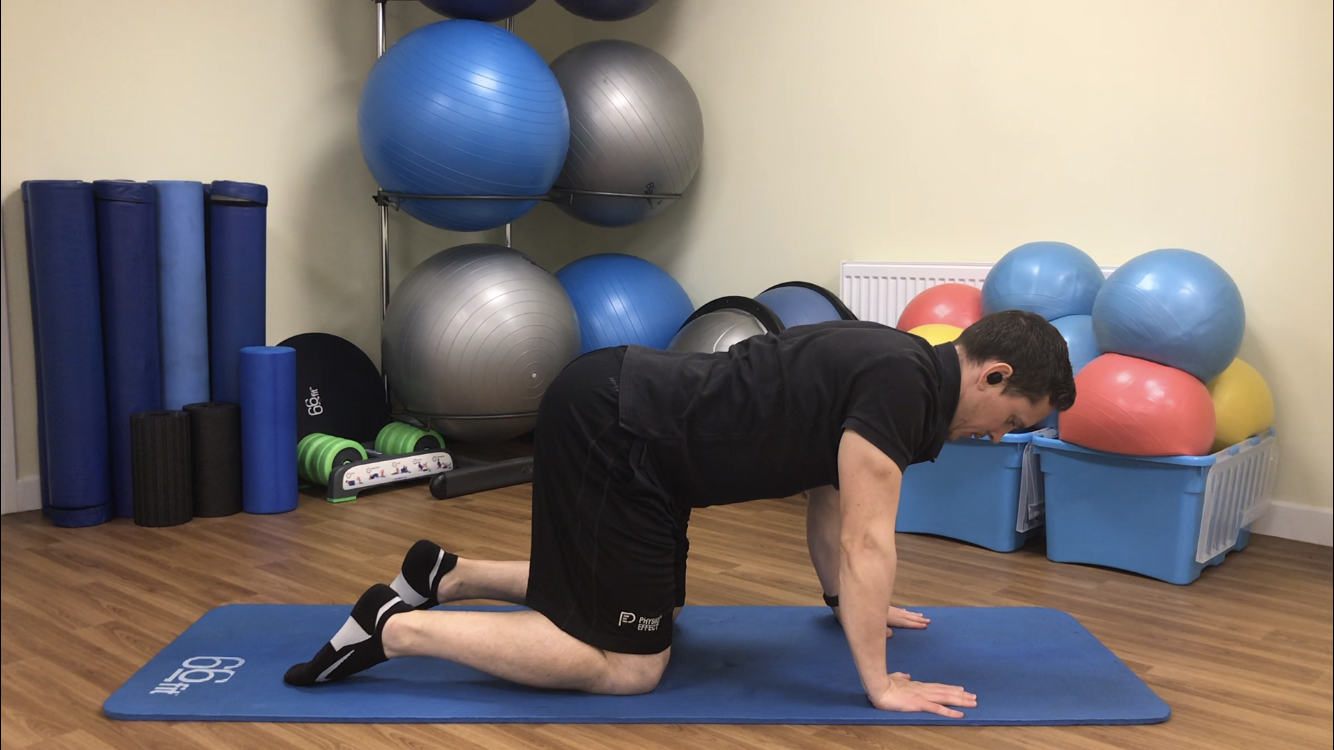
Cow -hollow back
Elevated Arms Thoracic Extension
Similar to cat-cow motion performed with your arms elevated & resting on a chair or bench.
Breathe in as you round up lifting your head and shoulders
Exhale as you sit down and back relaxing across your back and shoulder blades
Repeat slowly for 10-15 deep breath cycles

Breathe in as you round your upper back and shoulders
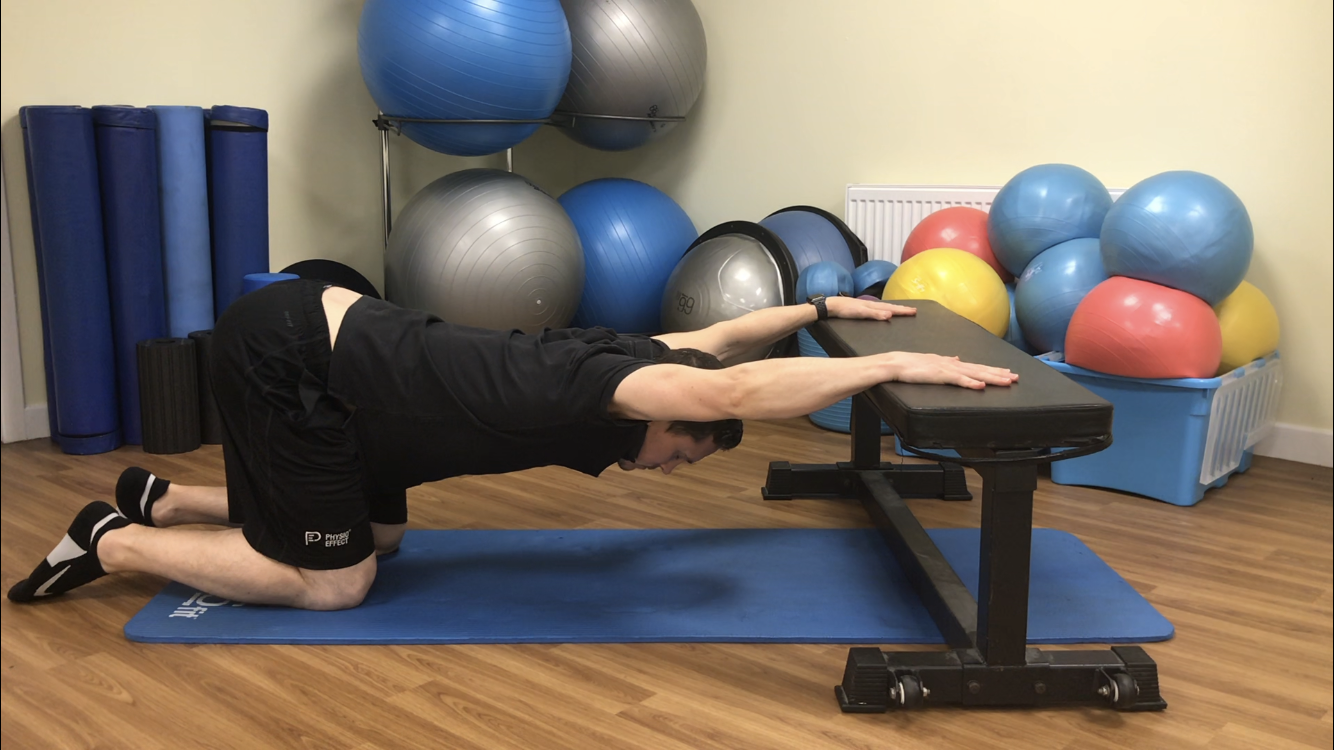
Exhale as you relax and sit back extending through your back and shoulders
Deep Squat Spine Rotations:
This is more advanced, please avoid if you are not comfortable or able to maintain a deep squat position
Get into a deep squat and hold, Block one knee on the inside with your elbow
With the opposite arm straight rotate and lengthen towards the ceiling
Follow the movement with your head and actively rotate your ribcage and sternum
Hold for a few seconds at the top position then return & repeat on the opposite side.
Work side to side for 30-60 seconds

Deep Squat - Spinal Rotations
Incorporating these exercises regularly can make a world of difference in how you feel and move. It's amazing what a little attention to your thoracic spine can do for your overall comfort and vitality!
Looking for something a little more challenging?
If you are physically able these videos below can help you progress your spinal mobility and can be done routinely to increase range of movement and reduce back ache and discomfort.
Like most things worth having mobility improvements are earnt by consistency of practice. Show up everyday and work on your areas of stiffness & weakness and you will reap the rewards of moving better & reducing pain!
Downward dog - Calves, hamstrings and Thoracic/Shoulder Stretch
3 Point Bridge- Full body mobility including hips, spine and shoulders
Thoracic Spine Windmills & rotations
thank you
Thanks for reading, please share with any friends, family or colleagues who could benefit.
We are always here to listen & help. Our specialist team can help you navigate and manage any ache, pain or injury.

Pain - Finding Relief & Taking Control
That ache in your back, the stiffness in your neck, the twinge in your knee – these are common experiences we all face from time to time. Pain is something we will all have to manage at some point in our lives. Your understanding and response to pain is crucial in optimally managing & ultimately reducing you pain
Understanding Musculoskeletal Pain: Finding Relief and Taking Control
Written By Daniel Wray (Sports Physiotherapist & Mobility Coach)
That ache in your back, the stiffness in your neck, the twinge in your knee – these are common experiences we all face from time to time. Musculoskeletal pain, affecting our muscles, bones, ligaments, nerves, and tendons, can range from a mild annoyance to a significant disruption in our daily lives.
It's natural to feel concerned when pain strikes, especially if it's intense. However, it's reassuring to know that most musculoskeletal pain, even when it feels quite severe, is not a sign of serious underlying damage or pathology. Often, it can be related to things like muscle strains, sprains, overuse, or even just prolonged awkward postures. Our bodies are resilient, and these minor issues usually resolve with time and proper care.
When Should You Seek More Urgent Investigation?
While most musculoskeletal pain is not serious, there are certain situations where it's important to seek professional medical advice promptly. Be mindful of the following:
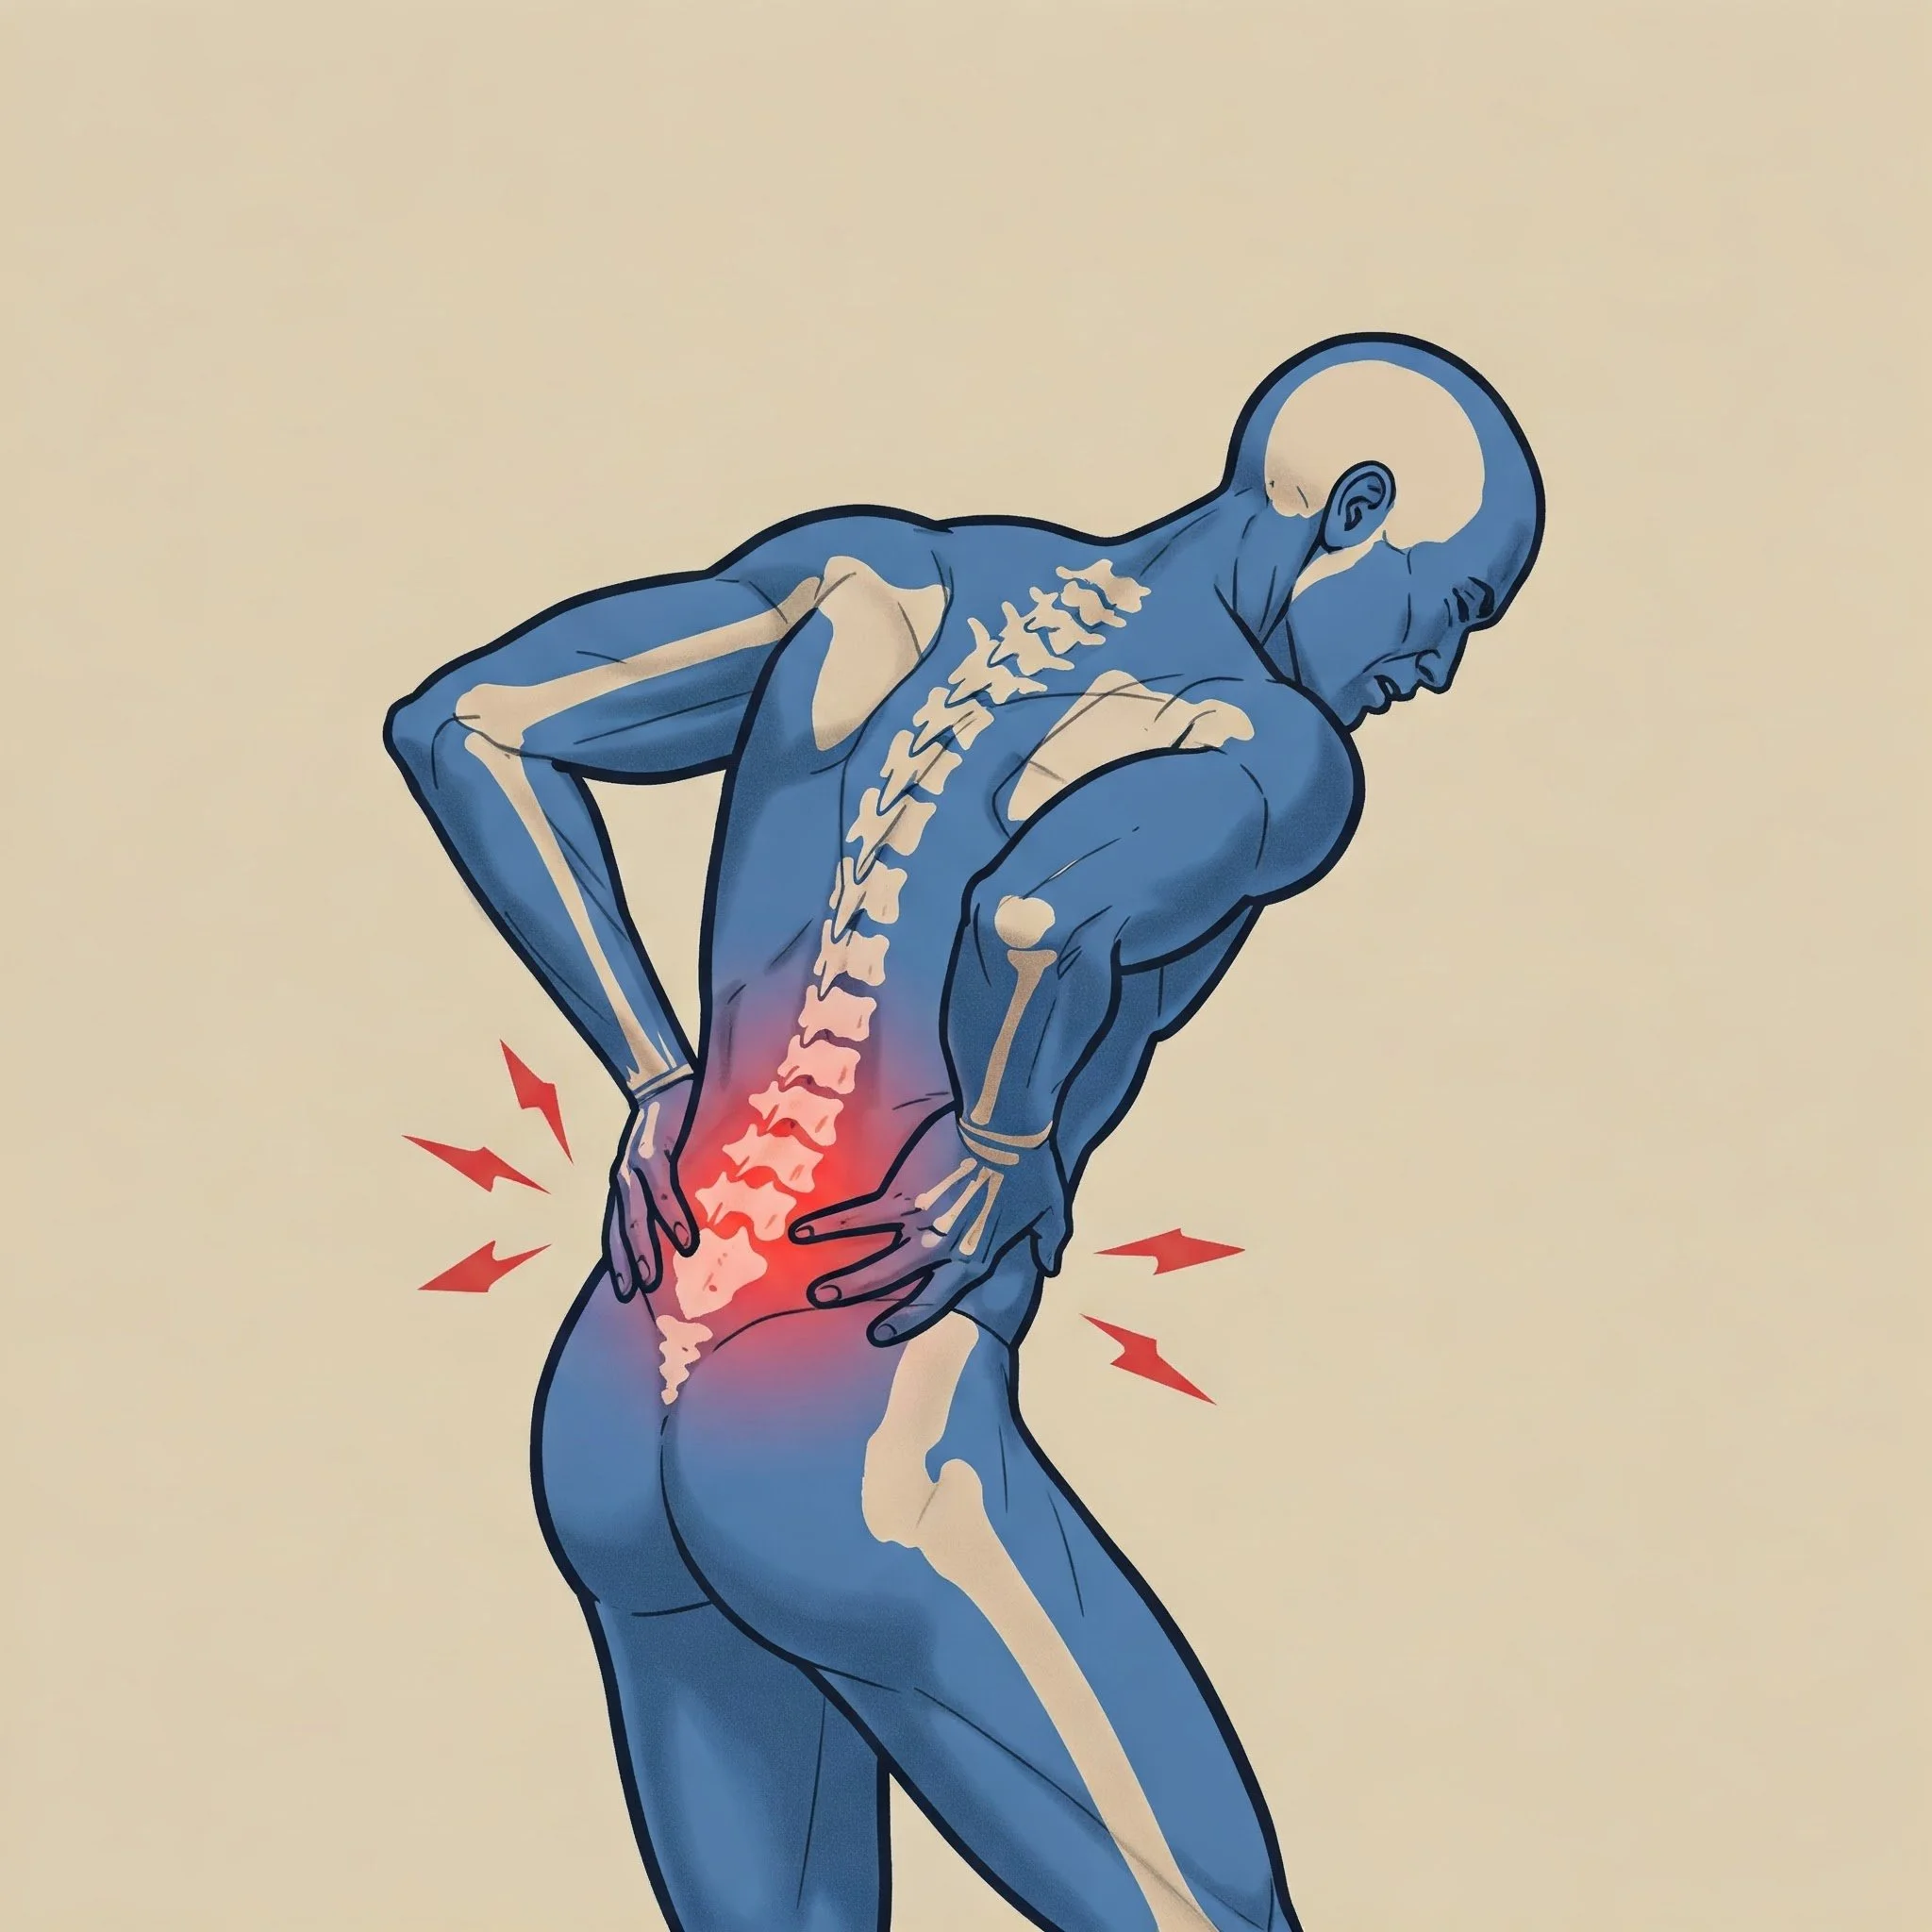
Lower Back Pain - Can Be Crippling but Is Rarely Serious Pathology
Severe pain that comes on suddenly and unexpectedly, especially after an injury.
Pain accompanied by other symptoms like fever, unexplained weight loss, or significant weakness.
Pain that radiates down your arm or leg with numbness or tingling.
Loss of bowel or bladder control.
Pain that is constant and progressively worsening, especially at night.
A history of cancer or other serious medical conditions.
If you experience any of these "red flag" symptoms, it's always best to err on the side of caution and consult a medical professional.
Simple Daily Habits and Strategies to Reduce Pain and Cope Better:
The good news is that there's a lot you can do in your daily life to manage and reduce musculoskeletal pain. Here are a few simple strategies to incorporate:

Some key areas to manage in improving Pain Control
Stay Active: Gentle exercise, like walking, swimming, or yoga, can help strengthen muscles, improve flexibility, and reduce stiffness. Find activities you enjoy and make them a regular part of your routine.
Practice Micro-breaks and Regular Movement: If you spend long periods sitting or in the same position, incorporate short, frequent breaks to move around, stretch, and change posture. Even a minute or two of gentle movement every 30 minutes can help relieve muscle and joint tension.
Be Mindful of Movement: Pay attention to your body when you move. Avoid sudden, jerky motions and lift heavy objects correctly.
Manage Stress: Stress can often exacerbate pain. Incorporate relaxation techniques like deep breathing, meditation, or spending time in nature.
Ensure Adequate Sleep: Quality sleep is crucial for muscle repair and overall well-being. Aim for 7-9 hours of restful sleep each night.
Consider Heat and Cold Therapy: Applying heat packs can help relax tight muscles, while ice packs can reduce inflammation. Experiment to see what works best for you.
Stay Hydrated: Drinking enough water is important for overall tissue health. This will range upwards from at least 2-3 litres per day depending on your circumstances
You Don't Have to Live with Pain – Help is Available:

Professional Physiotherapy guidance can help manage and improve your pain
Living with persistent musculoskeletal pain can be frustrating and limit your ability to enjoy life. Please remember that you don't have to accept pain as a normal part of your day.
At Physio Effect, our experienced team of physiotherapists is dedicated to helping you identify the underlying causes of your pain and develop a tailored treatment plan to address your specific needs. Our skilled practitioners are experts in assessing movement patterns, muscle imbalances, and joint mechanics. We utilize a variety of effective techniques, including manual therapy, targeted exercise prescription, and comprehensive education, all designed to help you reduce pain, improve your physical function, and prevent future problems.
Taking that first step to connect with the team at Physio Effect can make a significant difference in your quality of life. We're here to listen, understand your unique situation, and guide you on your journey towards a pain-free and more active future.
Summary
In conclusion, while musculoskeletal pain is a common experience, it doesn't have to dictate your life. By understanding the common causes, recognizing when to seek further advice, and incorporating simple daily strategies, you can take proactive steps to manage and reduce discomfort. Remember that expert help is available, and the experienced team at Physio Effect is ready to provide tailored support to help you regain comfort and get back to doing what you love.
thank you
Thanks for reading, please share with any friends, family or colleagues who could benefit.
We are always here to listen & help. Our specialist team can help you navigate and manage any ache, pain or injury.
You can Use the links to Book an appointment now or Contact us with any questions

Vaginismus - Our Expert Pelvic Health Team Can Help
Vaginismus can be physically and emotionally challenging, but with the right guidance and support, women can regain control over their bodies and enhance their overall well-being. In this post, I'll share insights into what vaginismus is, its causes, and most importantly, how it can be managed and treated.
Written by Jenny Devlin - Specialist Pelvic Health Physiotherapist
Vaginismus: You’re Not Alone, Help is Here!
As a women's health physiotherapist, I have had the privilege of helping many women address a variety of pelvic health concerns, one of which is vaginismus. This condition can be physically and emotionally challenging, but with the right guidance and support, women can regain control over their bodies and enhance their overall well-being. In this post, I'll share insights into what vaginismus is, its causes, and most importantly, how it can be managed and treated.
What is Vaginismus?
Vaginismus is a condition where the muscles of the pelvic floor involuntarily contract or spasm, making penetration—whether during sexual intercourse, a gynecological exam, or the use of tampons—painful or impossible.
Although vaginismus is often misunderstood or stigmatized, it is important to note that this medical condition is common, treatable, and you’re not alone!

Pelvic Health Physiotherapy
What Causes Vaginismus?
Vaginismus is often caused by a combination of physical, psychological, and emotional factors. It can be primary (always had it), or secondary (develop after previously being able to engage in penetration). While every individual is different, some common contributing factors include:
Physical Factors: Overactive pelvic floor muscles, past trauma (including childbirth), or medical issues like infections or changing hormones can lead to discomfort.
Psychological Factors: Anxiety about sex, a history of trauma, relationship issues or negative cultural beliefs around intimacy can trigger muscle tightness.
Neurological Factors: Nerves in the pelvic region that go haywire can also contribute to the issue.
Symptoms of Vaginismus
The main symptom is the involuntary tightening of pelvic muscles, which makes vaginal penetration difficult or impossible. This can happen during sex, gynecological exams, or even when trying to use tampons.

Pelvic Floor Physiotherapy
Diagnosing Vaginismus
If you suspect you have vaginismus, seeking a professional diagnosis is crucial. A women's health physiotherapist or gynecologist can assess your pelvic health and help determine the underlying causes. The diagnosis usually involves a thorough history-taking, a pelvic floor muscle assessment, and possibly some physical or internal examinations.
Treating Vaginismus
The good news is that vaginismus is treatable, and there are several approaches that can help improve symptoms and quality of life. The treatment plan will depend on the severity and underlying causes of the condition.
1. Pelvic Floor Physiotherapy
As a physiotherapist specializing in women’s health, I strongly recommend pelvic floor rehabilitation as one of the most effective treatments for vaginismus. This involves:
Education on Pelvic Floor Muscles: Understanding how the pelvic floor muscles function and learning how to relax and contract them appropriately is key to overcoming vaginismus.
Manual Therapy: In some cases, gentle hands-on techniques may be used to release tension and improve pelvic floor flexibility.
Progressive Desensitization: This involves gradually working up to tolerating vaginal penetration in a safe, controlled, and non-threatening way. This may include the use of vaginal dilators or other techniques to help retrain the pelvic floor muscles.
2. Cognitive Behavioral Therapy (CBT)
For women whose vaginismus is rooted in anxiety, trauma, or negative emotions, therapy may be beneficial. CBT focuses on changing harmful thought patterns and beliefs surrounding intimacy and sexuality. It helps to address fear or negative associations, ultimately enabling the body to respond more comfortably to intimacy.

3. Education and Support
Knowledge is power. Educating both the individual and their partner(s) about vaginismus can help reduce the shame or misunderstanding that often surrounds the condition. Couples therapy, if appropriate, can also improve communication and intimacy, fostering a stronger emotional connection.
4. Medical Treatments
Depending on the underlying causes of vaginismus, your doctor may recommend treatments such as hormone therapy (for vaginal dryness), pain management options, or medications to reduce muscle spasms. In rare cases, surgical interventions may be needed.
The Road to Recovery
Vaginismus is not a condition that should define you or limit your sexual well-being. While the journey to recovery may take time, with the right treatment and support, most women can experience a significant improvement in their symptoms. The key is to approach it holistically—focusing on physical, emotional, and psychological health.
It’s important to work with healthcare providers who specialize in women's health and pelvic rehabilitation. With commitment, patience, and a clear treatment plan, you can regain control and enjoy a fulfilling, pain-free life.

Specialist Pelvic Health Physiotherapy Can Help

Meditation - How, what, when & why?
Meditation enhances mental and physical well-being by promoting relaxation and reducing stress. It improves mood, focus, and emotional health, fostering self-awareness and control over thoughts. It can lower blood pressure and improve sleep quality, helping individuals respond to challenges with clarity and calmness. Read this blog for tips to help you get started on your meditation journey
Meditation is good for us - Fact!
Why do we find it so hard to prioritise and what benefits are we missing out on?
Written by Julie McSherry - Meditation Teacher with 22 years personal meditation practice (and counting!)

I’d love to meditate but……
‘I can’t sit still’
‘My mind is always racing’
‘I can’t concentrate’
‘It’s too noisy’
‘I can’t find a comfortable position’
‘I don’t have the patience’
‘I’m too busy’
Sound familiar?
Most people starting out on a meditation journey feel some or all of the above, but like all great things it’s really worth the effort!
Taking an average day waking at 7am, going to bed at 10.30pm is 930 mins! Meditating for 10 minutes is a tiny amount of time which produces many, many positive benefits..
So where to start?
Choose a time that suits you for meditation. If you’re a night owl, early mornings may not work. The best times to meditate are right after waking up or before bed.
Try meditating at the same time as another daily habit, like before a shower.
Find a quiet spot where you won't be disturbed.
For sitting, comfort is key. You don’t have to sit on the floor if it’s uncomfortable; sitting on a chair or against a wall is fine. Keep your spine straight—using a cushion can help.
Start with 10 minutes. As you relax, stay still and focus on your breath—notice each inhale and exhale.
It’s normal for thoughts to pop up; just let them pass and return your focus to your breathing.
With practice, you'll find fewer distractions as you get used to this quiet time.

Find your calm through meditation
Benefits of Meditation:
The effects of meditation are far reaching, positively impacting our physical health and our mental wellness, including cognitive functioning and emotional control.
Studies show reductions in:
Anxiety
Depression
Stress levels
Job burnout
We also see psychological benefits, such as:
Heightened empathy
Improved interoceptive awareness (stimuli and sensations within the body)
Better psychological wellbeing
Increased self-directedness (awareness that our actions and behaviors reflect our choices)
Improved cooperativeness (degree of agreeableness in relationships with others)
More self-transcendence (rising above the self and relating to something bigger)

Regular meditation has numerous physical & mental health benefits
Benefits of meditation on the brain:
Benefits of meditation includes physical changes to the brain and improved cognitive functioning, such as:
Slowing of brain aging (particularly thinning of the prefrontal cortex)
Improved attention
Increased innovation
Better problem-solving
Mental health conditions following trauma

Find your inner calm through meditation
Other physical benefits of meditation:
Other physical benefits offered by meditative and mindfulness practices — also backed up by research — include:
Strengthened immune function
Reduced stress
Improved sleep
Reduced panic attacks
Increased work satisfaction
Reduction in chronic pain
Reduced hypertension
Lowered risk of cardiovascular disease
thank you
Thanks for reading, please share with any friends, family or colleagues who could benefit.
We are always here to listen & help. Our specialist team can help you navigate and manage any ache, pain or injury.
Mobility - What? Why? When? How?!
Do you struggle with constant niggling joint and muscle pains? You workout regularly but still feel stiff all the time? Do you need help understanding and implementing better mobility habits and practices? If yes then this blog is for you! Modern stressful and busy lifestyles often mean we neglect flexibility and mobility practices. Long hours of static postures cause us to stiffen up & this compounds over weeks, months and years. It’s time to start organising your mobility practices to move better & feel better!
Improving mobility requires consistent structure, practice & effort!
Written By Daniel Wray (Sports Physiotherapist & Mobility Coach)

What is mobility?
Mobility is the ability to move freely and easily, encompassing physical movement, flexibility, balance, and environment access.
Mobility is vital for daily activities and exercise, impacting overall performance and quality of life.
Improving mobility enhances physical function, reduces injury risk, and fosters independence. Prioritising mobility supports long-term health and well-being.

5 barriers to mobility practice
Physical Limitations
Joint pain, muscle weakness, and neurological issues can hinder mobility exercises.Psychological Factors
Anxiety, depression, and lack of motivation can create fear of injury, impacting engagement.Access to Resources
Limited facilities, equipment, or expert access restrict effective mobility practice.Knowledge and Awareness
Lack of understanding about mobility's benefits inhibits participation.Environmental Barriers
Poorly designed spaces and clutter discourage movement, obstructing mobility practice.
stop sitting & start moving!

Sitting Is the New Smoking!
In our experience the main cause of reduced mobility and increased joint pain and stiffness is a sedentary job or lifestyle. Sitting for over 40 hours a week leads to negative consequences. What we see regularly in clinic is huge frustration from people in this situation who do actively find time for exercise, sport & gym classes.
“I go to the gym 4 times a week so why am I so stiff & sore?”
The problem with modern life stresses and lack of time mean many of us compartmentalise exercise to one point in the day for perhaps 1-2 hours. Out with that we are too static often sitting or standing at desks for long unbroken periods. Structured & planned exercise classes or sport is great but we must also find ways to inject short, varied, but regular amounts of movement into our everyday activities.
Tips to improve Mobility practice

Prioritise Side bends & Rotational Plane Movements
Incorporate Daily Stretching & Mobility Flows
Dedicate at least 10-15 minutes each day to stretching. Focus on major muscle groups and areas that typically feel tight, such as the hips, shoulders, and spine. Consistency is key to improving flexibility and joint mobility.Engage in Mobility-Focused Activities
Activities such as yoga, Pilates, and tai chi are excellent for enhancing mobility. These practices encourage controlled movements and can help increase your range of motion, balance, and overall physical awareness.Incorporate Micro Breaks
Aim to move for 2-3 minutes every hour as a minimum. Large simple movements of all major joints helps to create pressure changes and encourage healthy fluid balance in our tissues and joints reducing the cumulative build up of static postures.
Include Dynamic Warm-ups
Before engaging in physical activity, perform dynamic warm-up exercises. Movements like leg swings, arm circles, and torso twists can prepare your body for more strenuous activity and promote better mobility throughout your workout.Prioritise Functional Movements
A strong body is able to move in all planes of motion. A lot of gym exercises and routines can be too hinge like and robotic in nature failing to promote adequate movements in all planes. Incorporate good accessory training to include rotational, side bend and functional movements.
Example Mobility Flows For Daily Practice
Back Mobility Exercise Flow - Try this routine to gently mobilise your spine
Hip Mobility Flow - Try this exercise flow to mobilise and loosen up stiff hips

We love a 3 Point Bridge. Movement is medicine, start taking yours!
Summary
Improving mobility and reducing pain & stiffness is no simple task but it can be done! Take positive action and start today dedicating time for movement and stretching as often as you can. Spend some time analysing your current practice and training and see where you can improve.
We help people improve mobility & reduce pain and stiffness on a daily basis. If you need help to understand your needs and to design & implement a plan unique to your goals we can help!
thank you
Thanks for reading, please share with any friends, family or colleagues who could benefit.
We are always here to listen & help. Our specialist team can help you navigate and manage any ache, pain or injury.
You can Use the links to Book an appointment now or Contact us with any questions

5 Signs You Are Overtraining 😫
Getting fit is great but more isn’t always better. Learn to recognise the signs and indicators that you are overtraining
You are Probably Overtraining 😲 Follow this advice to train smarter, reduce injuries & Feel better 😀
Written by Daniel Wray (Senior Physiotherapist)
One of the most common causes of injury is poorly structured and executed training plans. We see a lot of injuries caused by excessive stress on the body due to no real planning around exercise type, intensity & volume. While it is admirable to get out there and get fit the tendency for most is to overreach and often exercise is too sporadic, random & intense. We have previously looked at common signs of overtraining so here we give practical and simple strategies you can implement to reduce this risk, take control & start implementing goal orientated, structured training.

Confusion around training & exercise is common
With increasing frequency we are seeing people in clinic who are getting injured from overtraining. The boom in hybrid style fitness like CrossFit & Hyrox means the demands people are putting on their bodies are constantly increasing. It’s natural to want it all but trying to serve 2 masters simultaneously, with strength training one side and cardio on the other, often results in injury & failure to really progress on either front.
5 Tips to Prevent Overtraining
Listen to Your Body
Pay attention to physical and mental signals. Fatigue, decreased performance, and persistent soreness may indicate that you need to rest.Incorporate Rest Days
Schedule regular rest days into your training regimen. Adequate recovery allows your muscles to repair and helps to avoid burnout.Vary Your Workouts
Include a mix of training modalities to prevent overuse injuries and mental fatigue. Cross-training can help maintain fitness while reducing strain on specific muscle groups.Monitor Training Volume
Keep track of the intensity, duration, and frequency of your workouts. Gradually increase these parameters and avoid sudden spikes in training load.Ensure Proper Nutrition and Hydration
Fuel your body with a balanced diet and stay hydrated. Proper nutrition supports recovery and overall performance, minimising the risk of overtraining.
5 Signs of Overtraining
Persistent Fatigue 🥱🥱
Experiencing constant fatigue, despite getting adequate rest, can be a sign of overtraining. If workouts begin to feel unusually exhausting and recovery seems difficult, it may indicate your body is not coping with the stress.Decreased Performance ⬇⬇⬇
A noticeable drop in performance levels, such as reduced strength, endurance, or speed, can signal that your body is struggling to recover. If previously manageable training sessions start to feel increasingly challenging, consider reassessing your training load.Increased Injuries ⬆⬆⬆
Frequent injuries or recurring muscle strains are common indicators of overtraining. Overworking your body can lead to a higher risk of injuries, affecting your ability to train effectively.Mood Changes 😰😰
Emotional fluctuations, such as increased irritability, anxiety, or depression, may occur with overtraining. These mood disturbances often stem from the physical stress your body is undergoing and can impact overall well-being.Sleep Disturbances 😪😪
Problems with sleep, such as insomnia or disrupted sleep patterns, can also indicate overtraining. A body under stress may struggle to relax, affecting both sleep quality and quantity, which are crucial for recovery.

Feeling Constantly Tired Can be A Sign of Overtraining
TIME TO TAKE STOCK
If any or all of the above points resonate with you then you are probably overtraining and risking injury and reduced performance. It’s good to remember that quality and structure are more important than quantity when it comes to training, fitness & progression. You probably aren’t an elite level athlete with the opportunity to train (& recover) full time so don’t try and train like you are. Exercise shouldn’t be punishment & a mindset like this will lead you to injury.
If you need help with injury or understanding training for your own unique needs then speak to a qualified trainer. Our team at Physio Effect can help you recover from injury and set realistic training goals helping you progress consistently and avoid the boom to bust crashes we see so often with no structure.
thank you
Thanks for reading, please share with any friends, family or colleagues who could benefit.
We are always here to listen & help. Our specialist team can help you navigate and manage any ache, pain or injury.

Working From Home Survival Guide
Is working from home making you ill and injured? Are you in pain & stiffer than ever? Are you feeling isolated and unsupported? The risks are real and you are not alone. This survival guide will help you make better choices to reduce pain & stiffness and look after your body and mind. What are you waiting for? Follow our top tips to move more, organise yourself and have a positive impact on your physical and mental health
Is Working from home breaking you? Do you feel:

WFH health risks are very real
Stiff and sore?
back, neck, joint or muscle pains?
headaches or vision problems?
overwhelmed?
fatigued?
irritable?
low mood?
The risks of working from home (WFH) to physical and mental health are significant and real.
If you are feeling any of these issues you are not alone. You need to take positive action now and improve your individual situation.
Below we will list our top tips for how you can act now to prioritise your health. In Summary you need to :
MOVE MORE
GET ORGANISED
OPTIMISE YOUR WORKSPACE

Take Positive Action and Get Organised To Improve Your WFH Situation
top tip 1 - move more!
The single most important thing you can do to improve your WFH health is to move more. If you roll out of bed, grab a coffee then plant yourself at your desk with no movement or plans to move then you are brewing trouble. The NHS recommends reducing your sitting time significantly to improve your health and reduce the risks of type 2 diabetes, some cancers and even early death!
Are you already struggling with pain & stiffness in your neck, shoulders, back or hips? Check out these links to our previous blogs for advice, stretching and mobility instructional videos:

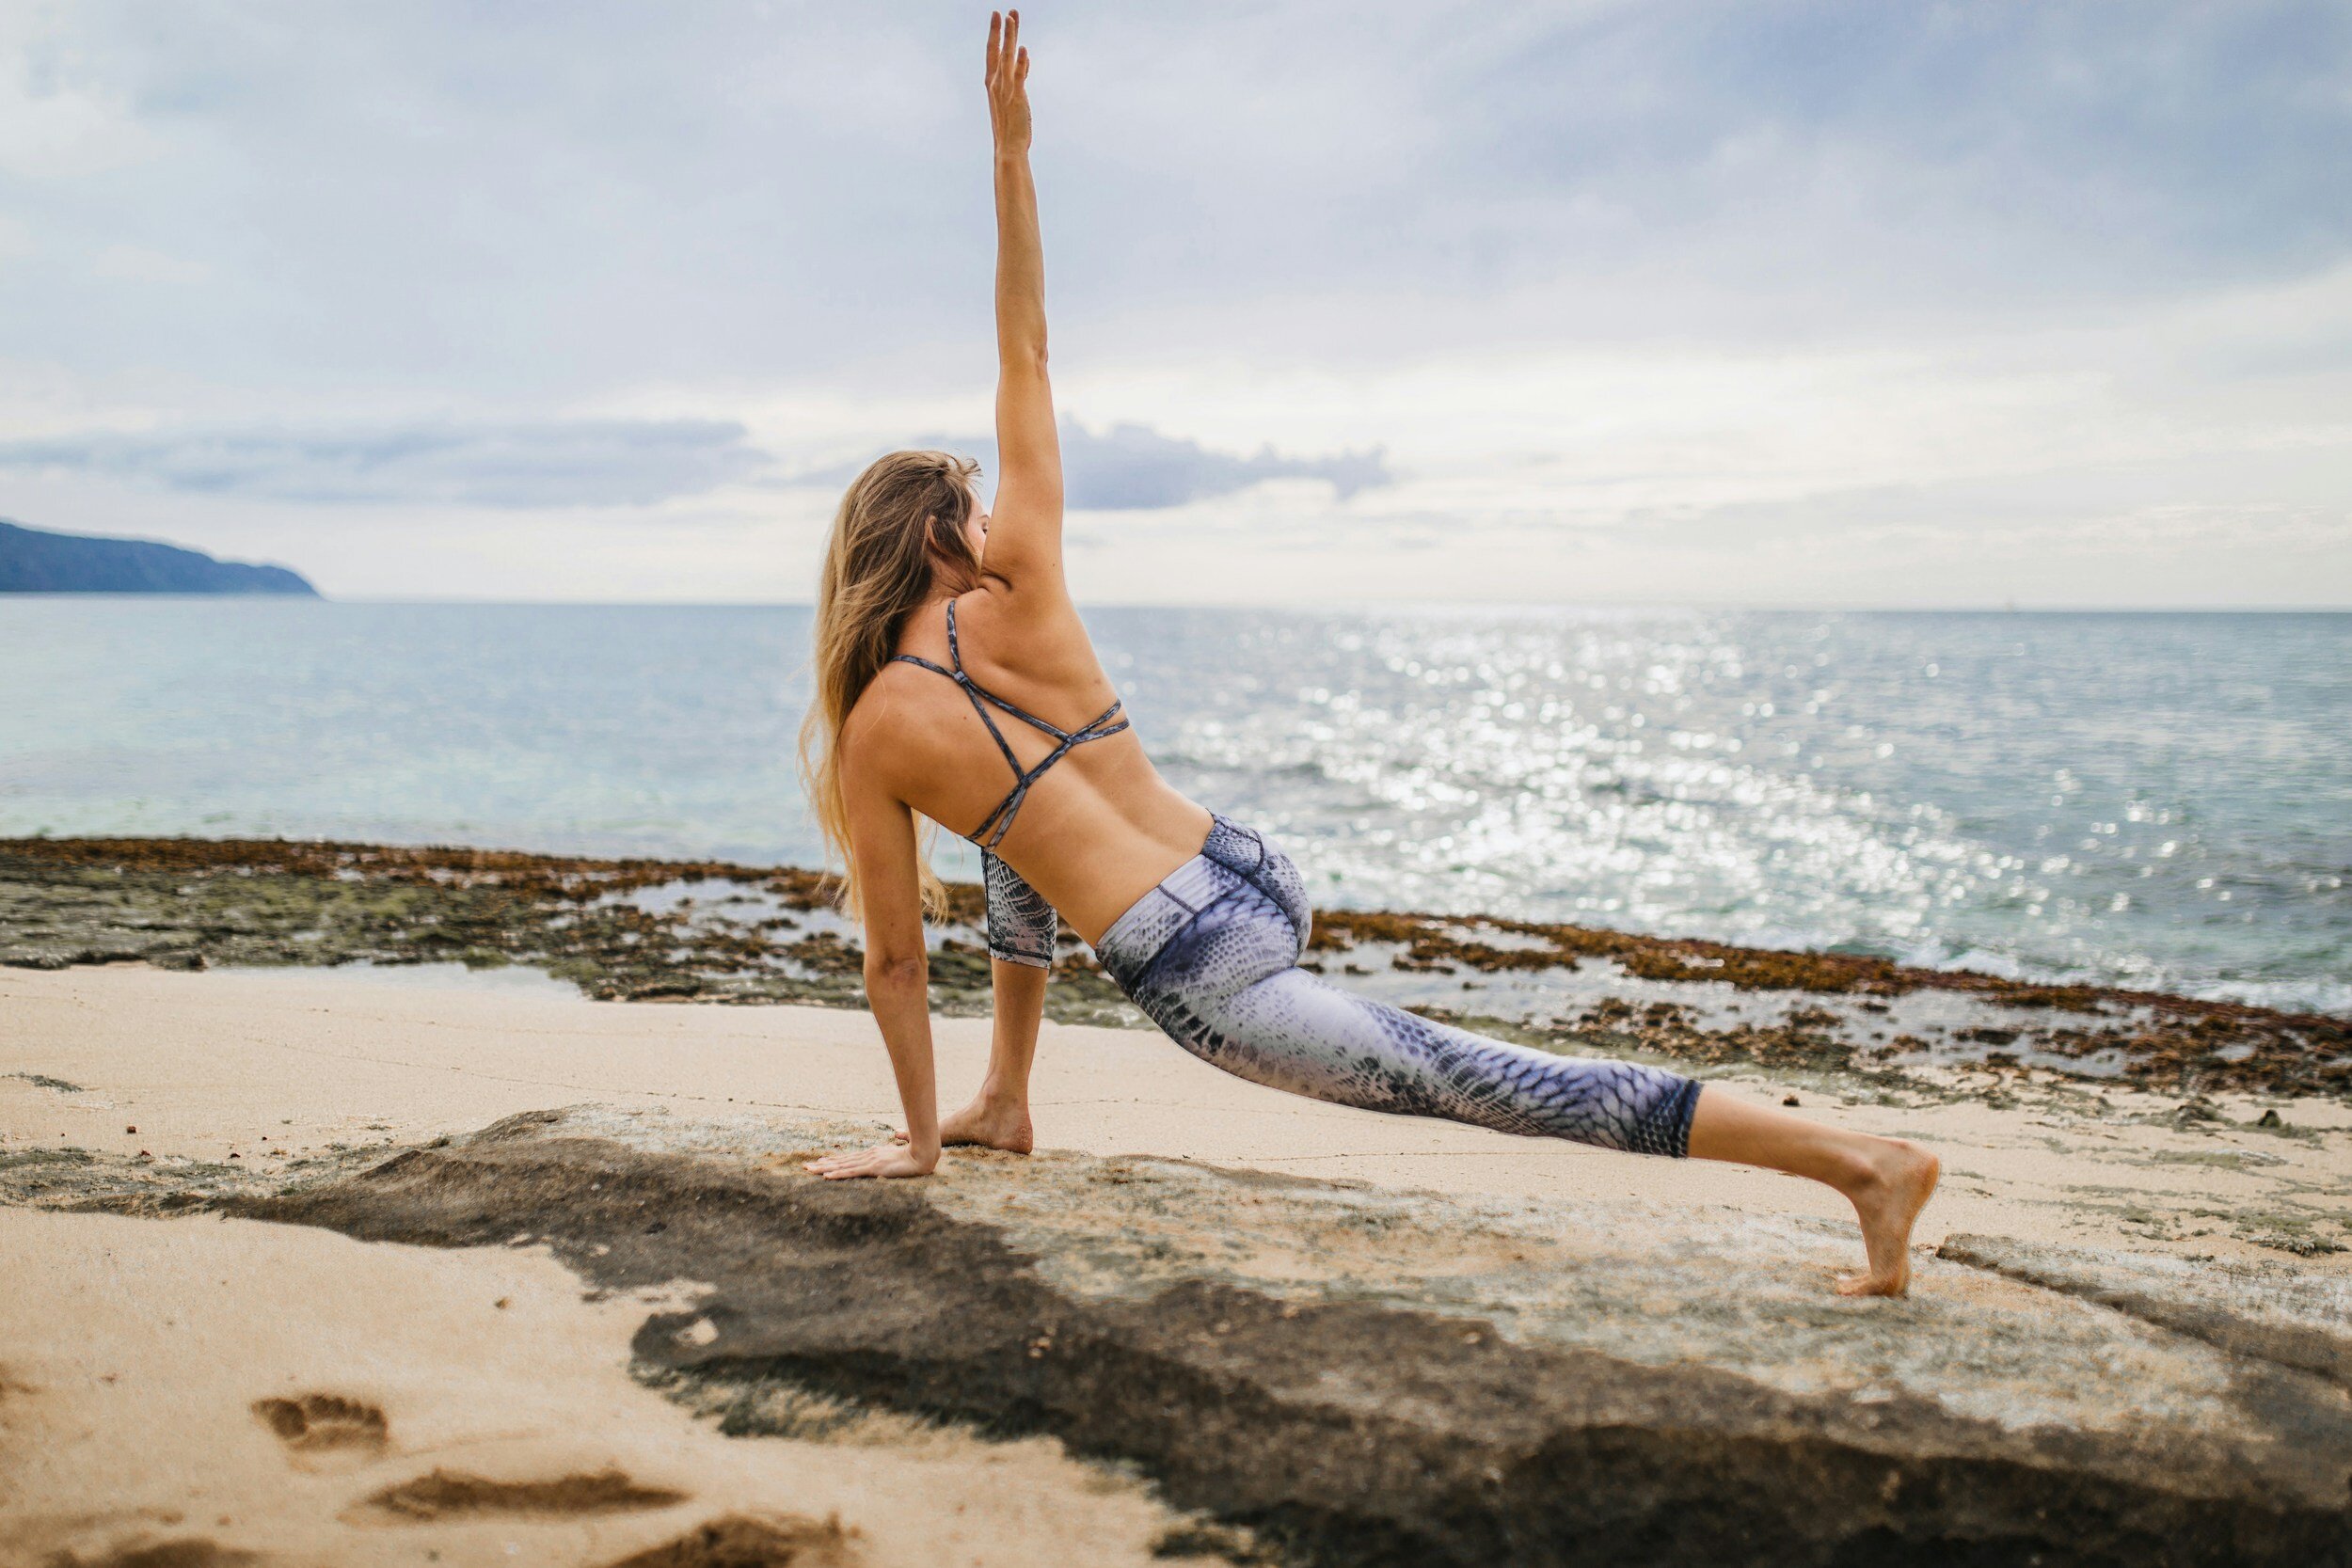
Movement Is The Key - Could you try Yoga?
When we are static (sitting or standing still) compressive and dehydrating forces are at work on our joints and soft tissues. All of our major body systems slow down and become sluggish which in the longer term contributes to significant health issues. The phase ‘Sitting Is the new smoking’ has been coined to highlight just how serious the impact of sedentary lifestyles can be
Movement creates positive pressure changes and improved fluid movement through our body as well as stimulating our body systems to be more active and alert. All of this helps to balance and reverse the negative effects of being static. Research shows us that movement and exercise can also help reduce stress and improve your mood.
Try these ideas:

Make time to move or you will get injured or sore
Rise earlier - Fit at least 10+ minutes of movement in before you hit the desk
Step challenge - Set a challenging daily step goal and go about smashing it. You need to prioritise time to walk. Try breaking it up into multiple smaller chunks (10-20 minutes x 2-3) throughout the day
Take breaks - Do not sit and rust at your desk! Take multiple complete breaks away from your desk and work. Walk, stretch or exercise, it doesn’t really matter, just take a break & move
Get outside - Combine fresh air & movement. Great for refreshing body & mind
Exercise for fun - Find something you enjoy and can commit to on at least a semi regular basis (2-3 x per week). Gym, walking, jogging, yoga, swimming etc.

Daily step targets are a great way to increase your activity. Get walking!
top tip 2 - organise yourself

Set Regular Break / Movement Alarms
Failure to plan is planning to fail! You need to actively organise yourself to make smarter, healthier choices and start reducing the negative impact of WFH.
We are great at making excuses for negative behaviour as it is generally the easier/lazier option. Get organised & remove barriers to promote positive action.
Try these ideas:
Plan Micro-Breaks - Aim to move away from your work for a minimum of 2-3 minutes every hour. Ideally combine this break with a little movement, stretching & breathing. 2-3 minutes of movement hourly is infinitely more important than trying to undo 8+ hours of static WFH with an end of day workout.
Set Movement Alarms - Use smart watches, desktop reminders or a simple timer to remind you when it’s time to get up and move. As already mentioned, ideally aim for a few minutes movement every hour as a minimum. Don’t ignore it! Get up and move.

Drink at least 2-3 litres of water every day
Create Dedicated Space - Dedicate some space at home away from your office or workstation setup to stretch, move & exercise. Get a yoga mat down, gather any small equipment like foam rollers or exercise bands and have it accessible. Removing the barrier of having to get setup each time you want to exercise will significantly increase your compliance
Measure Water Intake - Aim to drink at least 2 - 3 litres of water a day. Many people are chronically dehydrated and don’t even know it. This contributes massively to muscle and joint pain, headaches and general fatigue. Poor water intake increases your risk of dysfunctional metabolism and chronic diseases. Your tissues and body systems need water to function so give it to them! Use a water bottle to track your consumption and trigger better habits
top tip 3 - optimise your work space setup
When it comes to WFH there is no perfect workstation setup but you can improve and optimise in some areas. This article by the New York Times gives some further ideas on equipment and optimal desk setup. However, there is no point in forking out thousands on space age chairs and desks if you sit on you butt and barely move for 8+ hours a day.
You can’t buy your way to healthier WFH and you must still prioritise movement, regular breaks and a structure to your day that gives you balance physically and mentally. Once that’s in place see if you can implement some of the following ideas:

Stand Instead of Sit. Use a riser to optimise your screen and mouse position.
Stand Instead of Sit - Standing is probably the lesser of 2 evils and tends to naturally lead to a bit more movement and reduced pressure on some areas like the neck and lower back. If your work station allows it alternate sit to stand regularly throughout the day
Use Equipment & Aids - Optimise your sitting & standing postures by utilising equipment. Perhaps your employer can supply equipment such as a desk riser for raising the height of your monitor. Ergonomic chairs and variations of mouse and keyboards are available to promote better positioning and reduce repetitive strain. Access what you can & make arrangements that suit your own setup.
Stretch & Move - Our bodies love symmetry but unfortunately WFH and office based work in general promotes repetition with repeated postures, positions and static behaviours.
At risk of repeating ourselves here you need to counter static behaviours by moving your muscles and joints regularly through a large range and routinely in the opposite direction to the postures you adapt while working. For example to counter tightness in the hips and lower back from sitting we should target arching our lower back and lengthening our front hip and thigh muscles. Check out our Mobility blogs and Videos here.

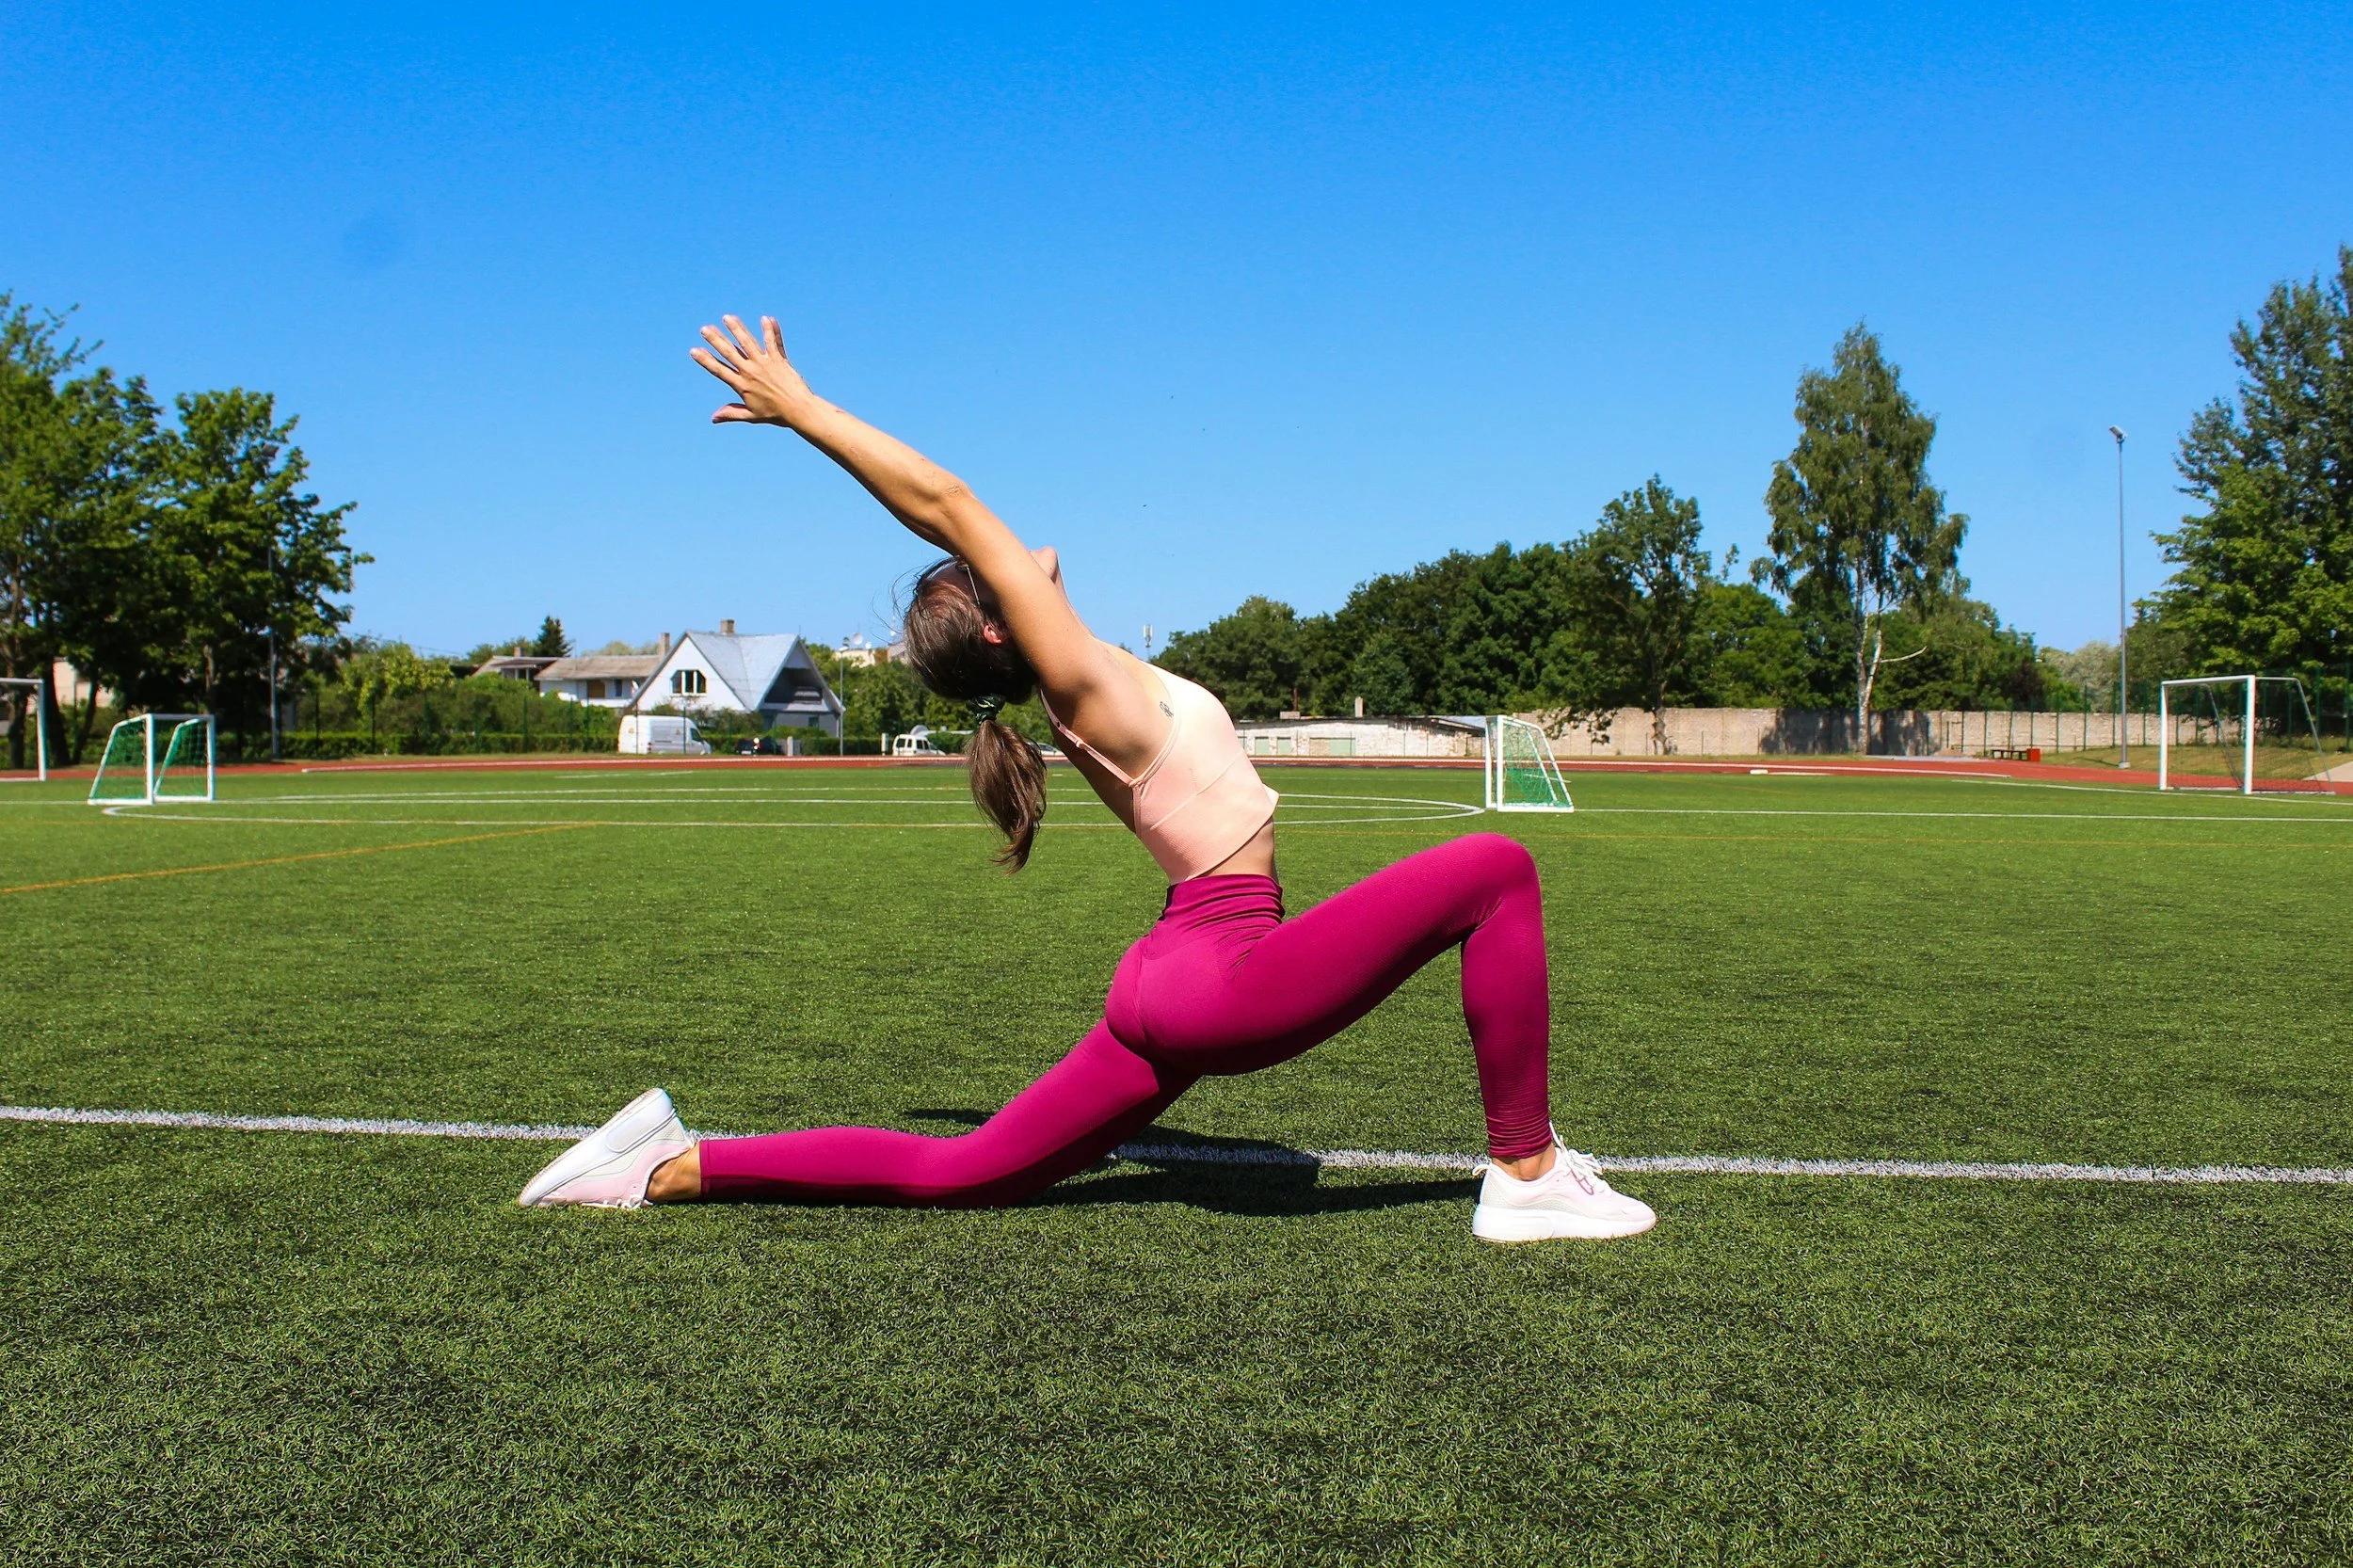
‘Cobra’ Back Bend Stretch
Lunge Hip Opener Stretch

WFH can be happier and healthier
Summary
It’s time for you to take positive action if you want to improve your WFH situation. Stop making excuses, organise yourself and make healthier choices now to improve your physical and mental well being. It’s up to you!
thank you
Thanks for reading, please share with any friends, family or colleagues who could benefit.
We are always here to listen & help. Our specialist team can help you navigate and manage any ache, pain or injury.
Use the links below to Book an appointment now or Contact us with any questions

STRONGER ANKLES: Simple exercise drills with no fuss!
Trail and hill running as a sport is demanding on our bodies. Common injuries are often as a result of overloading an area of the body not able to meet the demands placed on it, particularly as running is a repetitive, high-impact activity. Here are four minimal equipment/no fuss drills to help improve strength, proprioception and build fatigue resistance to improve your running economy.
Written by Mariam Kilpatrick, Physiotherapist, Trail and ultra Runner
Trail and hill running as a sport is demanding on our bodies. Common injuries are often as a result of overloading an area of the body not able to meet the demands placed on it, particularly as running is a repetitive, high-impact activity. Click on the video below for 4 minimal equipment/no fuss drills to help improve strength, proprioception and build fatigue resistance to improve your running economy.
The Glasgow Running Clinic is part of Physio Effect and we are located in the North of Glasgow. If you would like more information about the Running Clinic and the services we provide, please click on the button below:
My Marathon Experience
Read how Lewis planned, trained and ran his first marathon. Helpful insights and tips with some guidance from our resident Running Physio expert Jonny Kilpatrick
Marathon Prep 2023
For those that know me, know I’m passionate about training, especially Olympic weightlifting, CrossFit and getting stronger. Around September of 2022 I realised my training was getting a bit stagnant and progress was slowing right down so I decided I wanted to try something new alongside weightlifting. This was wrestling at the Griphouse with Cammy Nicol. I’d been loving this; however, I had picked up several upper body niggles, not serious injuries but some irritation as my body is demanded to be in positions it has never been in before.
This led to December of 2022 in which I was still balancing weightlifting and wrestling but decided to take a break from my Olympic lifting and do something different that I wasn’t totally comfortable with. This resulted in signing up for a marathon which really felt completely out of my comfort zone. I don’t think those close to me could believe I was even thinking of it, but on the 19th of December I dropped the hammer and decided the Manchester Marathon in April would be my purgatory. This would give me just over 16 weeks’ worth of training.
When I sent Jonny, one of the owners of Physio Effect who is a regular runner and running coach himself my entry email, he knew I was serious about completing this so took it upon himself to plan my programming for the next 4 months. This began with a 10k time trial on Christmas Day, cruelty at its finest and no doubt some sort of sick challenge from Jonny for me to prove my commitment!
THE AEROBIC BUILDING
As mentioned previously, my training began on Christmas Day with a 10km time trial in which Jonny could base my paces/heart rate zones for the upcoming training block on. The first few weeks consisted of between 20 and 40k per week to build some running volume into my legs and to build an aerobic base so I don’t “die on my arse in the second half” in the wise words of Jonny.
One thing I love is structured programming and often I can stick to a rigid program if it has been written for me. With the Jonny’s guidance, the plan was to build up an aerobic base over the first couple of months and complete the marathon with a time of between 3:30 and 4:00. Simultaneously I would still be attending the wrestling classes and building strength in the gym with a shift in focus onto unilateral strength (lunges, Bulgarian split squats), deadlifts and overhead press. This may seem like a lot of training, but I love running early in the morning around 6/7am before my day starts so this frees up the majority of the afternoon to work or if I have extra time, potentially do some double training days. Since running was the focus, this would be prioritised and over the coming months I would slowly decrease my volume in the gym. Around one month out from the marathon I would completely take out wrestling training to reduce the likelihood of an inconvenient injury occurring. During this time, I was also due to be on placement for university whilst still working so my biggest concern was potentially not having enough time in the day to fit in my training. Where there’s a will there’s a way though and this is likely why I really thrived training very early in the mornings.
Training Diary
25/01/23 - We are now 4 weeks into training with my longest distance so far being 15km, one thing I’ve noticed is people saying “I couldn’t do a marathon, I hate running” and I now believe I know why this is the case with many people. I think a lot of people run their easy runs too hard, go balls to the wall, jack their heart rate through the roof and die. Now that I am doing my runs based off heart rate and rate of perceived exertion (RPE) thanks to Jonny, I know that it’s okay to run slower as theoretically, you need to run slow to run fast. It’s all about those Mitochondria.
01/02/2023 - Longest run completed last week. It was meant to be a trail run of 18km but standard Lewis effort, I went the wrong way at Chatelhault and had to double back on myself. I checked my watch to clarify it was another 3km back to the car so thought to myself “screw it, let’s just make it a half”. I was delighted I done this which felt like a good achievement.
04/03/23 – 33.8km trail run on the West Highland Way. Jonny sent me a route to follow on my watch via a gpx file, little did I know there were PLENTY of hills throughout this. Sun was splitting the skies which made this run much more enjoyable! At the 20km mark however was a big stinking hill that I can only describe as never ending! I felt I was on this incline for at least 30 minutes (potentially maybe over exaggerating here). I must have cursed Jonny’s name about 6 times as I slog myself up the hill.

A ‘gradual’ incline just outside Milngavie on the West Highland Way.
Now that we are just over a month out from the race, I have reduced my gym sessions to 2 a week and I have completely taken out wrestling to focus solely on running and maintaining current strength.
18/03/23 – Longest run to date, 37.1k/22 miles. I managed it in just over 3 hours 30 minutes, which equates to 3 podcasts episodes. The Erskine bridge was the turn around point which made things a lot worse as I realised “I AM MILES away from my flat”! I thoroughly enjoyed this run though and I was able to stick with a consistent pace throughout and maintain my Zone 2 Heart Rate/RPE.
03/04/23 – Time to Taper. All the hard work has been done and now I am able to decrease mileage, keep intensity high and fuel properly. Lucky for me, I decided to book a 3 day holiday to Marseille so managed to soak up my final easy miles in a different country.

The lovely sunrise in Marseille.
13/03/23 – The Carb load 😊. 3 days out from the race the goal was to increase carbohydrate intake to around 500-600g each day prior to the race to ensure my glycogen stores are topped up as this is the body’s preferred source of energy thus, I will be properly fuelled going into Sunday.
Race day – Manchester marathon – April 16th 2023
5:30 – Wake up. I always tend to sleep well in hotels which was a massive bonus leading into this race.
6:30am – Breakfast – 3 slices of sourdough toast, banana and biscoff spread. This has been my go-to fuel for all my long runs, so I looked forward to consuming this.
7am – Coffee. Small hit of caffeine prior to my 30-minute drive into Manchester City Centre.
8/9am – Prepare my kit for the race.
9:50am Race starts.
Finishing time – 3 hours, 33 minutes, and 11 seconds

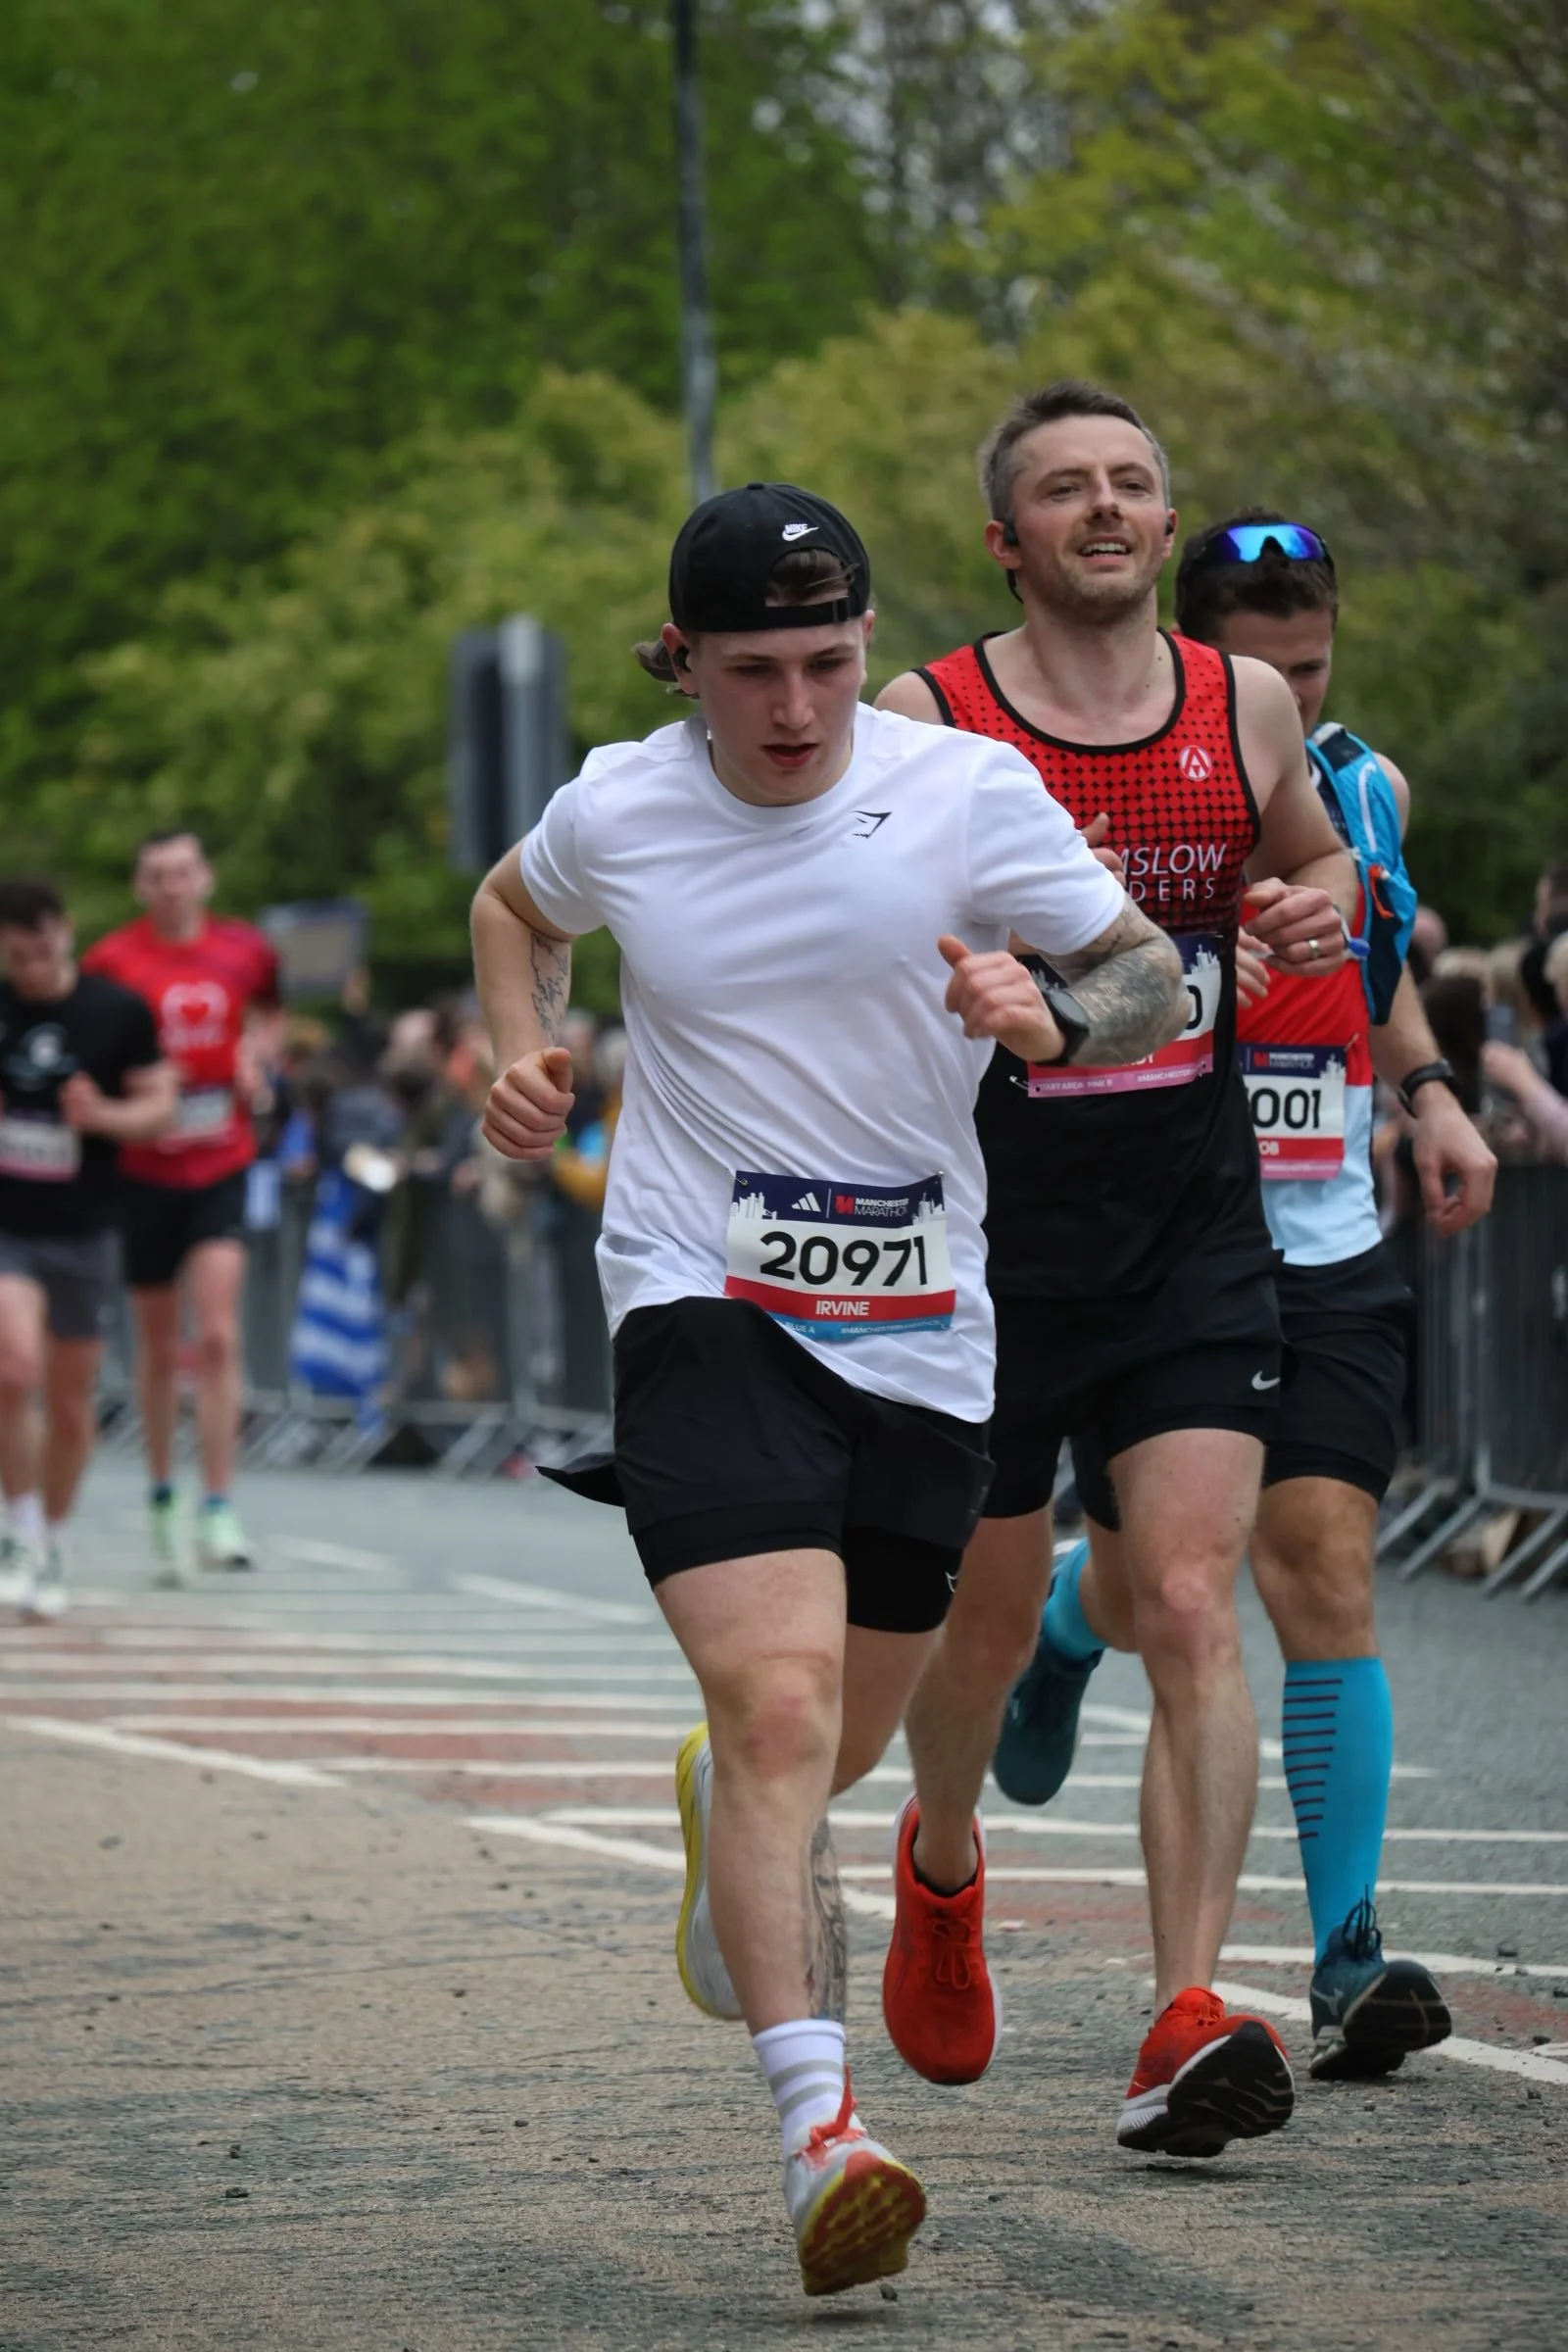
Lewis competing in the Manchester Marathon and his Strava statistics.
Race in review
I am absolutely delighted with how I performed. Started off the first mile at a nice conversational pace until the crowd dispersed so that I could find my flow. Luckily, I made a friend very early on that ran at the same pace as me and we stuck together for the first 13 miles.
Throughout the race I managed to stay on top of my nutrition taking a gel roughly every 20 minutes. So, this equated to about 60g carbohydrates per hour. Alongside this I was taking a few sips of water at every station which prevented me from hitting the dreaded ‘wall’ or ‘bonking’ so to speak.
From mile 2 right the way up to mile 20 I was averaging an 8-minute mile. From miles 20 onwards I upped the pace slightly which turned out to be about a 7:45 minute mile that I managed to maintain. I didn’t want to become obsessed with my watch and pacing so this was based on feel (RPE) and looking at the splits afterwards. At this time, I also looked down at my shoes and noticed my toe had bled right through my shoes, “oh dear” was my initial reaction followed by multiple swear words going through my head.
Mile 26 I could see the finish line, I checked my watch, and it was roughly 3 hours 31 minutes. I was absolutely delighted knowing I was finishing this in just over 3 and a half hours when my goal was anything under 4 hours.
Can’t thank Jonny enough for the coaching, check ins and treatment to ensure my body was in good condition and adapting to the training stimulus well.
Onto the next one…
A short word from Jonny on the plan

Physiotherapist and Running Coach, Jonny Kilpatrick.
objectives
When Lewis initially said to me in the clinic he’d be looking to do the Manchester Marathon in April it seemed a great opportunity to put my recent running coaching qualifications into practice on someone other than myself and my wife Mariam. I maybe inflicted myself upon poor Lewis as I was really keen to help him train effectively and safely for his first ever running event! Having watched Lewis train over the last few years with his weightlifting, crossfit and more recently wrestling, I knew there’d be no problem getting him to follow a plan; we just needed the right plan for his goals:
Finish the Manchester Marathon with no running background in 16 weeks
Finish Manchester under 4 hours
Have it not take over his life and all of his training as he does enjoy the gym and his new hobby of wrestling.
We had from late December until April 16th to get him in condition, so no time to waste. The biggest threat to this plan was really Lewis’s lack of running experience where he wouldn’t have the aerobic conditioning or musculoskeletal conditioning to do well with a running plan that was trying to force his mileage and pace too quickly. To be fair to Lewis he is very well clued up on sports science being a qualified sports therapist who massages athletes for us at Physio Effect and a student paramedic. He really took on board my initial conversations with him regarding this entire marathon block being anchored by aerobic base building and just accumulating gradually increasing volume while staying injury free.
Lewis’ training Plan
We planned out a 16 week Lydiard Pyramid plan that had 8 weeks aerobic base training, 3 week hill training, 2 weeks anaerobic, 2 weeks integration phase and 1 week of taper. This allowed us to work on all the different running and race development he would need rather than just having him repeat pretty much the same plan weekly with an increasing mileage. During this time Lewis spent the majority of his training in his low aerobic zones with a variety of speed workouts accounting for approximately 20% of his weekly training time. Gradually we saw his running economy improve as well as his tolerance to ever increasing volumes from week to week.
He executed the plan perfectly and had his brother programming him some strength work alongside it twice weekly. About 6-7 weeks out from race day Lewis was also practising full race nutrition on all of his long runs to take in 60g carbs per hour and 500ml fluids and electrolyte. By the end of this we were talking each other into all sorts of weird and wonderful flavours of gels that we’d imagined were our secret weapons on race day.
If I’m honest I felt 16 weeks was fine for Lewis to train for Manchester as he’s had a consistent number of years of training under his belt with other sports, he wasn’t overweight and generally was very health and fitness conscious. Lewis also had a realistic goal of completing the marathon and ideally sub-4 hours. He proved me right and was completely consistent with his training throughout and had the sense to ask about modifying sessions or moving them to just see off the inevitable niggle he could feel. I know from my Sports Physio work with runners that injury risk is so high in new runners due to the lack of Musculotendinous conditioning, poor aerobic base, poor running efficiency and a tendency to run too hard and long for their current fitness. Once conditioned and running regularly the increasing volume can become protective of injury. We just had to navigate this first 8 weeks for Lewis and avoid acute overload, sickening him of the running or causing him undue stress with injury. I was so impressed how well he followed the plan and resisted the urge to push harder which he’d be used to with crossfit. From the start of his plan to 2.5 weeks before Manchester he took his 10km time trial down from 51 minutes to 43 minutes so we could see his aerobic base had developed massively in those 13 weeks and I was confident his 4 hour goal for Manchester would be bettered by some margin.
My Review of Lewis’ Race
On race day, what can I say except he took everything he practised in his training and executed it, in my opinion, to achieve as good a first marathon effort as you’ll ever see! He started at an easy and controlled pace for the first few miles, increased to hold his target pace for most of the race and kicked for the last 5 miles down a further 30 sec/mile and ended up running a decent negative split and a fantastic time of 3 hours and 33 minutes. All of this while reporting he actually enjoyed it and was “buzzing” to do another. Turns out running slower to get faster, eating and drinking well and watching your early pace on race day does work! This just takes incredible discipline and for that I just have to applaud and congratulate Lewis! It’s incredibly satisfying to see such a positive experience for him with this and I’ve been delighted to be part of this with him. It’s really pleasing that he’s decided to continue running and has enjoyed getting out on the local trails with me for a social run. We’re now looking at a few more weeks off for him from a plan where he can keep some maintenance mileage up to give us a good start point for the Dunoon Ultra in October where he can expect this early season marathon training to provide the perfect start point for his first trail ultra.

The Bob Graham Round
Read about Jonny’s incredible experience running his Bob Graham Round in the English Lake District, the home of Fell Running.
Completed 7th May 2023 in 21 hours and 31 minutes
by Jonny KilpatrickWhy did I find myself at 9:29pm on Saturday the 6th of May 2023 at Moot Hall in Keswick about to run/walk/hobble my way over 67 miles, 42 summits and 26000ft of Lake District Fells? That I don’t really know how to answer, but I’m so glad that I did!
My Bob Graham Round (BGR) notion maybe started a few years back when I’d read Richard Askwith’s excellent book, “Feet in the Clouds”, which described his own journey to a Bob Graham Round and the rich fell running culture in the English Lake District. In true form, I of course read the book, bought the maps, bought more books and bought some kit but then did nothing about it for a further 3 years. During this time I’d torn the Meniscus in my knee on the hills in Scotland and had spent an entire running season just rebuilding. In July 2022 we took our campervan for a trip to the Italian Dolomites. Here I was in the midst of some of the most incredible mountains I’d ever seen and I realised my knee wasn’t just better, it was better than it had felt in the previous 10 years and I was able to hike up and run down these hills daily with no injury issues. Right off the back of that I knew I needed to keep this momentum going and feed my craving to be back in the hills. I’m fairly sure on the way back from that holiday I said to my wife Mariam I’d be looking at doing a Bob Graham Round sometime the next year. As usual, Mariam was fully supportive and excited about the idea also realising this could take us back down to the lakes and the mountains all through the next number of months, which we love.
Having done a few 20+ hour ultra trail races, I knew I had good experience for the duration of a BGR but I was both mildly concerned but mostly enthusiastic about the training requirements of all the hill training I’d need to do. I also had signed up to do a repeat of the Lakeland 100 in July 2023 which would be my “A” goal for the year so I couldn’t afford to have the BGR tank my whole season. This could be a risky game to try and do well in two of the biggest running endurance challenges in the UK within a few months of each other. I spent the rest of 2022 just getting as much hill training in as I could on the weekends under my own guidance, but reconnected with my long term coach, Neil MacNicol, of RunRecover at the start of 2023. Neil is a 4 time veteran of the Lakeland 100 with 3 top-5 finishes and a massive interest himself in the BGR so he was the perfect fit for this!
Training from January to May went off without a hitch. Neil’s plan had me hitting a consistent 10000ft a week with plenty of sessions that really kept our hand in for the Lakeland 100 training. No session was missed and no injuries came in the whole block. As much as I looked at the plan some weeks and felt it could be beyond me, it happened and it worked brilliantly. I’d never been fitter than I was standing on those steps at Moot Hall in Keswick about to start my Bob Graham. My plan for the BGR was not to race it however; I was just hoping to have a great experience with friends in the hills in one if my favourite areas, while using the BGR as a practice run for my Lakeland 100 pacing, fuelling and general race management. I couldn’t afford a big layoff due to fatigue or injury. I chose a 21 hour schedule as this seemed to fit with that best in my current condition.
Before the attempt I’d been round the route twice to iron out my route choices and pacing. My kit had been well tried and tested as well as my nutritional strategy. Since January I’d ran 1000 miles in training with 175,000ft of elevation with probably about the same again in the second half of 2022. I was settled on my route going clockwise where I’d mostly follow the gpx trace of Jack Kuenzle, the American runner who’d set the outrageously fast BGR record time of 12 hours and 23 minutes. I’d deviate from this route twice on my effort. On descending Blencathra via Doddick Fell, I felt the more cruisy, albeit slightly longer descent early in the round was preferable in the dark than the scrambly route off Halls Fell Ridge where the line I’d need to take was much more important. Scafell would also be summited via the Lords Rake and West Wall Traverse rather than the low grade rock climb up Broad stand. I’d decided on a 9:30pm start on the Saturday evening of King Charles’ Coronation weekend mainly to be family and support crew friendly. I really wanted to have my daughter Aria enjoy the start and the end of the effort with me and it would just be easier for my support crew not to drag them all into two disrupted night’s sleep.
The Round

Support crew before the start
After a long few days of rest impatiently waiting to go where I was suffering all the phantom niggles you get with ‘taper-itis’, the time had come and we landed into the car park in Keswick at 9pm. Just prior to my start time of 9:30pm, my leg 1 support runner Alwyn, who had us all in a mild panic having not appeared yet, made his “fashionable” appearence at Moot Hall about 3 minutes before the start. Fair to say, I thought he was joking on our message thread suggesting that he’d be wearing his Coronation shorts! Not that any of us knew what that actually meant at the time.

Lets get ready to rumble
Leg 1 Keswick - Threlkeld
I had my planned my BGR for this weekend as it was a good 12 weeks ahead of the Lakeland 100 and was a full moon, where I’d hoped to benefit from the extra light on the night section. How wrong was I! On the ascent of Skiddaw literally the only view I had due to the dense clag and rain was the illuminated close up of Alwyn’s Union Jack arse and extras, as I’d instructed him to get ahead of me and block me into walking rather than white knuckling it up Skiddaw.

A picture is worth 1000 words……..
Neil rightly had me well instructed that excitement at early gains would be regretted later on which was definitely something I’d experienced in my last 2 long ultras. Regardless of the diabolical visibility, we had no navigation issues at all and even made better progress than in my most recent recce over the horrible boggy section over Great Calva to Blencathra. Alwyn was great company and having someone to chat with really relaxed me and settled me into the effort. Coming off Blencathra, I accidently took us down onto Doddick Fell a little too early before the 2nd set of zig zags which involved a fairly steep but short off track traverse. Once on Doddick though, it was cruisy down to Threlkeld where Stevie was waiting at Road support.

Up to Blencathra summit
Leg 2 Threlkeld - Dunmail Raise
We arrived into Threlkeld just slightly up on schedule by about 8 minutes. I took slightly longer here than the 3 minutes on my schedule as I wanted to make sure to change socks and reapply the trench foot cream I was hoping would stave off the dreaded trenchfoot that had plagued my Lakeland 100 in 2019. Leg 2 which was the Helvellyn Ridge, I had made the call to do solo as I didn’t want to take the risk that Stevie’s recently injured ankle would flare up and we’d get seperated in the poor visibility. Far from the full moon nicely illuminating the ridge (which I consider to be the most runnable section of the round), the visibility due to the dense clag was easily the worst I’ve ever been on a hill in. I made good time up the really steep climb to Clough head and was still 6 minutes up on schedule at the top which was a suprise. From this point on though, I missed just about every trod or path and could barely see my own feet with no concept of going up or downhill unless it was REALLY up or down. Finding the various cairns and even the Helvellyn trig proved almost impossible at first sweep. I was turning back, circling, walking when I shouldn’t have been and even slipped off a verge I was running on when my foot just totally missed solid ground. This I knew would be the crux of my entire round. I couldn’t afford to panic and push too hard as the conditions made that quite dangerous and I really couldn’t do much about the pace as I basically needed to walk using my watch or more accurately zoomed in OS maps on the phone to find these little piles of rocks that sometimes aren’t even that obvious during the day. I think with hindsight, with most of my big hill days in training being solo where I was used to navigating by myself, this really helped me during this little crisis within the round. My strava feed did however look like a flipping spirograph around some of these summits.


To be honest though, it really wouldn’t have made much difference to have support on this leg for navigation sake and in the conditions I’d have still carried a pack full of safety gear. Stevie as agreed, did however come up to meet me at the summit of Dollywagon Pike. Boy was I glad to see his head torch when I did, as I knew at that point clag was behind me on the main body of the ridge. We even had a sighting of that beautiful bright big full moon that could have been oh so helpful in different conditions! From this point on, we made great time with the descent of Dollywagon and steep out and back to Fairfield where it was just turning light. Seat Sandal came and went quickly and we were descending to the Dunmail Raise support point to meet Saki and Paul. Just on a final note for leg 2, I hadn’t noticed in training, but the descent of Seat Sandal is deceptively long and steep enough to require more quads activity than you’d like. It isn’t much of a climb up to the summit from Grizedale Tarn but the descent feel is much longer down to the road at Dunmail Raise . If I were to do a recce again, I would definitely do this descent and just link straight onto the steep climb of Steel Fell to just familiarise that. The road crossing point here for most people won’t be a long pause at all being so early in the round.

Dunmail Raise with Stevie and Saki
Leg 3 Dunmail Raise - Wasdale
Starting leg 3, I was now 30 minutes down on schedule having lost a good 40 minutes wandering around the ridge! I was however feeling really good as fuelling had been consistent with 60-70g carbs per hour and my legs were feeling great now that all the phantom niggles in my right knee and left foot on leg 1 and 2 were out of my mind. I also knew the worst of it was now behind me and I’d overcome a night on my own and touched each summit in very trying conditions. The rest of this would have much better visibility and my support runners would now also be able to help with navigation to give me a mental switch-off at times.
Steel Fell came and went pretty quickly as Saki and I were just catching up on various goings on in our lives and talking about our various running plans and experiences. Saki had a great year in 2022 finishing a close 2nd place in the West Highland Way race and completing the Tor de Geants. Leg 3 is very similar with its muddy and boggy terrain for the first 2 hours of it to running in the local Campsie Hills. Neither of us had any issues and just coasted along admiring the brilliant sunrise where we were treated to a beautiful cloud inversion and quite a bit of warmth from the sun when out of the mist.


I was slightly concerned that at 0700 it was hot and humid and wondered briefly how the afternoon leg 4 would feel high up on the ridge if the sun was to get at us unimpeded. Good progress was made and I really enjoyed catching up with Saki, while ticking off the various prominences of the Langdale Pikes. I had forewarned Saki we were in for a grind up Bowfell - and to be fair it didn’t disappoint! Looking back however, this was a little faster than I’d done Bowfell either time in training, so I guess we got our traverse line right and we both just dug in well when we needed to. As expected, from Bowfell right over to Scafell Pike it was a case of trying to bumble our way over the unrelenting rocky surfaces while not losing too much time, but equally keeping our ankles and shins intact. This bit is quite frustating on tiring legs as it just looks so runnable, but there’s so much proprioception and momentum needed to keep a pace. As it was approaching mid morning, we now started bumping into other groups doing BGR recce’s which was really nice. Everyone I’ve met doing BGR recce runs through the entire training block have been absolutely great people and I’ve just found them all to be very enthusiastic and kind in offering help or supplies or route advice if needed.

Having bagged Scafell Pike (England’s Highest peak) which was completely mobbed as usual, I was buzzing to go through my favourite bit of the entire route. I think Scafell (not the same as Scafell Pike) is a brilliant mountain and the Lords Rake and West Wall Traverse is such an immersive and steep route right through the belly of the hill. From Scafell Pike summit I took off and found some pace again in my legs over Mickledore and down to the Lords Rake. I think I remember Saki (who’s a Mountain Leader by profession) seeing the Lords Rake and saying “oh wow that’s very like the Cuillins on Skye”. For context it’s a very steep, narrow gully that’s full of scree. I haven’t done much of the ridge on Skye but that certainly encourages me to get up there again. We ground our way up the Lords Rake and branched off onto the West Wall Traverse where I was glad to be able to show three other runners that bit of the route as they weren’t aware of it. They said afterwards they’d likely use it on their rounds rather than continuing up the Lords Rake and having to drop height again before the summit push. I was pleased to do my bit and give a little back as one of them had filled my water bottle about 3 miles earlier. We popped out of the West Wall Traverse right at the summit plateau and after touching the top, we were on our way down the long descent from 3200ft back down to the car park where my support crew would be at about 200ft. This is such a great descent with loads of scree running, which I love, so I had to really curtail my impulse to kick on and batter it down. Turns out we’d made great time on leg 3 and clawed a few minutes back from that lost on leg 2 without us thinking about that. Saki had been brilliant on the leg where she’d reminded me to eat and drink numerous times and was just easy-going company while working our way over the most difficult leg of the round.
Leg 4 Wasdale - Honister Pass
Meeting up with the support crew at Wasdale was a brilliant morale boost and it was great to hear my daughter Aria ringing the cowbell before I’d even arrived. I think my poor wife Mariam had been up half the night checking the tracker and with the morning fog they’d had a horrible drive into Wasdale. This check point would see me change socks again, reapply the Trench foot cream and freshen up with a new t-shirt. As I was getting myself sorted, both Neil and Scott subtly suggested that no matter how I feel, I should really be seen to make an effort with the mashed potato and gravy that Mariam had lovingly prepared for me on my request. I’m still not quite sure how she did that with just a jetboil, but little did we have to worry as this hungry Irishman hoovered the bowl of potatoes down in record time and had even some sort of whinge about why there wasn’t any more.

Best potatoes ever!

Leg 4 support runners Paul and Neil
Off we went on leg 4, Neil, Paul and I into the Yewbarrow climb. Wasdale is known as the Bob Graham graveyard because so many efforts end here due to the huge descent of Scafell into the outrageously steep and long ascent of Yewbarrow and then Red Pike back up to the roof of the Lakes. I was aware this climb would be unrelenting and adopted the one foot in front of the other approach with absolutely no consideration of stopping to rest. It was slow but consistent and the chat with my new support runners Neil and Paul passed it quickly. Having this pair on the start of leg 4 was great as they’re both so accomplished themselves where Paul has a sub-20 hour Ramsey Round and stupidly quick Tranters Round and of course, Neil is my coach. He’s also someone I’ve always felt would take on board any of your excuses with a stern look, rather than words that may not have you feeling good that you let that out of your head. We had both invested quite a bit in this BGR and I certainly wanted to keep up my end of the bargain and have a good section where we maintained the schedule. Paul stuck with us until Red Pike where he had to descend to keep his legs fresh for his own race next week. Neil and I pushed on over to Steeple and along the rocky high route of Pillar, Kirkfell and Great Gable. We made pretty steady time and I think on the whole we were fortunate with the weather to have clag that blocked the sun but not our ability to navigate, and the temperature was again comfortable for just t-shirt and shorts.

Traverse to the Red Pike climb
My nutrition had started to falter a bit as inevitably I’d sickened myself a little of all the sweet stuff with the gels and bars I’d scoffed to that point. Unfortunately or Fortunately for me, Neil was under strict instruction from me to make sure eating happened on leg 4. Maybe I’ve exaggerated this in my mind, but from Pillar to Gable I’m pretty sure he had me in a headlock just squeezing gel after gel down my neck until I completely tapped out of the food. Fair play to him though, as I’m really not sure I’d have got up that absolutely stinking line on Great Gable that he decided to follow from Jack’s record round that cuts out the Zig Zags. So steep and silly in fact, that we totally missed poor Stevie who’d came over from Honister and was waiting to give us resupplies of water. Between that and the usual tedious and awkward descent off Great Gable, I was quite happy the round was in the bag by the time I was at Windy Gap heading up to Green Gable. I did tell Neil however that it’d be a long while before I set foot on Great Gable again. Brandreth ticked off and what we see in the distance could really only be one thing; Alwyn had decided to get his moneys worth from his coronation shorts and was once again out getting bikini-type tan lines over by the final summit of the round, Grey Knotts. I really like the descent into Honister and I have to say, it was still enjoyable on the round and significantly better following Alwyn, this time, where I was uphill from him rather than downhill and at eye level like on leg 1.

Grey Knotts summit
Leg 5 Honister - Keswick
A quick transition at Honister where I just dropped all kit and just had my wife Mariam take me a water bottle and we were off up the last long climb of the round to Dale Head. It was lovely to be able to do this last leg with Mariam. She has been an absolute legend of a wife helping me train and organise this whole thing. I could think of no one I’d rather have on the glory leg. Unfortunately for poor Mariam, not long into the climb up Dale Head she suggested I should eat and take a gel and I think this triggered a bit of leg 4 PTSD from my experiences with Neil ‘the feeder’ MacNicol, so she got a rather out of character and snappy response about how I didn’t want any!

Super crew of Scott and Mariam at Honister

Dale Head summit
On our way up Hindscarth the next summit of the round, Mariam noticed that Stevie was running us down to complete the leg with us. Turns out he hoofed it back from Gable realising he’d missed us and had landed into Honister to see us half way up Dale Head. Neil suggested he could catch us up if he left immediately and against every fibre of his being, he didn’t want to incur a look of disappointment from Neil or the other support crew, so off he went. Jokes aside, it was a brilliant surprise and I was delighted to have Stevie on board as he’d really been the main man of the crew for my night section which was so critical to to our success, so it was only right he got some of the glory leg action too! Slow and steady progress and we had Robinson the last summit of the 42 complete. At this point the skies were completely clear and sun was blazing. The views across to Grizedale Pike and over to the Newlands Valleys were just stunning.

Robinson - final summit number 42
On the descent of Robinson, Mariam was left rather unamused when I hung a sharp right off the bottom of the crags and descended a very long and direct scree route that Jack had used on his round. I’m not sure she was entirely happy with my justification to leave a perfectly good runnable ridge path being that, “sure this just gets the last of the descending done quicker and then it’s just a short run to Keswick on the road”. A change of shoes at Newlands to my super foam bright pink, carbon plated Saucony Edge Trail shoes - which I’d have no choice but to produce epicness in, and we were off. Stevie once again, got gazumpted out of his lift back here when Mariam suggested she didn’t know the way and he’d need to come incase Jonny’s watch dies. To my great surprise my legs worked just fine for road running and we made great progress into Keswick at 7-8 min/miles, even beating the car support back by a few seconds to Moot Hall where they emerged from the car park lane to see me already lapping up the only applause I could get from the top of the steps. This which just happened to be a large group of drinkers at the pub just down the high street - but I took it!

Enjoying the finish with the girls and Stevie on top of the steps
21 hours and 31 minutes it took and I’m being honest when I say that it was thoroughly enjoyable and I’ve loved the experience so much! A few days later while writing this, I’m pleasantly surprised to find myself feeling reasonably well recovered and very content with the buzz of a job well done. I know when I was researching the BGR, I was constantly reading accounts of rounds and trying to find information that could help put me at ease over the whole thing. I’m going to bullet point a few bits of advice below that I think are important for a Bob Graham Round effort.

Enjoying catching up again with Aria in Keswick the next day
Lastly I just cannot thank my support crew enough. Living in Glasgow it was such a huge ask to have people coming down for a whole weekend to the Lakes to support my effort. You guys are complete legends and I’m grateful beyond words. I hope the success of our Round will inspire each of you within your own running adventures this year and in the future for which I will happily support you on if needed! This is the beauty of something like the Bob Graham Round and I am confident I will pass all of your time, effort and support forwards to yourselves or others. Thanks guys!
Tips for the Bob Graham Round
Do the training. The lines are incredibly steep and unrelenting. You really need months of being in the hills on as similar terrain as you can find. Running on hilly, more manicured trails is not the same thing and you will find it incredibly difficult to keep your leg turnover on the rocks and tussock without training on it.
Recce the route at least once. I did twice, but I still regret just doing recces as individual legs. If I was doing this again, I would make sure on recce that I ran through every road crossing and up the next climb or two as this would give me the appreciation of how this would feel on the day. There are a few huge descents into the very steep ascents from the crossings.
Look after your feet on this challenge. Your feet may very well be wet for the better part of a day and in that instance it is highly likely you could suffer foot issues such as Trenchfoot, blisters or other pain such as damaged toes. Moisturise your feet months and weeks in advance to have them well hydrated so the water gradient for absorption into your foot is less. On the day treat the feet with some form of barrier type cream and take the time to change your socks and reapply if needed. Generally just have looked after your feet in advance such as keeping calluses to a minimum and noticing when your shoes or socks give you issues and iron this out in training. With your kit, have shoes, packs and clothing that you’ve tried and tested. I wore the La Sportiva Cyklon which I felt worked amazingly well on this route gripping to everything from eroded steep muddy track to doing well on wet rock. My packs were the Montane Gecko 5 and 12 where I was able to have prepacked packs that my support could just quickly hand me to swap over to at road support depending on what I needed on the section. The poles I used were the Black Diamond Distance Z and the headtorch was the Black Diamond Icon 700 which lasted the full night on full power of 700 lumens. I rehersed with all my kit for months in advance and had full confidence on the day that my equipment would not be my issue.
This is a really difficult challenge to organise adequate support for. I was content I could carry my own stuff and if needed to do legs on my own, so I trained to do this. It was significantly better to not have a pack on while on leg 5 so if you feel you will be tight to the 24 hour mark on the round, I would strongly suggest getting involved in the BGR community and helping on other rounds and try to get yourself 2 support crew per leg to carry your stuff and help navigate.
Poles make a massive difference in training and on the round. I trained for 8 months every weekend with poles even though I didn’t use them beforehand. They became like extensions of my arms that saved me so many times from falls and likely an injury somewhere. They helped with keeping an uphill rhythm too and I think this kept my uphill climbing consistent all day. They also keep your back set better and this was something that really didn’t bother me on the day.
Practice your BGR nutrition in training, exactly like you plan to use it on the day! You will largely avoid a bad stomach on the day and minimise energy bonks. This could be the difference in you getting out of Wasdale or not, let alone achieving the time you want.
The weather is a massive factor on the Bob Graham. High winds will really slow you down. Saturation underfoot and slicked up rocks will also slow you down. Take this into account when planning your effort and support crew. On my round if the clag remained as bad as it was on leg 2 I would have called it a day at Wasdale without a doubt. There would have been no point doing a whole round with my nose inches from my watch, let alone the danger I would have exposed myself and support runners to. It also would have added hours to the effort.
Do the route choices that are right for you. You will see most faster rounds go certain ways. That’s optimal for accomplished world-class hill runners with a world class support crew taking them perfect lines in dry conditions. The rock are slippy when wet and for me personally I enjoyed descending Doddick on Blencathra instead of Halls Fell which I found a little awkward in the wet during training. Similarly ascending Lords Rake and West Wall Travserse on Scafell rather than Broad Stand was simply a safety decision as I’m not an accomplished climber so adding a few minutes for that sake wasn’t a big deal to me and I enjoyed the route. I would guess I added 10-15 minutes maximum to my round but was safer and actually loved both routes.
Practice some of the legs in poor visibility and become proficient with how you plan to navigate whether it be watch, phone or map and compass. Do not entirely rely on your support crew for this! They will help on the day but you need to be able to mentally be comfortable in uncomfortable conditions as weather will likely throw you some sort of curve ball at some stage in your round. You are spending a full day in the mountains in the UK so expect the forecast is not set in stone no matter how certain it seems.
The round itself is just a big and enjoyable day in the hills with your friends. Train yourself well enough that you can enjoy this side of it and don’t spend the whole time fretting over your schedule being up or down 10-15 minutes. If you are well trained and on the day you are on point with nutrition, you will likely do well at the end and make time up relative to the average finisher.
Everyone will have their own round experiences and it will be genuinely difficult to compare times from one to another as the circumstances and underfoot conditions are so different from one week to the next. I really hope me saying I used the Bob Graham Round as a big training day doesn’t get taken out of context. I found it physically demanding and I genuinely don’t know how much faster I could have went if it was the main goal of my running season this year. Pushing at your maximum over such a long challenge itself comes with risks such as stomach issues, injury and just totally blowing up. I am delighted with my time and even more delighted that I had such a positive experience in the hills and have came out of this with a deeper affinity to everyone who helped. I’m not sure I’ve ever felt like that after a race, so on that basis I’d really encourage anyone reading this to back themselves, prepare well and have a go. As Mark Webber the Formula 1 driver once said “Average is easy, that’s why it’s so popular!”. This is not an average challenge or experience and I assure you that you will experience something that cannot be replicated easily and you will feel it was absolutely worthwhile!

Early Postpartum Tips for Pelvic Floor
Women’s health expert Physiotherapist Jenny Devlin gives insight on what you might expect from your postpartum body and the best approach to begin exercise and optimise your recovery
WRITTEN BY JENNY DEVLIN, MSK PHYSIOTHERAPIST AND SPECIALIST WOMEN’S HEALTH PHYSIOTHERAPIST AT PHYSIO EFFECT
So, you’ve just had a baby… CONGRATULATIONS!!
The first days and weeks postpartum can be a blur and prioritizing pelvic floor exercises might not be at the forefront of everyone’s mind. There are some things you can do, however, throughout the day to start working on your pelvic floor while also enjoying sweet baby cuddles.
BREATHE
Something that we do every day but often don’t do well. Once we have had a baby our breathing is often altered as our baby has been taking up the space in our abdominal cavity and achieving a deep breath might have been tricky for the past few months. Remembering how to take deep breaths can help with the healing process. Our diaphragm and pelvic floor move together and as a result breathing deeply in can help relax and lengthen the pelvic floor muscles and conversely exhaling can help engage the same muscles.
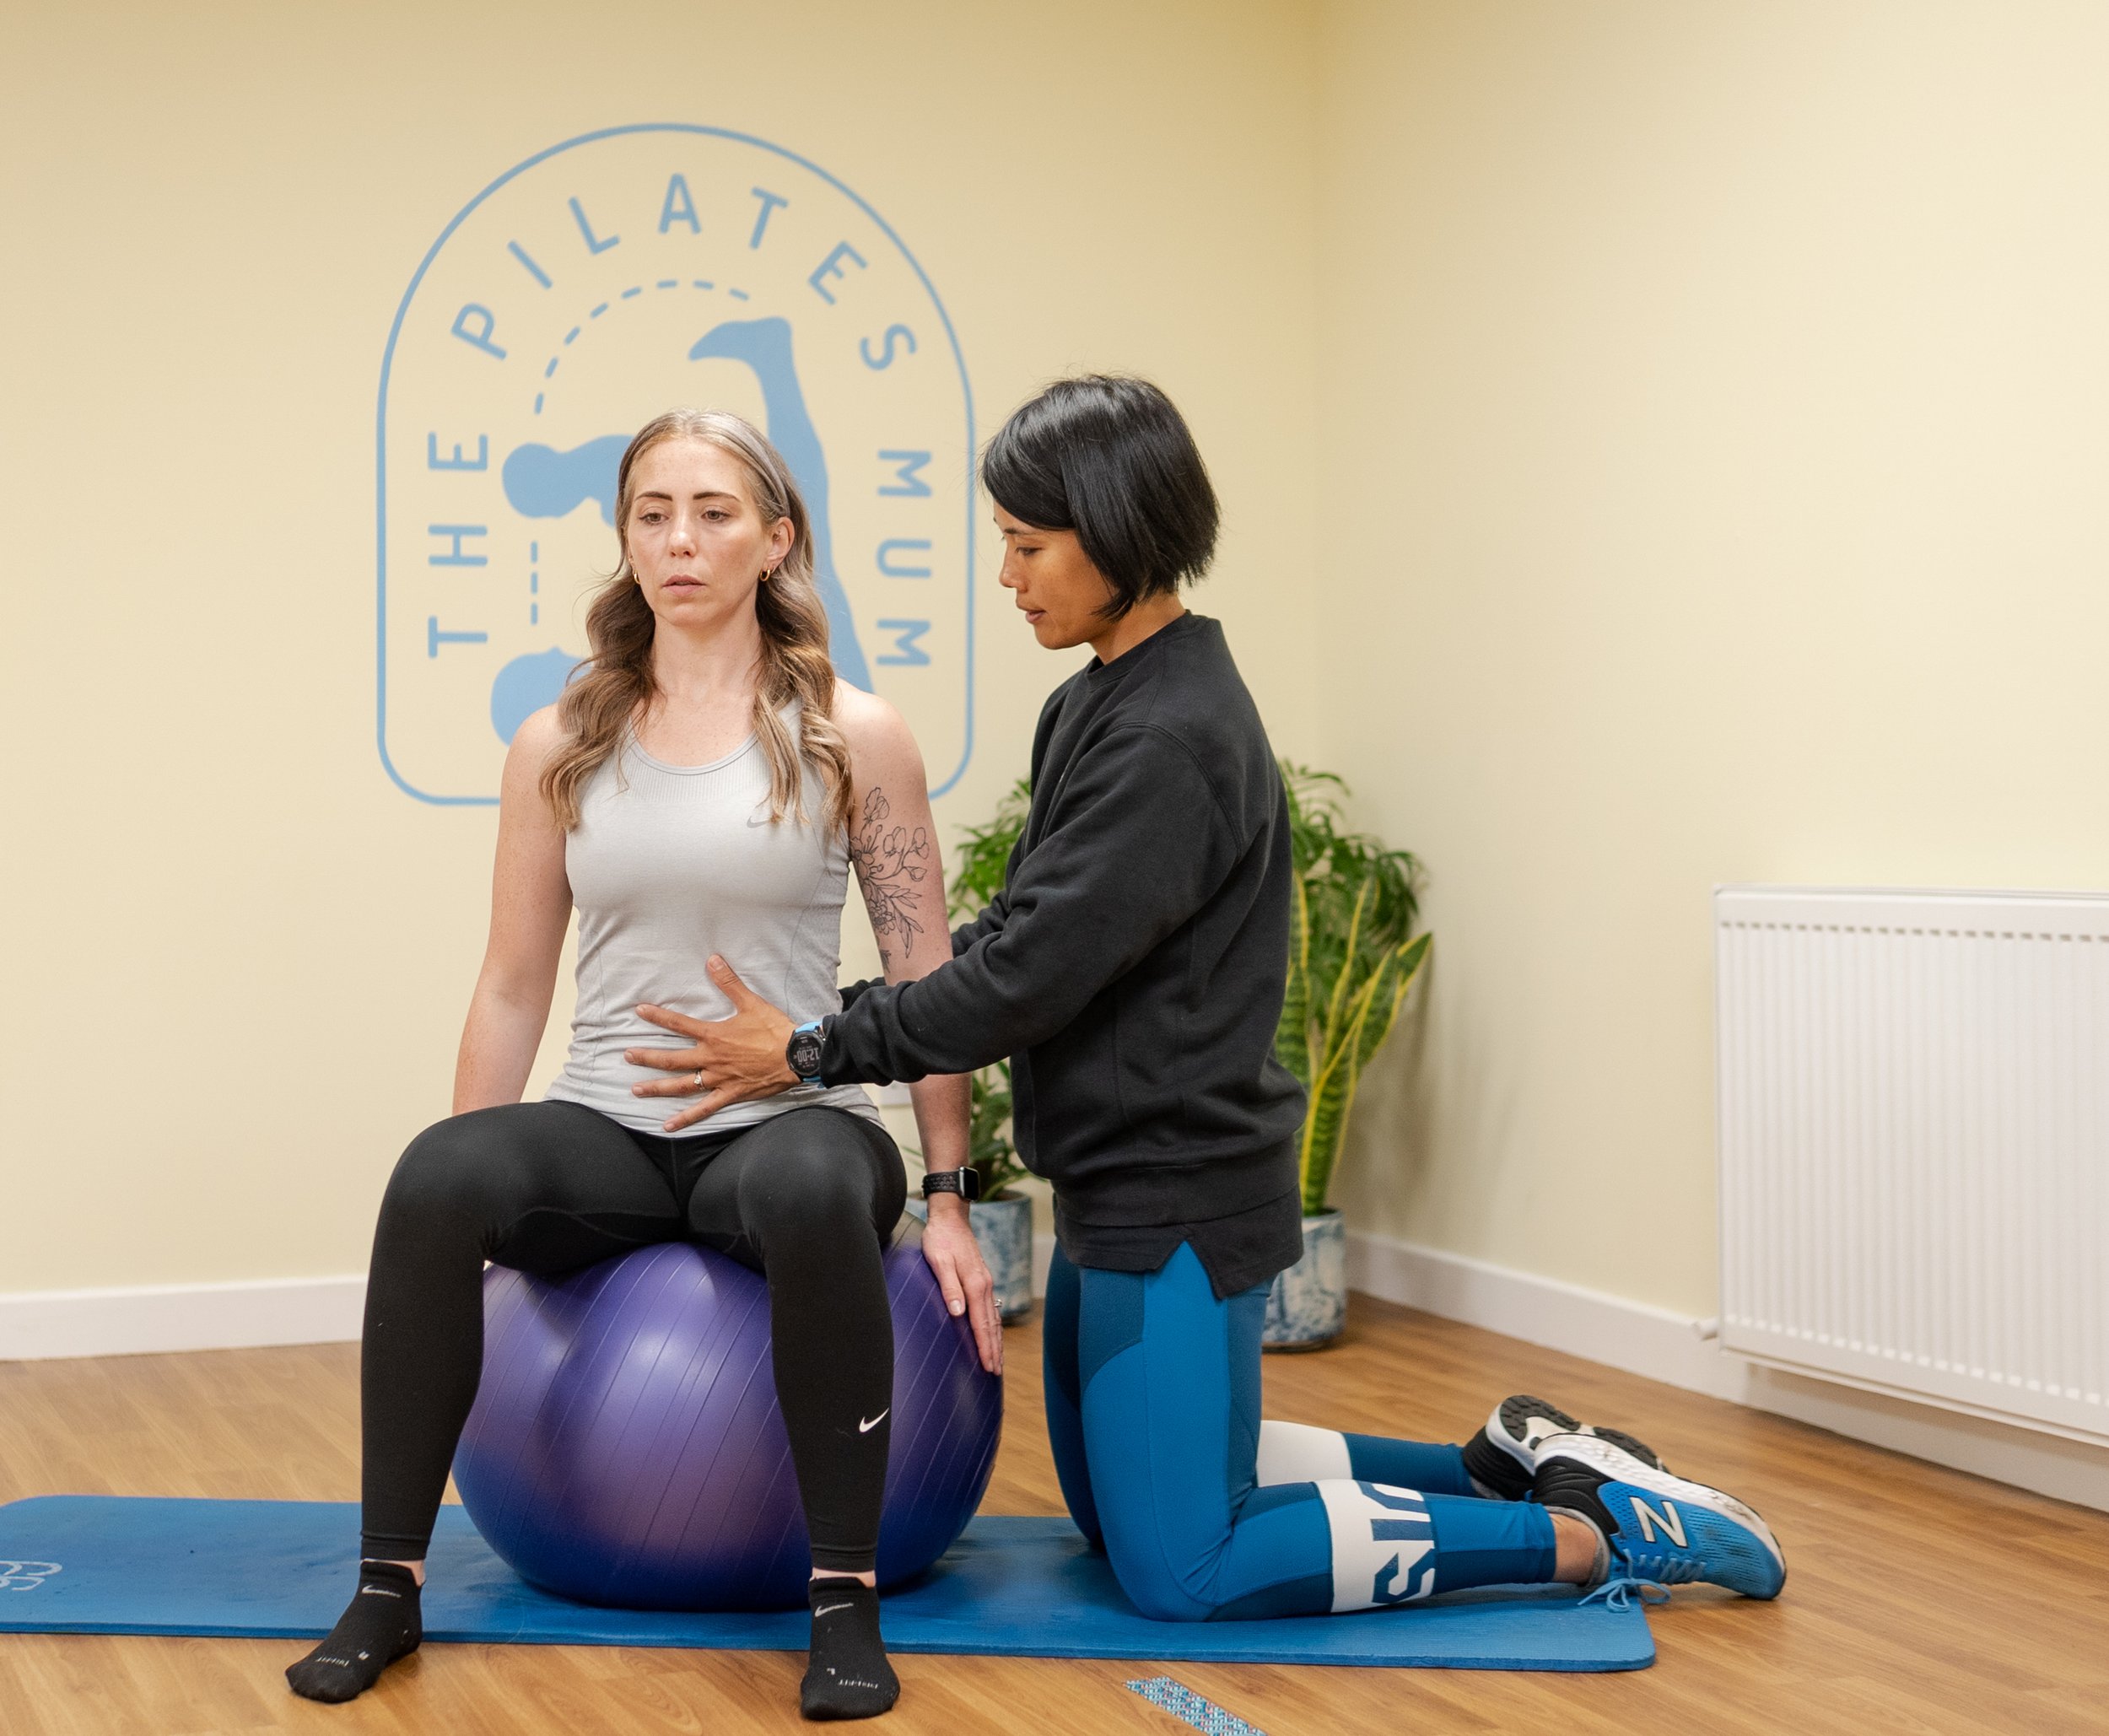
Women’s health Physiotherapist, Mariam Kilpatrick, educating a patient on diaphragmatic breathing.
Getting the muscle pump of the pelvic floor working can aid pelvic congestion and help heal the tissues through lymphatic drainage.
Deep breathing can also help us enter into ‘rest and digest’ mode which can help us feel calm and decrease anxiety and enjoy being present with our baby.
You can practice breathing anywhere but it might be easiest sitting or in a semi-reclined position. Make sure you’re comfortable. Inhale slowly through the nose, feeling the air fill the lungs and the pelvic floor lengthen. Exhale gently through the mouth and feel the recoil of the tissues. Keep your shoulders and jaw relaxed. You can learn more about the structures that make up your abdominal cannister, including your pelvic floor in our recent Blog Post.
Posture
Throughout the day, check in with your posture while sitting, standing and moving around. Has your posture changed since having your baby? Can you find your way back to your previous position?
How we hold ourselves while feeding baby for many hours per day is important. Make sure baby is supported to come up to you, so that you don’t have to hunch over to feed. Try to maintain an upright posture for feeding as much as you can - it has an impact, not only on your back, neck and shoulders, but on your pelvic floor too! This NHS guide has ideas alternative breastfeeding positions from the commonly adopted ‘Cradle Hold.’

Image Credit: Shutterstock. Breastfeeding in a reclined position can ease the tension of a painful back and shoulders.
Have a think when you’re holding baby, are you always holding them on one side? Can you switch? Can you wear them for a while in a carrier instead of carrying them? Try placing your hands on your ribs and stacking them over your pelvis.
There are lots of little ways we can improve postures throughout the day to make our pelvic floor a little happier and function better too!
Pelvic Floor Exercises
Throughout the day try to practice a few pelvic floor muscle contractions. You may find it easier to do it lying down or in sitting. Check in with yourself and see what you can feel. You should be able to feel a gentle lift of the pelvic floor without your pelvis tilting and without your legs or bum muscles working hard. You should also be able to feel it relaxing. Try for some longer contractions and some short, fast ones too.

Women’s health Physiotherapist Mariam Kilpatrick demonstrating the ‘Butterfly’ Technique to connect with your pelvic floor.
Gentle Exercise
In the first days postpartum, take it easy. No matter how your baby was born, the body goes through a lot to bring your little one into the world. You might feel like you can do more exercise wise, but do you really need to? Give your body time to rest and recover and gradually build in your exercises. The first days or weeks might start out just thinking about pelvic floor, core and posture and progress from there. We are all about getting you back to doing the things you LOVE so let’s make sure you’re doing them sequentially in a way that’s right for your body and will allow you to continue doing them long term!

We offer ‘CryBaby Pilates’ classes in our Studio to women and their babies from 6 weeks postpartum.
See a Pelvic Floor Physiotherapist
Pelvic floor symptoms are common, but they are not normal! We hear a lot of people normalizing pain or incontinence. Often ladies don’t know there is help out there but there is level 1, grade A evidence to show that pelvic floor assessment and treatment can improve pelvic floor function. Enjoy baby cuddles and gentle progressive exercises and anywhere from the 6 week mark, come and see us and have a pelvic floor evaluation so we can do an assessment, assist with any symptoms and help you work towards your goals, no matter what they are.

The Core
Think your core muscles are just a ‘six pack?’ You’re wrong! Learn more about your core and it’s importance in movement.
Written by Jenny Devlin, MSK Physiotherapist and Specialist Women’s Health Physiotherapist at Physio Effect
The Core
What do you think of when you hear the word ‘core’?
For most people, they think of the rectus abdominis muscles, or the “six pack muscles”, but the core is so much more than that!
The core is actually a full canister that comprises a top, bottom, front and back. Respectively, these are:
The diaphragm
The pelvic floor
The transversus abdominis (deep stomach muscles)
The multifidus (deep back muscles)
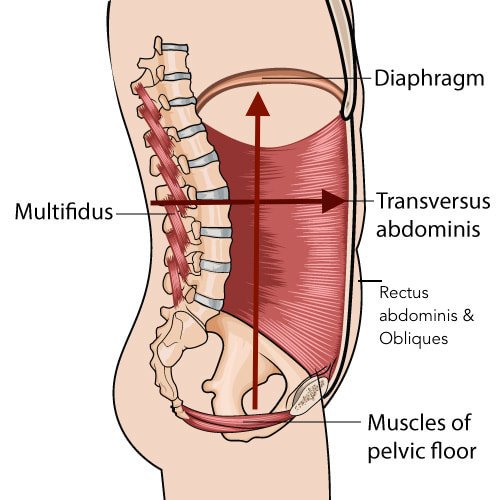
Abdominal canister illustration courtesy of ‘The Wellness Blog for Women.’
These muscles work all the time to hold us upright and provide a base from which other muscles can operate. People will often tell us they ‘have no core’ which simply can’t be true or they would be a floppy noodle! What they mean is that they have forgotten how to tune in to activate their core and the good news is that this can be trained.
Our core canister houses our fluid and organs and is responsible for controlling pressure within the system, namely intra-abdominal pressure (IAP). IAP helps our ribs and spine stay in place and is the central mechanism from which we produce strength and stability. Since the muscles surround the canister, they are in prime position to help to control the pressure. IAP changes to match the task we are looking to perform and without a strong inner unit, it is challenging to keep our bodies moving and functioning effectively.

At Physio Effect we can offer you a path back to exercise safely after pregnancy.
Why do i have weakness in my core?
There are many things which can contribute to the core functioning less optimally - it could be the way you train or perform your sport, from being overweight or just a lack of body awareness of how to engage the correct muscles. In particular, pregnancy can lead to dysfunction as the muscles have been stretched out over nine months to accommodate the baby and then afterwards we often just hope they will go back to doing what they did before. Strength and coordination often need to be retrained and, while traditional abdominal exercises are great, it is important to ensure we have the deep core muscles working efficiently before we layer on the larger muscle groups. When we don’t have good core control, it can lead to injuries anywhere in the body such as the low back or the shoulder.
It is normal to have a diastasis rectus abdominus (abdominal separation) following pregnancy but when the pressure is not well controlled, we see doming at the linea alba (midline connective tissue). If we can work to control the IAP with the core muscles, we can minimise this doming and increase overall strength and performance since we are not losing pressure at our core canister.

Illustration of Abdominal Separation courtesy of Cleveland Clinic.
What can I do to strengthen my core?
It is important to spend time connecting to the core and learning how to coordinate the breath, pelvic floor and deep abdominal and low back muscles before adding more challenging exercises to your program. Our physiotherapists can provide you with some targeted core exercises that are specific to your needs. You could also consider our Clinical Pilates, Pregnancy Pilates or Postpartum Pilates Classes to strengthen your core.
To find out more, give us a call or book in online.

Pelvic Organ Prolapse
Pelvic Organ Prolapse - Signs, Symptoms and Treatment
PELVIC ORGAN PROLAPSE
WRITTEN BY JENNY DEVLIN, MSK PHYSIOTHERAPIST AND SPECIALIST WOMEN’S HEALTH PHYSIOTHERAPIST AT PHYSIO EFFECT. MCSP & HCPC
For a lot of people a diagnosis of, or even the thought of, pelvic organ prolapse is terrifying. It is extremely common though with the Royal College of Obstetricians & Gynaecologists suggesting that as many as 1 in 10 women over the age of 50 are affected. This number may well be higher with an increasing risk of complications after pregnancy and childbirth.
The good news is that many people are able to reduce or resolve their prolapse with the help of a pelvic floor physiotherapist. In this blog we explain more about Pelvic organ prolapse and look at how our experienced and specially trained Pelvic health Physiotherapists can help you.
What is pelvic organ prolapse (POP)?
A pelvic organ prolapse occurs when a pelvic organ (or organs) bulge into the vaginal space. Strained, tight or weak muscles, ligaments or fascia can contribute to this. It can occur in different ways and we name the POP based on the organ that is not in its optimal position. A bladder prolapse (or cystocele) is where the bladder pushes against the front wall of the vagina. A uterine prolapse is where the uterus drops down into the middle of the vaginal space and a rectocele is when the rectum moves into the space at the back of the vaginal canal. You can also have a vaginal vault prolapse which occurs after a hysterectomy.
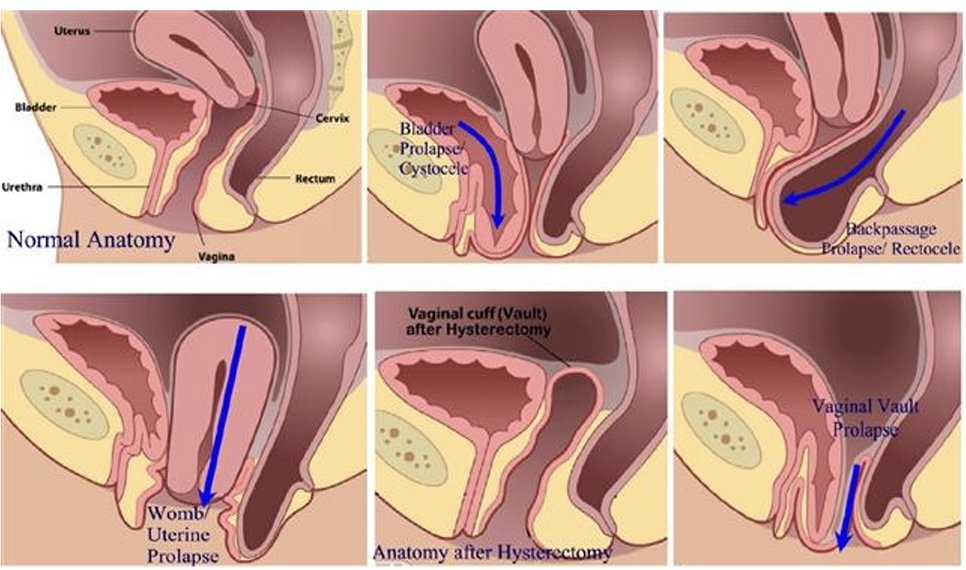
Pelvic Organ Prolapse
Symptoms of a pelvic organ prolapse
Prolapse affects everyone in a very unique way both physically and mentally. Some people live with prolapse and do not experience any symptoms. Other people can experience any number of symptoms which can be mild or affect your quality of life. Symptoms include:
pressure or heaviness in your pelvis area, which is often worse at the end of the day or with exercise
low back pain
urinary symptoms such as a slower stream, increased frequency or urgency to void, feeling of incomplete emptying of the bladder, urinary incontinence
bowel problems such as constipation, straining, feeling like the bowel doesn’t empty completely, increased frequency of bowel movements, faecal smearing (stool on the tissue after wiping clean), incontinence of faeces
Discomfort during sexual intercourse
Treatment options for pelvic organ prolapse

Pelvic Health Physiotherapy Assessment
Great news! Pelvic floor physiotherapy may be able to help with your symptoms of POP. Our team can help suggest changes you can make to your day to day routine to manage pressure on the organs, help with toilet positions to aid more effective urination/defecation.
Our specially trained Physiotherapists can assess muscle tension in the pelvic floor and abdominal muscles and help you to release this. We can also assess the strength and endurance of the muscles and teach you how to improve this if need be.

Physio instructed strengthening
We can guide you on correct strength and endurance exercises to help support the pelvic organs and the pelvis itself. This can help you in everyday functions when straining or lifting and on safely returning to sport. We can also make individual suggestions for more comfortable positions for intercourse.
Pessary For Pelvic Organ Prolapse
At Physio Effect our specialist team can assess and fit a pessary. A pessary is a device you wear inside the vagina, intermittently or continuously, to help hold things in position while you do the things you love. Once it is in place, you don’t feel anything but it can provide instant relief from that heaviness or pressure and can help with symptoms of incontinence too.

Cube Pessaries
Best of all once fitted these pessaries are designed for self management so you are in complete control and can remove and fit the pessary as required. After assessment and discussing your individual symptoms and needs our physiotherapists can help you decide if surgery might be the best route for you if conservative therapy has not worked.
We are here to help so please ask us anything. Hopefully this information makes things seem a bit less overwhelming and gives you hope that your symptoms can be improved. Give us a call or book in online for a full assessment and personalised treatment plan.

Sports Massage FAQs
Often, before, during and after a Sports Massage I get asked a handful of questions surrounding the topic. Therefore, I have compiled a list of FAQs that may help put a lot of minds to ease with this easy-to-follow guide and reason as to why you should get a Sports Massage.
Sports Massage – What is it and what does it do?

Warming up the rotator cuff
A Sports massage is a form of massage using a variety of simple and specialist techniques to manipulate the soft tissue of the musculoskeletal system.
1. Sports massage has been shown to increase muscle flexibility in the acute stage. This means that following your sports massage you will be capable of reaching positions that you struggled with prior to the massage. An example of this would be simply struggling to touch your toes, if this is due to extremely tight hamstrings then a sports massage on this area may improve blood flow to said area and allow you to reach the range you aim for.
https://www.ncbi.nlm.nih.gov/pmc/articles/PMC7716682/
2. Sports massage has also been shown to aid recovery. As someone who trains you will undergo periods of stress on the body that will build up over time often known as DOMS (Delayed Onset Muscle Soreness). A sports massage will vastly improve circulation into these areas deprived of oxygen and nutrients and reduce the severity of the dreaded DOMS. https://bmjopensem.bmj.com/content/6/1/e000614
https://bjsm.bmj.com/content/32/3/212
3. Sports massage has also been proven time and time again to improve blood flow. In turn, this will enhance oxygen and nutrient delivery into your muscles which will allow them to feel better and more robust.
Who would benefit from a Sports Massage?
Everyone! From the everyday athlete and weekend warrior to the elite sports athlete. If you exercise as part of your routine then often, your body may begin to generate some fatigue, therefore, it is vital to take care of the impact your workouts are having on your body. (I am, however, quite the hypocrite as I do not receive massages as often as I should, whoops)

Muscle Energy Techniques (MET) on Hamstring
When can I train again after a massage?
As a general rule of thumb, I suggest that you should have a massage either on the same day as a rest day or the day before a rest day. The rationale for this, is that you will often feel tired after a massage as it puts your body into the ‘recovery process’. Post massage, your body activates the parasympathetic nervous system which allows your body to recover, thus, inflammation happens in the targeted muscle groups so that you can get back to a stronger condition afterwards.
Why do I get told to drink plenty of water after a massage?
After a massage, as previously mentioned, blood flow is improved, therefore the blood needs to continue to be oxygenated to deliver the right nutrients to the right areas, by drinking water this aids this process and prevents the risk of dehydration. As massage can be quite uncomfortable if your muscles are particularly tight, then your heart rate might spike during the treatment which will cause you to sweat and potentially cause fluid loss, so this by drinking enough you will replenish this lost fluid.
https://www.huffpost.com/entry/water-after-a-massage_n_2075604
How often should I get a massage?
There are various studies suggestive of different frequencies for massage but in my opinion, I believe it’s very individualised. A few examples are as follow.
If you are training at a moderate to high level (training 4-6 times a week), a sports massage once every 2-3 weeks should be enough.
During Jonny’s training, (one of our Physios here at Physio Effect) I had the privilege of providing him with a fortnightly sports massage which he found made a massive difference while pushing his body to new limits in his training to run the west highland way in December 2021. He stated that “the regular release of the muscle groups in my legs that were being overloaded with training allowed me to complete a 12-week plan for the first time ever without regular minor niggles to different muscles and joints in my legs. With the high training volume and a busy life, I often find it difficult to keep on top of my own soft tissue release and maintenance, so having the regular massage appointment in my diary meant I was able to focus my time and efforts into the more enjoyable training than torturing myself late in the evening on a foam roller. It also allowed me to have regular quality work done to a long-standing knee issue that I feel avoided it is flaring up beyond a manageable level in my training. I will absolutely be doing this on future training blocks for my various running events.”
If you are an elite athlete (2 a day sessions) then once a week would be the most optimal.
If you work a moderate to intense job/Occupational factors that involves either sitting in a compromised postural position or carrying heavy loads, then a massage once every 3-4 weeks would suffice. However, it is individual dependant as I myself, only get one every 2 months or so as it this fits my lifestyle.
https://www.onemassagetherapy.co.uk/how-often-should-you-get-a-massage/

Is a sports massage sore?
This is a question that is dependent on an individual’s pain tolerance, using myself as an example I get nervous prior to any form of body work as I expect it to be sore. However, using one of my managers Jonny as an example in which he won’t mind me saying, he is okay with a sports massage and tolerates them well, albeit that he receives them frequently and has built up a good tolerance towards them.
The pressure of the massage we provide is always adapted through the variety of techniques we use throughout the treatment so this will go from some light techniques in order to warm the tissue up at the beginning and end of the treatment with some specific deeper techniques throughout.
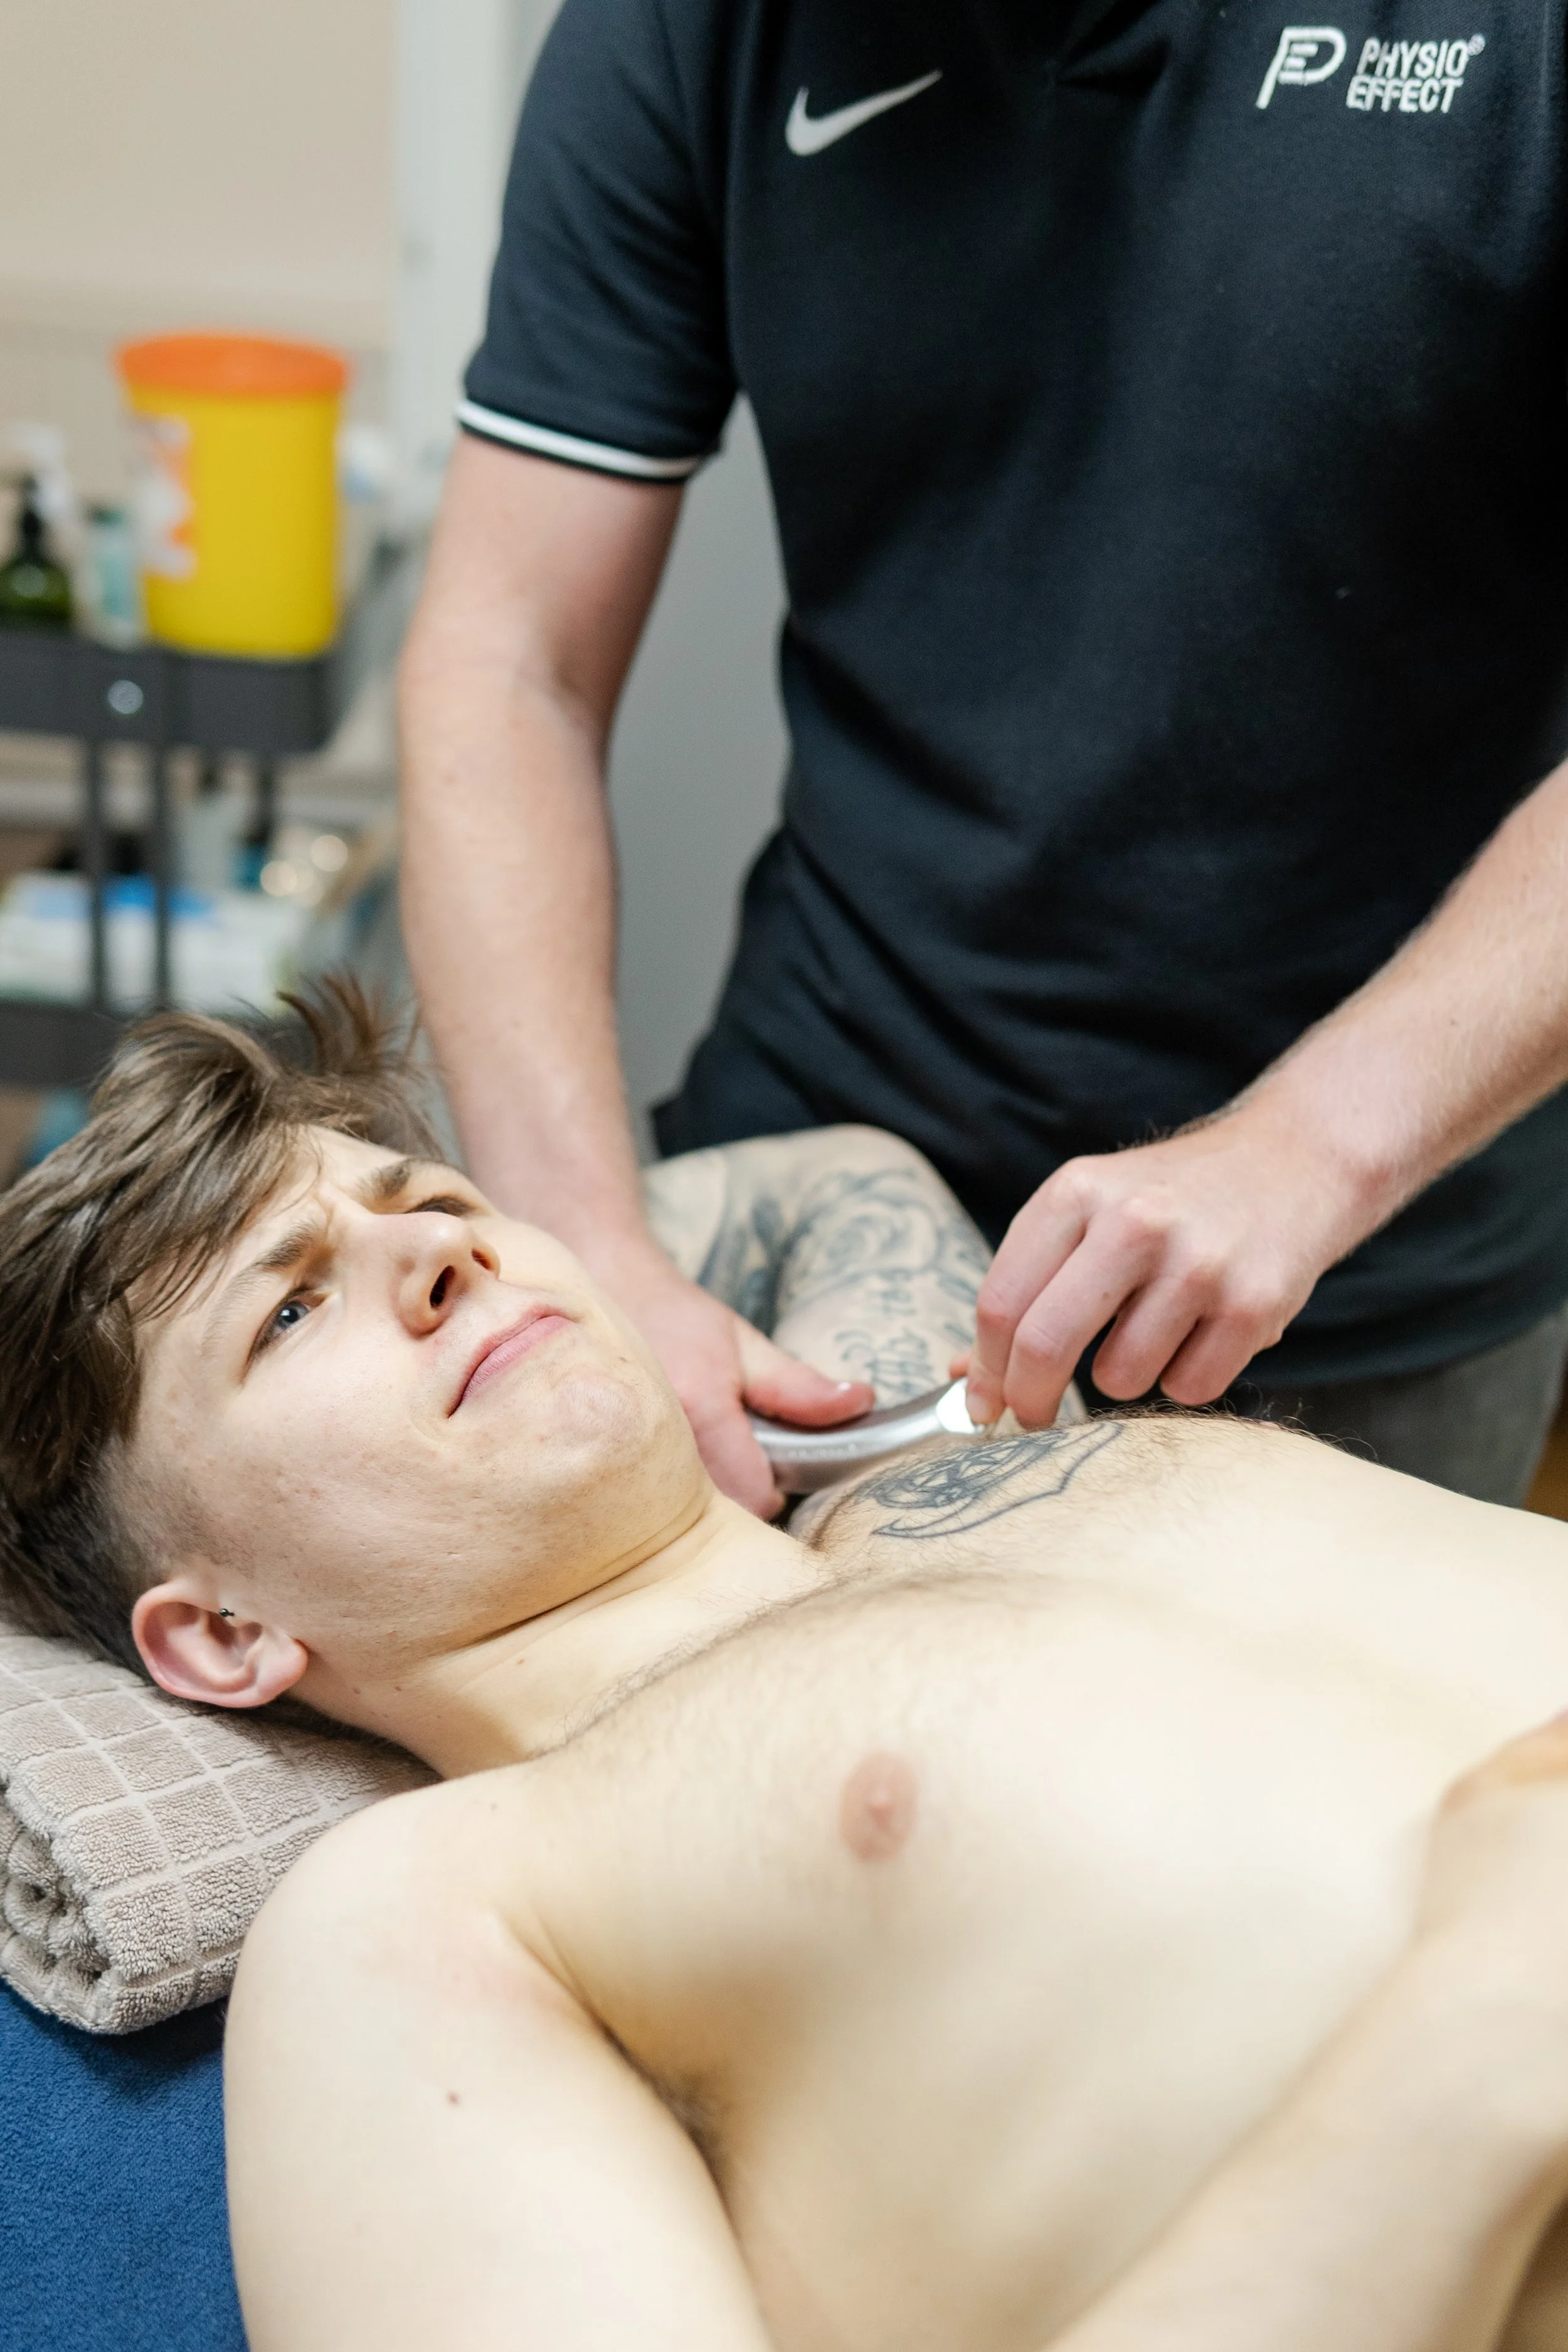
Gua Sha Scraping on the Pec (not the nicest)
When should I NOT get a massage?
If you have an acute injury (within the first 3 days of the injury occurring) I would not book in for a sports massage. The reason for this is that the injured area will be begin the healing process resulting in pain and inflammation. Massaging this area would only aggravate the injured tissue and potentially make the injury worse.
I hope this blog answers common queries and questions and we’ll be more than happy to answer any more questions either via email - reception@physioeffect.co.uk or by phoning us on 01412304766

What is Pelvic Floor Physiotherapy?
What is pelvic floor physiotherapy and how can our team help you get back to doing the things you love symptom free?
Written by Jenny Devlin, MSK Physiotherapist and Specialist Women’s Health Physiotherapist at Physio Effect. MCSP & HCPC
What is pelvic floor physiotherapy?
Pelvic floor physiotherapists are musculoskeletal physios who have undergone specialised training in assessing and treating conditions that affect the pelvic area. This can be from pregnancy, childbirth or surgery but it does not have to be!
Some pelvic floor issues that can be treated with pelvic floor physiotherapy include:
Urinary and faecal incontinence
Urinary urgency, retention, frequency
Diastasis rectus abdominus
Pain with bowel movements or urination
Pain in the vulvar area (vestibulodynia, vulvodynia)
Painful intercourse (dyspareunia)
Constipation
Interstitial cystitis
Pudendal neuralgia
Endometriosis
Low back pain
Hip pain
Prenatal care - including pain management, exercise advice, positions for birthing, breathing techniques
Postpartum care - including return to sport

Jenny Devlin, specialist pelvic health Physiotherapist explaining pelvic health assessment
What does a pelvic floor assessment involve?
At your first appointment you will be asked several questions about your current symptoms, past symptoms and other relevant medical and social information.
We will then conduct a physical assessment which will be different for everyone depending on what’s going on with you. It will likely involve postural assessment, checking your pelvic alignment, tummy muscles and how your body moves when you do certain tasks like squat or stand on one leg.
If your pelvic floor seems to be involved then we will recommend an internal assessment. The benefits of a digital vaginal or rectal examination are that the physiotherapist is able to assess tension, strength, prolapse and improve activation of the muscles. The risks are that there may be local discomfort or emotional stress, skin reaction, nausea or bleeding, though we take all measures to minimise these risks.The alternative is doing an external examination and observing the abdomen and giving verbal cues for exercises, however, we will not know exactly what the muscles are doing and often progress is slower with this option. All of this will be discussed with your physiotherapist prior to therapy and throughout treatment. Consent to assessment and treatment can be withdrawn at any time. You are in charge!

Women’s Health Physiotherapist Jenny Devlin conducting a pelvic floor assessment with a female patient.
Does pelvic floor physiotherapy work??
Studies have shown that pelvic floor physiotherapy has Level 1, grade A evidence for treating urinary incontinence and pelvic organ prolapse. Clinical guidelines (2008) on the conservative management of urinary incontinence by the Society of Obstetricians and Gynaecologists of Canada recommend “proper performance of Kegel exercises should be confirmed by digital vaginal examination or biofeedback”. This is crucial because a high percentage of women can not contract their pelvic floor correctly. Further to that, performing more kegel exercises may not be what you need and an assessment with a trained pelvic floor physiotherapist can help guide you as to what treatment is most effective for your body.
Often people are prescribed pelvic floor physiotherapy in their postpartum period or when they are older but physiotherapy should be routine for pregnant people too. Research shows that pelvic floor muscle training between 20-36 weeks of pregnancy had a shorter second stage of labour, less urinary incontinence and less pregnancy related low back pain compared to people who did not perform pelvic floor exercises. This is an essential time to have your pelvic floor evaluated, learn optimal positions and breathing for labour and delivery and to set yourself up for a more successful postpartum recovery.
Make sure you align yourself with a pelvic floor physiotherapist who understands that not all pelvic pain is tissue based. Pain, especially chronic pain, is multifactorial and therefore it is so important that you find a physio who understands the relationship between pain, biological factors, the nervous system, psychological and social factors so that you can have the best outcome!
How do I know if pelvic floor physiotherapy is for me?
Do you have a pelvis? Then the answer is YES, pelvic physio is for you! Joking aside, there are so many reasons that might bring you to a pelvic physiotherapist. If you have pain or discomfort in your pelvis area; heaviness or pressure at the vulva, vagina or rectum; leaking of urine or stool; need to go to the toilet often or experience urgency or have pain with intercourse. If you have uncontrolled doming of your tummy muscles when you move or have noticed a gap between your tummy muscles. If you have issues with constipation, hip pain or low back pain. If you are pregnant and in pain, or are looking for exercise guidance or tips and tricks for labour and delivery. If you are postpartum (6 weeks after childbirth for a vaginal exam, though physiotherapy can start before that). If you want to make a plan for returning to running or working out or to make day to day tasks feel easier on your body.
Still can’t decide? Call us on 01412304766 to discuss or use the link below and book your initial assessment, we will figure out what is best for you.

Proprioception Drills for Hill Runners
Trail and hill running as a sport is demanding on our bodies. Common injuries are often as a result of overloading an area of the body not able to meet the demands placed on it, particularly as running is a repetitive, high-impact activity. Here are some of our favourite exercises to help improve strength, proprioception and build fatigue resistance to improve your running economy.
written By Mariam Kilpatrick - Physiotherapist and Ultra-runner
Trail and hill running as a sport is demanding on our bodies. Common injuries are often as a result of overloading an area of the body not able to meet the demands placed on it, particularly as running is a repetitive, high-impact activity. Here are four of our favourite exercises to help improve strength, proprioception and build fatigue resistance to improve your running economy.
STEP UP
What you will need…
A Bench or box that is knee height.
Technique Tips
Try NOT to push through your back leg.
Step up with the weight primarily on your heel.
Maintain a knee window i.e. knees on either side of your midline.
Perform 8-12 reps each leg, aim to perform 5-6 sets with a max of 30s rest between each one.
2. SINGLE LEG BALANCE
What you will need…
An unstable surface to balance on i.e. a bosu ball, wobble board or cushion.
Technique Tips
While balancing on one leg try;
Writing the letters of the alphabet with the other.
To draw a clock face.
Closing your eyes.
Perform 1 minute each leg, aim to perform 2-3 sets with a max of 30s between each one.
3. POLEQUIN STEP UP
What you will need…
A slant/decline board OR
A small block placed beneath your heel to elevate it, while standing on a step. This puts your foot into a decline position.
Technique Tips
Keep your weight on the block.
Lightly tap your other heel to the floor.
Maintain a knee window i.e. knees on either side of your midline.
Perform 8-12 reps each leg, aim to perform 5-6 sets with a max of 30s rest between each one.
4. TRAMPETTE BALANCE
What you will need…
A trampette
OR
Your child’s back yard trampoline.
Technique Tips
Aim to land on the same spot, don’t bounce all over the place.
Don’t let you knee fold inwards.
Spend a minute on each leg, aim to work 5-6 sets or work to fatigue.

The Glasgow Running Clinic
If you’d like to improve your running technique or are keen to prevent or return from injury, Physio Effect offer a bespoke running analysis service to get you operating at peak performance. Call our reception team on 0141 230 4766 to find out more and schedule your appointment.

Shockwave therapy for Tibial Stress syndrome (shin splints)
Written by Daniel Wray (BSc Hons Physio/ PG Dip Sports Physio)
What is Shockwave Therapy?
Shockwave therapy is a non invasive, non surgical procedure used to treat a variety of injuries and painful conditions. It is often referred to as extracorporeal (outside of the body) shockwave therapy or ESWT.

Shockwave therapy for tibial stress syndrome (shin splints)
Shockwaves are a type of acoustic wave which carry high energy to painful areas and tissues during various phases of injury helping to stimulate a tissue healing response.
The waves are created by compressed air which is then applied by the therapist onto the affected area via a handheld device.
Shockwave has recently been compared to ultrasound, however the two waveforms are very different. The energy produced via shockwave promotes regeneration and reparative processes of the bones, tendons and other soft tissues.
Shockwave therapy carries minimal risk and is a fast and effective treatment for many chronic painful conditions. The picture below descibres some of the mechanisms of action for shockwave therapy.
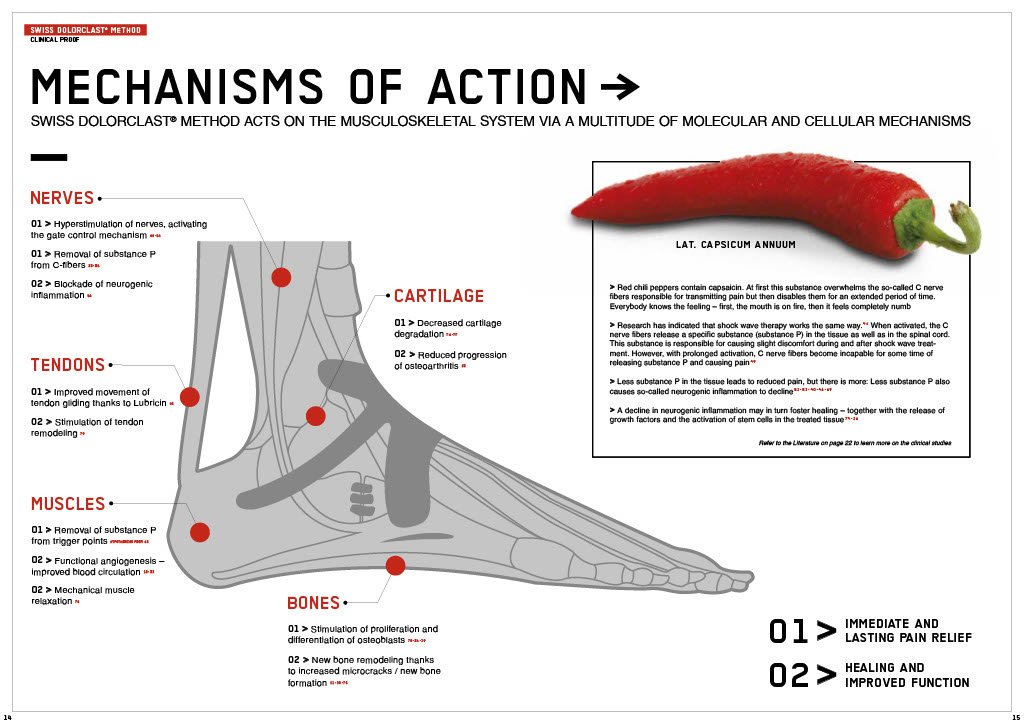
WHAT IS TIBIAL STRESS SYNDROME?
Tibial stress syndrome, also known as shin splints, is an overuse injury which leads to persistent dull pain at the front of the shin along the tibial edge.
It is more common in those who don’t exercise regularly and then suddenly try to run or increase activity levels significantly.
Symptoms include overall pain at the shin area, pain after exercise and if severe, can be painful when walking or using stairs
SHOCKWAVE THERAPY FOR TIBIAL STRESS SYNDROME
Clients who do not respond to conservative treatment including reduced activity and stretching and strengthening exercises should consider shockwave therapy.
Shockwave therapy can be targeted at the painful area and can increase blood flow as well as stem cell activity promoting increased healing and reduced pain
For optimal treatment outcomes shockwave therapy will be combined with a bespoke rehabilitation and strengthening plan based around an assessment of your unique needs and goals by our experienced Physiotherapists

Shockwave therapy for tibial stress syndrome (shin splints)
What does a shockwave treatment session involve?
Shockwave therapy for tennis elbow (Lateral epicondylalgia)
Shockwave therapy requires no injections or surgery.
It is usually indicated when Physiotherapy alone does not improve specific symptoms which have persisted for at least 12 weeks.
The treatment is administered via a handheld device which is placed on the skin above the injured area. The shockwaves pass into the tissue in the form of low energy sound waves which pass into the injured area enhancing blood flow and stimulating a tissue healing response.
For optimal results shockwave treatment requires a course of 3-4 treatments delivered once every 7-10 days. The shockwave treatment itself takes only a few minutes. When you book Shockwave therapy at Physio Effect we will always assess you fully on an individual basis, listening carefully to your history and needs, so that we can formulate the best possible treatment plan.
Why choose the Swiss Dolorclast?

Swiss Dolorclast Smart 20 shockwave System
Not all shockwave treatments are equal so please be careful and research before committing to any treatment. Some companies may charge significant amounts for shockwave therapy yet deliver their treatment on cheap, untested and sub-standard machines. Cheap machines will be unable to produce the kind of pressures required to create a therapeutic treatment effect. At Physio Effect we do not compromise on quality and have therefore purchased the top of the range Swiss Dolorclast system to deliver our shockwave treatments.
Evo Blue Handheld Probe
The Swiss Dolorclast systems have been tried, tested and proven as effective systems for pain relief and injury recovery. On the Physiotherapy evidence Database 34 out of 62 randomised controlled trials listed used the Dolorclast shockwave systems, providing substantial high quality evidence of their efficacy.
Does shockwave therapy hurt?
Shockwave treatment for medial tibial stress syndrome (shin splints)
In simple terms shockwave treatment is at the least uncomfortable and in some cases can be painful. The nature of this technology requires the delivered shockwaves to create a focal tissue response to stimulate blood flow and cell reaction and to achieve this a level of discomfort is required. If you have received pain free shockwave treatment or been offered it as pain free it may be worth questioning if the intensity and quality of treatment provided is within the range required for therapeutic benefit.
Shockwave treatment generally takes only 3-5 minutes to deliver so most people are quite able to cope with the short duration of discomfort. Your therapist will work with you to adjust the treatment intensity so that optimal results can be achieved while managing any discomfort.
Is there any reason I can’t have shockwave therapy?
In general terms shockwave therapy is very safe and causes minimal side effects. There are relatively few contraindications to the radial shockwave which we use here at Physio Effect.
Shockwave therapy is contraindicated if;
You are pregnant
You are being treated for cancer
You have an infection or wound at the treatment site
You have had a steroid injection in the previous 6 weeks

Shockwave therapy for subacromial impingement syndrome
Shockwave therapy may not be appropriate, or used with caution if;
You have metal pins, plates or prosthesis in the area requiring treatment
You have a blood clotting disorder
You are under 18
You are taking anticoagulant medication
You have had a serious tissue rupture at the injury site previously
Loss of sensation at the site of injury
If you are in any doubt about whether shockwave therapy is suitable for you then please contact us and we will be happy to guide you.
Seeking guidance or have questions? We Can Help.
Our experienced team at Physio Effect are specialists in the field and will be happy to answer any questions you might have about Shockwave Therapy. Click below to contact us.
Ready to take decisive action and book shockwave therapy? Click below to Book Now!
Thank You
Thank you for taking the time to read this post, we sincerely hope that you find it useful. We appreciate all feedback so please take a moment and let us know what you think.

Shockwave therapy for Osgood Schlatter disease
Written by Daniel Wray (BSc Hons Physio/ PG Dip Sports Physio)
What is Shockwave Therapy?
Shockwave therapy is a non invasive, non surgical procedure used to treat a variety of injuries and painful conditions. It is often referred to as extracorporeal (outside of the body) shockwave therapy or ESWT.
Shockwave therapy for Osgood Schlatter disease
Shockwaves are a type of acoustic wave which carry high energy to painful areas and tissues during various phases of injury helping to stimulate a tissue healing response.
The waves are created by compressed air which is then applied by the therapist onto the affected area via a handheld device.
Shockwave has recently been compared to ultrasound, however the two waveforms are very different. The energy produced via shockwave promotes regeneration and reparative processes of the bones, tendons and other soft tissues.
Shockwave therapy carries minimal risk and is a fast and effective treatment for many chronic painful conditions. The picture below descibres some of the mechanisms of action for shockwave therapy.
WHAT IS OSGOOD SCHLATTER DISEASE?
Osgood-Schlatter is inflammation inflammation of the area just below the knee where the tendon from the kneecap (patellar tendon) attaches to the shinbone (tibia) at the tibial tuberosity.
It is most common during growth spurts in adolescents when bones, tendons, muscles and other structures are changing rapidly. Physical activity puts further stress on these structures so adolescents who participate in sports such as running, football, and athletics are more susceptible to this injury
Symptoms include knee pain, pain at the top of the shin and tight quads and hamstrings
SHOCKWAVE THERAPY FOR OSGOOD SCHLATTER DISEASE
Clients who do not respond to conservative treatment including activity modification and stretching and strengthening exercises should consider shockwave therapy.
The shock waves applied promote blood flow and stimulate stem cell activity in the tissue providing pain relief while increasing the healing response.
For optimal treatment outcomes shockwave therapy will be combined with a bespoke rehabilitation and strengthening plan based around an assessment of your unique needs and goals by our experienced Physiotherapists

Shockwave therapy for Osgood Schlatter disease
What does a shockwave treatment session involve?
Shockwave therapy for tennis elbow (Lateral epicondylalgia)
Shockwave therapy requires no injections or surgery.
It is usually indicated when Physiotherapy alone does not improve specific symptoms which have persisted for at least 12 weeks.
The treatment is administered via a handheld device which is placed on the skin above the injured area. The shockwaves pass into the tissue in the form of low energy sound waves which pass into the injured area enhancing blood flow and stimulating a tissue healing response.
For optimal results shockwave treatment requires a course of 3-4 treatments delivered once every 7-10 days. The shockwave treatment itself takes only a few minutes. When you book Shockwave therapy at Physio Effect we will always assess you fully on an individual basis, listening carefully to your history and needs, so that we can formulate the best possible treatment plan.
Why choose the Swiss Dolorclast?
Swiss Dolorclast Smart 20 shockwave System
Not all shockwave treatments are equal so please be careful and research before committing to any treatment. Some companies may charge significant amounts for shockwave therapy yet deliver their treatment on cheap, untested and sub-standard machines. Cheap machines will be unable to produce the kind of pressures required to create a therapeutic treatment effect. At Physio Effect we do not compromise on quality and have therefore purchased the top of the range Swiss Dolorclast system to deliver our shockwave treatments.
Evo Blue Handheld Probe
The Swiss Dolorclast systems have been tried, tested and proven as effective systems for pain relief and injury recovery. On the Physiotherapy evidence Database 34 out of 62 randomised controlled trials listed used the Dolorclast shockwave systems, providing substantial high quality evidence of their efficacy.
Does shockwave therapy hurt?
Shockwave treatment for medial tibial stress syndrome (shin splints)
In simple terms shockwave treatment is at the least uncomfortable and in some cases can be painful. The nature of this technology requires the delivered shockwaves to create a focal tissue response to stimulate blood flow and cell reaction and to achieve this a level of discomfort is required. If you have received pain free shockwave treatment or been offered it as pain free it may be worth questioning if the intensity and quality of treatment provided is within the range required for therapeutic benefit.
Shockwave treatment generally takes only 3-5 minutes to deliver so most people are quite able to cope with the short duration of discomfort. Your therapist will work with you to adjust the treatment intensity so that optimal results can be achieved while managing any discomfort.
Is there any reason I can’t have shockwave therapy?
In general terms shockwave therapy is very safe and causes minimal side effects. There are relatively few contraindications to the radial shockwave which we use here at Physio Effect.
Shockwave therapy is contraindicated if;
You are pregnant
You are being treated for cancer
You have an infection or wound at the treatment site
You have had a steroid injection in the previous 6 weeks
Shockwave therapy for subacromial impingement syndrome
Shockwave therapy may not be appropriate, or used with caution if;
You have metal pins, plates or prosthesis in the area requiring treatment
You have a blood clotting disorder
You are under 18 (parent / guardian consent required)
You are taking anticoagulant medication
You have had a serious tissue rupture at the injury site previously
Loss of sensation at the site of injury
If you are in any doubt about whether shockwave therapy is suitable for you then please contact us and we will be happy to guide you.
Seeking guidance or have questions? We Can Help.
Our experienced team at Physio Effect are specialists in the field and will be happy to answer any questions you might have about Shockwave Therapy. Click below to contact us.
Ready to take decisive action and book shockwave therapy? Click below to Book Now!
Thank You
Thank you for taking the time to read this post, we sincerely hope that you find it useful. We appreciate all feedback so please take a moment and let us know what you think.

Shockwave therapy for shoulder impingement syndrome
Written by Daniel Wray (BSc Hons Physio/ PG Dip Sports Physio)
What is Shockwave Therapy?
Shockwave therapy is a non invasive, non surgical procedure used to treat a variety of injuries and painful conditions. It is often referred to as extracorporeal (outside of the body) shockwave therapy or ESWT.

Shockwave therapy for shoulder impingement syndrome
Shockwaves are a type of acoustic wave which carry high energy to painful areas and tissues during various phases of injury helping to stimulate a tissue healing response.
The waves are created by compressed air which is then applied by the therapist onto the affected area via a handheld device.
Shockwave has recently been compared to ultrasound, however the two waveforms are very different. The energy produced via shockwave promotes regeneration and reparative processes of the bones, tendons and other soft tissues.
Shockwave therapy carries minimal risk and is a fast and effective treatment for many chronic painful conditions. The picture below descibres some of the mechanisms of action for shockwave therapy.
WHAT IS SHOULDER IMPINGEMENT SYNDROME?
Shoulder impingement is often referred to as swimmers shoulder due to the repeated overhead motions carried out by swimmers. It may also be known as subacromial impingement.
Impingement is when the supraspinatus tendon of the rotator cuff rubs against the acromion (shoulder blade) due to a narrowing of the space between these two structures. The tendon can be repeatedly pinched or impinged leading to tissue injury, inflammation and pain.
Symptoms include sudden catching pain when lifting your arm overhead or backwards. Pain can occur at night causing sleep disturbance
Impingement can occur after a fall onto an outstretched arm but is more typically a gradual process caused by wear and tear and overuse of the shoulder
Impingement is more common in sports requiring repetitive overhead shoulder movements such as tennis or swimming
SHOCKWAVE THERAPY FOR SHOULDER IMPINGEMENT
Shock waves are passed through the skin to the injured part of the shoulder using a special hand held probe.
The shock waves applied promote blood flow and stimulate stem cell activity in the tissue providing pain relief while increasing the healing response.
For optimal treatment outcomes shockwave therapy will be combined with a bespoke rehabilitation and strengthening plan based around an assessment of your unique needs and goals by our experienced Physiotherapists
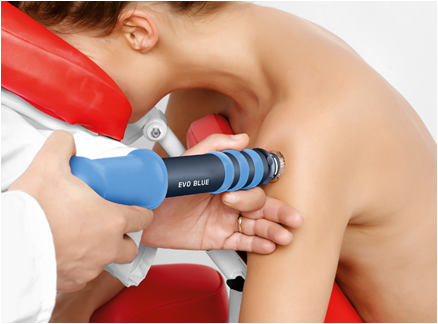
Shockwave therapy for shoulder impingement syndrome
What does a shockwave treatment session involve?
Shockwave therapy for tennis elbow (Lateral epicondylalgia)
Shockwave therapy requires no injections or surgery.
It is usually indicated when Physiotherapy alone does not improve specific symptoms which have persisted for at least 12 weeks.
The treatment is administered via a handheld device which is placed on the skin above the injured area. The shockwaves pass into the tissue in the form of low energy sound waves which pass into the injured area enhancing blood flow and stimulating a tissue healing response.
For optimal results shockwave treatment requires a course of 3-4 treatments delivered once every 7-10 days. The shockwave treatment itself takes only a few minutes. When you book Shockwave therapy at Physio Effect we will always assess you fully on an individual basis, listening carefully to your history and needs, so that we can formulate the best possible treatment plan.
Why choose the Swiss Dolorclast?
Swiss Dolorclast Smart 20 shockwave System
Not all shockwave treatments are equal so please be careful and research before committing to any treatment. Some companies may charge significant amounts for shockwave therapy yet deliver their treatment on cheap, untested and sub-standard machines. Cheap machines will be unable to produce the kind of pressures required to create a therapeutic treatment effect. At Physio Effect we do not compromise on quality and have therefore purchased the top of the range Swiss Dolorclast system to deliver our shockwave treatments.
Evo Blue Handheld Probe
The Swiss Dolorclast systems have been tried, tested and proven as effective systems for pain relief and injury recovery. On the Physiotherapy evidence Database 34 out of 62 randomised controlled trials listed used the Dolorclast shockwave systems, providing substantial high quality evidence of their efficacy.
Does shockwave therapy hurt?
Shockwave treatment for medial tibial stress syndrome (shin splints)
In simple terms shockwave treatment is at the least uncomfortable and in some cases can be painful. The nature of this technology requires the delivered shockwaves to create a focal tissue response to stimulate blood flow and cell reaction and to achieve this a level of discomfort is required. If you have received pain free shockwave treatment or been offered it as pain free it may be worth questioning if the intensity and quality of treatment provided is within the range required for therapeutic benefit.
Shockwave treatment generally takes only 3-5 minutes to deliver so most people are quite able to cope with the short duration of discomfort. Your therapist will work with you to adjust the treatment intensity so that optimal results can be achieved while managing any discomfort.
Is there any reason I can’t have shockwave therapy?
In general terms shockwave therapy is very safe and causes minimal side effects. There are relatively few contraindications to the radial shockwave which we use here at Physio Effect.
Shockwave therapy is contraindicated if;
You are pregnant
You are being treated for cancer
You have an infection or wound at the treatment site
You have had a steroid injection in the previous 6 weeks
Shockwave therapy for subacromial impingement syndrome
Shockwave therapy may not be appropriate, or used with caution if;
You have metal pins, plates or prosthesis in the area requiring treatment
You have a blood clotting disorder
You are under 18
You are taking anticoagulant medication
You have had a serious tissue rupture at the injury site previously
Loss of sensation at the site of injury
If you are in any doubt about whether shockwave therapy is suitable for you then please contact us and we will be happy to guide you.
Seeking guidance or have questions? We Can Help.
Our experienced team at Physio Effect are specialists in the field and will be happy to answer any questions you might have about Shockwave Therapy. Click below to contact us.
Ready to take decisive action and book shockwave therapy? Click below to Book Now!
Thank You
Thank you for taking the time to read this post, we sincerely hope that you find it useful. We appreciate all feedback so please take a moment and let us know what you think.

Shockwave therapy for proximal hamstring tendinopathy
Written by Daniel Wray (BSc Hons Physio/ PG Dip Sports Physio)
What is Shockwave Therapy?
Shockwave therapy is a non invasive, non surgical procedure used to treat a variety of injuries and painful conditions. It is often referred to as extracorporeal (outside of the body) shockwave therapy or ESWT.
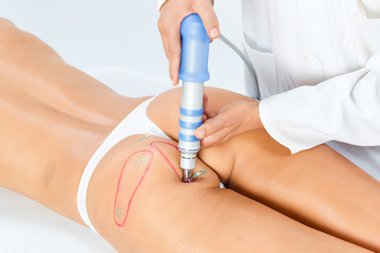
Shockwave therapy for proximal hamstring tendinopathy
Shockwaves are a type of acoustic wave which carry high energy to painful areas and tissues during various phases of injury helping to stimulate a tissue healing response.
The waves are created by compressed air which is then applied by the therapist onto the affected area via a handheld device.
Shockwave has recently been compared to ultrasound, however the two waveforms are very different. The energy produced via shockwave promotes regeneration and reparative processes of the bones, tendons and other soft tissues.
Shockwave therapy carries minimal risk and is a fast and effective treatment for many chronic painful conditions. The picture below descibres some of the mechanisms of action for shockwave therapy.
WHAT IS PROXIMAL HAMSTRING TENDINOPATHY?
Proximal hamstring tendinopathy is the breakdown of collagen at the top of the hamstrings near to where the tendon attaches to the bone. It is common among long distance runners and athletes that regularly sprint with directional changes
Symptoms include pain at the very top of the hamstrings, just at the buttock crease. Pain usually occurs after activities with increased post exercise stiffness
The condition is typically the result of cumulative micro-trauma to the tendon which fails to fully heal. This results in degeneration and partial tearing of the tendon causing pain, weakness and impaired function
Symptoms may be progressive over many months or even years
SHOCKWAVE THERAPY FOR PROXIMAL HAMSTRING TENDINOPATHY
Shock waves are passed through the skin to the injured part of the hamstring using a special hand held probe.
The shock waves applied promote blood flow and stimulate stem cell activity in the tissue providing pain relief while increasing the healing response.
For optimal treatment outcomes shockwave therapy will be combined with a bespoke rehabilitation and strengthening plan based around an assessment of your unique needs and goals by our experienced Physiotherapists

Shockwave therapy for proximal hamstring tendinopathy
What does a shockwave treatment session involve?
Shockwave therapy for tennis elbow (Lateral epicondylalgia)
Shockwave therapy requires no injections or surgery.
It is usually indicated when Physiotherapy alone does not improve specific symptoms which have persisted for at least 12 weeks.
The treatment is administered via a handheld device which is placed on the skin above the injured area. The shockwaves pass into the tissue in the form of low energy sound waves which pass into the injured area enhancing blood flow and stimulating a tissue healing response.
For optimal results shockwave treatment requires a course of 3-4 treatments delivered once every 7-10 days. The shockwave treatment itself takes only a few minutes. When you book Shockwave therapy at Physio Effect we will always assess you fully on an individual basis, listening carefully to your history and needs, so that we can formulate the best possible treatment plan.
Why choose the Swiss Dolorclast?
Swiss Dolorclast Smart 20 shockwave System
Not all shockwave treatments are equal so please be careful and research before committing to any treatment. Some companies may charge significant amounts for shockwave therapy yet deliver their treatment on cheap, untested and sub-standard machines. Cheap machines will be unable to produce the kind of pressures required to create a therapeutic treatment effect. At Physio Effect we do not compromise on quality and have therefore purchased the top of the range Swiss Dolorclast system to deliver our shockwave treatments.
Evo Blue Handheld Probe
The Swiss Dolorclast systems have been tried, tested and proven as effective systems for pain relief and injury recovery. On the Physiotherapy evidence Database 34 out of 62 randomised controlled trials listed used the Dolorclast shockwave systems, providing substantial high quality evidence of their efficacy.
Does shockwave therapy hurt?
Shockwave treatment for medial tibial stress syndrome (shin splints)
In simple terms shockwave treatment is at the least uncomfortable and in some cases can be painful. The nature of this technology requires the delivered shockwaves to create a focal tissue response to stimulate blood flow and cell reaction and to achieve this a level of discomfort is required. If you have received pain free shockwave treatment or been offered it as pain free it may be worth questioning if the intensity and quality of treatment provided is within the range required for therapeutic benefit.
Shockwave treatment generally takes only 3-5 minutes to deliver so most people are quite able to cope with the short duration of discomfort. Your therapist will work with you to adjust the treatment intensity so that optimal results can be achieved while managing any discomfort.
Is there any reason I can’t have shockwave therapy?
In general terms shockwave therapy is very safe and causes minimal side effects. There are relatively few contraindications to the radial shockwave which we use here at Physio Effect.
Shockwave therapy is contraindicated if;
You are pregnant
You are being treated for cancer
You have an infection or wound at the treatment site
You have had a steroid injection in the previous 6 weeks
Shockwave therapy for subacromial impingement syndrome
Shockwave therapy may not be appropriate, or used with caution if;
You have metal pins, plates or prosthesis in the area requiring treatment
You have a blood clotting disorder
You are under 18
You are taking anticoagulant medication
You have had a serious tissue rupture at the injury site previously
Loss of sensation at the site of injury
If you are in any doubt about whether shockwave therapy is suitable for you then please contact us and we will be happy to guide you.
Seeking guidance or have questions? We Can Help.
Our experienced team at Physio Effect are specialists in the field and will be happy to answer any questions you might have about Shockwave Therapy. Click below to contact us.
Ready to take decisive action and book shockwave therapy? Click below to Book Now!
Thank You
Thank you for taking the time to read this post, we sincerely hope that you find it useful. We appreciate all feedback so please take a moment and let us know what you think.