Shockwave therapy for tennis elbow (lateral epicondylitis)
Written by Daniel Wray (BSc Hons Physio/ PG Dip Sports Physio)
What is Shockwave Therapy?
Shockwave therapy is a non invasive, non surgical procedure used to treat a variety of injuries and painful conditions. It is often referred to as extracorporeal (outside of the body) shockwave therapy or ESWT.
Shockwave therapy for tennis elbow (lateral epicondylitis)
Shockwaves are a type of acoustic wave which carry high energy to painful areas and tissues during various phases of injury helping to stimulate a tissue healing response.
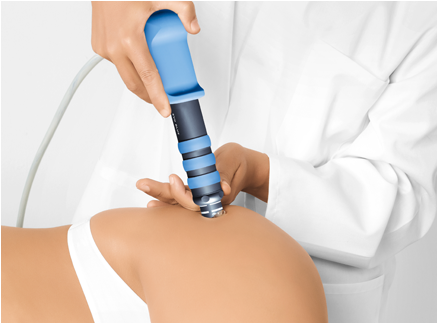
The waves are created by compressed air which is then applied by the therapist onto the affected area via a handheld device.
Shockwave has recently been compared to ultrasound, however the two waveforms are very different. The energy produced via shockwave promotes regeneration and reparative processes of the bones, tendons and other soft tissues.
Shockwave therapy carries minimal risk and is a fast and effective treatment for many chronic painful conditions.
Physio Effect are so confident in their shockwave therapy we offer a ‘Money Back Guarantee’ (Ts & Cs Apply)
Want to learn more about our Expert Approach to treating Tennis Elbow? Click HERE
WHAT IS TENNIS ELBOW (LATERAL EPICONDYLITIS)?
Lateral Epicondylitis is commonly known as tennis elbow while Medial Epicondylitis is known as golfers elbow.
It is caused by overuse of the muscles of the forearm which attach to the inner (golfers) and outer (tennis) elbow
Overuse causes tissue overload and cumulative micro-trauma where damaged tissue fails to properly heal. Pain and weakness then occur at the outside (lateral) or inside (medial) of the elbow joint
Symptoms include pain when lifting or bending your arm. Weakness and pain often occur when gripping and lifting objects or when twisting your forearm such as opening a jar
Symptoms may be progressive over many months or even years
SHOCKWAVE THERAPY FOR TENNIS OR GOLFERS ELBOW
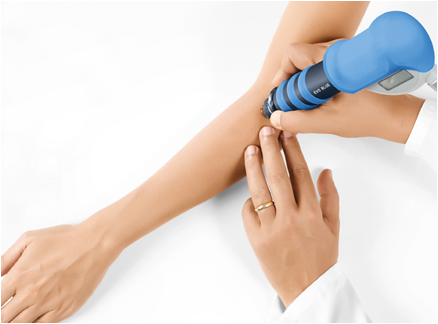
Shock waves are passed through the skin to the injured part of the elbow, using a special hand held probe.
The shock waves applied promote blood flow and stimulate stem cell activity in the tissue providing pain relief while increasing the healing response.
For optimal treatment outcomes shockwave therapy will be combined with a bespoke rehabilitation and strengthening plan based around an assessment of your unique needs and goals by our experienced Physiotherapists
Shockwave therapy for tennis elbow (lateral epicondylitis)
What does a shockwave treatment session involve?
Shockwave therapy for tennis elbow (Lateral epicondylalgia)
Shockwave therapy requires no injections or surgery.
It is usually indicated when Physiotherapy alone does not improve specific symptoms which have persisted for at least 12 weeks.
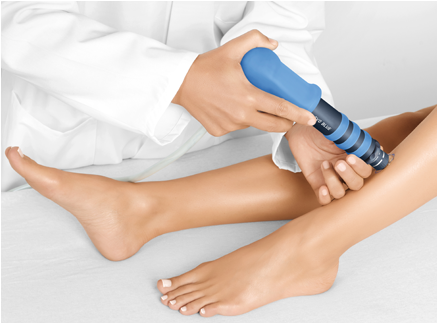
The treatment is administered via a handheld device which is placed on the skin above the injured area. The shockwaves pass into the tissue in the form of low energy sound waves which pass into the injured area enhancing blood flow and stimulating a tissue healing response.
For optimal results shockwave treatment requires a course of 3-4 treatments delivered once every 7-10 days. The shockwave treatment itself takes only a few minutes. When you book Shockwave therapy at Physio Effect we will always assess you fully on an individual basis, listening carefully to your history and needs, so that we can formulate the best possible treatment plan.
Why choose the Swiss Dolorclast?
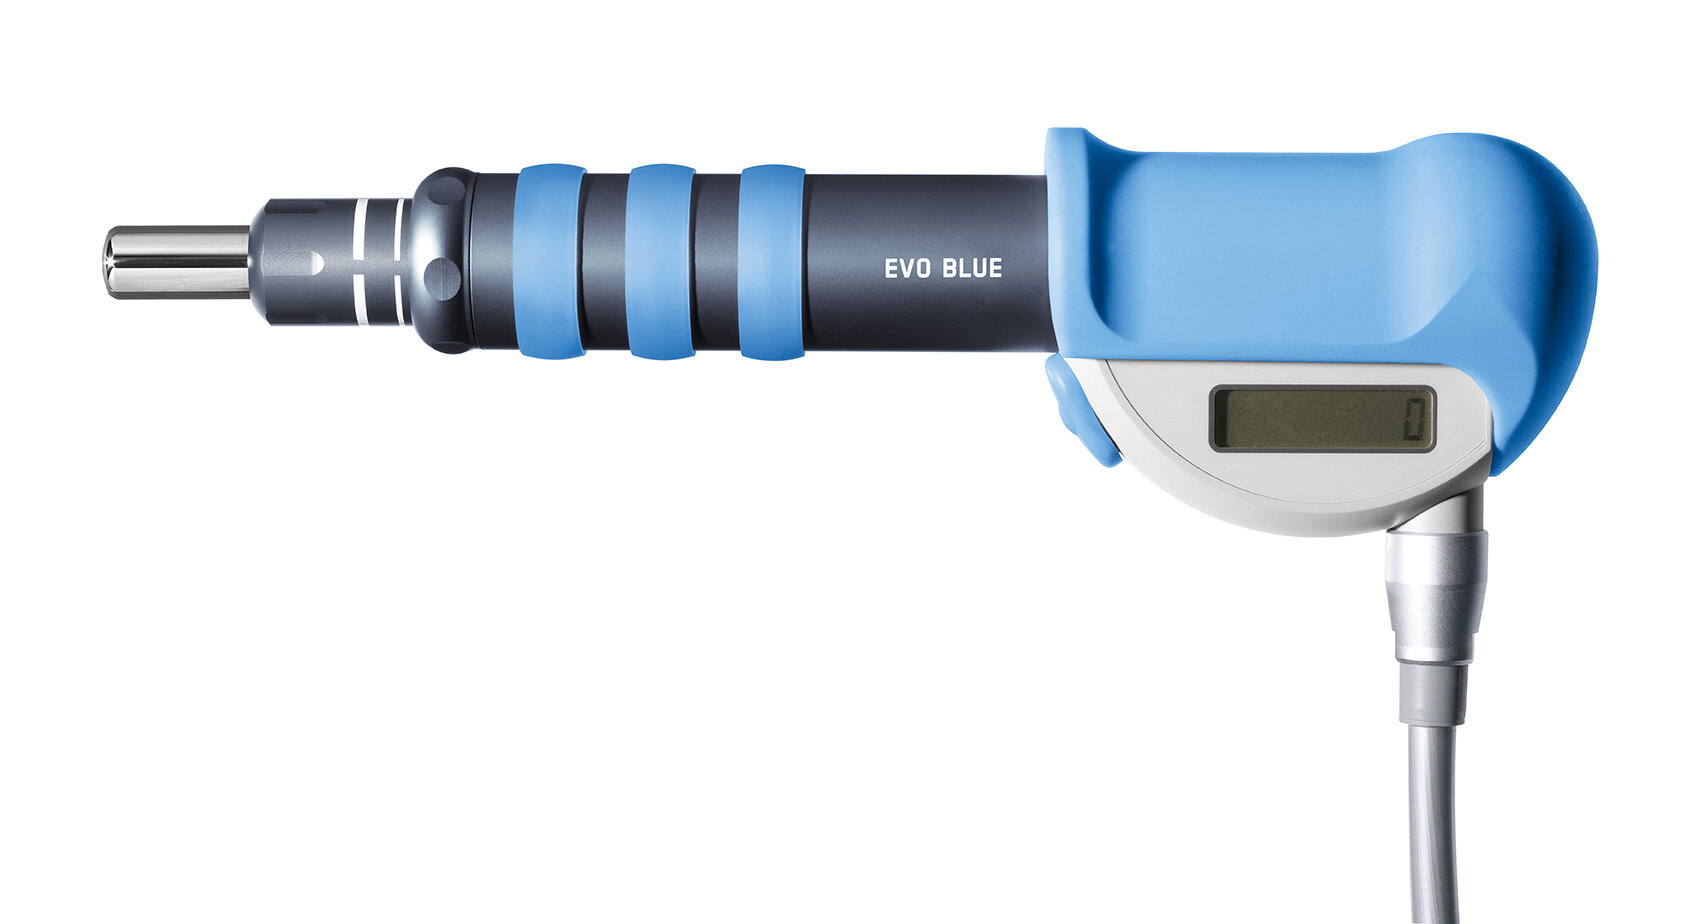
Swiss Dolorclast Smart 20 shockwave System
Not all shockwave treatments are equal so please be careful and research before committing to any treatment. Some companies may charge significant amounts for shockwave therapy yet deliver their treatment on cheap, untested and sub-standard machines. Cheap machines will be unable to produce the kind of pressures required to create a therapeutic treatment effect. At Physio Effect we do not compromise on quality and have therefore purchased the top of the range Swiss Dolorclast system to deliver our shockwave treatments.
Evo Blue Handheld Probe
The Swiss Dolorclast systems have been tried, tested and proven as effective systems for pain relief and injury recovery. On the Physiotherapy evidence Database 34 out of 62 randomised controlled trials listed used the Dolorclast shockwave systems, providing substantial high quality evidence of their efficacy.
Does shockwave therapy hurt?
Shockwave treatment for medial tibial stress syndrome (shin splints)
In simple terms shockwave treatment is at the least uncomfortable and in some cases can be painful. The nature of this technology requires the delivered shockwaves to create a focal tissue response to stimulate blood flow and cell reaction and to achieve this a level of discomfort is required. If you have received pain free shockwave treatment or been offered it as pain free it may be worth questioning if the intensity and quality of treatment provided is within the range required for therapeutic benefit.
Shockwave treatment generally takes only 3-5 minutes to deliver so most people are quite able to cope with the short duration of discomfort. Your therapist will work with you to adjust the treatment intensity so that optimal results can be achieved while managing any discomfort.
Is there any reason I can’t have shockwave therapy?
In general terms shockwave therapy is very safe and causes minimal side effects. There are relatively few contraindications to the radial shockwave which we use here at Physio Effect.
Shockwave therapy is contraindicated if;
You are pregnant
You are being treated for cancer
You have an infection or wound at the treatment site
You have had a steroid injection in the previous 6 weeks
Shockwave therapy for subacromial impingement syndrome
Shockwave therapy may not be appropriate, or used with caution if;
You have metal pins, plates or prosthesis in the area requiring treatment
You have a blood clotting disorder
You are under 18
You are taking anticoagulant medication
You have had a serious tissue rupture at the injury site previously
Loss of sensation at the site of injury
If you are in any doubt about whether shockwave therapy is suitable for you then please contact us and we will be happy to guide you.
Seeking guidance or have questions? We Can Help.
Our experienced team at Physio Effect are specialists in the field and will be happy to answer any questions you might have about Shockwave Therapy. Click below to contact us.
Thank You
Thank you for taking the time to read this post, we sincerely hope that you find it useful. We appreciate all feedback so please take a moment and let us know what you think.
Shockwave therapy for calcific shoulder tendinopathy
Written by Daniel Wray (BSc Hons Physio/ PG Dip Sports Physio)
What is Shockwave Therapy?
Shockwave therapy is a non invasive, non surgical procedure used to treat a variety of injuries and painful conditions. It is often referred to as extracorporeal (outside of the body) shockwave therapy or ESWT.
Shockwave therapy for calcific shoulder tendinopathy (shoulder tendinitis)
Shockwaves are a type of acoustic wave which carry high energy to painful areas and tissues during various phases of injury helping to stimulate a tissue healing response.
The waves are created by compressed air which is then applied by the therapist onto the affected area via a handheld device.
Shockwave has recently been compared to ultrasound, however the two waveforms are very different. The energy produced via shockwave promotes regeneration and reparative processes of the bones, tendons and other soft tissues.
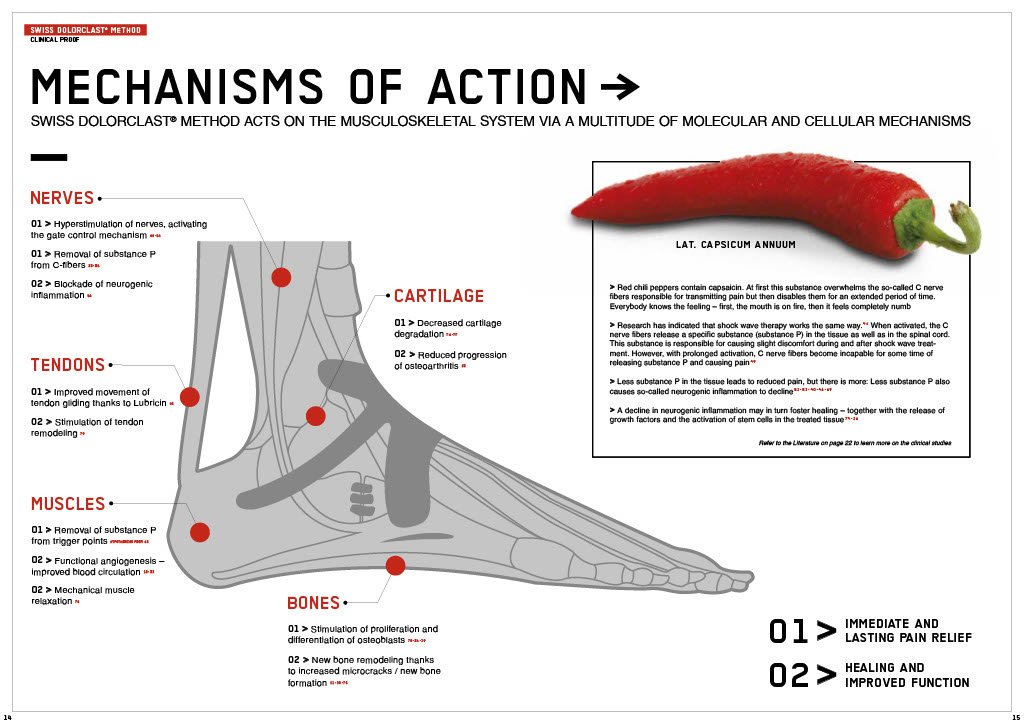
Shockwave therapy carries minimal risk and is a fast and effective treatment for many chronic painful conditions. The picture below descibres some of the mechanisms of action for shockwave therapy.
WHAT IS CALCIFIC SHOULDER TENDINOPATHY?
Calcific shoulder tendinopathy occurs when hydroxyapatite crystals deposit within the rotator cuff shoulder tendons. (Hydroxyapatite is an essential ingredient for normal bones and teeth. However sometimes unwanted crystals can form in or around joints and tendons causing inflammation in the surrounding structures.)
Symptoms include sudden or gradual pain in the shoulder and in severe cases range of movement in the shoulder may be significantly reduced. Pain can often be felt radiating down the back and front of the arm.
Symptoms can be similar or mimic those of shoulder impingement which may also be treated via shockwave therapy
Symptoms may be progressive over many months or even years
SHOCKWAVE THERAPY FOR CALCIFIC SHOULDER TENDINOPATHY
Shock waves are passed through the skin to the injured part of the shoulder using a special hand held probe.
The shock waves applied promote blood flow and stimulate stem cell activity in the tissue providing pain relief while increasing the healing response. The shock waves can also help to break up the crystal deposits
For optimal treatment outcomes shockwave therapy will be combined with a bespoke rehabilitation and strengthening plan based around an assessment of your unique needs and goals by our experienced Physiotherapists
Shockwave therapy for calcific shoulder tendinopathy (shoulder tendinitis)
What does a shockwave treatment session involve?
Shockwave therapy for tennis elbow (Lateral epicondylalgia)
Shockwave therapy requires no injections or surgery.
It is usually indicated when Physiotherapy alone does not improve specific symptoms which have persisted for at least 12 weeks.
The treatment is administered via a handheld device which is placed on the skin above the injured area. The shockwaves pass into the tissue in the form of low energy sound waves which pass into the injured area enhancing blood flow and stimulating a tissue healing response.
For optimal results shockwave treatment requires a course of 3-4 treatments delivered once every 7-10 days. The shockwave treatment itself takes only a few minutes. When you book Shockwave therapy at Physio Effect we will always assess you fully on an individual basis, listening carefully to your history and needs, so that we can formulate the best possible treatment plan.
Why choose the Swiss Dolorclast?
Swiss Dolorclast Smart 20 shockwave System
Not all shockwave treatments are equal so please be careful and research before committing to any treatment. Some companies may charge significant amounts for shockwave therapy yet deliver their treatment on cheap, untested and sub-standard machines. Cheap machines will be unable to produce the kind of pressures required to create a therapeutic treatment effect. At Physio Effect we do not compromise on quality and have therefore purchased the top of the range Swiss Dolorclast system to deliver our shockwave treatments.
Evo Blue Handheld Probe
The Swiss Dolorclast systems have been tried, tested and proven as effective systems for pain relief and injury recovery. On the Physiotherapy evidence Database 34 out of 62 randomised controlled trials listed used the Dolorclast shockwave systems, providing substantial high quality evidence of their efficacy.
Does shockwave therapy hurt?
Shockwave treatment for medial tibial stress syndrome (shin splints)
In simple terms shockwave treatment is at the least uncomfortable and in some cases can be painful. The nature of this technology requires the delivered shockwaves to create a focal tissue response to stimulate blood flow and cell reaction and to achieve this a level of discomfort is required. If you have received pain free shockwave treatment or been offered it as pain free it may be worth questioning if the intensity and quality of treatment provided is within the range required for therapeutic benefit.
Shockwave treatment generally takes only 3-5 minutes to deliver so most people are quite able to cope with the short duration of discomfort. Your therapist will work with you to adjust the treatment intensity so that optimal results can be achieved while managing any discomfort.
Is there any reason I can’t have shockwave therapy?
In general terms shockwave therapy is very safe and causes minimal side effects. There are relatively few contraindications to the radial shockwave which we use here at Physio Effect.
Shockwave therapy is contraindicated if;
You are pregnant
You are being treated for cancer
You have an infection or wound at the treatment site
You have had a steroid injection in the previous 6 weeks
Shockwave therapy for subacromial impingement syndrome
Shockwave therapy may not be appropriate, or used with caution if;
You have metal pins, plates or prosthesis in the area requiring treatment
You have a blood clotting disorder
You are under 18
You are taking anticoagulant medication
You have had a serious tissue rupture at the injury site previously
Loss of sensation at the site of injury
If you are in any doubt about whether shockwave therapy is suitable for you then please contact us and we will be happy to guide you.
Seeking guidance or have questions? We Can Help.
Our experienced team at Physio Effect are specialists in the field and will be happy to answer any questions you might have about Shockwave Therapy. Click below to contact us.
Ready to take decisive action and book shockwave therapy? Click below to Book Now!
Thank You
Thank you for taking the time to read this post, we sincerely hope that you find it useful. We appreciate all feedback so please take a moment and let us know what you think.
Shockwave therapy for Greater trochanteric pain syndrome
Written by Daniel Wray (BSc Hons Physio/ PG Dip Sports Physio)
What is Shockwave Therapy?
Shockwave therapy is a non invasive, non surgical procedure used to treat a variety of injuries and painful conditions. It is often referred to as extracorporeal (outside of the body) shockwave therapy or ESWT.
Shockwave therapy for Greater trochanteric pain syndrome (trochanteric bursitis)
Shockwaves are a type of acoustic wave which carry high energy to painful areas and tissues during various phases of injury helping to stimulate a tissue healing response.
The waves are created by compressed air which is then applied by the therapist onto the affected area via a handheld device.
Shockwave has recently been compared to ultrasound, however the two waveforms are very different. The energy produced via shockwave promotes regeneration and reparative processes of the bones, tendons and other soft tissues.
Shockwave therapy carries minimal risk and is a fast and effective treatment for many chronic painful conditions. The picture below descibres some of the mechanisms of action for shockwave therapy.
WHAT IS GREATER TROCHANTERIC PAIN SYNDROME?
Previously known as trochanteric bursitis. It is caused by degenerative changes that affect the tendon and bursa of the gluteal muscles.
Symptoms include pain on the outside of the thigh that is heightened with long periods of sitting, walking or general exercise. It can be painful to lie on the affected side.
Weakness and muscle imbalance around the hip may contribute to symptoms
Symptoms can be progressive over many months or even years
SHOCKWAVE THERAPY FOR GREATER TROCHANTERIC PAIN SYNDROME
Shock waves are passed through the skin to the injured part of the hip, using a special hand held probe.
The shock waves applied promote blood flow and stimulate stem cell activity in the tissue providing pain relief while increasing the healing response
For optimal treatment outcomes shockwave therapy will be combined with a bespoke rehabilitation and strengthening plan based around an assessment of your unique needs and goals by our experienced Physiotherapists
Shockwave therapy for Greater trochanteric pain syndrome (trochanteric bursitis)
What does a shockwave treatment session involve?
Shockwave therapy for tennis elbow (Lateral epicondylalgia)
Shockwave therapy requires no injections or surgery.
It is usually indicated when Physiotherapy alone does not improve specific symptoms which have persisted for at least 12 weeks.
The treatment is administered via a handheld device which is placed on the skin above the injured area. The shockwaves pass into the tissue in the form of low energy sound waves which pass into the injured area enhancing blood flow and stimulating a tissue healing response.
For optimal results shockwave treatment requires a course of 3-4 treatments delivered once every 7-10 days. The shockwave treatment itself takes only a few minutes. When you book Shockwave therapy at Physio Effect we will always assess you fully on an individual basis, listening carefully to your history and needs, so that we can formulate the best possible treatment plan.
Why choose the Swiss Dolorclast?
Swiss Dolorclast Smart 20 shockwave System
Not all shockwave treatments are equal so please be careful and research before committing to any treatment. Some companies may charge significant amounts for shockwave therapy yet deliver their treatment on cheap, untested and sub-standard machines. Cheap machines will be unable to produce the kind of pressures required to create a therapeutic treatment effect. At Physio Effect we do not compromise on quality and have therefore purchased the top of the range Swiss Dolorclast system to deliver our shockwave treatments.
Evo Blue Handheld Probe
The Swiss Dolorclast systems have been tried, tested and proven as effective systems for pain relief and injury recovery. On the Physiotherapy evidence Database 34 out of 62 randomised controlled trials listed used the Dolorclast shockwave systems, providing substantial high quality evidence of their efficacy.
Does shockwave therapy hurt?
Shockwave treatment for medial tibial stress syndrome (shin splints)
In simple terms shockwave treatment is at the least uncomfortable and in some cases can be painful. The nature of this technology requires the delivered shockwaves to create a focal tissue response to stimulate blood flow and cell reaction and to achieve this a level of discomfort is required. If you have received pain free shockwave treatment or been offered it as pain free it may be worth questioning if the intensity and quality of treatment provided is within the range required for therapeutic benefit.
Shockwave treatment generally takes only 3-5 minutes to deliver so most people are quite able to cope with the short duration of discomfort. Your therapist will work with you to adjust the treatment intensity so that optimal results can be achieved while managing any discomfort.
Is there any reason I can’t have shockwave therapy?
In general terms shockwave therapy is very safe and causes minimal side effects. There are relatively few contraindications to the radial shockwave which we use here at Physio Effect.
Shockwave therapy is contraindicated if;
You are pregnant
You are being treated for cancer
You have an infection or wound at the treatment site
You have had a steroid injection in the previous 6 weeks
Shockwave therapy for subacromial impingement syndrome
Shockwave therapy may not be appropriate, or used with caution if;
You have metal pins, plates or prosthesis in the area requiring treatment
You have a blood clotting disorder
You are under 18
You are taking anticoagulant medication
You have had a serious tissue rupture at the injury site previously
Loss of sensation at the site of injury
If you are in any doubt about whether shockwave therapy is suitable for you then please contact us and we will be happy to guide you.
Seeking guidance or have questions? We Can Help.
Our experienced team at Physio Effect are specialists in the field and will be happy to answer any questions you might have about Shockwave Therapy. Click below to contact us.
Ready to take decisive action and book shockwave therapy? Click below to Book Now!
Thank You
Thank you for taking the time to read this post, we sincerely hope that you find it useful. We appreciate all feedback so please take a moment and let us know what you think.
Shockwave therapy for Patellar tendinopathy (Jumper's knee)
Written by Daniel Wray (BSc Hons Physio/ PG Dip Sports Physio)
What is Shockwave Therapy?
Shockwave therapy is a non invasive, non surgical procedure used to treat a variety of injuries and painful conditions. It is often referred to as extracorporeal (outside of the body) shockwave therapy or ESWT.
Shockwave therapy for Patellar tendinopathy (Jumper’s knee)
Shockwaves are a type of acoustic wave which carry high energy to painful areas and tissues during various phases of injury helping to stimulate a tissue healing response.
The waves are created by compressed air which is then applied by the therapist onto the affected area via a handheld device.
Shockwave has recently been compared to ultrasound, however the two waveforms are very different. The energy produced via shockwave promotes regeneration and reparative processes of the bones, tendons and other soft tissues.
Shockwave therapy carries minimal risk and is a fast and effective treatment for many chronic painful conditions. The picture below descibres some of the mechanisms of action for shockwave therapy.
WHAT IS PATELLAR TENDINOPATHY?
Patellar tendinopathy is the breakdown of collagen within the patellar tendon. This is the tendon that connects your knee to your shin
Symptoms include pain just below the kneecap which may be tender to touch
Often referred to as jumper's knee as it frequently occurs in sports involving jumping such as basketball or netball.
It is typically an overuse condition where repetitive activity such as jumping and landing puts excessive pressure on the patellar tendon causing cumulative micro traumas which fail to heal fully
Long term degradation of the tendon can increase the risk of a rupture if not treated and corrected
SHOCKWAVE THERAPY FOR PATELLAR TENDINOPATHY
Shock waves are passed through the skin to the injured part of the knee, using a special hand held probe.
The shock waves applied promote blood flow and stimulate stem cell activity in the tissue providing pain relief while increasing the healing response
For optimal treatment outcomes shockwave therapy will be combined with a bespoke rehabilitation and strengthening plan based around an assessment of your unique needs and goals by our experienced Physiotherapists
Shockwave therapy for Patellar tendinopathy
What does a shockwave treatment session involve?
Shockwave therapy for tennis elbow (Lateral epicondylalgia)
Shockwave therapy requires no injections or surgery.
It is usually indicated when Physiotherapy alone does not improve specific symptoms which have persisted for at least 12 weeks.
The treatment is administered via a handheld device which is placed on the skin above the injured area. The shockwaves pass into the tissue in the form of low energy sound waves which pass into the injured area enhancing blood flow and stimulating a tissue healing response.
For optimal results shockwave treatment requires a course of 3-4 treatments delivered once every 7-10 days. The shockwave treatment itself takes only a few minutes. When you book Shockwave therapy at Physio Effect we will always assess you fully on an individual basis, listening carefully to your history and needs, so that we can formulate the best possible treatment plan.
Why choose the Swiss Dolorclast?
Swiss Dolorclast Smart 20 shockwave System
Not all shockwave treatments are equal so please be careful and research before committing to any treatment. Some companies may charge significant amounts for shockwave therapy yet deliver their treatment on cheap, untested and sub-standard machines. Cheap machines will be unable to produce the kind of pressures required to create a therapeutic treatment effect. At Physio Effect we do not compromise on quality and have therefore purchased the top of the range Swiss Dolorclast system to deliver our shockwave treatments.
Evo Blue Handheld Probe
The Swiss Dolorclast systems have been tried, tested and proven as effective systems for pain relief and injury recovery. On the Physiotherapy evidence Database 34 out of 62 randomised controlled trials listed used the Dolorclast shockwave systems, providing substantial high quality evidence of their efficacy.
Does shockwave therapy hurt?
Shockwave treatment for medial tibial stress syndrome (shin splints)
In simple terms shockwave treatment is at the least uncomfortable and in some cases can be painful. The nature of this technology requires the delivered shockwaves to create a focal tissue response to stimulate blood flow and cell reaction and to achieve this a level of discomfort is required. If you have received pain free shockwave treatment or been offered it as pain free it may be worth questioning if the intensity and quality of treatment provided is within the range required for therapeutic benefit.
Shockwave treatment generally takes only 3-5 minutes to deliver so most people are quite able to cope with the short duration of discomfort. Your therapist will work with you to adjust the treatment intensity so that optimal results can be achieved while managing any discomfort.
Is there any reason I can’t have shockwave therapy?
In general terms shockwave therapy is very safe and causes minimal side effects. There are relatively few contraindications to the radial shockwave which we use here at Physio Effect.
Shockwave therapy is contraindicated if;
You are pregnant
You are being treated for cancer
You have an infection or wound at the treatment site
You have had a steroid injection in the previous 6 weeks
Shockwave therapy for subacromial impingement syndrome
Shockwave therapy may not be appropriate, or used with caution if;
You have metal pins, plates or prosthesis in the area requiring treatment
You have a blood clotting disorder
You are under 18
You are taking anticoagulant medication
You have had a serious tissue rupture at the injury site previously
Loss of sensation at the site of injury
If you are in any doubt about whether shockwave therapy is suitable for you then please contact us and we will be happy to guide you.
Seeking guidance or have questions? We Can Help.
Our experienced team at Physio Effect are specialists in the field and will be happy to answer any questions you might have about Shockwave Therapy. Click below to contact us.
Ready to take decisive action and book shockwave therapy? Click below to Book Now!
Thank You
Thank you for taking the time to read this post, we sincerely hope that you find it useful. We appreciate all feedback so please take a moment and let us know what you think.
Shockwave therapy for Plantar fasciitis
Written by Daniel Wray (BSc Hons Physio/ PG Dip Sports Physio)
What is Shockwave Therapy?
Shockwave therapy is a non invasive, non surgical procedure used to treat a variety of injuries and painful conditions. It is often referred to as extracorporeal (outside of the body) shockwave therapy or ESWT.
Shockwave therapy for Plantar fasciitis
Shockwaves are a type of acoustic wave which carry high energy to painful areas and tissues during various phases of injury helping to stimulate a tissue healing response.
The waves are created by compressed air which is then applied by the therapist onto the affected area via a handheld device.
Shockwave has recently been compared to ultrasound, however the two waveforms are very different. The energy produced via shockwave promotes regeneration and reparative processes of the bones, tendons and other soft tissues.
Shockwave therapy carries minimal risk and is a fast and effective treatment for many chronic painful conditions. The picture below descibres some of the mechanisms of action for shockwave therapy.
WHAT IS PLANTAR FASCIITIS?
Plantar fasciitis is inflammation of the plantar fascia. Plantar fascia is a ligament that connects your heel to your forefoot. This acts as a shock absorber, supports the arches in your feet and helps assist with walking
Symptoms often include pain in the bottom of your heel and along the sole of your foot which is frequently worse first thing in the morning. Pain and disability can be progressive over many months or even years
It can be caused by numerous factors but is typically an overuse reaction where loads exceed the tissues ability to cope causing cumulative tissue stress and injury
SHOCKWAVE THERAPY FOR PLANTAR FASCIITIS
By using the shockwave machine, shockwaves are passed through the skin to the injured part of the foot
The shock waves applied promote blood flow and stimulate stem cell activity in the tissue providing pain relief while increasing the healing response
For optimal treatment outcomes shockwave therapy will be combined with a bespoke rehabilitation and strengthening plan based around an assessment of your unique needs and goals by our experienced Physiotherapists
Shockwave therapy is often advised to those who have not reacted well to frequent treatment methods including physiotherapy, RICE, steroid injection, and painkillers
Shockwave therapy for Plantar fasciitis
What does a shockwave treatment session involve?
Shockwave therapy for tennis elbow (Lateral epicondylalgia)
Shockwave therapy requires no injections or surgery.
It is usually indicated when Physiotherapy alone does not improve specific symptoms which have persisted for at least 12 weeks.
The treatment is administered via a handheld device which is placed on the skin above the injured area. The shockwaves pass into the tissue in the form of low energy sound waves which pass into the injured area enhancing blood flow and stimulating a tissue healing response.
For optimal results shockwave treatment requires a course of 3-4 treatments delivered once every 7-10 days. The shockwave treatment itself takes only a few minutes. When you book Shockwave therapy at Physio Effect we will always assess you fully on an individual basis, listening carefully to your history and needs, so that we can formulate the best possible treatment plan.
Why choose the Swiss Dolorclast?
Swiss Dolorclast Smart 20 shockwave System
Not all shockwave treatments are equal so please be careful and research before committing to any treatment. Some companies may charge significant amounts for shockwave therapy yet deliver their treatment on cheap, untested and sub-standard machines. Cheap machines will be unable to produce the kind of pressures required to create a therapeutic treatment effect. At Physio Effect we do not compromise on quality and have therefore purchased the top of the range Swiss Dolorclast system to deliver our shockwave treatments.
Evo Blue Handheld Probe
The Swiss Dolorclast systems have been tried, tested and proven as effective systems for pain relief and injury recovery. On the Physiotherapy evidence Database 34 out of 62 randomised controlled trials listed used the Dolorclast shockwave systems, providing substantial high quality evidence of their efficacy.
Does shockwave therapy hurt?
Shockwave treatment for medial tibial stress syndrome (shin splints)
In simple terms shockwave treatment is at the least uncomfortable and in some cases can be painful. The nature of this technology requires the delivered shockwaves to create a focal tissue response to stimulate blood flow and cell reaction and to achieve this a level of discomfort is required. If you have received pain free shockwave treatment or been offered it as pain free it may be worth questioning if the intensity and quality of treatment provided is within the range required for therapeutic benefit.
Shockwave treatment generally takes only 3-5 minutes to deliver so most people are quite able to cope with the short duration of discomfort. Your therapist will work with you to adjust the treatment intensity so that optimal results can be achieved while managing any discomfort.
Is there any reason I can’t have shockwave therapy?
In general terms shockwave therapy is very safe and causes minimal side effects. There are relatively few contraindications to the radial shockwave which we use here at Physio Effect.
Shockwave therapy is contraindicated if;
You are pregnant
You are being treated for cancer
You have an infection or wound at the treatment site
You have had a steroid injection in the previous 6 weeks
Shockwave therapy for subacromial impingement syndrome
Shockwave therapy may not be appropriate, or used with caution if;
You have metal pins, plates or prosthesis in the area requiring treatment
You have a blood clotting disorder
You are under 18
You are taking anticoagulant medication
You have had a serious tissue rupture at the injury site previously
Loss of sensation at the site of injury
If you are in any doubt about whether shockwave therapy is suitable for you then please contact us and we will be happy to guide you.
Seeking guidance or have questions? We Can Help.
Our experienced team at Physio Effect are specialists in the field and will be happy to answer any questions you might have about Shockwave Therapy. Click below to contact us.
Ready to take decisive action and book shockwave therapy? Click below to Book Now!
Thank You
Thank you for taking the time to read this post, we sincerely hope that you find it useful. We appreciate all feedback so please take a moment and let us know what you think.
Shockwave therapy for Achilles tendinopathy
Written by Daniel Wray (BSc Hons Physio/ PG Dip Sports Physio)
What is Shockwave Therapy?
Shockwave therapy is a non invasive, non surgical procedure used to treat a variety of injuries and painful conditions. It is often referred to as extracorporeal (outside of the body) shockwave therapy or ESWT.
Shockwave therapy for Achilles tendinopathy
Shockwaves are a type of acoustic wave which carry high energy to painful areas and tissues during various phases of injury helping to stimulate a tissue healing response.
The waves are created by compressed air which is then applied by the therapist onto the affected area via a handheld device.
Shockwave has recently been compared to ultrasound, however the two waveforms are very different. The energy produced via shockwave promotes regeneration and reparative processes of the bones, tendons and other soft tissues.
Shockwave therapy carries minimal risk and is a fast and effective treatment for many chronic painful conditions. The picture below descibres some of the mechanisms of action for shockwave therapy.
WHAT IS ACHILLES TENDINOPATHY?
Achilles tendinopathy is the breakdown of collagen within the Achilles tendon. This is the tendon that connects the calf muscle to your heel bone
Symptoms include pain and stiffness in the Achilles at the heel bone or in the tendon just above. Early morning stiffness is typical and symptoms can be progressive over many months or even years
It is typically an overuse condition where repetitive activity such as running or jumping and landing puts excessive pressure on the tendon causing cumulative micro traumas which fail to heal fully due in part to the poor blood supply to tendon areas
Long term degradation of the tendon can increase the risk of a rupture if not treated and corrected
Shockwave Therapy For Achilles tendinopathy
Shock waves are passed through the skin to the injured part of the tendon, using a special hand held probe.
The shock waves applied promote blood flow and stimulate stem cell activity in the tissue providing pain relief while increasing the healing response
For optimal treatment outcomes shockwave therapy will be combined with a bespoke rehabilitation and strengthening plan based around an assessment of your unique needs and goals by our experienced Physiotherapists
Shockwave therapy for Achilles tendinopathy
What does a shockwave treatment session involve?
Shockwave therapy requires no injections or surgery.
Shockwave therapy for tennis elbow (Lateral epicondylalgia)
It is usually indicated when Physiotherapy alone does not improve specific symptoms which have persisted for at least 12 weeks.
The treatment is administered via a handheld device which is placed on the skin above the injured area. The shockwaves pass into the tissue in the form of low energy sound waves which pass into the injured area enhancing blood flow and stimulating a tissue healing response.
For optimal results shockwave treatment requires a course of 3-4 treatments delivered once every 7-10 days. The shockwave treatment itself takes only a few minutes. When you book Shockwave therapy at Physio Effect we will always assess you fully on an individual basis, listening carefully to your history and needs, so that we can formulate the best possible treatment plan.
Why choose the Swiss Dolorclast?
Swiss Dolorclast Smart 20 shockwave System
Not all shockwave treatments are equal so please be careful and research before committing to any treatment. Some companies may charge significant amounts for shockwave therapy yet deliver their treatment on cheap, untested and sub-standard machines. Cheap machines will be unable to produce the kind of pressures required to create a therapeutic treatment effect. At Physio Effect we do not compromise on quality and have therefore purchased the top of the range Swiss Dolorclast system to deliver our shockwave treatments.
Evo Blue Handheld Probe
The Swiss Dolorclast systems have been tried, tested and proven as effective systems for pain relief and injury recovery. On the Physiotherapy evidence Database 34 out of 62 randomised controlled trials listed used the Dolorclast shockwave systems, providing substantial high quality evidence of their efficacy.
Does shockwave therapy hurt?
Shockwave treatment for medial tibial stress syndrome (shin splints)
In simple terms shockwave treatment is at the least uncomfortable and in some cases can be painful. The nature of this technology requires the delivered shockwaves to create a focal tissue response to stimulate blood flow and cell reaction and to achieve this a level of discomfort is required. If you have received pain free shockwave treatment or been offered it as pain free it may be worth questioning if the intensity and quality of treatment provided is within the range required for therapeutic benefit.
Shockwave treatment generally takes only 3-5 minutes to deliver so most people are quite able to cope with the short duration of discomfort. Your therapist will work with you to adjust the treatment intensity so that optimal results can be achieved while managing any discomfort.
Is there any reason I can’t have shockwave therapy?
In general terms shockwave therapy is very safe and causes minimal side effects. There are relatively few contraindications to the radial shockwave which we use here at Physio Effect.
Shockwave therapy is contraindicated if;
You are pregnant
You are being treated for cancer
You have an infection or wound at the treatment site
You have had a steroid injection in the previous 6 weeks
Shockwave therapy for subacromial impingement syndrome
Shockwave therapy may not be appropriate, or used with caution if;
You have metal pins, plates or prosthesis in the area requiring treatment
You have a blood clotting disorder
You are under 18
You are taking anticoagulant medication
You have had a serious tissue rupture at the injury site previously
Loss of sensation at the site of injury
If you are in any doubt about whether shockwave therapy is suitable for you then please contact us and we will be happy to guide you.
Seeking guidance or have questions? We Can Help.
Our experienced team at Physio Effect are specialists in the field and will be happy to answer any questions you might have about Shockwave Therapy. Click below to contact us.
Ready to take decisive action and book shockwave therapy? Click below to Book Now!
Thank You
Thank you for taking the time to read this post, we sincerely hope that you find it useful. We appreciate all feedback so please take a moment and let us know what you think.
What is Shockwave therapy?
Written by Daniel Wray (BSc Hons Physio/ PG Dip Sports Physio)
What is Shockwave Therapy?
Shockwave therapy is a non invasive, non surgical procedure used to treat a variety of injuries and painful conditions. It is often referred to as extracorporeal (outside of the body) shockwave therapy or ESWT.
Shockwave therapy for greater trochanteric pain syndrome
Shockwaves are a type of acoustic wave which carry high energy to painful areas and tissues during various phases of injury helping to stimulate a tissue healing response.
The waves are created by compressed air which is then applied by the therapist onto the affected area via a handheld device.
Shockwave has recently been compared to ultrasound, however the two waveforms are very different. The energy produced via shockwave promotes regeneration and reparative processes of the bones, tendons and other soft tissues.
Shockwave therapy carries minimal risk and is a fast and effective treatment for many chronic painful conditions. The picture below descibres some of the mechanisms of action for shockwave therapy.
What can shockwave therapy treat?
Shockwave treatment for Achilles tendinopathy
Shockwave therapy has been shown to successfully treat a variety of different musculoskeletal and soft tissue injuries.
This ranges from calcific tendinitis of the shoulder to plantar fasciitis of the foot.
The main aims are fast pain relief and optimal restoration of any dysfunction (stiffness / weakness etc) caused by your injury.
Shockwave therapy has been shown to be particularly effective in treating tendinopathies and when combined with expert Physiotherapy advice and rehabilitation the outcomes are excellent.
Shockwave therapy can treat chronic tendon pathologies including:
Shockwave therapy for plantar fasciitis
Shockwave therapy for Osgood Schlatter disease
Shockwave therapy can also help treat some bone pathologies including:
What does a shockwave treatment session involve?
Shockwave therapy for tennis elbow (Lateral epicondylalgia)
Shockwave therapy requires no injections or surgery.
It is usually indicated when Physiotherapy alone does not improve specific symptoms which have persisted for at least 12 weeks.
The treatment is administered via a handheld device which is placed on the skin above the injured area. The shockwaves pass into the tissue in the form of low energy sound waves which pass into the injured area enhancing blood flow and stimulating a tissue healing response.
For optimal results shockwave treatment requires a course of 3-4 treatments delivered once every 7-10 days. The shockwave treatment itself takes only a few minutes. When you book Shockwave therapy at Physio Effect we will always assess you fully on an individual basis, listening carefully to your history and needs, so that we can formulate the best possible treatment plan.
Why choose the Swiss Dolorclast?
Swiss Dolorclast Smart 20 shockwave System
Not all shockwave treatments are equal so please be careful and research before committing to any treatment. Some companies may charge significant amounts for shockwave therapy yet deliver their treatment on cheap, untested and sub-standard machines. Cheap machines will be unable to produce the kind of pressures required to create a therapeutic treatment effect. At Physio Effect we do not compromise on quality and have therefore purchased the top of the range Swiss Dolorclast system to deliver our shockwave treatments.
Evo Blue Handheld Probe
The Swiss Dolorclast systems have been tried, tested and proven as effective systems for pain relief and injury recovery. On the Physiotherapy evidence Database 34 out of 62 randomised controlled trials listed used the Dolorclast shockwave systems, providing substantial high quality evidence of their efficacy.
Does shockwave therapy hurt?
Shockwave treatment for medial tibial stress syndrome (shin splints)
In simple terms shockwave treatment is at the least uncomfortable and in some cases can be painful. The nature of this technology requires the delivered shockwaves to create a focal tissue response to stimulate blood flow and cell reaction and to achieve this a level of discomfort is required. If you have received pain free shockwave treatment or been offered it as pain free it may be worth questioning if the intensity and quality of treatment provided is within the range required for therapeutic benefit.
Shockwave treatment generally takes only 3-5 minutes to deliver so most people are quite able to cope with the short duration of discomfort. Your therapist will work with you to adjust the treatment intensity so that optimal results can be achieved while managing any discomfort.
Is there any reason I can’t have shockwave therapy?
In general terms shockwave therapy is very safe and causes minimal side effects. There are relatively few contraindications to the radial shockwave which we use here at Physio Effect.
ESWT is contraindicated if;
You are pregnant
You are being treated for cancer
You have an infection or wound at the treatment site
You have had a steroid injection in the previous 6 weeks
Shockwave therapy for subacromial impingement syndrome
ESWT may not be appropriate, or used with caution if;
You have metal pins, plates or prosthesis in the area requiring treatment
You have a blood clotting disorder
You are under 18
You are taking anticoagulant medication
You have had a serious tissue rupture at the injury site previously
Loss of sensation at the site of injury
If you are in any doubt about whether shockwave therapy is suitable for you then please contact us and we will be happy to guide you.
Seeking guidance or have questions? We Can Help.
Our experienced team at Physio Effect are specialists in the field and will be happy to answer any questions you might have about Shockwave Therapy. Click below to contact us.
Ready to take decisive action and book shockwave therapy? Click below to Book Now!
Thank You
Thank you for taking the time to read this post, we sincerely hope that you find it useful. We appreciate all feedback so please take a moment and let us know what you think.
A Winter Walloping of the West Highland Way
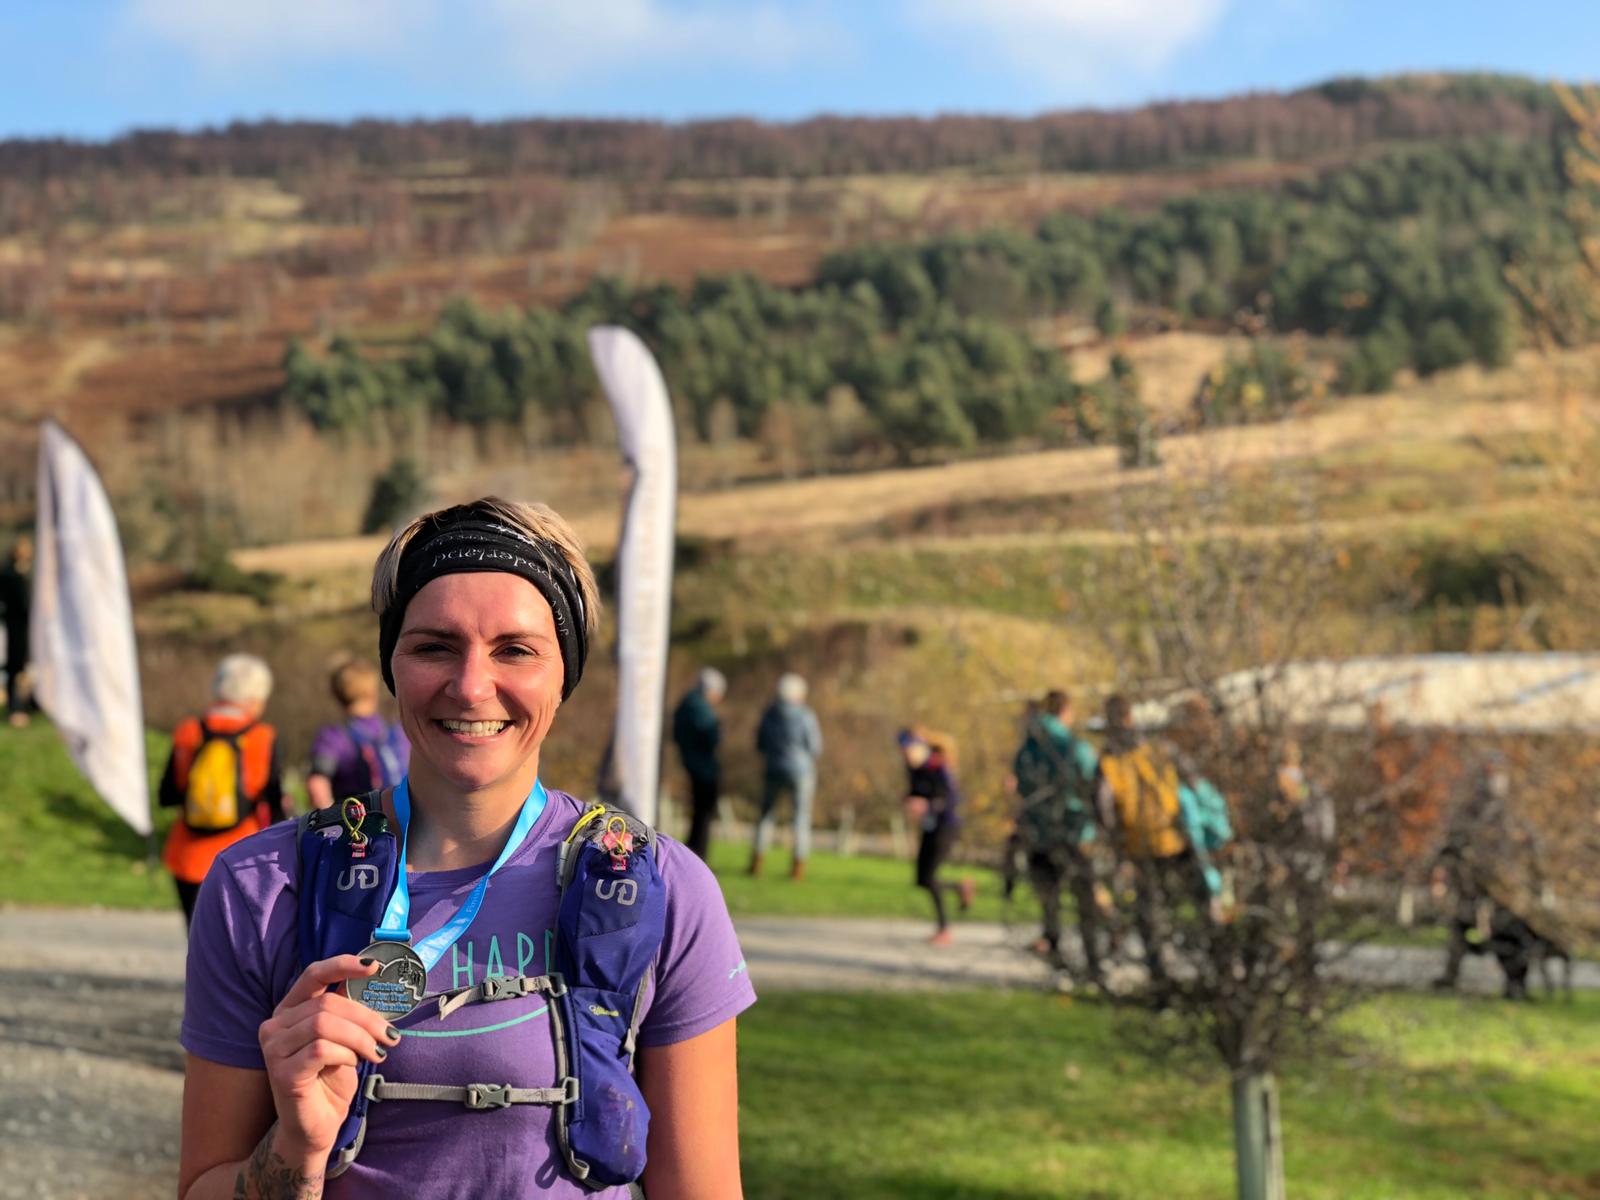
On the 18th December 2021 , Jonny Kilpatrick who’s one of our owners and Sports Physios here at Physio Effect successfully ran the West Highland Way from Fort William to Milngavie in 20 hours and 25 minutes, beating his summer effort from 2018 at the West Highland Way race but on the weekend of the shortest day of the year. Here is an account of his day on the trails.
On 18th December 2021 one of our owners and Sports Physiotherapist Jonny Kilpatrick ran the West Highland Way , in a day, North to South on the weekend closest to the winter solstice. Here is his account of it.
“I’m thinking of running the West Highland Way from North to South on the weekend closest to the winter solstice this year Mariam”, I said to my wife in August. A brief pause and “Okay, that sounds a good challenge” came back at me, which completely sums up how well supported I am by Mariam and my daughter Aria to do the hobbies I love.
This certainly hadn’t been something I’d ever really thought about but the seed got planted after watching Mariam pull off an epic effort herself running the West Highland Way in June. After 2 years of staying fit and being disappointed the pandemic had cancelled the race twice for her she did the route independently and pulled off one of the most nail biting and gritty finishes I’ve ever seen to finish 2 minutes inside her target of Sub-24 hours. It was brilliant and I think everyone who was involved, including myself left that day feeling quite inspired! When I feel inspired, I need to do something about it!
I’ve ran the West Highland Way as part of the race in June 2018 so I knew the route really well and have since developed as a runner so I felt a more ambitious goal of trying to beat my previous time of 20 hours and 46 minutes but in winter with the least daylight hours possible was achievable. That would work out to be a whole 7 hours daylight to use as well as the total unknown of how severe or relatively kind the weather would be. I’d also had a really disrupted year of running with an injury to the Meniscus in my right knee earlier in year leaving me with a lack of mileage this year but a massive motivation to pull something out late in the year and feel like I still achieved in my running during 2021.
So we have the Why of this challenge, now for the How!
I found myself more motivated than I’ve ever been in planning for this, maybe appreciating I could run again after the knee or just the way the world has generally been this last 2 years in the pandemic where my work as an owner in a Sports Physio Clinic has really took over a little more of my time than I’d ever wanted. Whatever it was, I hit my training like never before with an intensity and goal that I wouldn’t be compromising on. Incidentally, and some may laugh; this was the first time since I began running back in 2017 that I actually thought about myself as a runner and that doing well in it would be important to me. Previously with the many races I’ve done in the last few years Including some fairly chunky ones such as the Lakeland 100 in 2019 or the triple crown of West Highland Way races in 2018 I was really just approaching it as a big challenge and trying not to F**k it. I even found myself brave enough this training cycle to run in leggings minus the over shorts, although numerous corners of my social circle have not so subtly suggested I don’t!
I dredged up my old WHW plans by Neil MacNicol of RunRecover from 2018 and decided I’d just be doing a 12 week block of that with some additional rehab type strengthening a few times a week for my duff knee. I’d been training myself for a year or so prior to this and I’d forgot just how good Neil’s plans were with the variety and intensity. In hindsight on my own, I had fallen into a habit of making training harder and more grinding in terms of the terrain, but this was definitely not going to help on this challenge and I’m not sure it’s done that much to progress my running in the last year or two.
Training went brilliantly and I knew by 6 weeks into the block that I was on course to be in the best shape of my life, if not already in it. I even did all my rehab and didn’t adjust the plan whatsoever which resulted in not one single training niggle except for the right knee which I was happy to deal with myself through a regular battery of dry needling, massage and strengthening. In the planning of this I’d also decided that I really wanted to enjoy the whole day and opted against going totally unsupported as I know some people do on these efforts. Instead, I arranged a hit squad of local Scottish runners I’m friendly with all of whom I consider to be better runners than myself to accompany me on various sections and just keep me engaged with it all. The respect I had for each of these runners I was sure would completely prevent me showing myself up with any melodrama on the day and just keep that mental pressure on me for the target I’d told them all I wanted to achieve. You can’t hit a target you can’t see, right? I provided them all a 20 hour schedule to make sure they would all keep me moving to it.
Finally on preparation, I can’t thank Mariam enough for shelving her own big training runs and time on the trail on the weekends to facilitate mine. We’ve realised in the last year or thereabouts that with Aria being 4.5 years old it’s just not right to have both of us attempting big runs at the same times in the year.
So how’d it go?
I’m really pleased to report that I managed to beat my target time by 21 minutes and finished in Milngavie in 20 hours 25 minutes and 59 secs. The Kilpatrick’s do like the dramatic sprint (hobble) finish and on the day for some reason I’d convinced myself I was chasing a finish time of 0128 making for a nerve wracking last few miles! Not the first time my glycogen depleted brain on these long runs has let me down in the old maths department. The run actually went really well and I thoroughly enjoyed myself throughout it with great company and stunning winter weather. I’m told this is could be a Fastest Known Time in Winter for a supported West Highland Way effort North to South. That remains to be seen but if it is then that’s a nice bonus and certainly sets an achievable target for people to have a crack at next year!
If you’re still with me at this stage what follows is my blow by blow account of the effort and of course loads of profound insights into what went well and what should have went a little better.
Saturday 18th December 2021
Sore Feet Statue Fort William just before starting
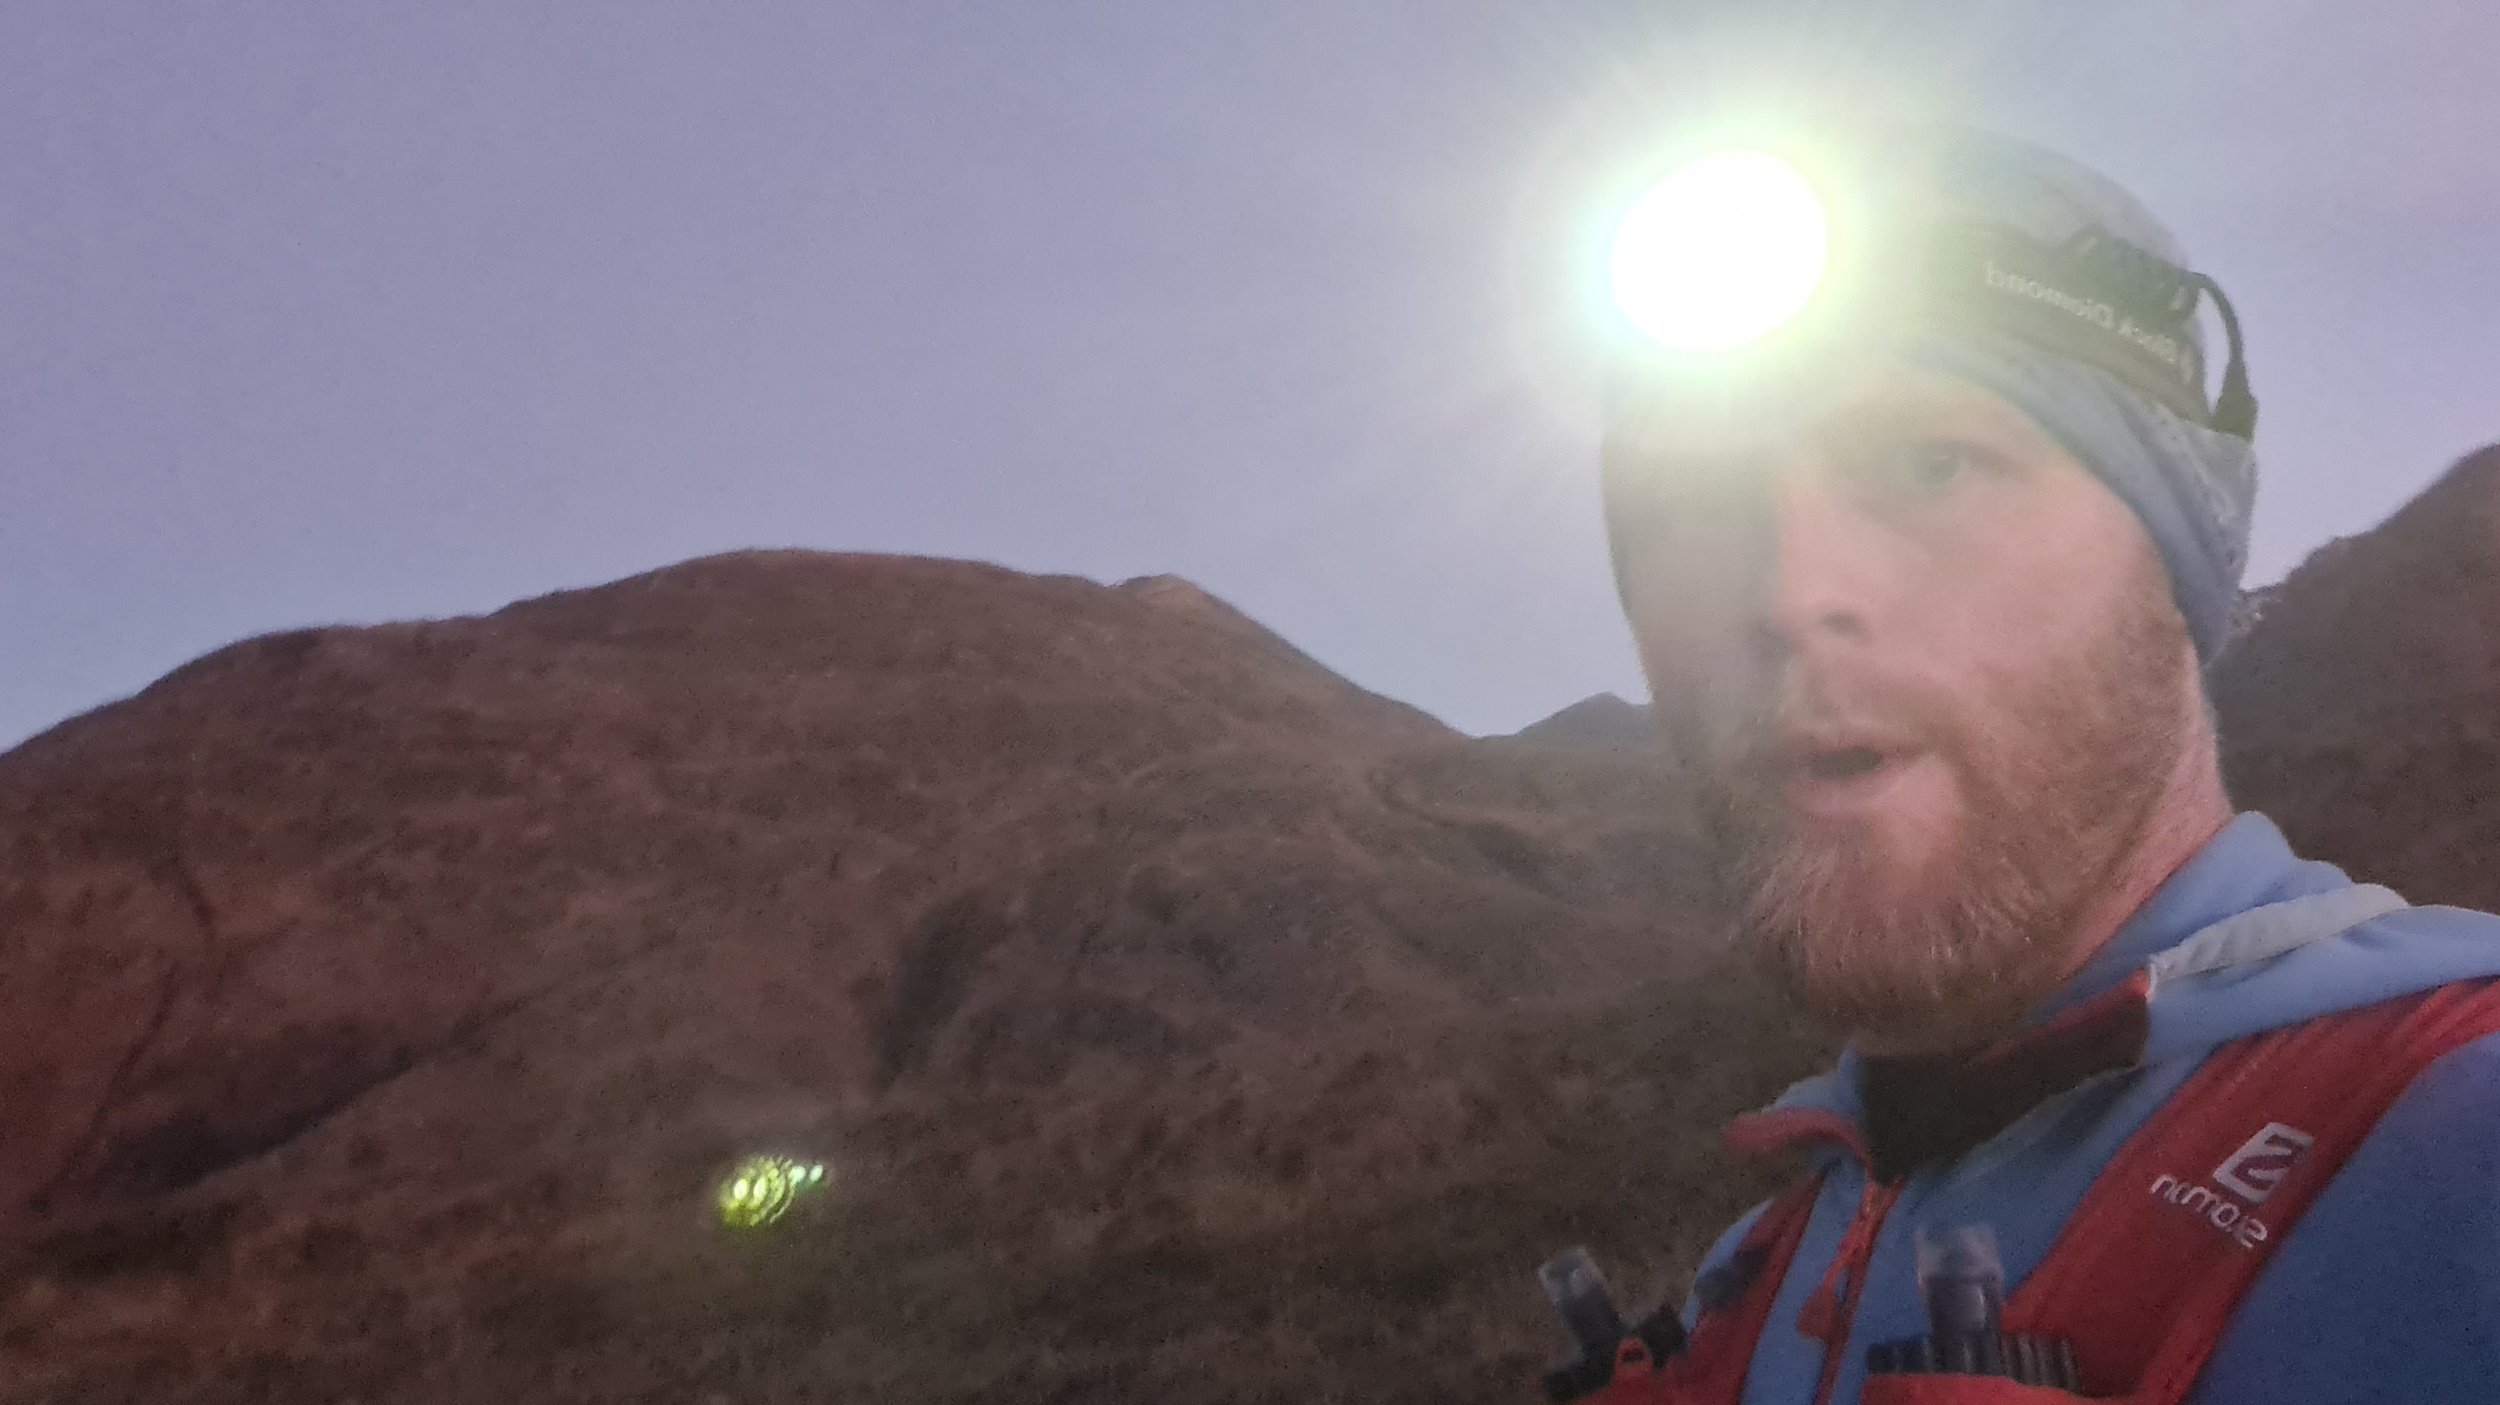
It’s 0459 and I find myself at the Sore Feet Statue that marks the end of the West Highland Way in Fort William about to start what should be about 20 hours of running back home to Glasgow. As you’d expect it’s dark, it’s cold and I’m unsurprisingly the only person on the street. Certainly this is the most low key start to any race I’ve ever done but that was because of the antisocial hours I’d decided to attempt and finish this in based upon maximising my daylight hours on the fast more runnable sections. I’d set a schedule for my supporting crew that would have me through Kinlochleven at 0810 and over to Kingshouse by 1000. Of course everything got a little exciting at the start of this and I’d had far too much caffeine and I ended up in Kinlochleven at 0740 and Kingshouse at 0930. Mariam was a little panicked at my message coming through Kinlochleven as her and Aria were still in bed at the hotel in Fort William. The section went really well to be honest and I think I’d probably overestimated the time needed. I had an initial panic for the first mile running down the street trying to get my headtorch which had been fine in the hotel to actually turn on. Not sure how I did it, but I’d activated the lock button which I was able to suss out with a trusty google search while running, nothing like a drama to settle you into the thing. I decided I would just run the entire hill up from Glen Nevis as it’s pretty flat all along the top and it looked foggy up there so I wanted a little time in the bank. Foggy was an understatement, I’m not sure I could see more than about 1 m in front of the wall of mist and light from my headtorch the whole way over to the Kinlochleven Descent. This strangely I think worked to my favour as I just ran to feel with what was immediately in front of me on fresh legs and I made great progress. It also kept me totally unaware of the creepy sheep and deer eyes that were no doubt planning to scare the crap out of me.
Coming up the long 4 mile hill from Kinlochleven I did show much more restraint and walked the bits that needed it while eating a ton and listening to some angry people in my ears asking me how much I wanted this and telling me not to be a pussy and such! As planned, daylight was in about half way up the climb and the sunrise was just stunning and totally reminded me to take it all in as well. The descent down the Devil‘s Staircase flowed well and I didn’t feel like I sustained any real damage to my quads or sore knee. I just love this bit of the route too as the Buachialle has such a special place in my heart having left some of my Uncle Raymond’s remains at the top and purposely made it Aria’s first Munro, carrying her up there at 5 months of age. Towards the bottom of the staircase, I came across Lorne and his partner Lorraine taking pictures so of course I popped out some completely unreflectively fast descending just to give Lorne a wee panic about supporting me for the next 31 miles from Kingshouse down to Beinglas. Not sure how wise that was 20 miles later when I was chasing Lorne without him ever looking back!
Coming up the path from Kinlochleven as light starts to turn
Beautiful sunrise looking back down to Kinlochleven
Buachialle Etive Mor taking some early morning light
My girls waiting at Kingshouse
A quick checkpoint at Kingshouse where it was lovely to see Mariam and Aria’s smiles and support, then Lorne and I headed off towards Glencoe. He kept running and I kept following thinking the whole way up the hill towards the Rannoch Moor from the Ski centre if I would have actually ran all this on my own. I concluded I probably would and I did say to him to drag me through the hours of daylight down to Beinglas in good time to get a little of the Lochside in during the last light. Lorne actually was brilliant company having done the first 22 miles myself and we made great time over the moor with lovely winterised sunkissed hills to our right and eventually the big hills at Orchy in front. What else would you rather be doing with a Saturday morning in winter Jonny? It was fairly cold but with the temperature inversion it was noticeable that the valleys were the coldest and we warmed the higher we went. Not a lick of wind or rain forecast would be a major factor on my side today.
Another quick pitstop with the girls out the front of the Inveroran Hotel and we were off up Jelly Baby Hill en route to Bridge of Orchy. My legs were still working great on the climb and descent and I was taking in calories and caffeine no problem. Through Orchy and on our way up to Tyndrum was the first time I actually started to feel a little fatigue creeping into the legs on the uphills, nothing major but I did think I’ll need to be sensible with walking the appropriate inclines and not toughing them out. The views on this section are some of my favourite from the whole route, it’s just a wide open valley with really steeply rising mountains everywhere. It’s well surfaced and not a chore at all to run through even when tiring.
Tyndrum was Baltic when we reached it! I was supposed to eat something more substantial here but opted to get going with just a banana which wasn’t the wisest idea. I’d already slowed up with eating my solid foods because they were all slightly frozen and much more effort than usual to get chewed and swallowed. This would come back to bite me but I felt okay even though I’d deviated from my food plan! I was starting to feel the pace a little with the cumulative mileage so I opted to get the headphones in again and have those rather angry chaps “motivate me”. This did make an immediate difference though and I felt I was able to keep a much better pace behind Lorne through the Crainlarich Rollercoaster! Thankfully the medieval fortress of fallen spruce trees from the storm a few weeks prior had been cut up as it had took Lorne and I a good 5-10 minutes to get through on a training run and it had been in my head how little I was looking forward to being scratched and spiked from every angle climbing through them. As I’d pretty much been reverted to powder and gels for food due to the cold I started to really get some stomach and gut bloating across this section which was hard to keep running our pace through. I knew though there was a proper toilet block at Beinglas so it was just about getting there and I could take a slightly longer check point as I’d been quick through them until now.
Chasing after Lorne towards Crainlarich on a brilliant winters afternoon
We arrived at Beinglas Farm 25 minutes up on the 20 hour schedule I’d given my support crew. Unfortunately I think I took 20 minutes of this at the check point between trying to eat, change clothing/shoes and use the facilities. At this point Mark and Stu rotated into the supporting roles and Lorne bowed out with a job well done. The Lochside was certainly one of the crux points in the planning of this effort. It always is though due to the treacherously slippy and undulating terrain of rocks and roots, with Scotland’s largest Loch ready to swallow you right up with any falls. Hitting it at 55 miles in where you’ve pushed the pace to get ahead of time for the second longer darkness was definitely going to make a difference too. The longer checkpoint had made a positive difference and I was running well to begin the section and thankfully my stomach and guts were being kinder. Unfortunately this was short lived as I just didn’t stomach solids well at all from here and survived really on the odd glass of flat coke, nibble of tablet or a muller rice. I found myself deflecting the efforts of Stu and Mark to suggest I should eat because everytime I drank or ate my stomach was just terrible for the next half hour. Another thing that was immediately apparent was that I shouldn’t have changed my shoes out from the Hoka Speedgoat to the much less protected but more nimble Hoka Torrent. The Speedgoat had been like a bulldozer down the WHW so far with all of its plush cushioning, the torrent though I could feel every tiny rock through and I think the slower speed we were going compared to training would totally have accommodated the lack of grip and dexterity of the speedgoat along the lochside.
We were actually making steady progress across the Lochside and I really enjoyed getting a catch up with both Mark and Stu at various bits. Probably so much so that my lack of attention to the trail had me at one stage trip on a root and go down like a trap door, face first into a rock on the ground with no efforts from my arms to help. Luckily cheek bone still intact with a graze and bruise but eyes seeing straight and I was confident I’d swerved an effort ending accident and we could batter on. Once off the much more treacherous and slow ground north of Inversnaid we made some great progress right across onto the low road where I think my lack of training on this bit recently really played on my mind as with the very poor visibility in dark and fog it felt much longer than the 2 miles or so it should be and I was constantly convincing myself the climb up to the forestry was upon us, but wasn’t! The weird thing about running in dark and fog is just how disorientating it can be in terms of what type of gradient you’re actually on. I know the section from the low road to Rowardennan like the back of my hand but it felt like we just couldn’t be on the right path as it looked to be constantly going uphill even though it is clearly downhill. Thankfully I knew we had no where else we could have went wrong so just continued at a decent trot until we saw Neil MacNicol’s headtorch in the distance at the toilet block at Rowardennan at 1900 (14 hours in). Rodger had taken over car duties and I knew it would be good having his experience to draw upon if I needed it for the coming sections.
The next section between Rowardennan and Balmaha was one I was determined not to lose too much time on as it’s a complete rollercoaster of short hills and sections of runnable trail. I’d purposely asked Neil to join here even though Stu and Mark would continue to Drymen. I have a lot of respect for Neil as a runner and a coach and I knew his calm head and dry sense of humour would help in some darker moments to come. I opted to once again put the headphones in for this section and take an abusive bit of ‘motivation’ on board. The section actually went really well I felt, minus another belly flop that once again I came away from unscathed. We were running (or at least that what it felt like) everything that was flattish and downhill and making really steady uphill walking pace. The various landmarks of the section came and went quickly and I was surprised how quickly we were in Balmaha although for some reason the last hill up and over into Balmaha had kicked the arse clean out of me and I was feeling probably my first proper bonk of the whole effort. This wasn’t aided a whole lot when I got to Rodger’s food station at 2055 (15 hours 55mins) at the foot of Conic Hill and realised Mark and Stu had tanned all my remaining flat coke. All I could do was have a little mental chuckle at that when Rodger asked, “so what do you feel like” to which I replied “the flat coke the lads have just finished off”, he looked a little mortified but I actually found it quite funny.
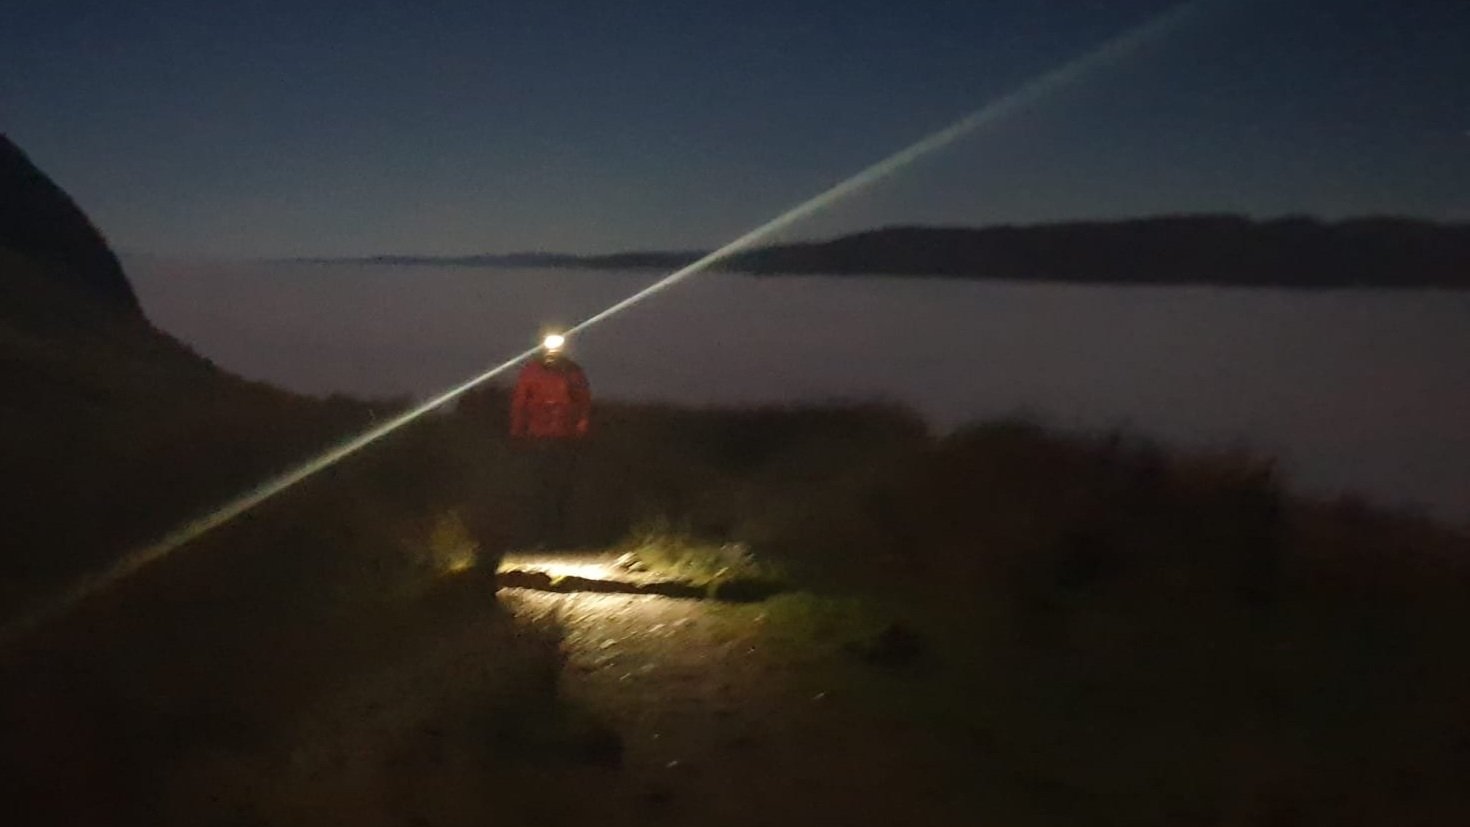
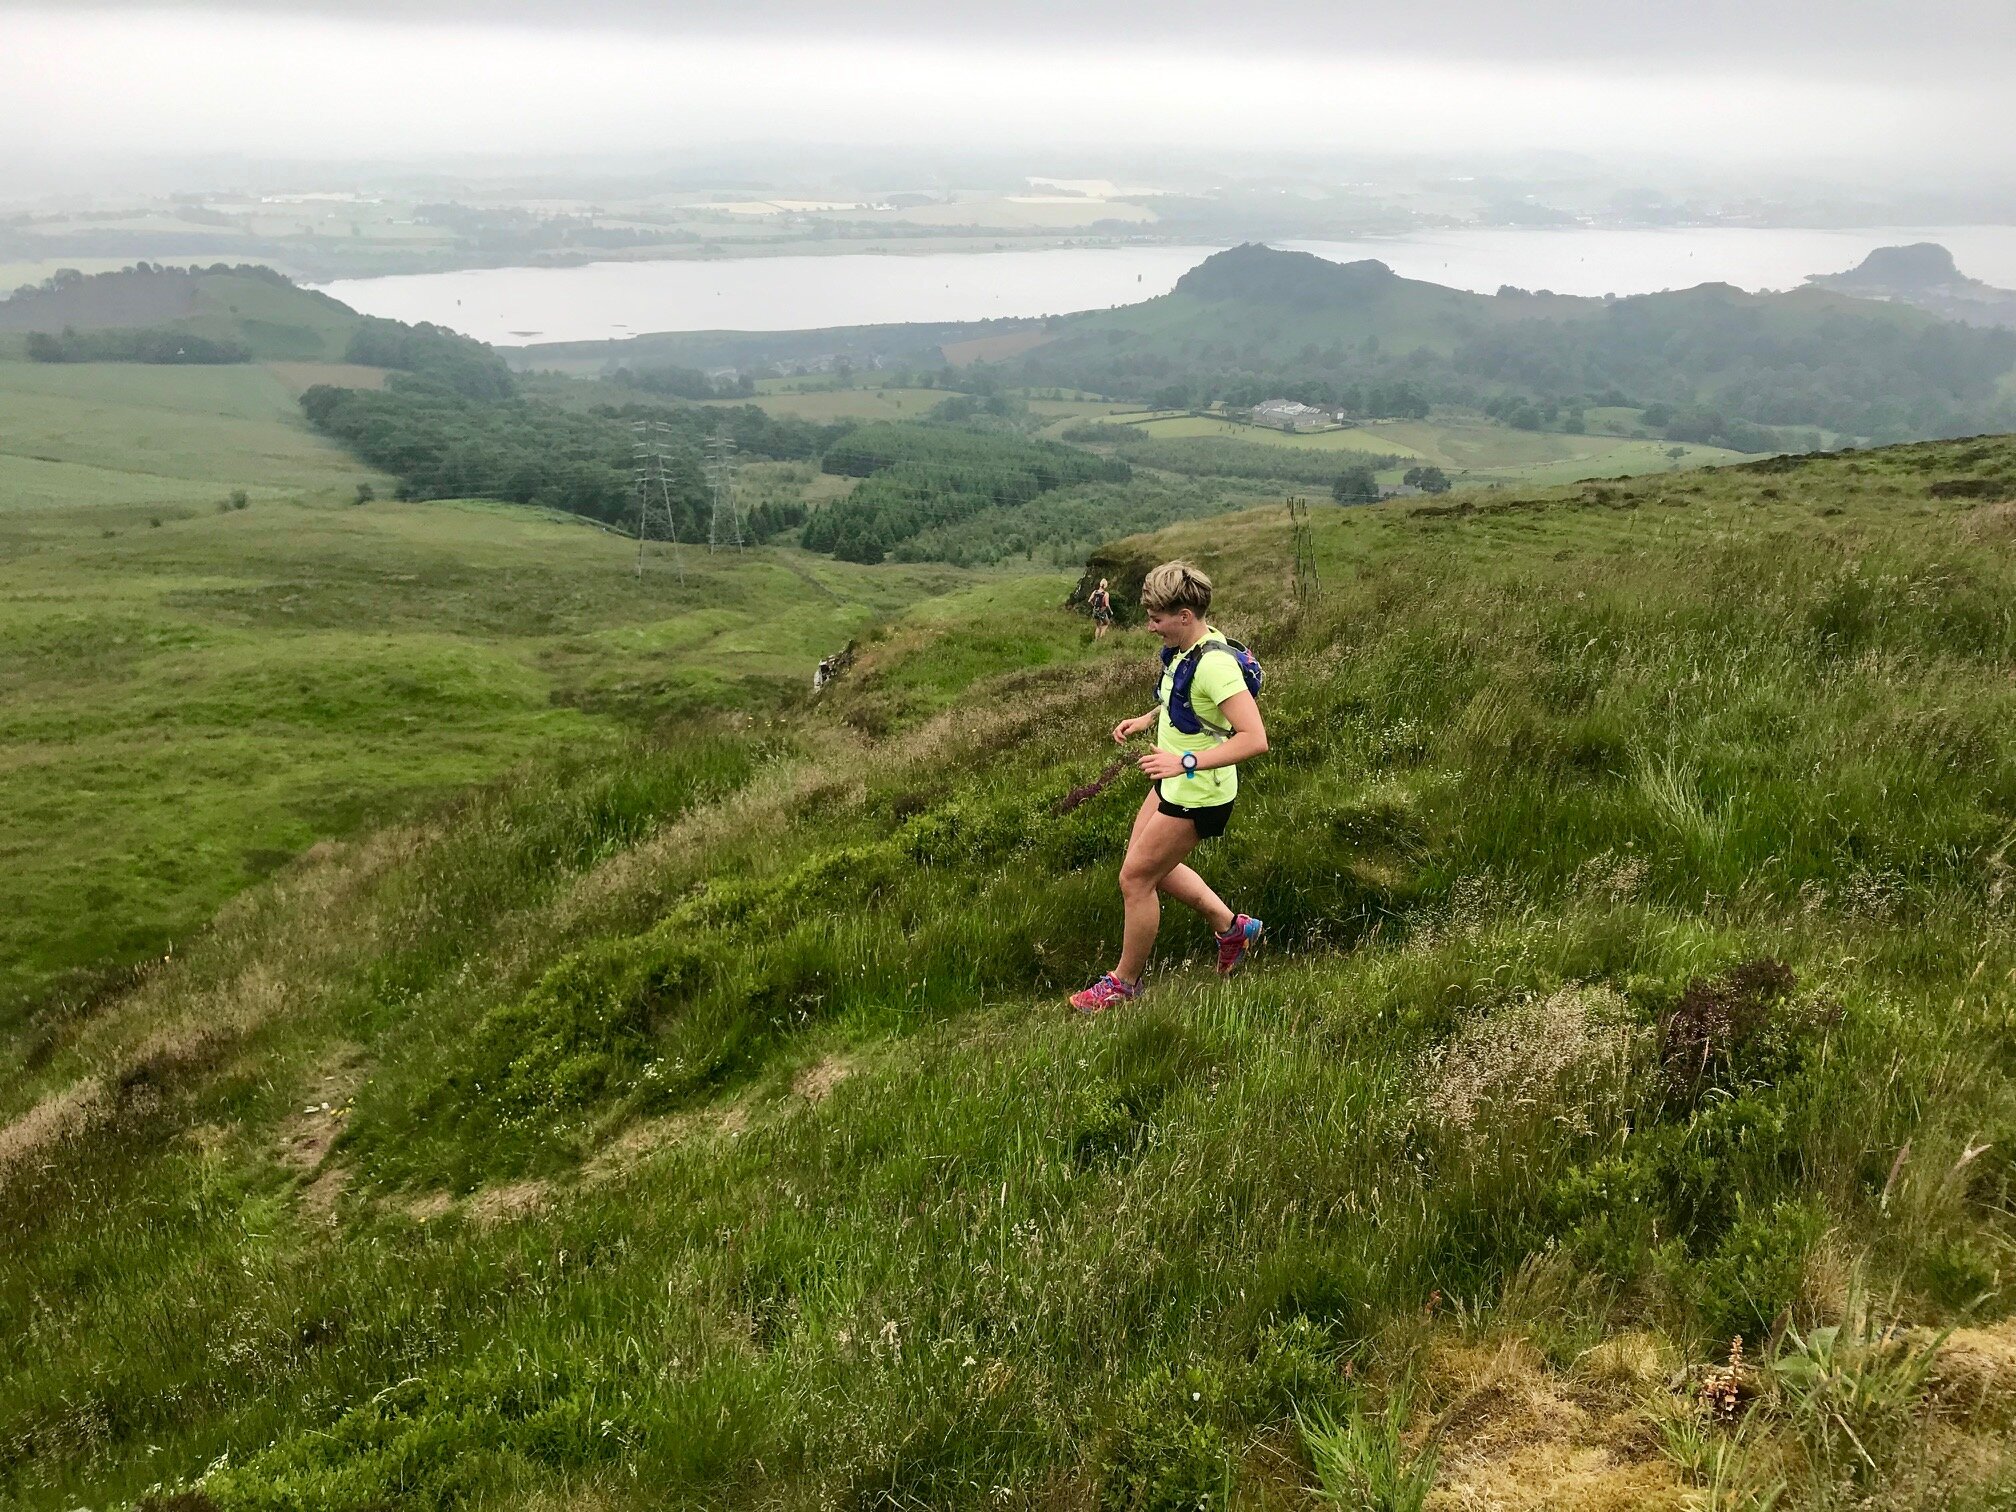
Off we set up Conic with absolutely no illusions that this would be a cold, slow slog as it’s steep as f**k from the North side and I wasn’t exactly feeling like a mountain goat ready to spring up it. Headphones were taken out which I knew wouldn’t necessarily be optimal but I fancied a chat with the lads now we had a slower pace. There was an incredible temperature inversion and the cloud was so thickly banked all over Loch Lomond below us with a clear sky above. Knowing I couldn’t do a whole lot more at that moment in time than keep the legs moving up I actually quite enjoyed the odd glimpse backwards and thought there’s certainly silver linings to every situation. Not sure how much my freezing cold support runners were enjoying that stunning view by the top having to move at my pace. Over conic and I’d forgot just how trickly the upper 3rd of the southern side is on tired legs for loose rubble, thankfully no more falls.
Conic Hill with Temperature Inversion drawing clouds down low beneath us
It was good to get back onto the more runnable trails back towards Drymen as I could slowly build a little momentum with these tired legs. I’ve always found that towards the 70 mile plus mark of the ultras that you really need to get the momentum going on flatter ground as it is entirely possible to run but the ups and downs just kill that. About 2 miles out from Drymen we spotted a head torch in the distance over by the sheep pen (well not actually) which turned out to be Ross Jack, the husband of one of my final 2 support runners Stacey who’d clearly got the FOMO and dropped the girls early so he could come get involved.
Into the Check point at the high car park in the forestry above Drymen where I was so glad to see Mariam who’d be accompanying me on the last section with Stacey. Rodger the legend, had made another trip to the small store in Drymen and was standing with a fresh bottle of flat coke and a muller rice. I managed a little flat coke and that was about it though, I just wanted to get going without feeling like I was starting the section feeling sick again. Here we said goodbye to Stu, Mark and Neil who’d all done a great job getting me through what I consider to be the crux of this effort and had left me bang on time provided I pulled out a good last section with the girls.
I wanted to run the last section with Mariam and Stacey as this was the reverse of Mariam’s effort where Ross and I ran with her over from Kinlochleven to Fort Bill. I felt if Mariam hadn’t pulled that awesome finish out of the bag and got her sub-24 there would be a high chance we could be on for a divorce after the ‘encouragement’ Ross and I had gave her. I was just going to have to suck up whatever came my way and pull up my Big Boy pants when it came to that last 2 mile section down Mugdock to emulate the tenacity and drive Mariam had shown in June. I don’t really have much to say for this section except it was a few hours of hearing Mariam shouting back from the front “come on Jay” and Stacey behind me saying “you’re doing great Jonny”, while I just tried to run, shuffle limp at something resembling a steady pace. It was nice to see Ross pop up to check if we needed anything again at the Beech Tree road crossing. I don’t think he realised in this dark fog how creepy it looked constantly popping up with a blinding head torch - just kidding Ross. I was glad to get the last big hill finished and onto the short downhill road section to Carbeth as I knew we could easily enough run it in from here. As a nice bonus I managed to get some Kendall Mint Cake in which wasn’t long on giving me a kick of energy and had me wondering why I hadn’t tried this at any stage in the previous 40 miles. As we entered Mugdock I knew the script without it needing to be said and Mariam just lifted the pace! I decided not to look at my watch but I knew it was going to be tight, I’d just do what I could and what would be, would be. We ran well for the 2 miles down to Milngavie town centre and I touched the finish at 20 hours 25 minutes and 59 secs! I’d done it and managed to beat my target time over the 96 mile route by 21 minutes; only realising this after a week of telling folk it’d beat it by 2 minutes, romantically describing my epic finish that emulated what Mariam had done 6 months earlier. I was so happy to be finished and delighted to once again be at the finish of a West Highland Way effort with Mariam and our Friends Ross and Stacey. Like the start this was very low key as it was half one in the morning but I really liked that for some reason as we’d also pretty much not seen a single person on the West Highland Way between Fort William and Milngavie which is a complete rarity.
Finish point in Milngavie with my final support runners
Content at a job well done and to be heading home to my own bed
Strava Screenshot
Final Thoughts
I appreciate this is a long blow by blow account of my effort but I hope this is helpful for other people who may be considering undertaking it in future as I only really found two other accounts that I could use as a little bit of research by Paul Giblin and Neil MacNicol. I think it’s also important for me to acknowledge that weather wise I had a great forecast which really made a long winter effort much more enjoyable. If it was windy, rainy or icy, all of which in winter may be more likely than what I got then I think this would have been a much tougher day out that I wouldn’t have had a chance of beating my old summer time on. All in all though I would say this went about as well as I could have hoped except for my nutrition but I understand you have days like this on the trail and I probably wouldn’t have changed much about the pace that was needed to get down to Beinglas to give me a good distance in the bank because I know from experience that the 70-100 mile mark the wheels always grind a little slower or come off at some point.
Having done the route both directions I would be inclined to say that I feel the profile of North to South is a little more difficult due to getting the lochside at 55 miles in and then Conic from the North on very tired legs, I guess though different tactics of not pushing so hard for the first 55 miles and I may see that differently. Running in the dark with poor visibility really slowed things down in the second darkness as it really affected my ability to commit to descents as I couldn’t see the gradient profile in front of me. This definitely smoked my quads and shin muscles more than I’ve ever experienced before and it’d be worth training slower descents in my opinion for any winter effort and strengthening the tibial muscles.
Doing it in winter has been an awesome challenge and actually a very enjoyable experience. I feel humbled that so many people gave me their time so close to Christmas and we all worked together to make this happen for me. It’s been suggested that this is a Fastest Known Time (FKT) for a winter supported effort North to South on the West Highland Way. That will be amazing if it is and I’ll be sure to log it as I feel its certainly a time a number of runners could take aim at on this iconic route. Doing these individual challenges with your friends has been awesome for both Mariam and myself this year and I would totally suggest others have a go at similar efforts rather than just stacking up race after race. It’s been great for me to relive all this a week after the effort and I’m pleased to report I’ve made a great recovery and am looking forward to running again in 2022 with a renewed enthusiasm for it.
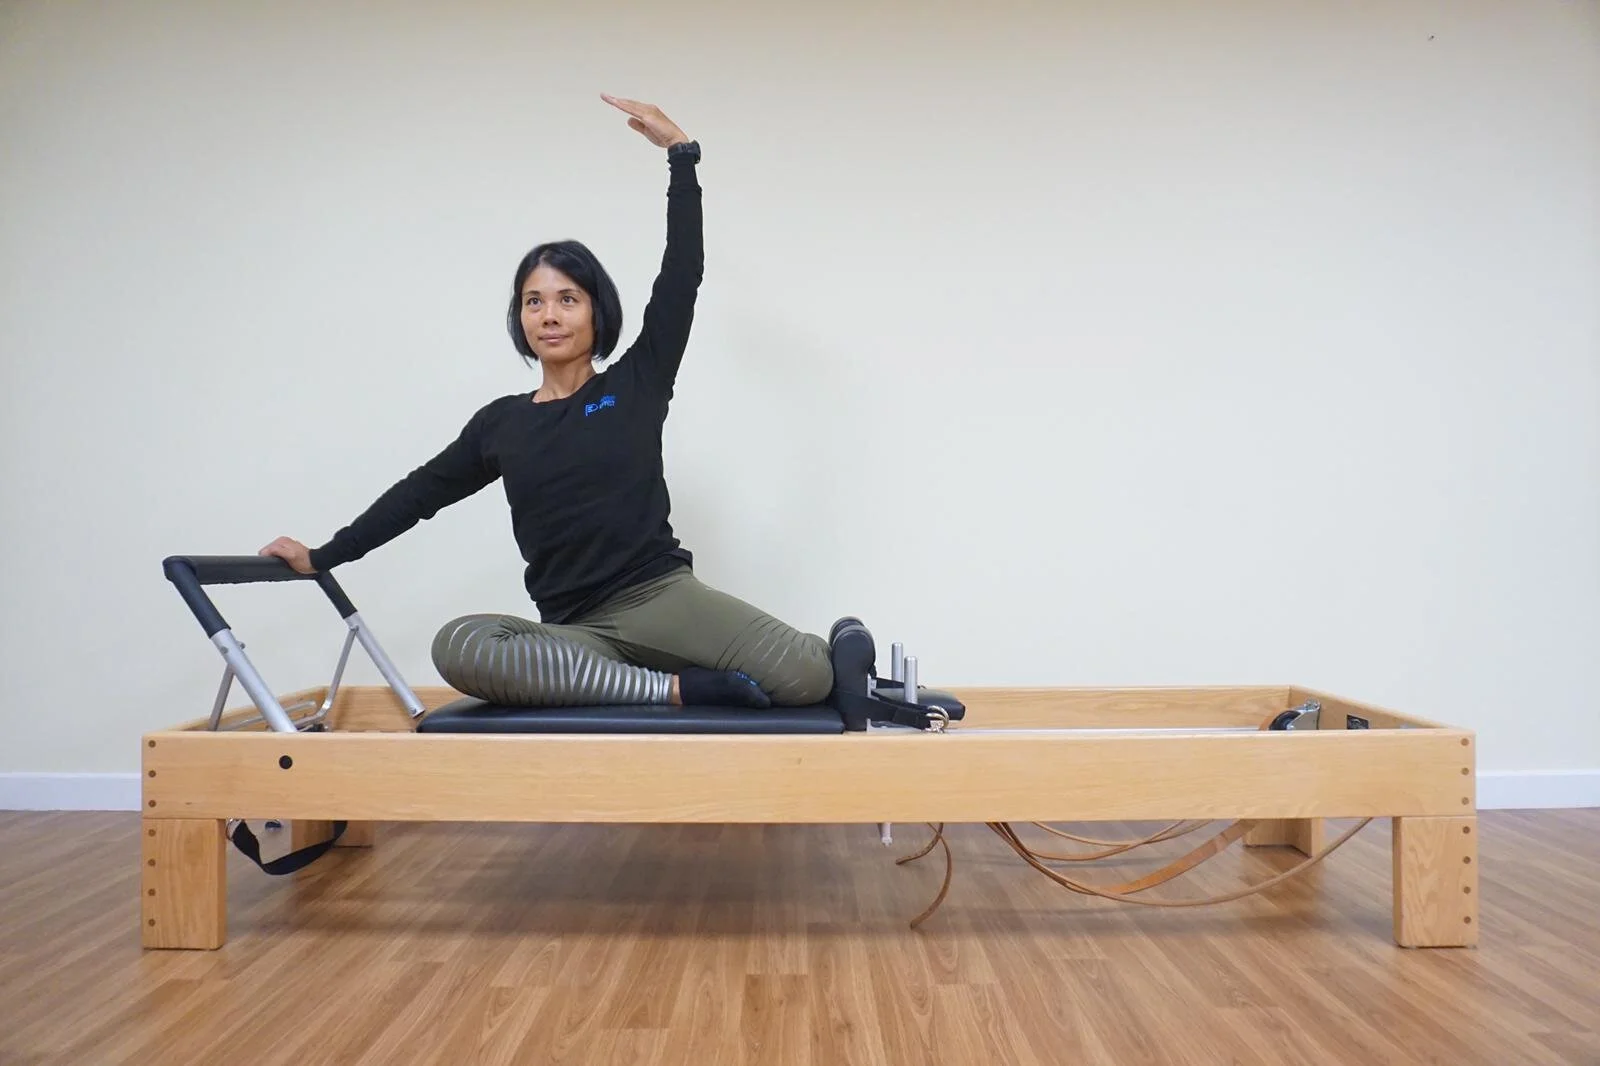
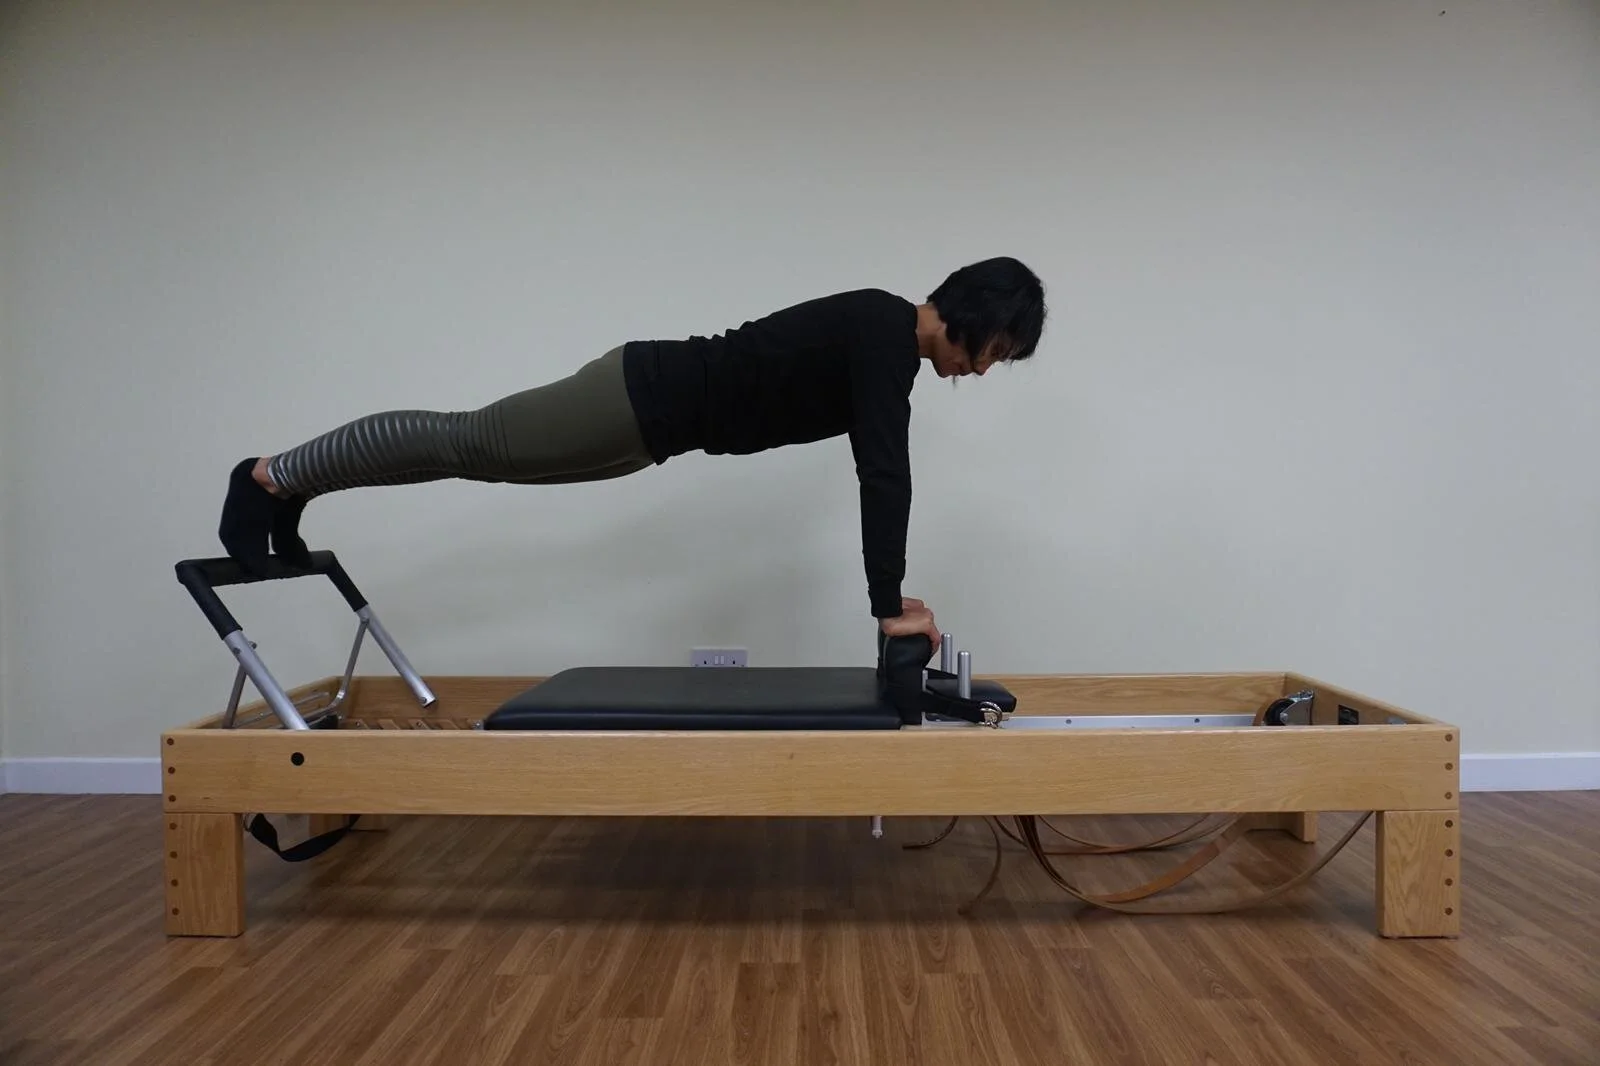
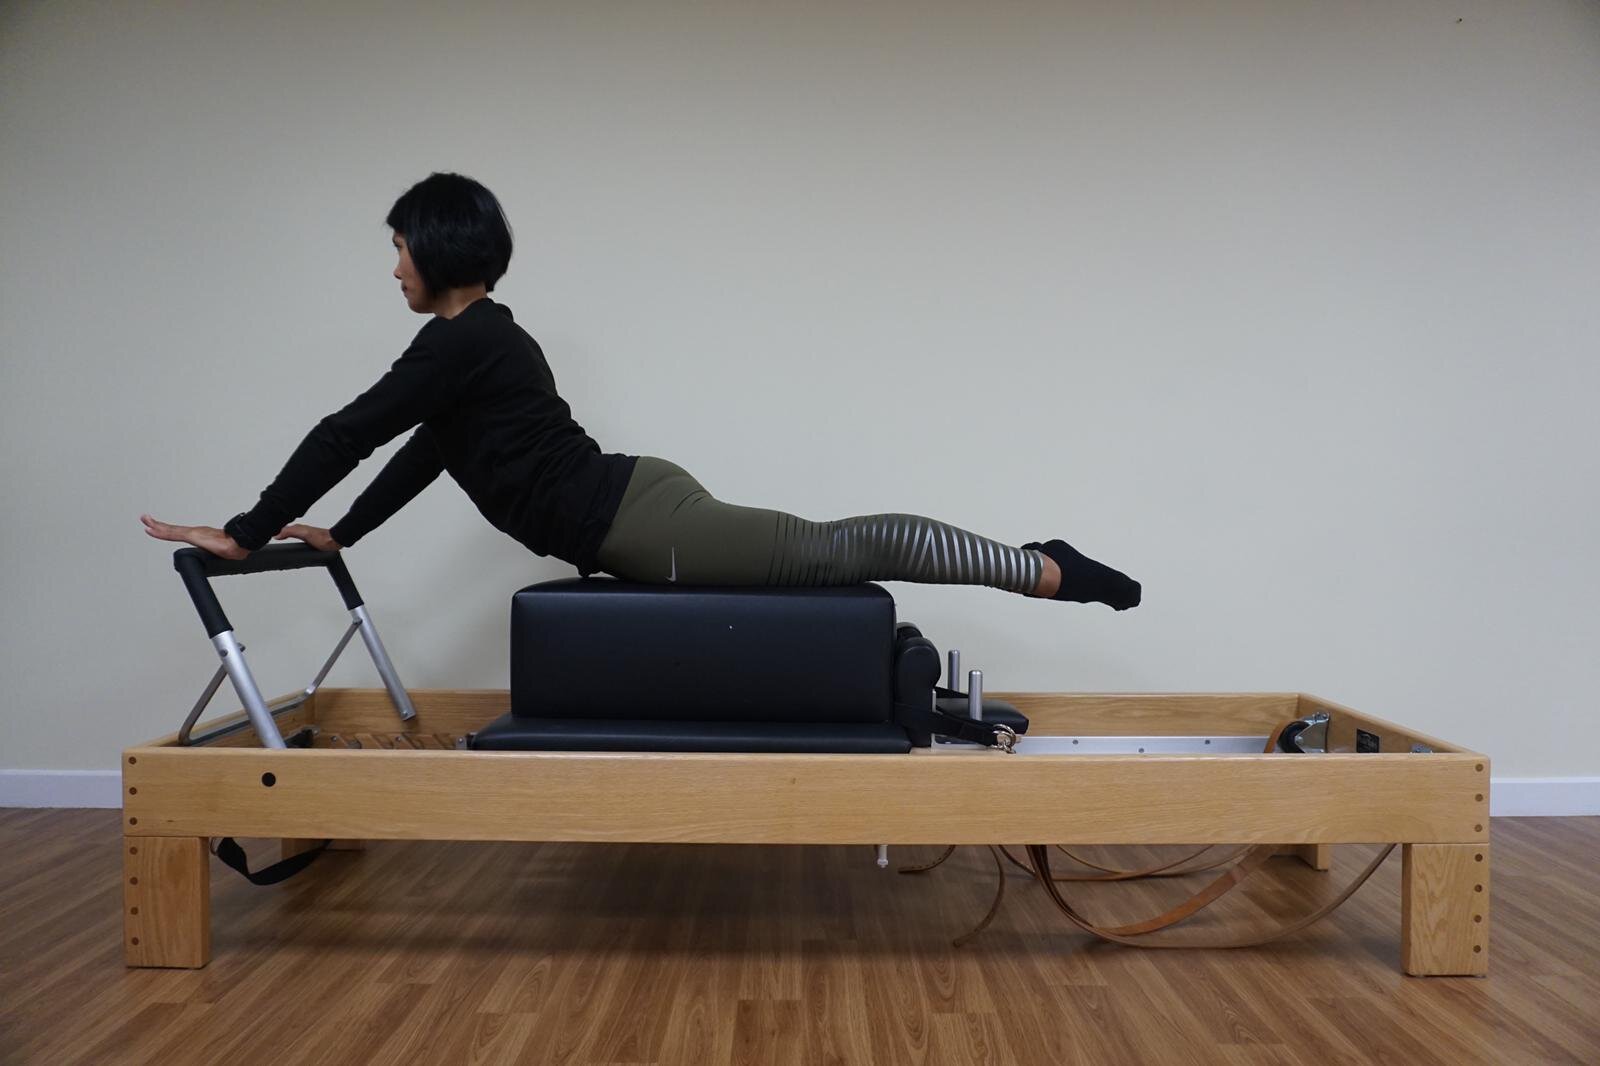
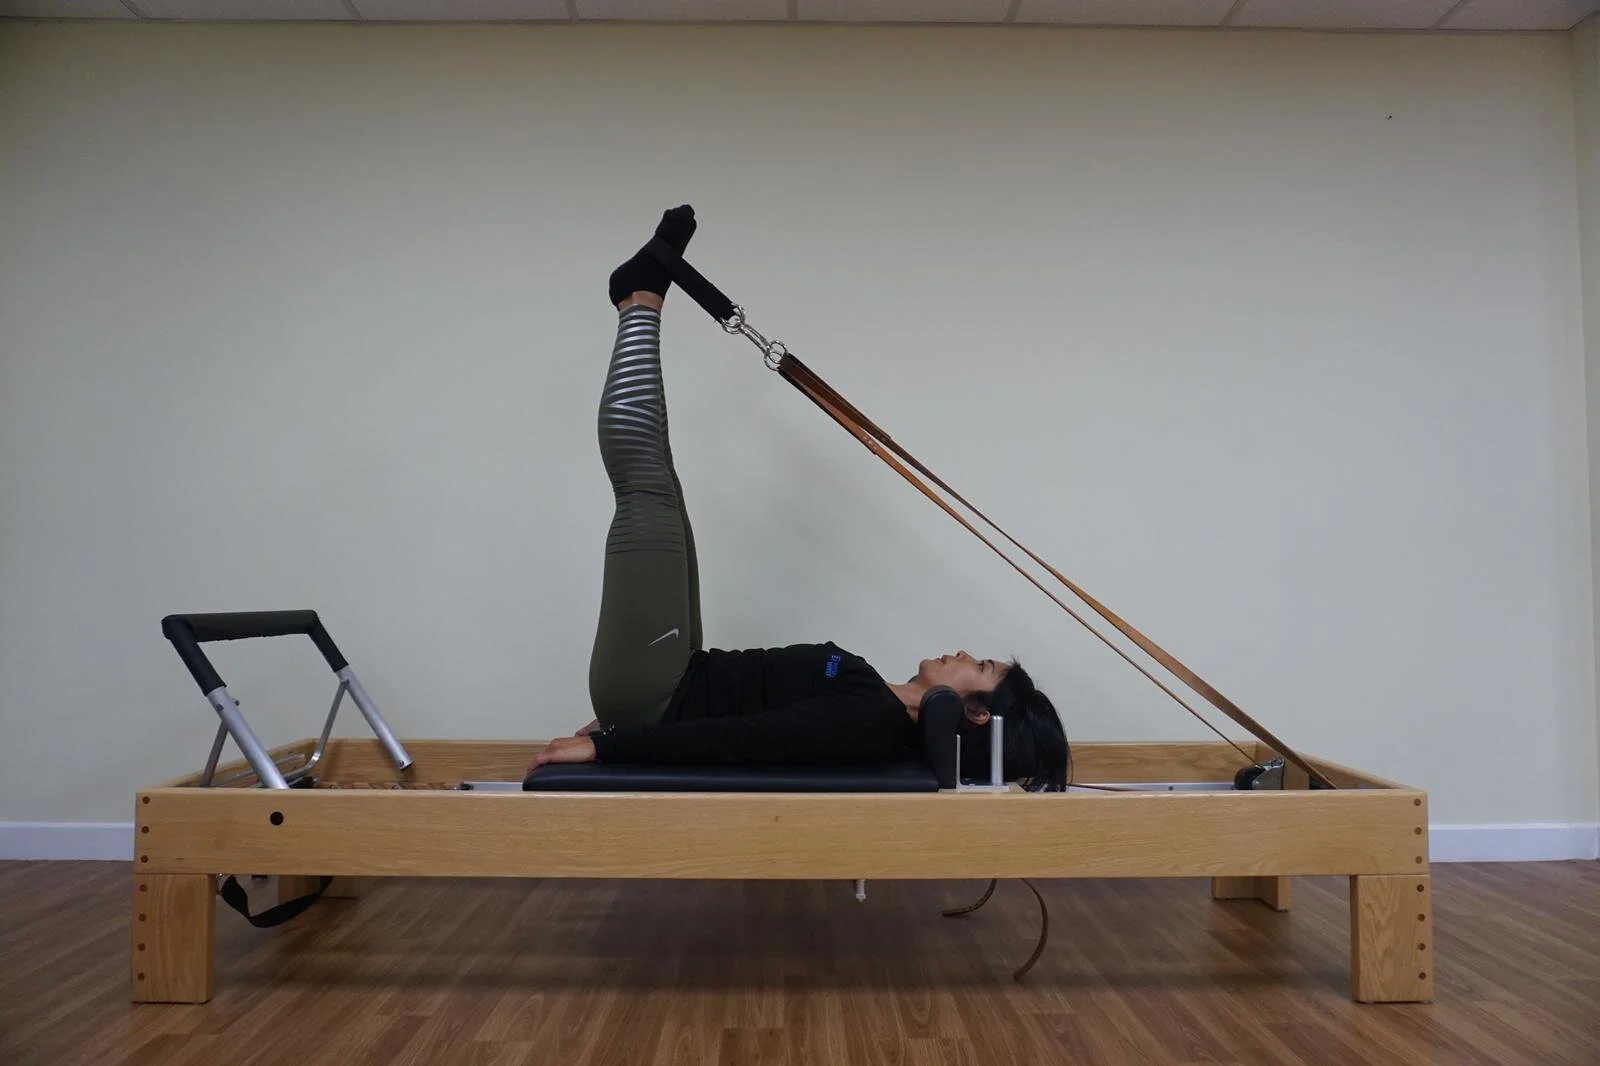
Clinical Pilates Classes at Physio Effect
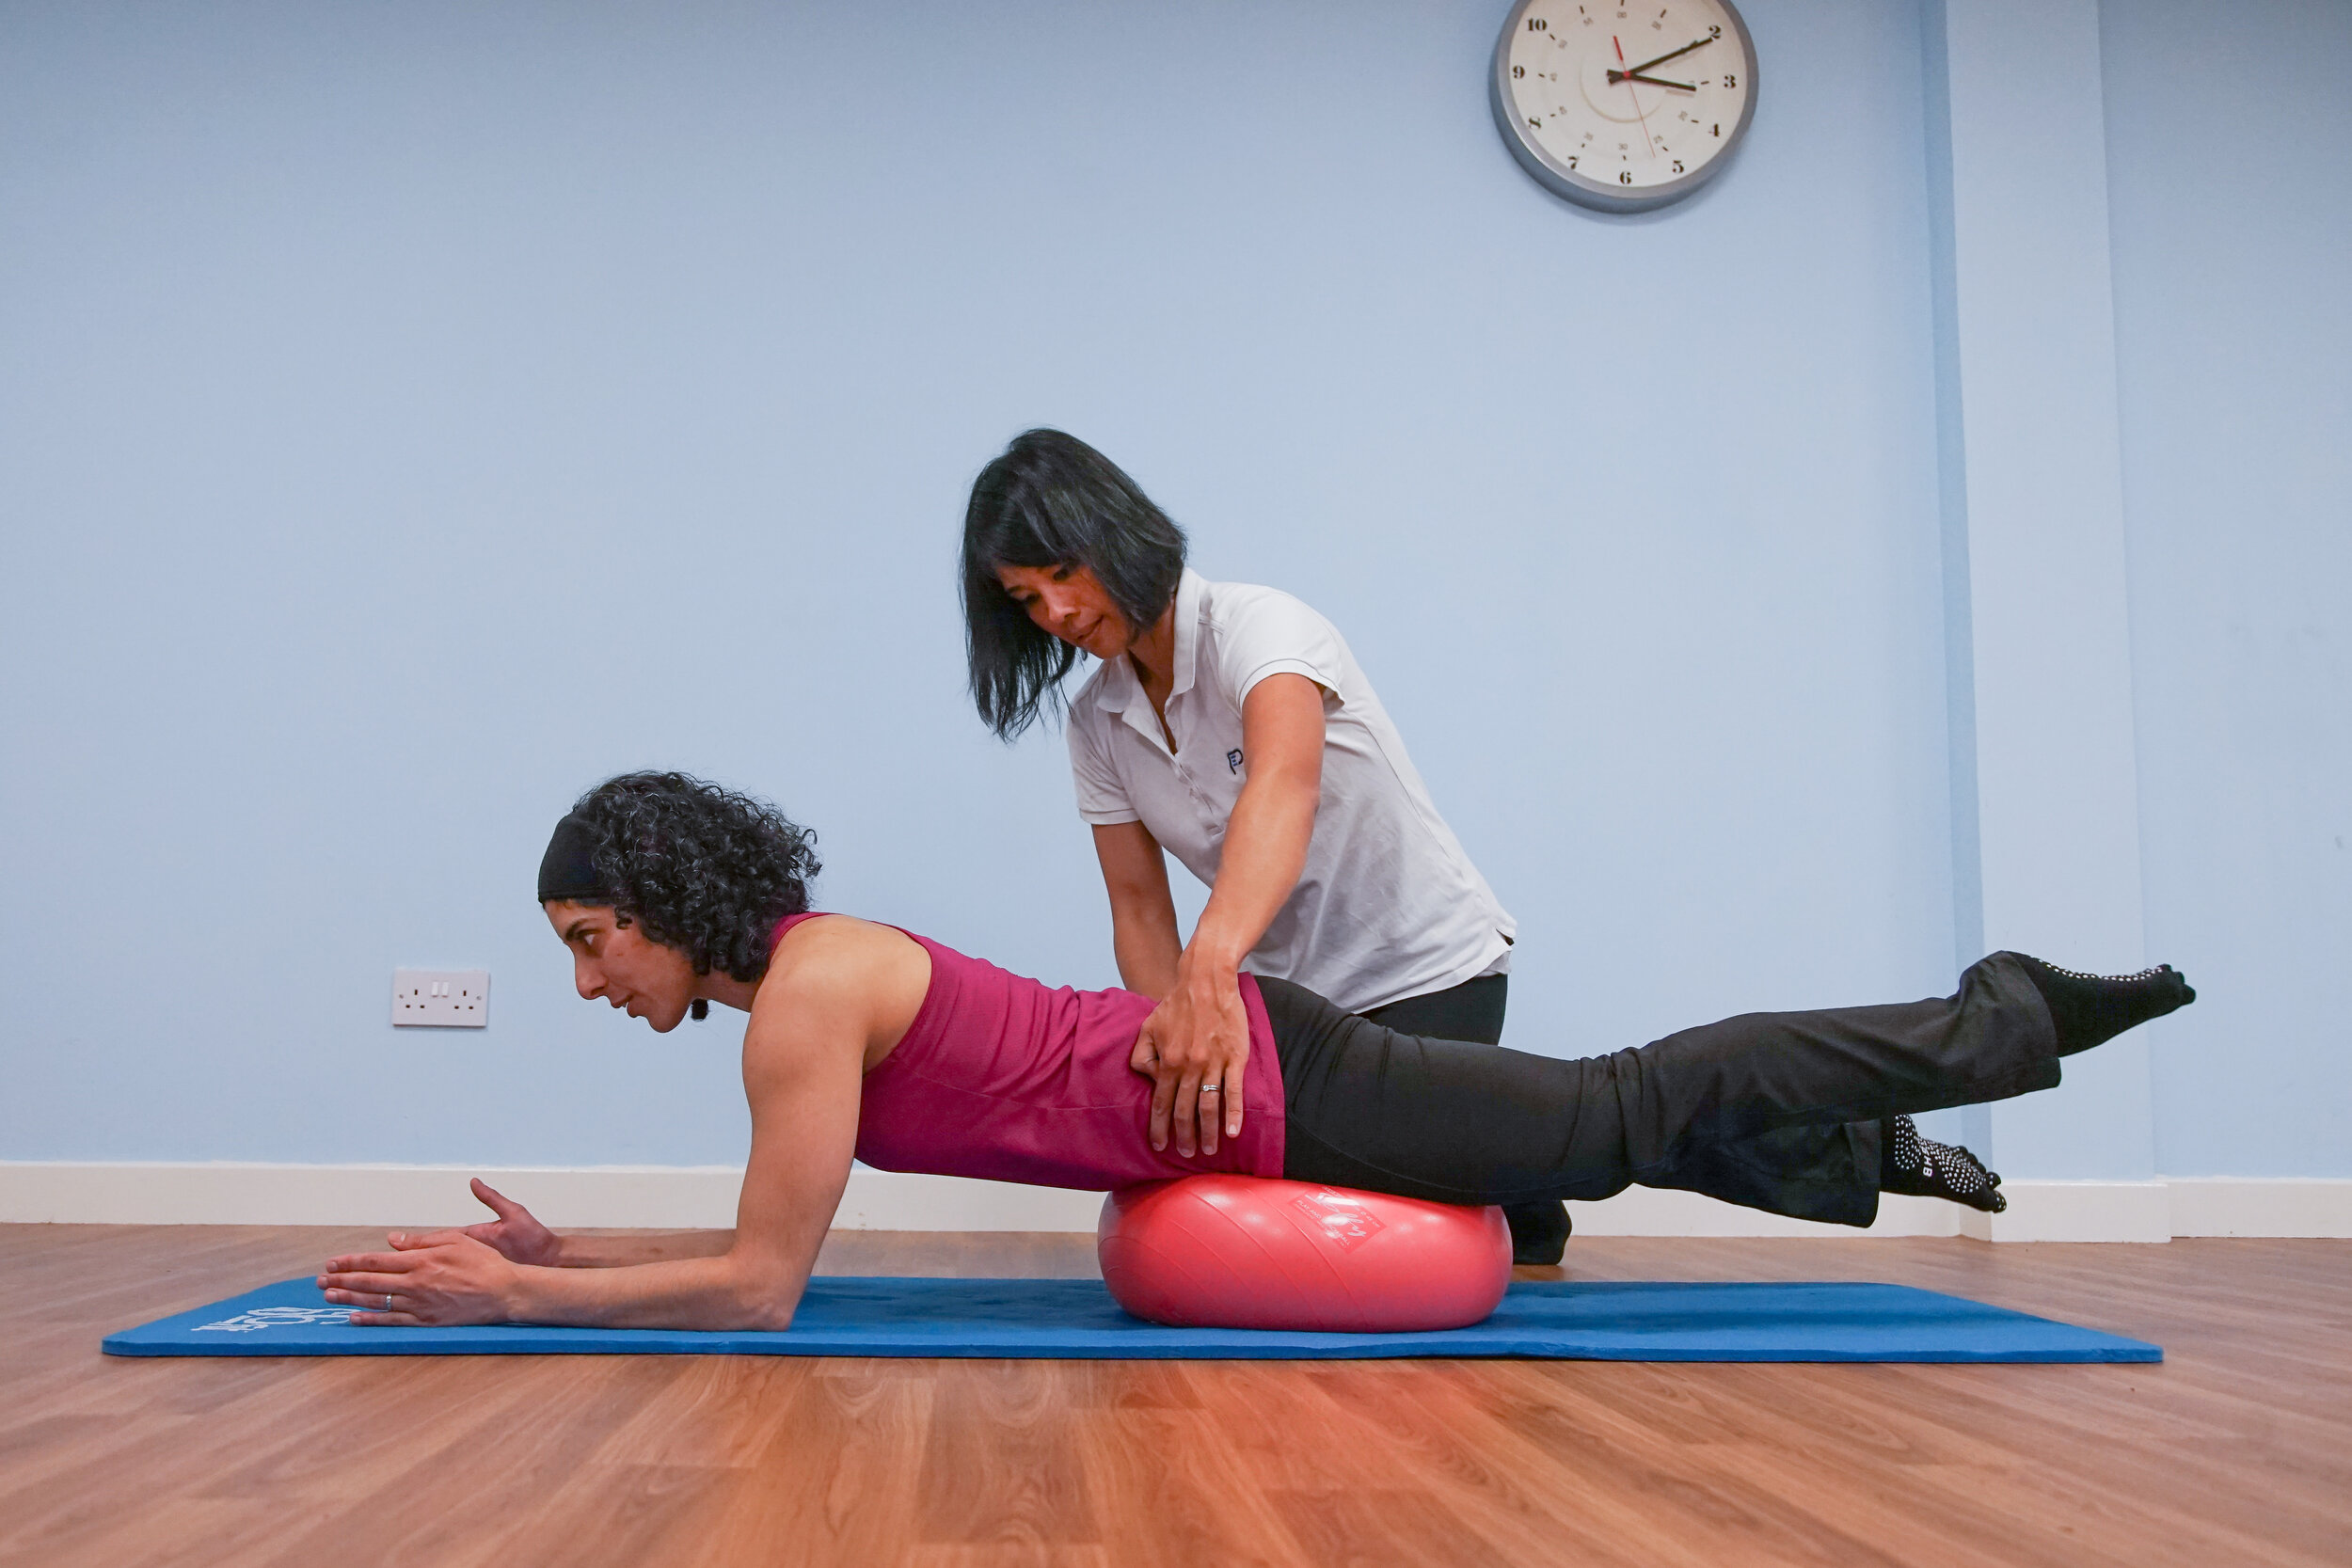
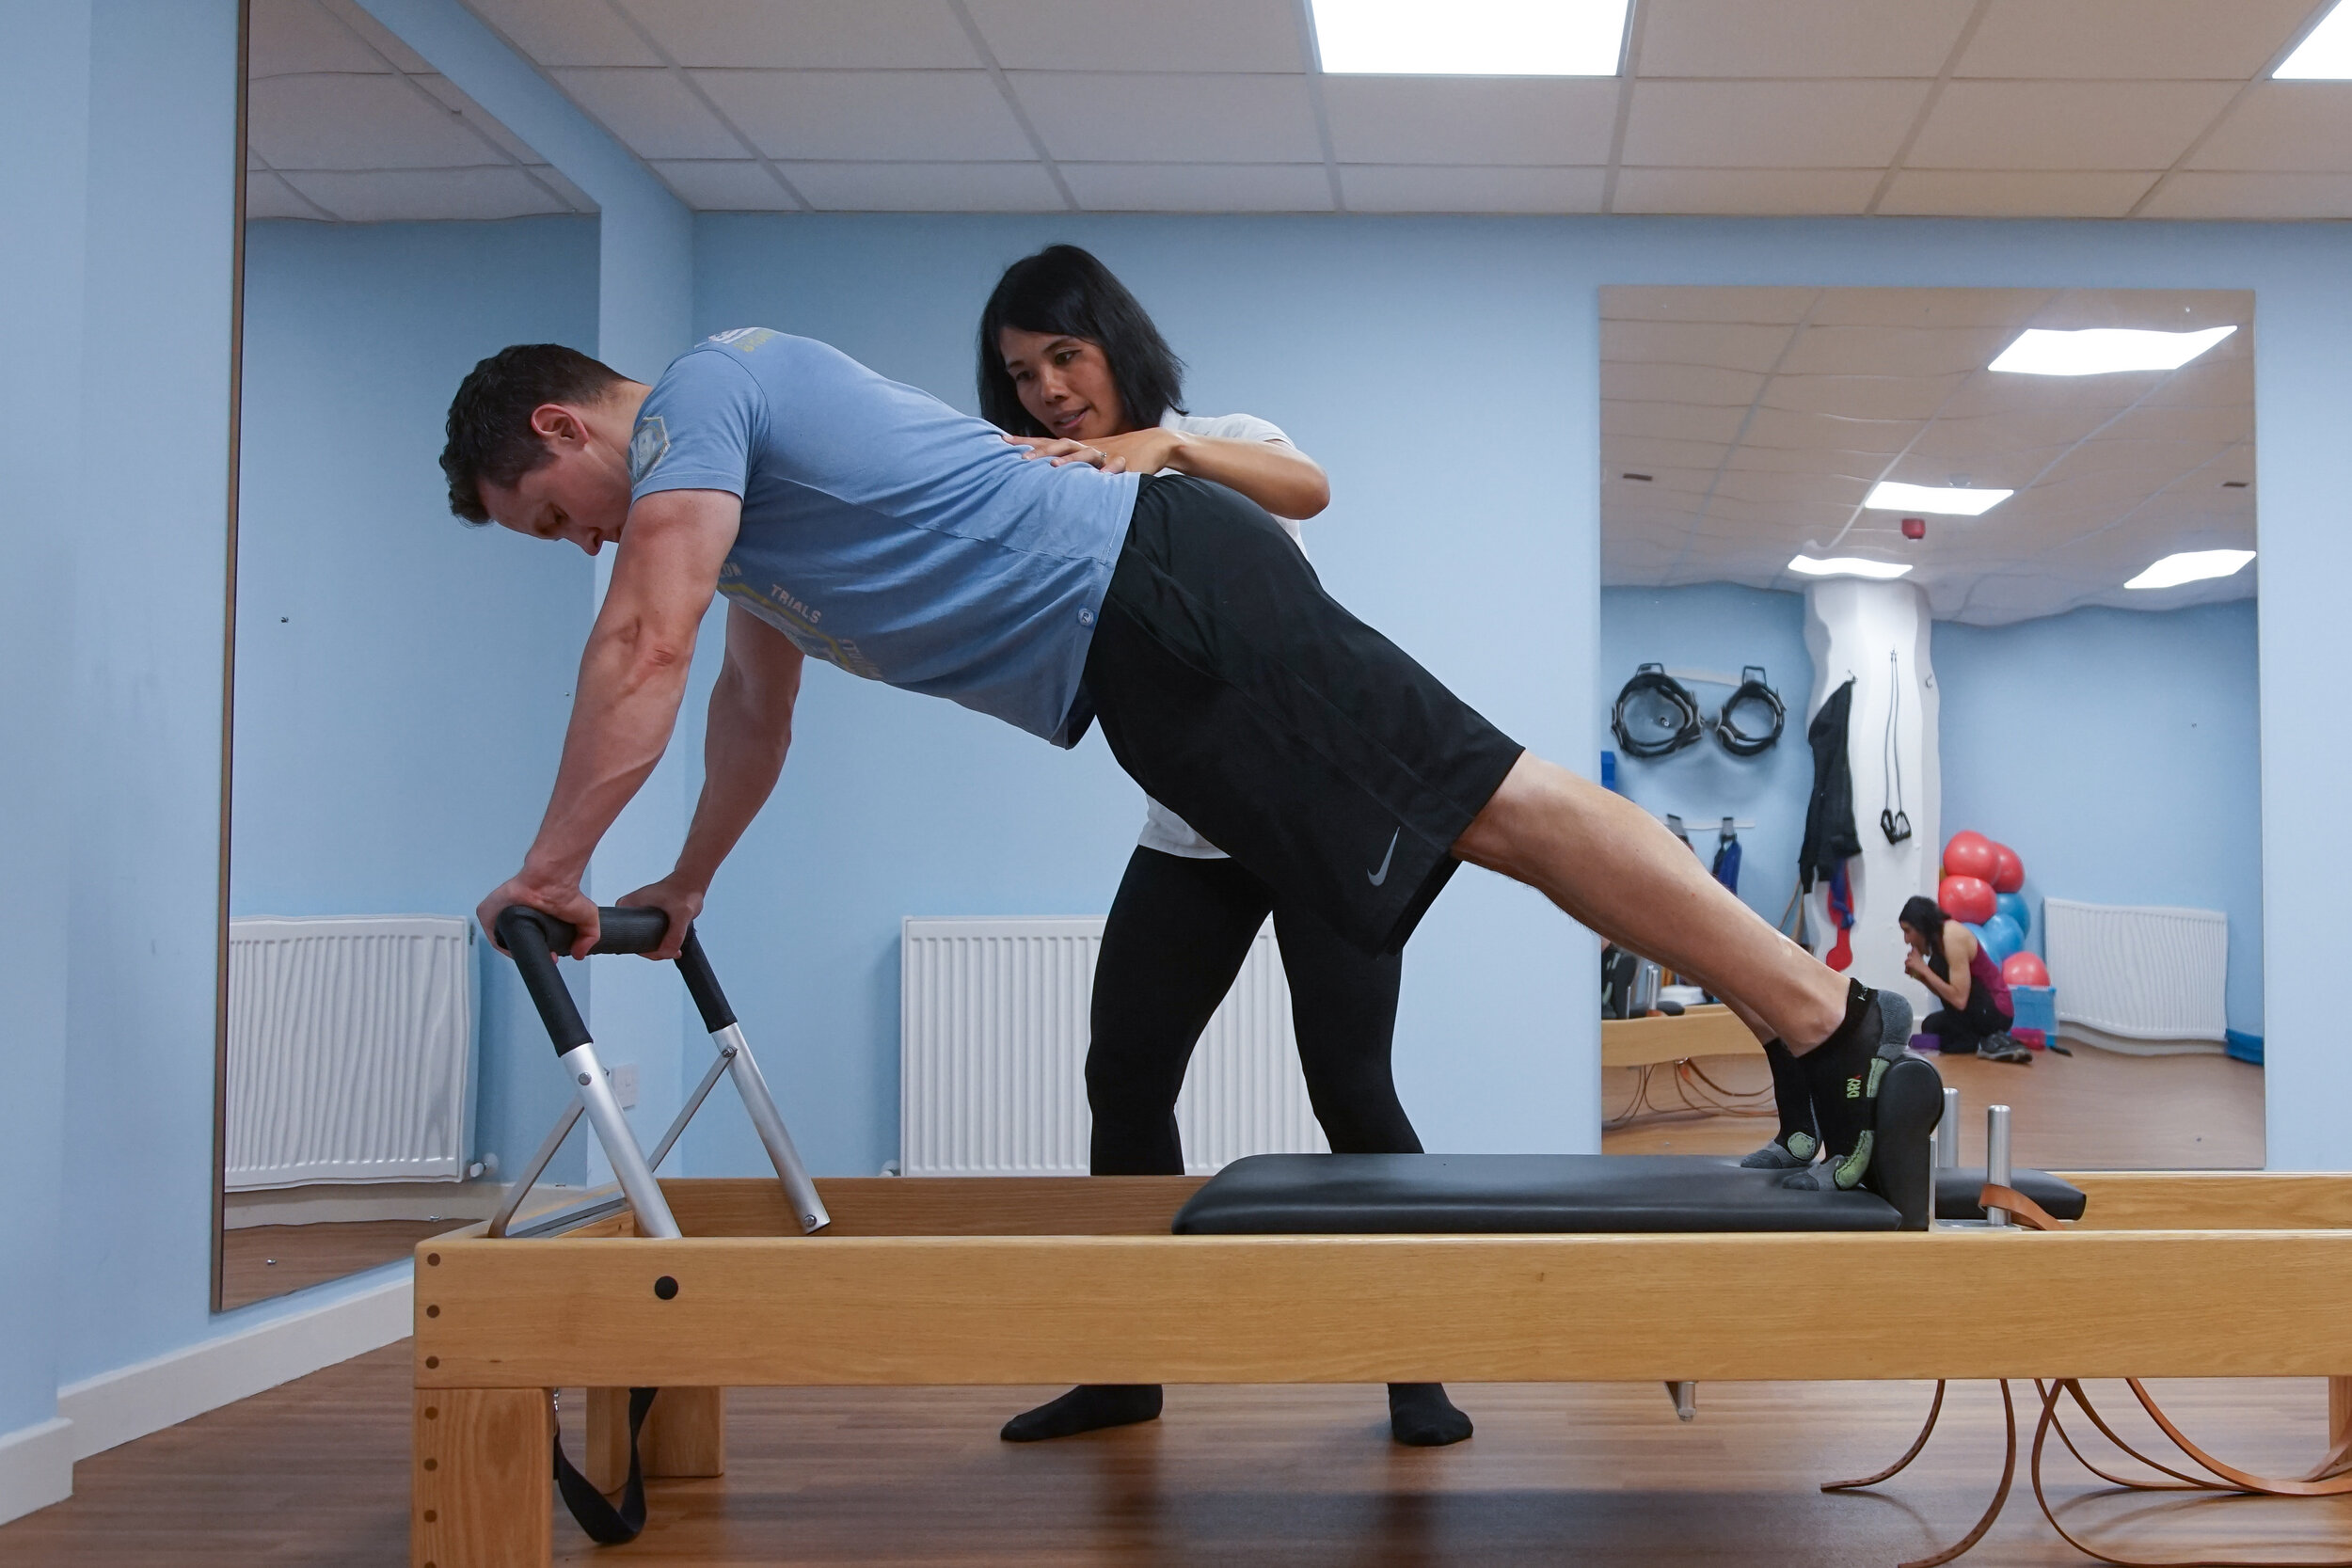
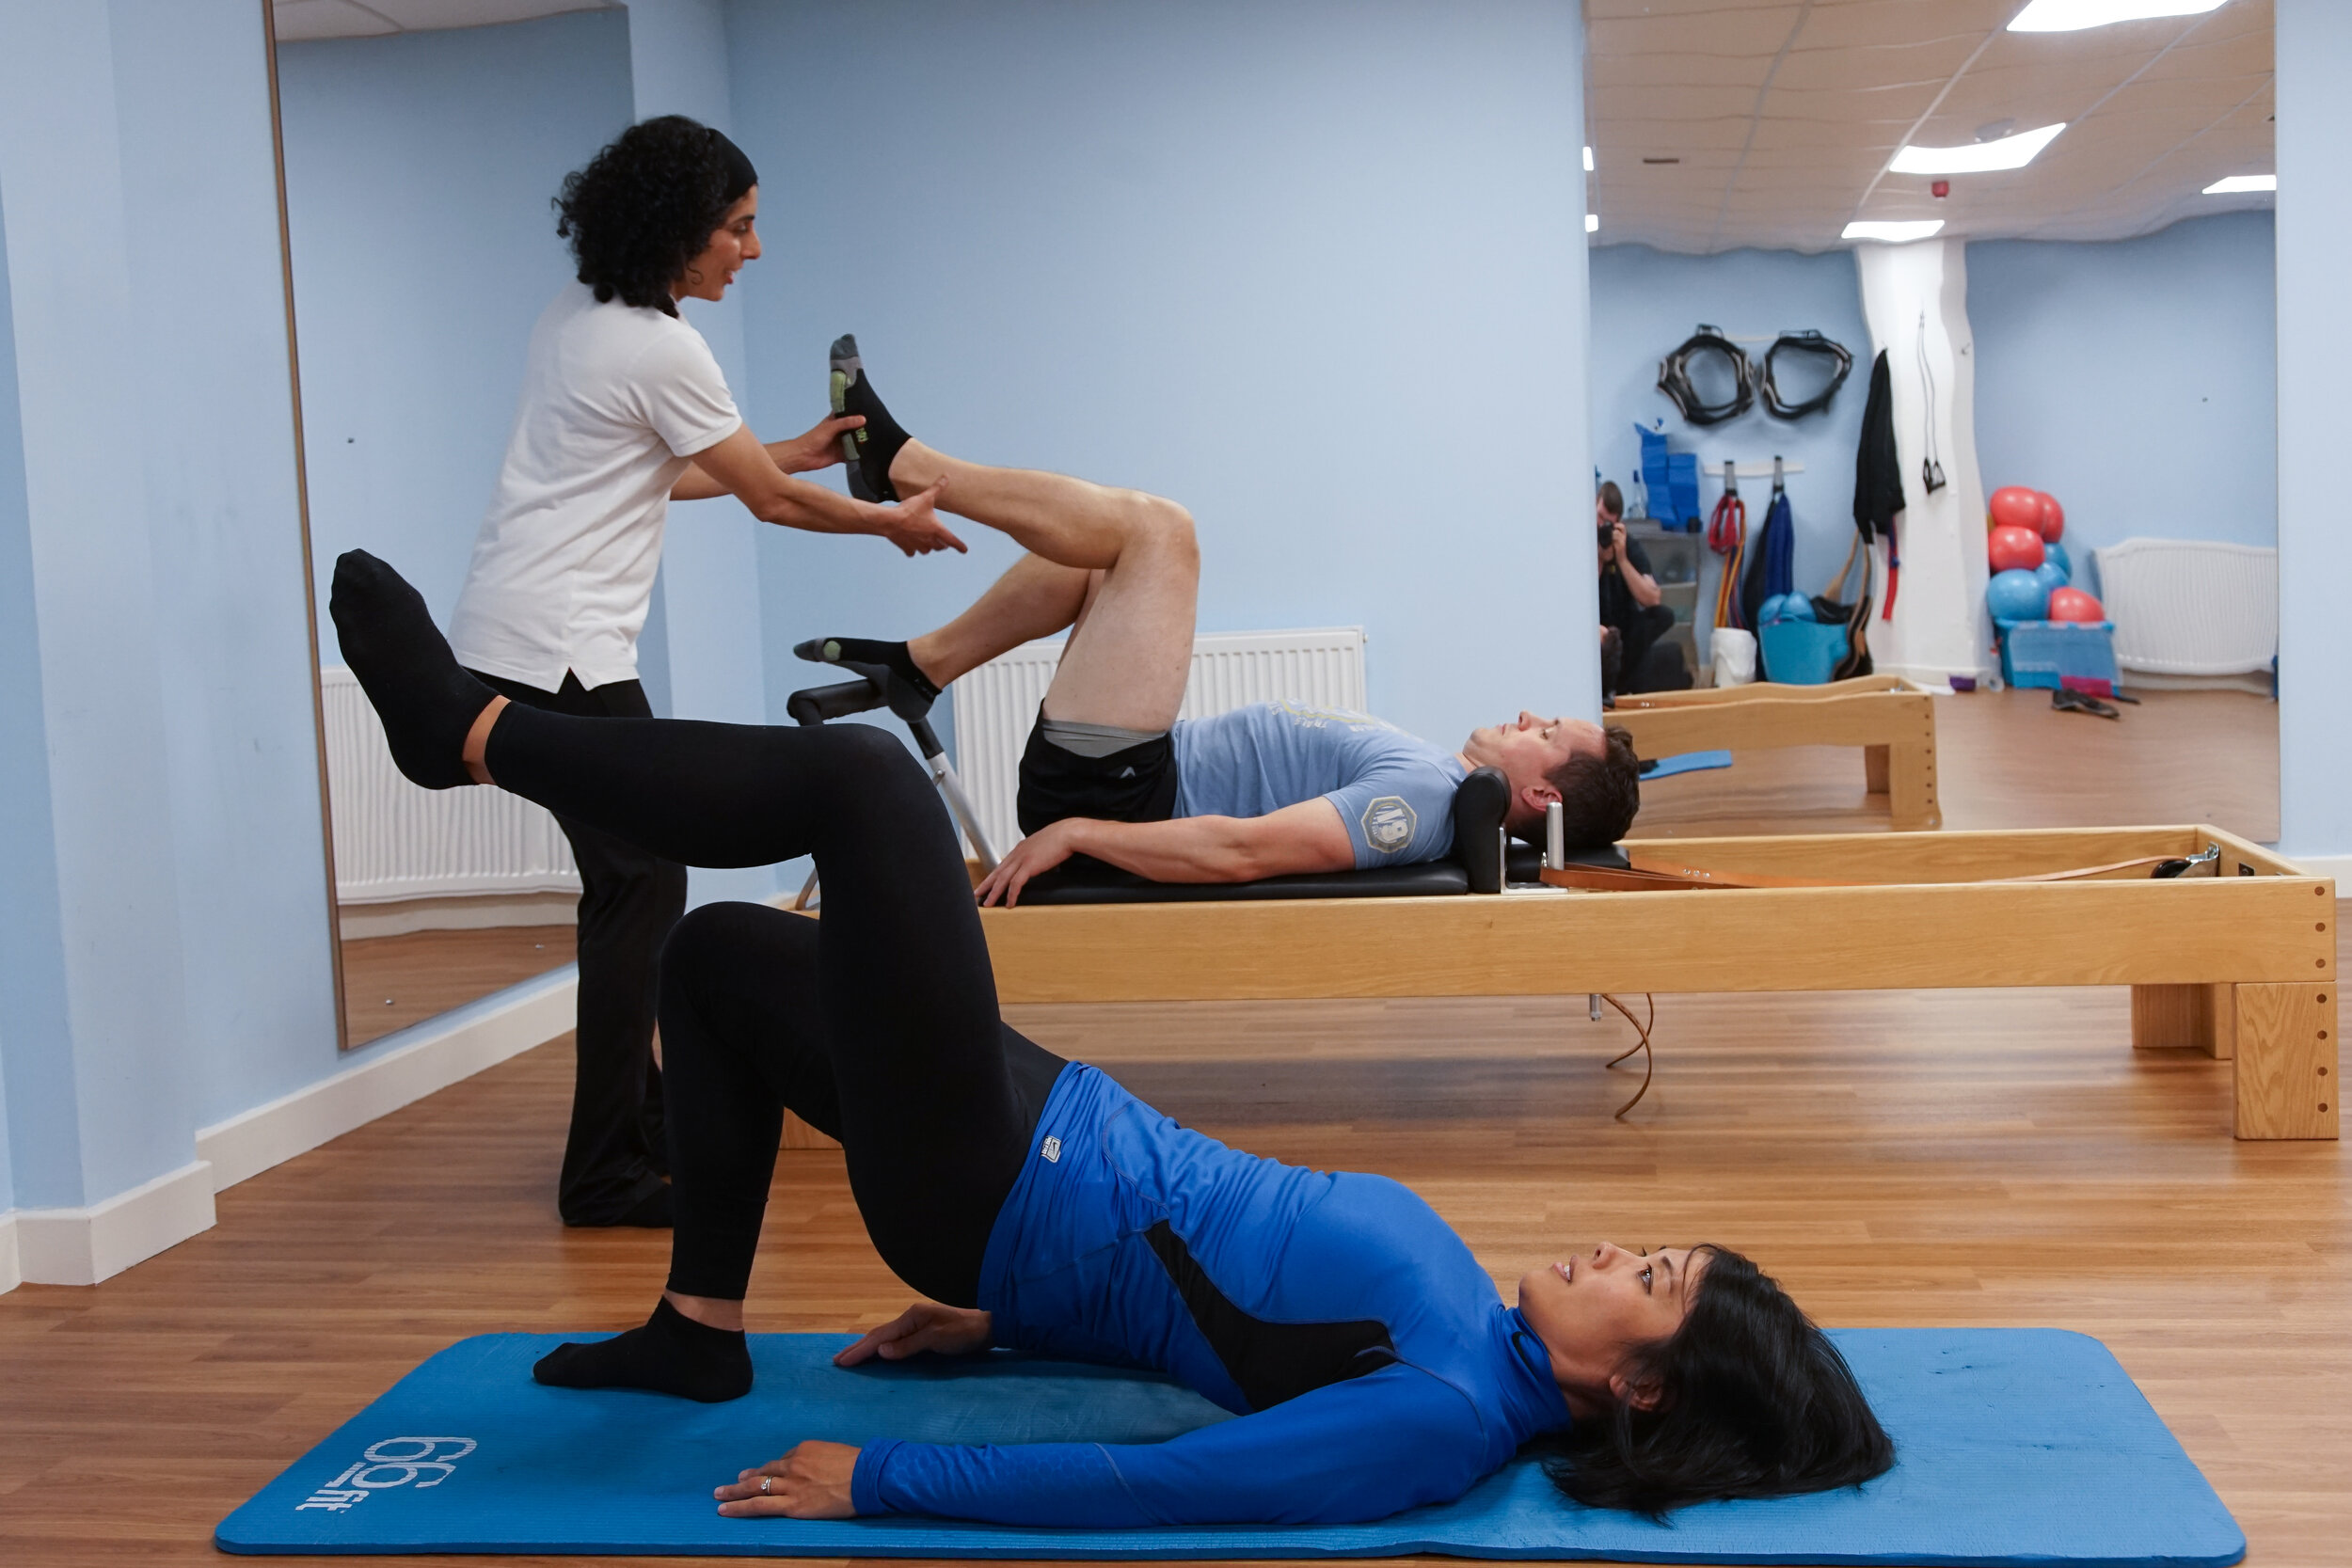
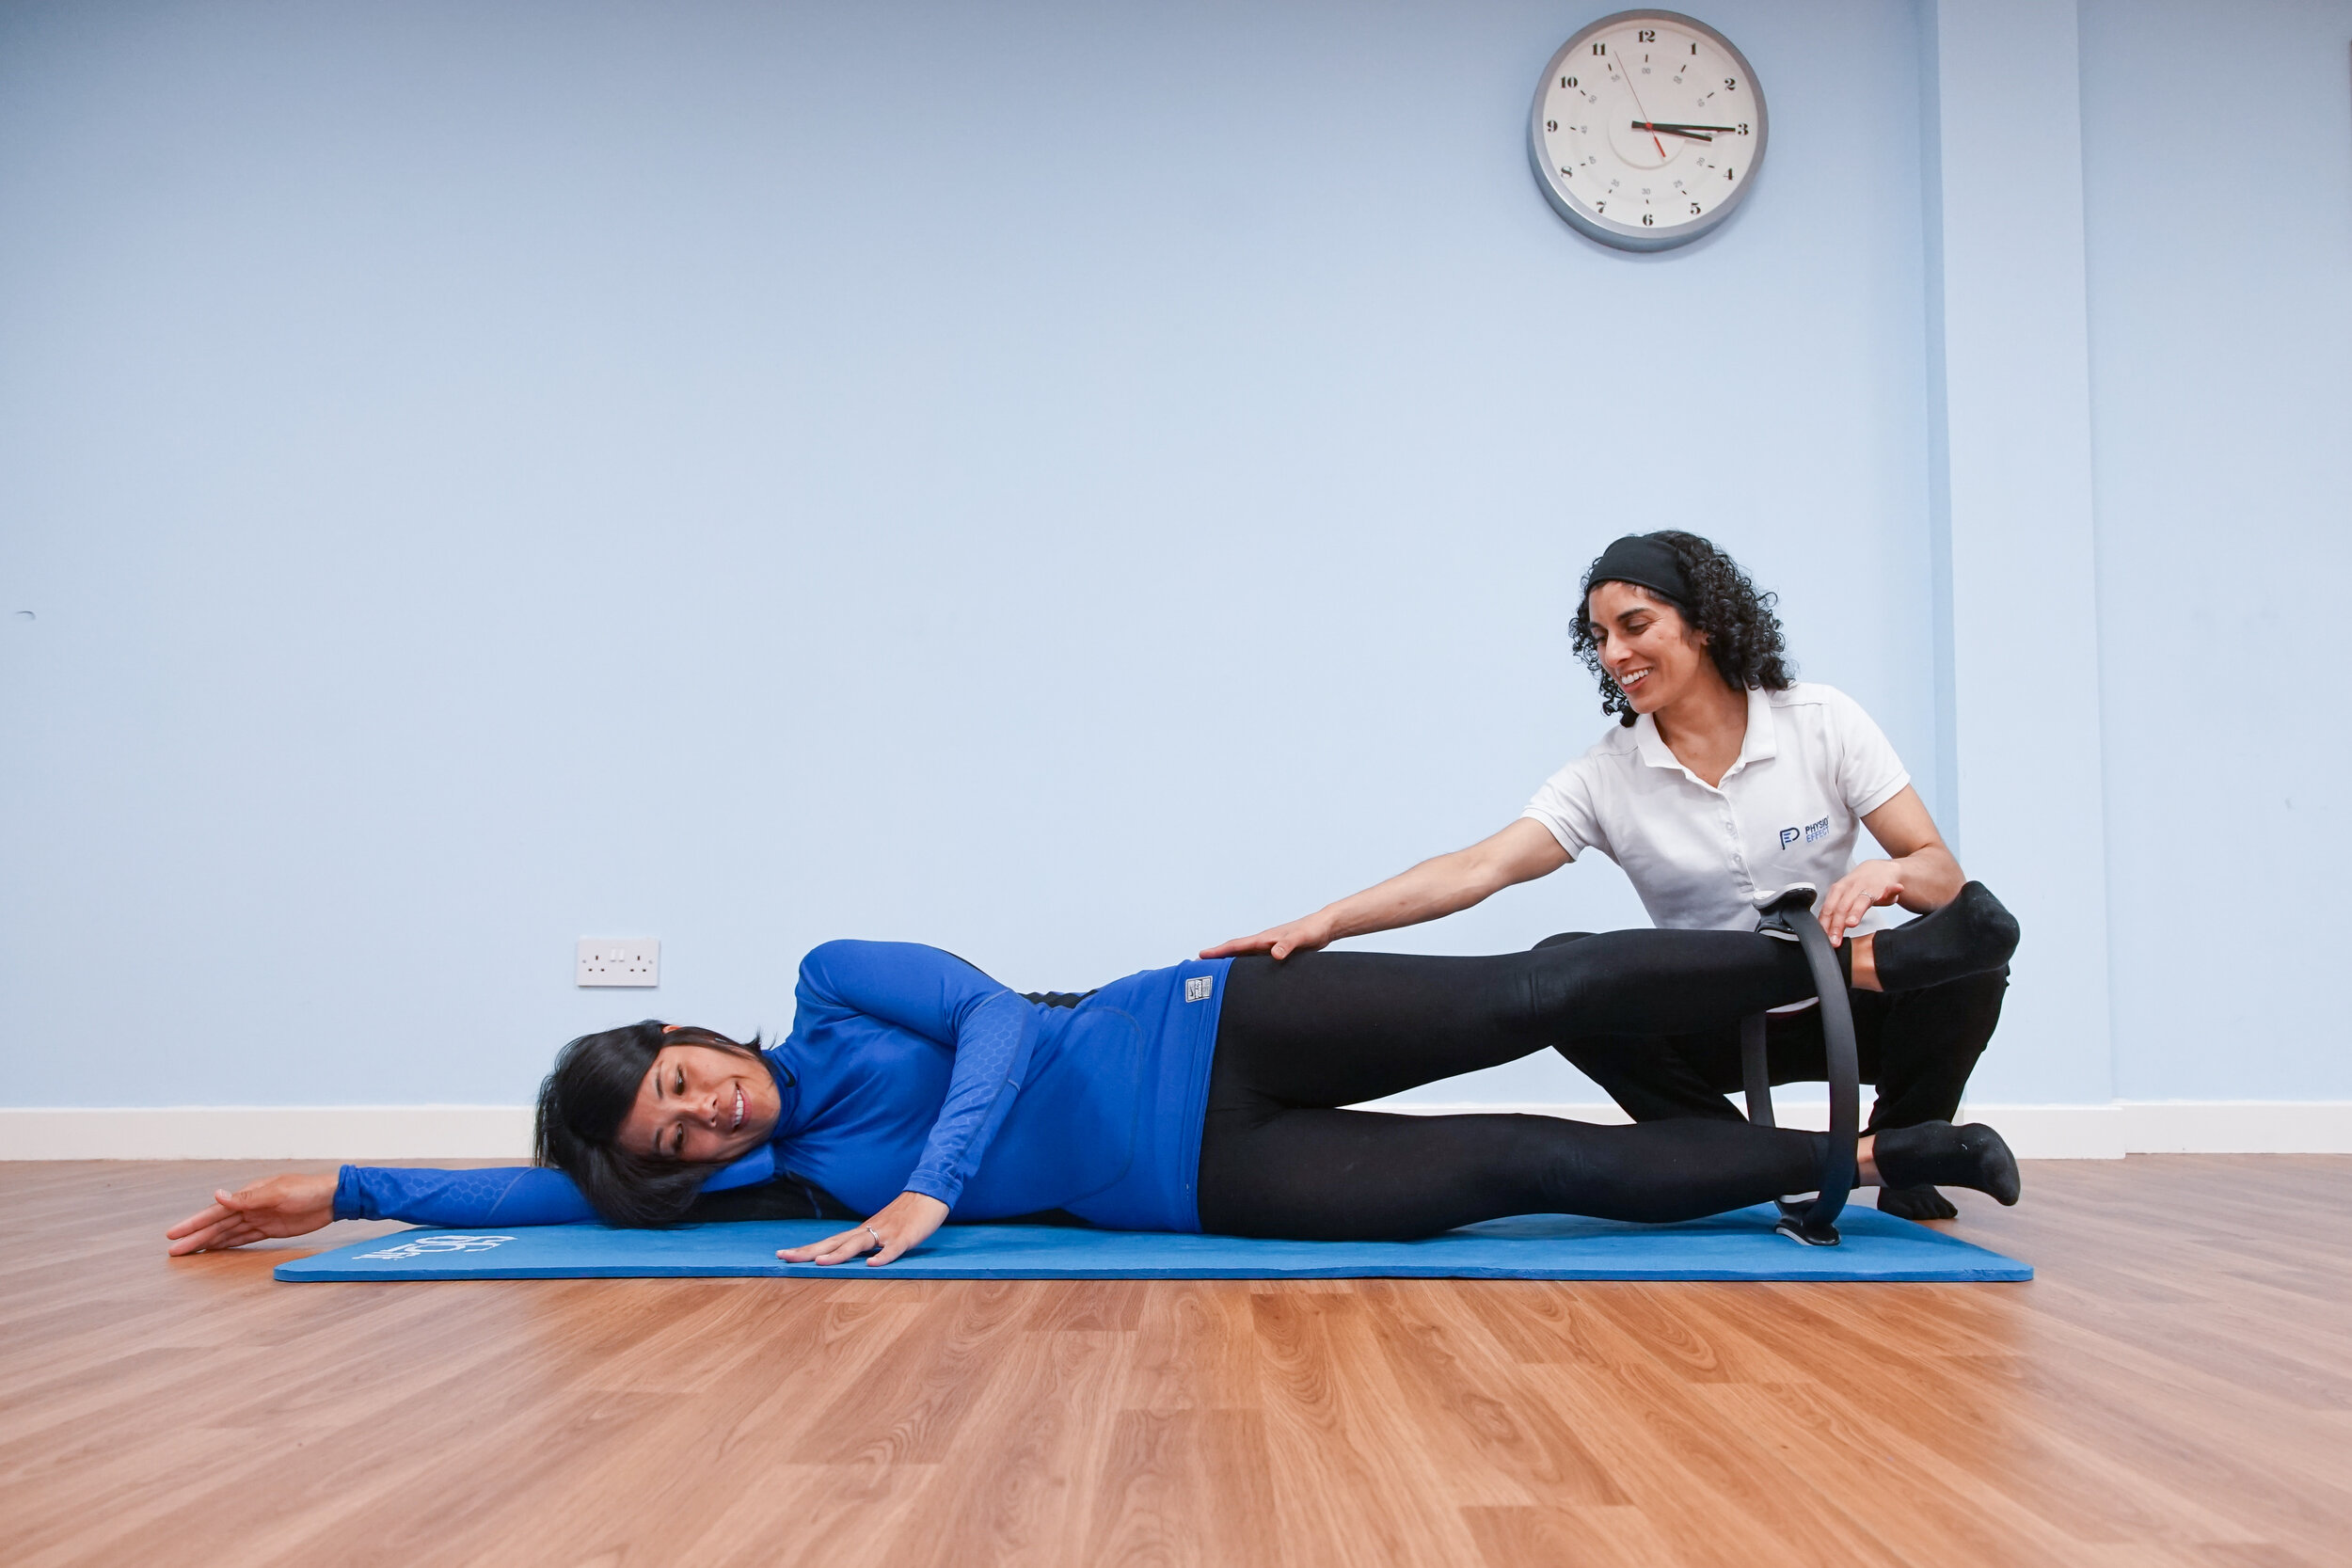
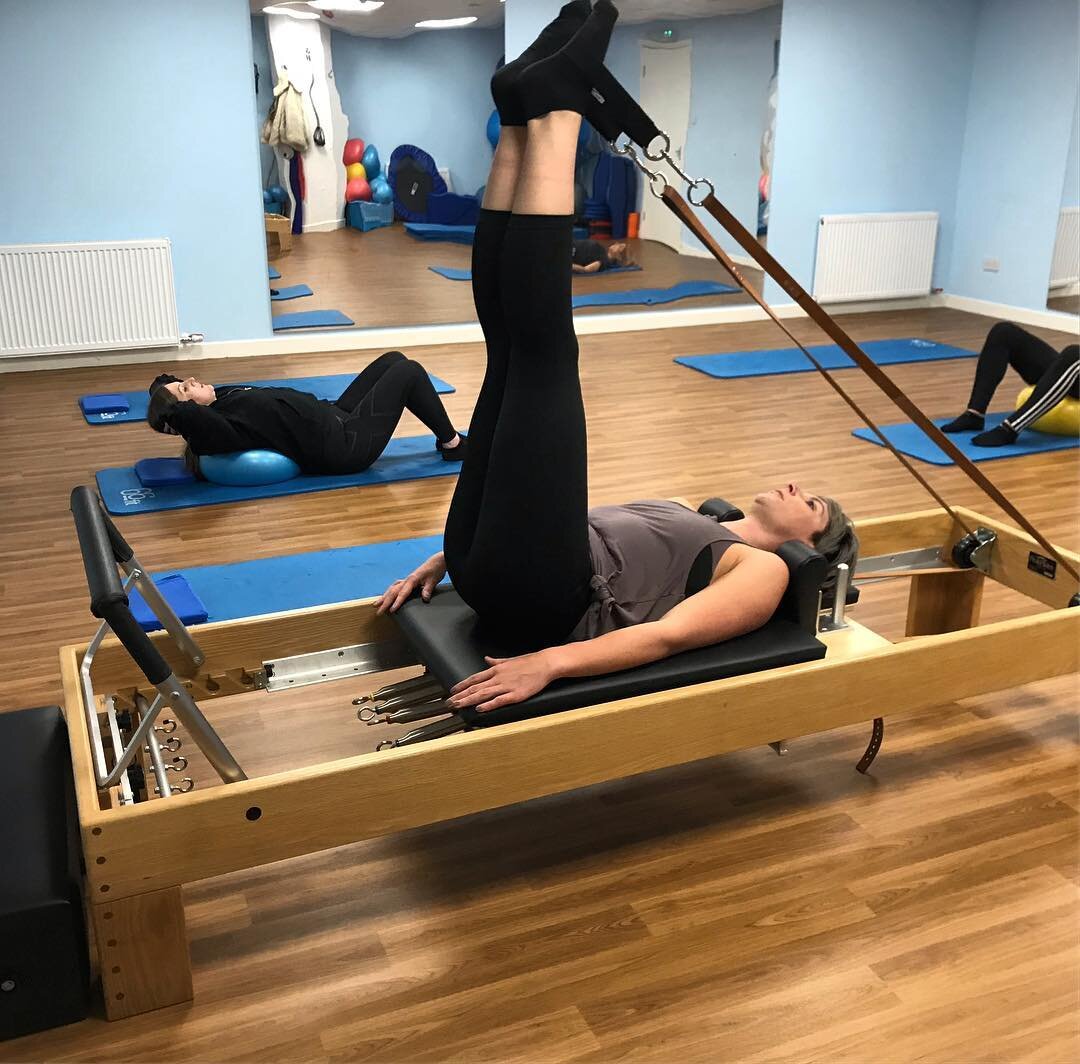
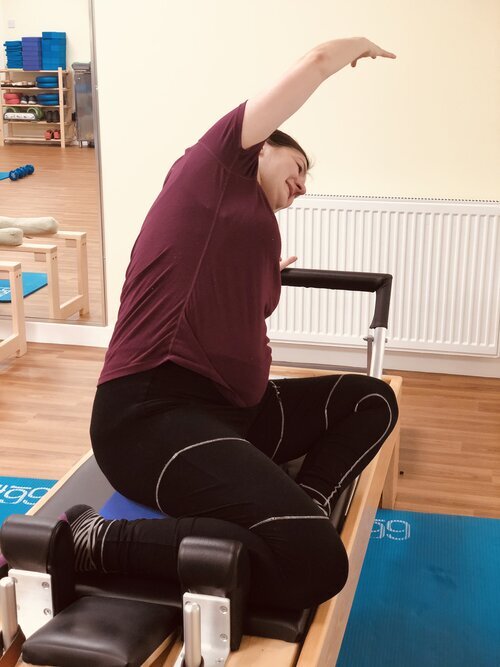
Clinical Pilates uses a number of original and modified Pilates exercises and is given on a prescriptive basis. It is instructed by a qualified physiotherapist after a musculoskeletal or injury assessment. At Physio Effect, we deliver mat work, small equipment and Reformer based Clinical Pilates on a 1:1 basis and small group classes (maximum of 5 participants) as part of your rehabilitation. This may be suggested as the most effective form of treatment and rehabilitation programme for your condition by your physiotherapist on assessment.
What is Clinical Pilates?
Clinical Pilates uses a number of original and modified Pilates exercises and is given on a prescriptive basis. It is instructed by a qualified physiotherapist after a musculoskeletal or injury assessment. At Physio Effect, we deliver mat work, small equipment and Reformer based Clinical Pilates on a 1:1 basis and small group classes (maximum of 5 participants) as part of your rehabilitation. This may be suggested as the most effective form of treatment and rehabilitation programme for your condition by your physiotherapist on assessment.
The difference between Clinical Pilates and the traditional Pilates method is that you will be firstly assessed by a Pilates-trained Physiotherapist and then have a tailored programme of Pilates exercises given to you. During the session, you will be given exercises to do specific to your individual circumstance. This is usually a prehabilitation or rehabilitation programme relevant to an existing injury (e.g. back pain or post-surgical etc) or a specific condition (e.g. ante - post natal, hypermobility, fybromylagia etc) that will be discussed at an initial Physiotherapy Assessment ahead of you starting your block of classes.
New Class Wednesdays 6PM
Due to popular demand, we have opened a new class time on a Wednesday evening at 6PM from 7th October. This is a rolling class and you can start any time from 7th October. There is a “use-by” date when purchasing a block of classes which is:
10 weeks for a 6 x class block
4 months for a 12 x class block
To find out if there is space in this class or any of our other class times, use the button below:
How much does it cost?
Initial 1:1 Physio Assessment: £49
Single class: £25
6 classes: £120 (£20 per class)
12 classes: £220 (£18.3 per class)
“I have been attending Mariam’s Clinical Pilates classes and they are superb. Because the classes are small (max 5 people) Mariam is able to ensure everyone does exercises which are relevant to their individual problems/injuries.”
Antenatal Pilates Classes at Physio Effect
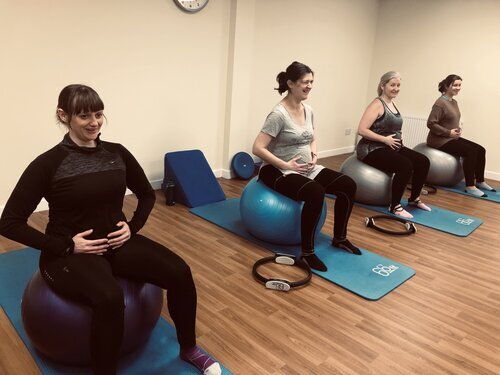
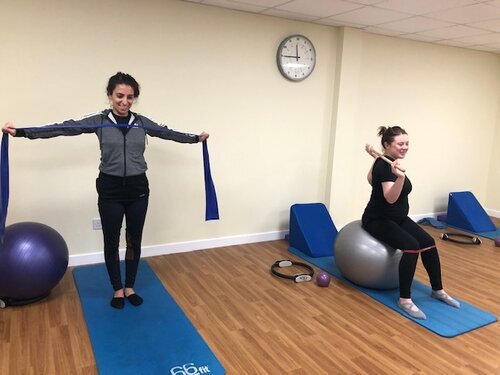
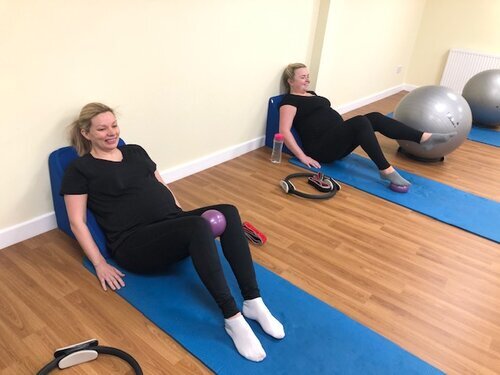
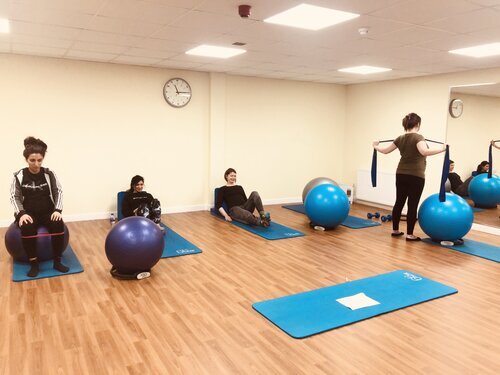
Some exciting news! We have a NEW Antenatal Pilates class running in our studio within our Northside clinic at Borron Street. This physio-led Clinical Pilates class aims to prevent pregnancy related issues such as pelvic girdle pain (PGP), symphysis pubis dysfunction (SPD), posture related pain as well as a full body programme to prepare you for the birth of your child. During the class, you will be guided through an individualised programme relevant to your stage of pregnancy and any other issues discussed during your initial physiotherapy appointment.
WHEN: Wednesday evenings at 7PM from 21st October
**CLASS NOW FULLY BOOKED**
Please contact us below if you would like to be placed on our waiting list or if you wish to attend any of our other Clinical Pilates classes which will be a mixed group, but you will still be able to do an antenatal programme due to the bespoke nature of the class.
WHEN CAN I START?
As long as you have an uncomplicated pregnancy and your midwife/ doctor approves, you can begin from any time in your second trimester if you have no Pilates experience. If you have previous Pilates experience, you may begin earlier.
HOW DO I GET STARTED?
You will be required to have a 1:1 session with one of our physiotherapists before joining a class for the first time. During this appointment, your physiotherapist will be able to plan a bespoke Pilates programme for you based on your goals, requirements and stage of pregnancy. You will be introduced to the various Pilates props and equipment used during a class including the Pilates Reformer machine.
HOW MUCH DOES IT COST?
Antenatal Physiotherapy Appointment: £49
Single class rate: £25
6 classes: £120 (£20 per class)
12 classes: £220 (£18.3 per class)
You have flexibility to use the class blocks within the following time period:
● 10 weeks on a 6-class block
● 4 months on an 12-class block
WHAT HAPPENS IF I HAVE MY BABY BEFORE I USE UP ALL MY CLASSES?
You may use any remaining class credit towards our Crybaby Pilates Classes. This is our specialist Postnatal Pilates class which you may begin once you are at least 6 weeks postpartum after a non-complicated vaginal delivery or 8 weeks if you have had a C-section/assisted delivery with any complications.
CryBaby (Postnatal) Pilates Class
Postnatal Pilates Classes at Physio Effect
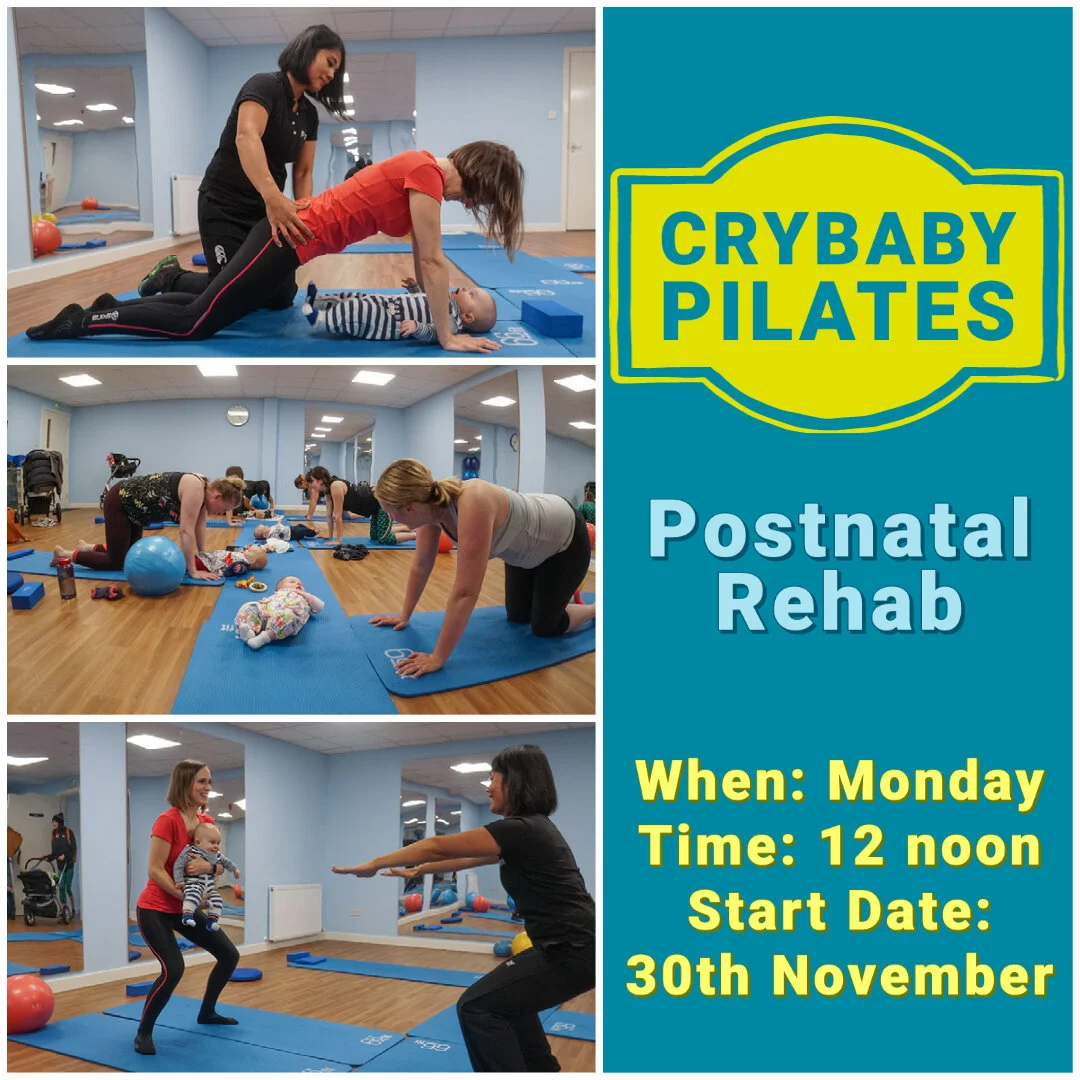
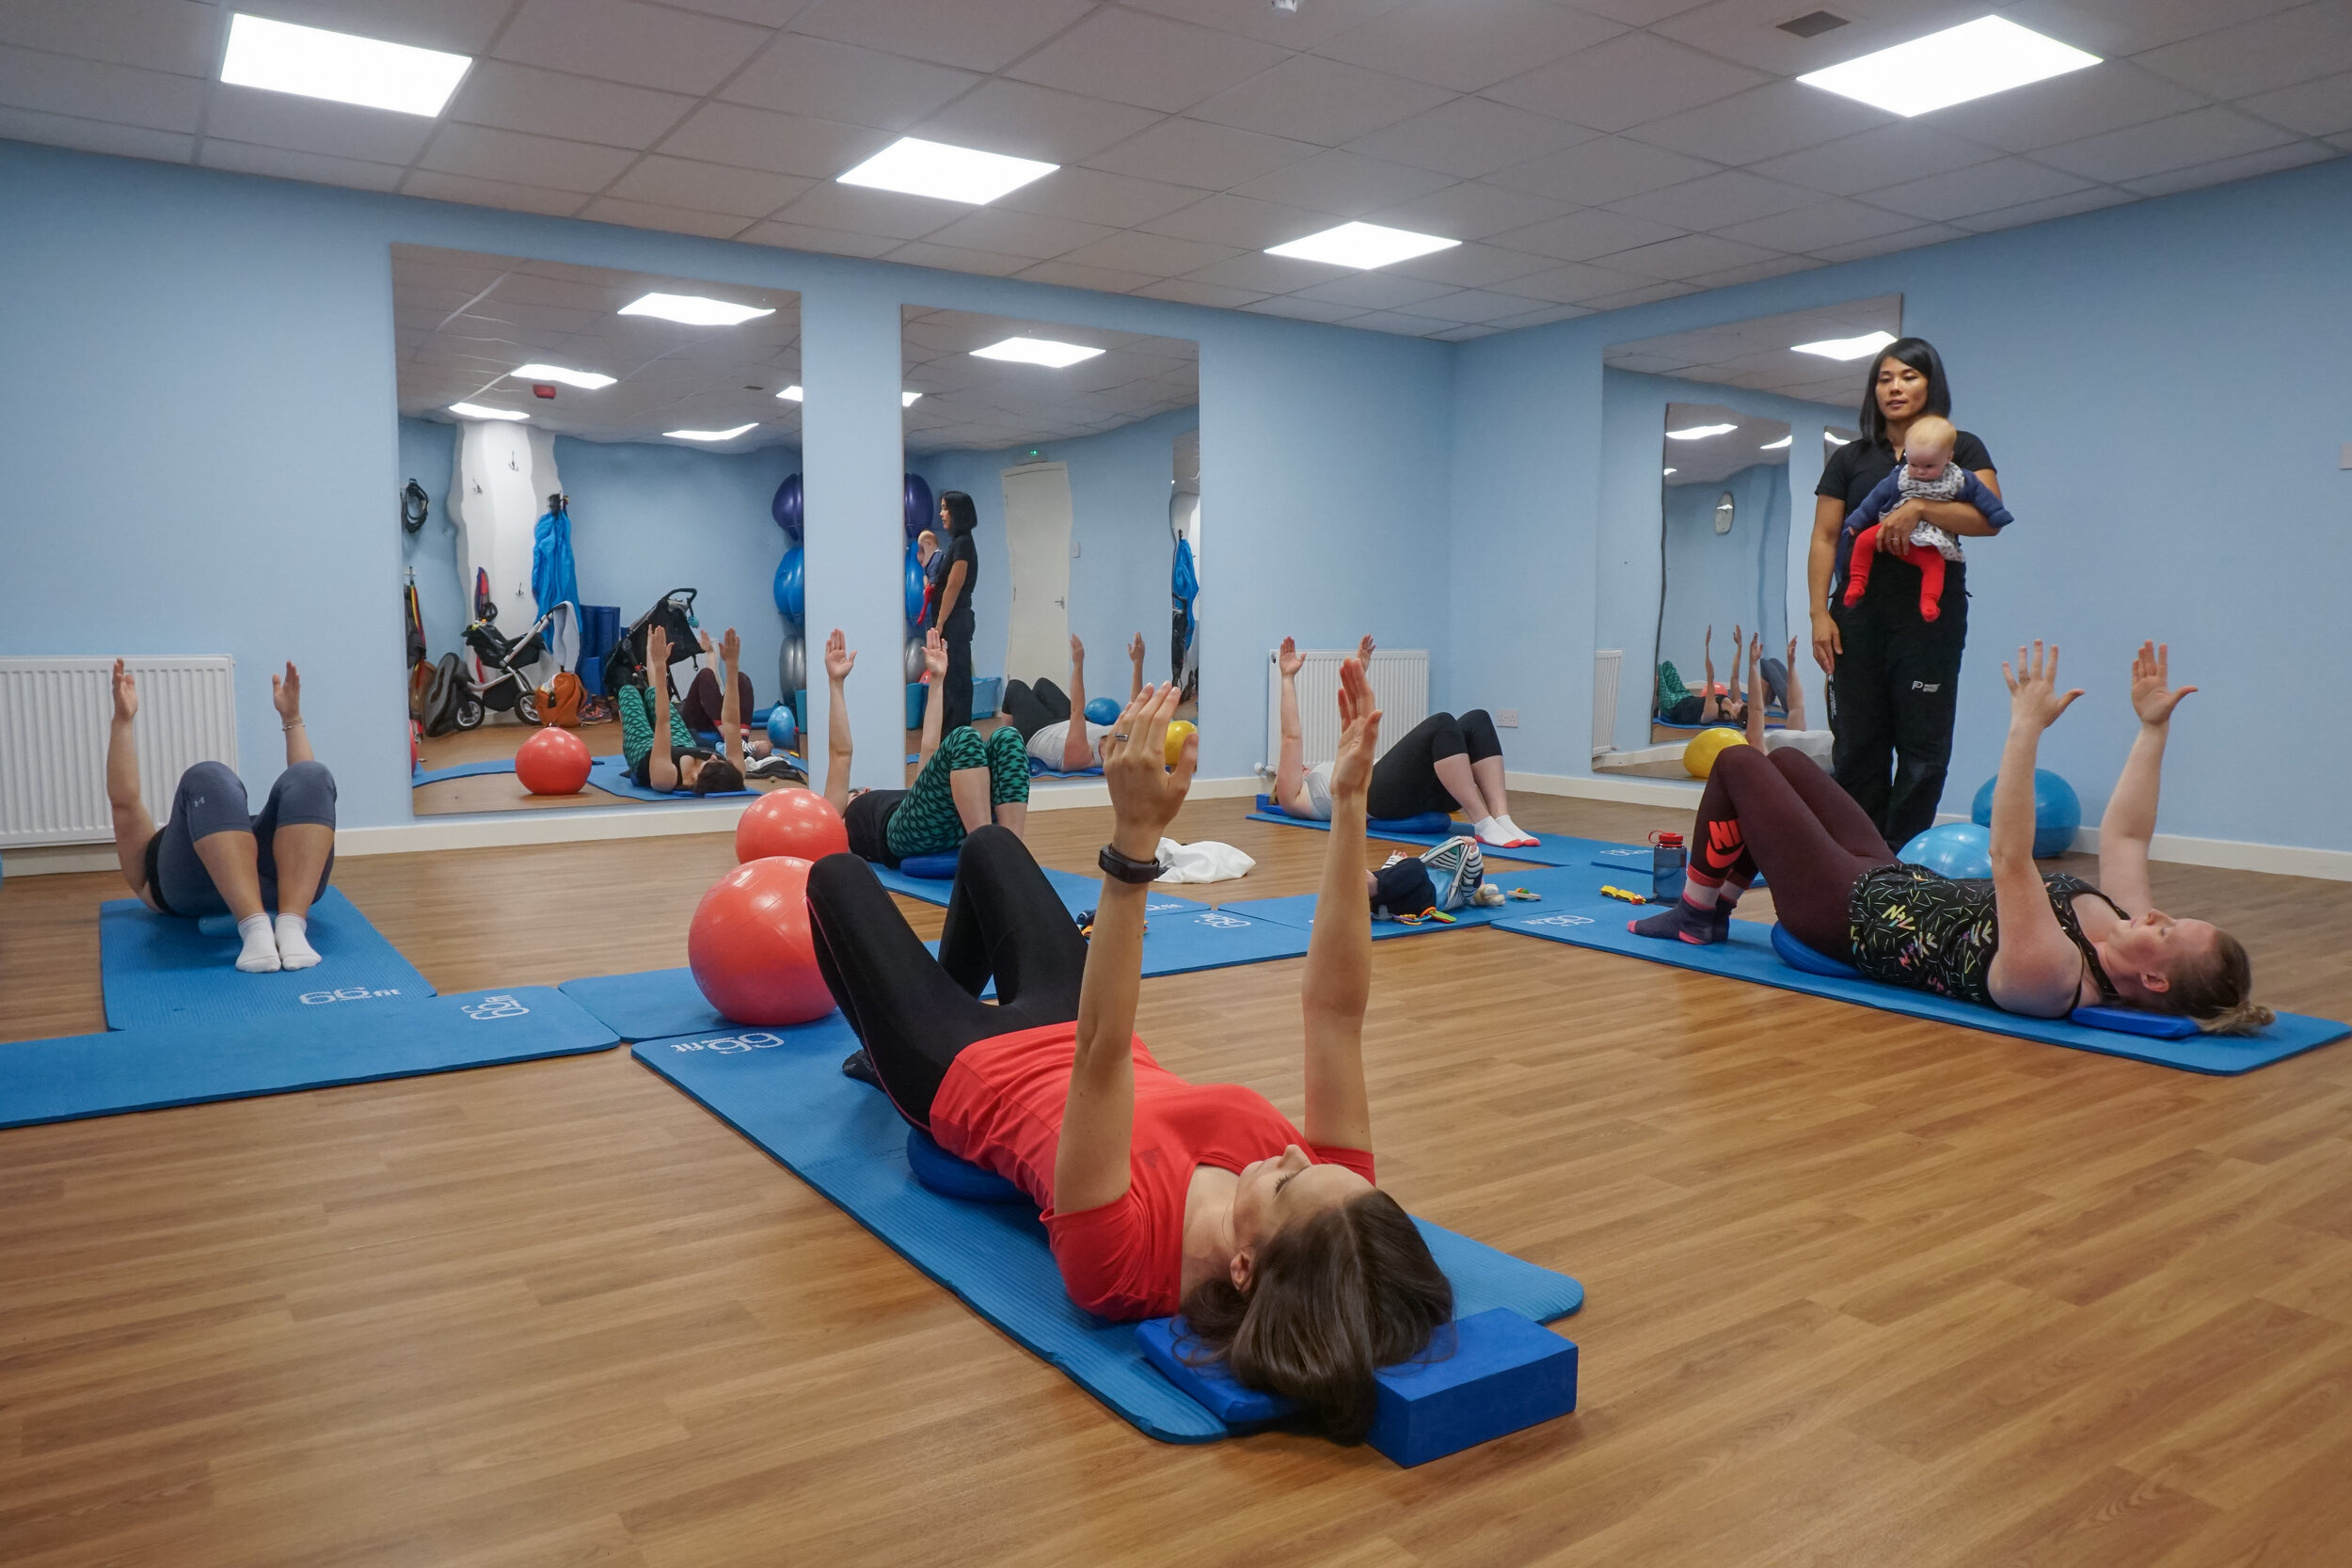
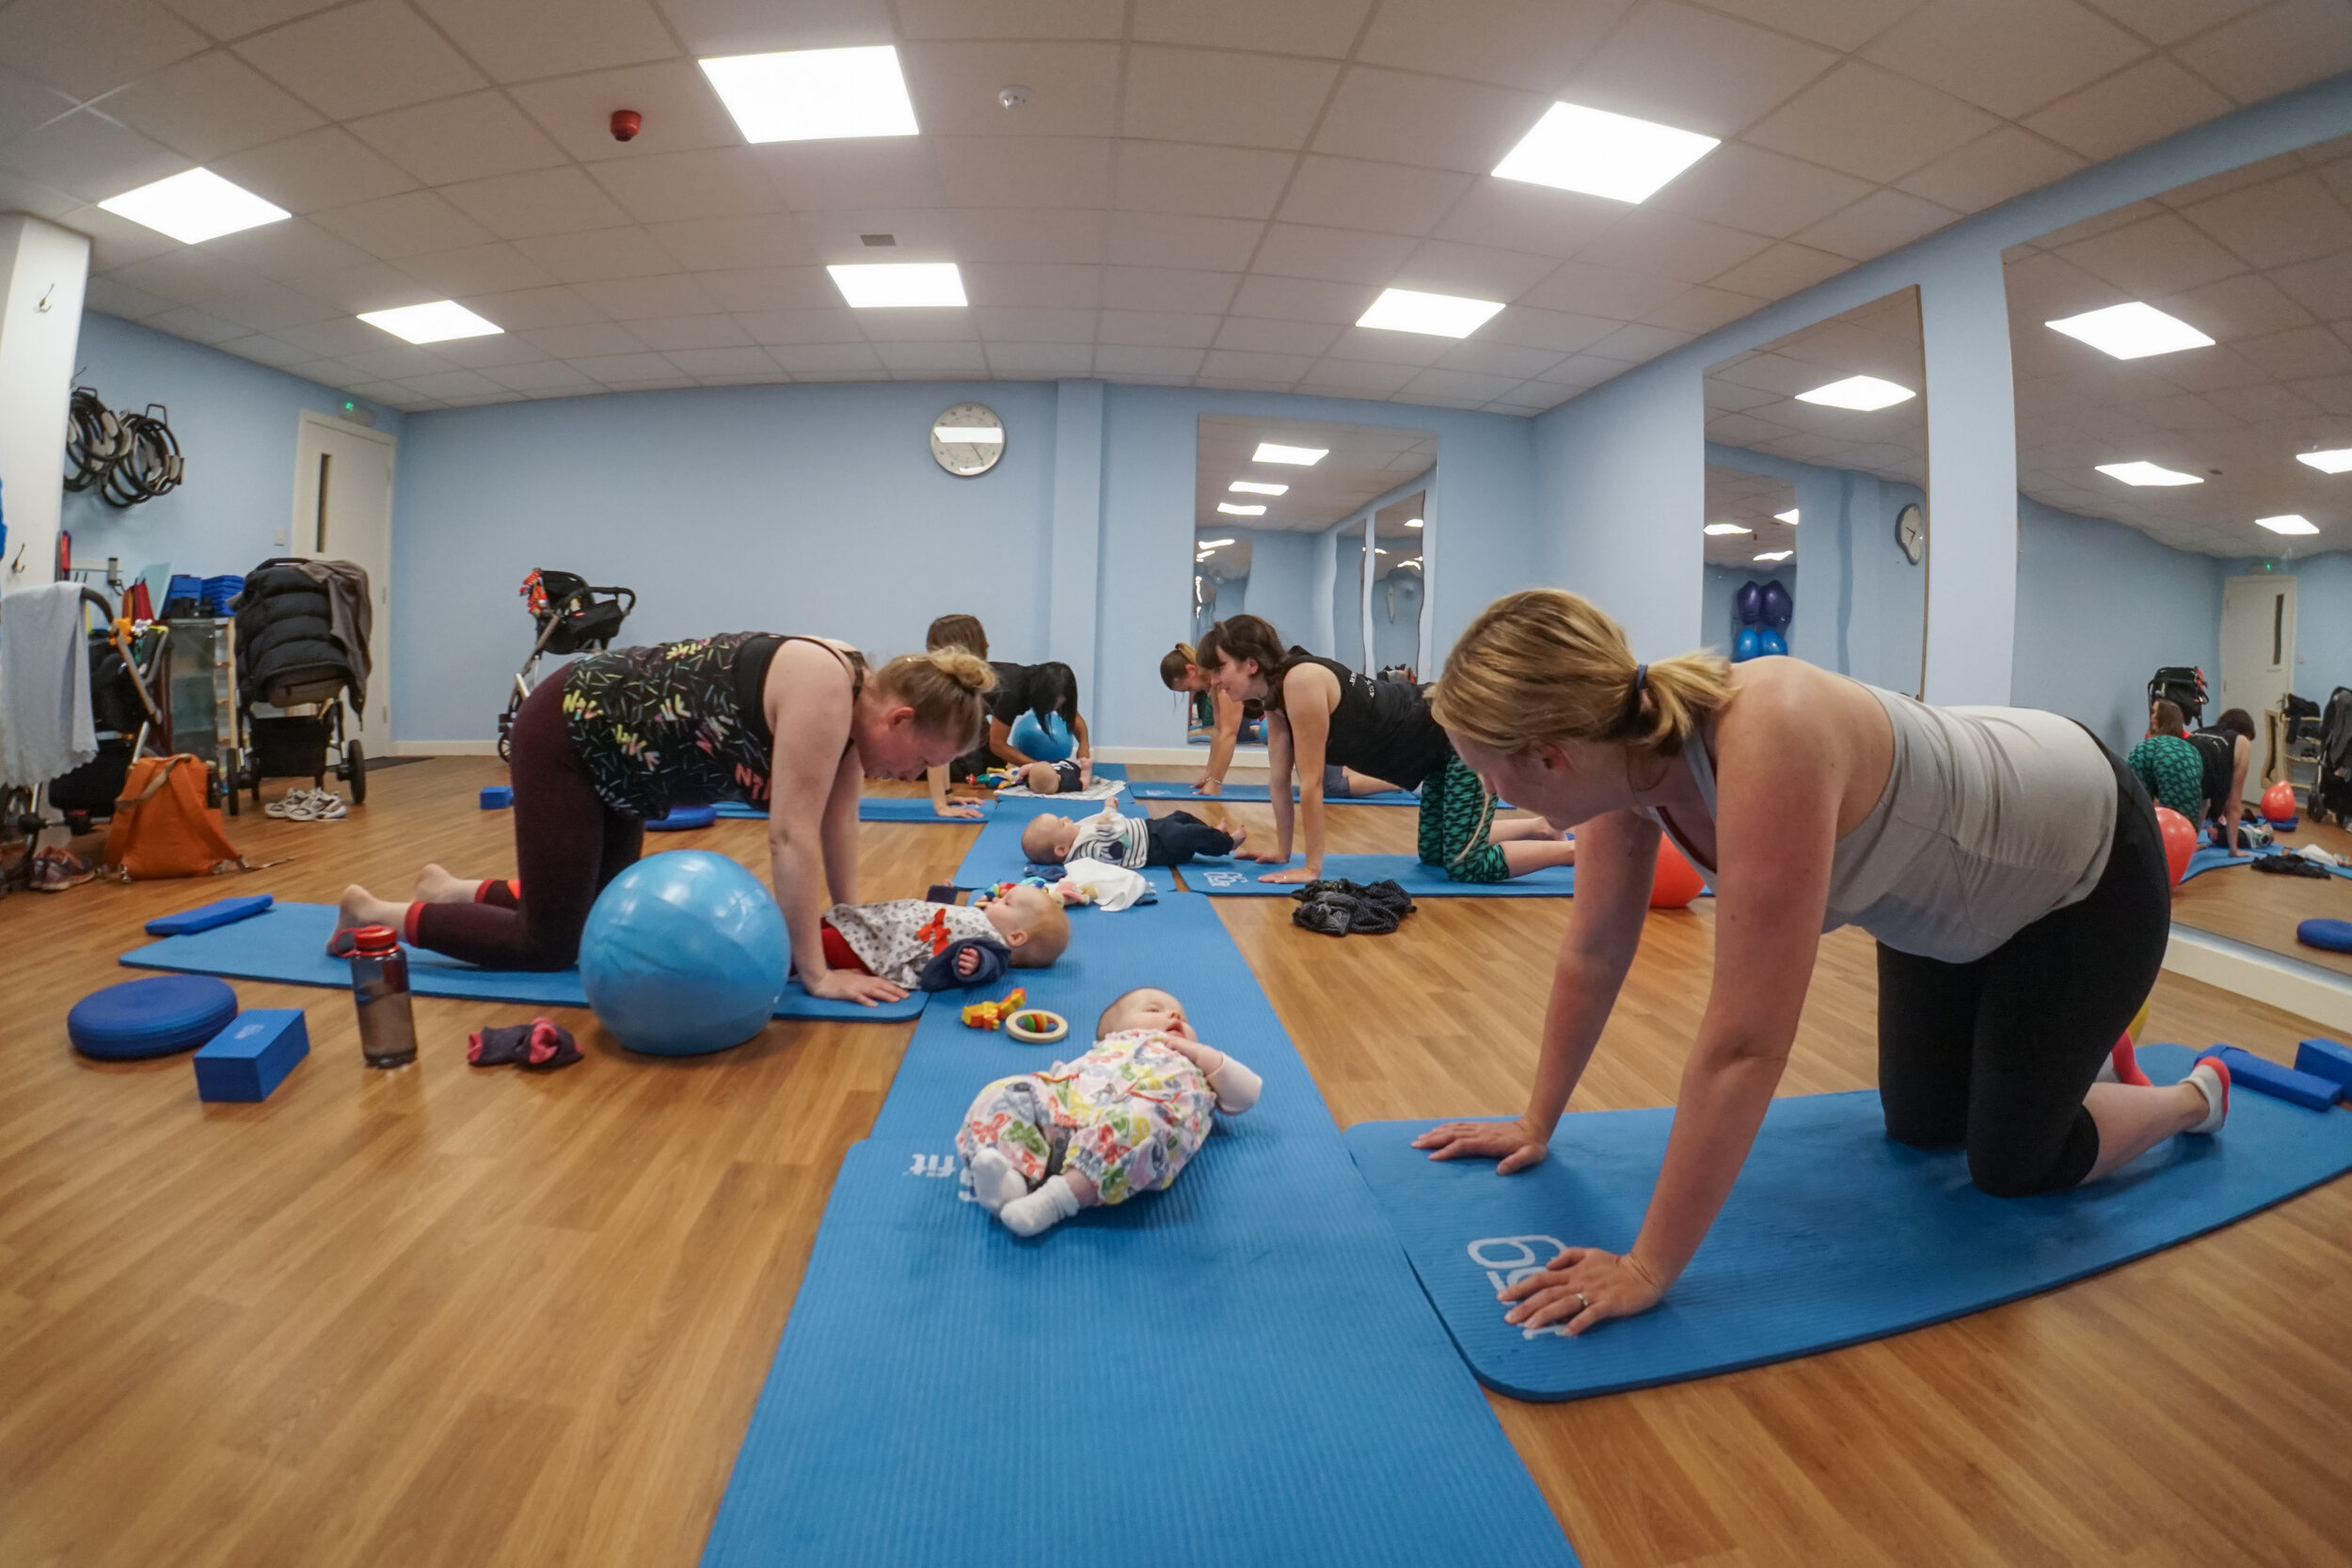
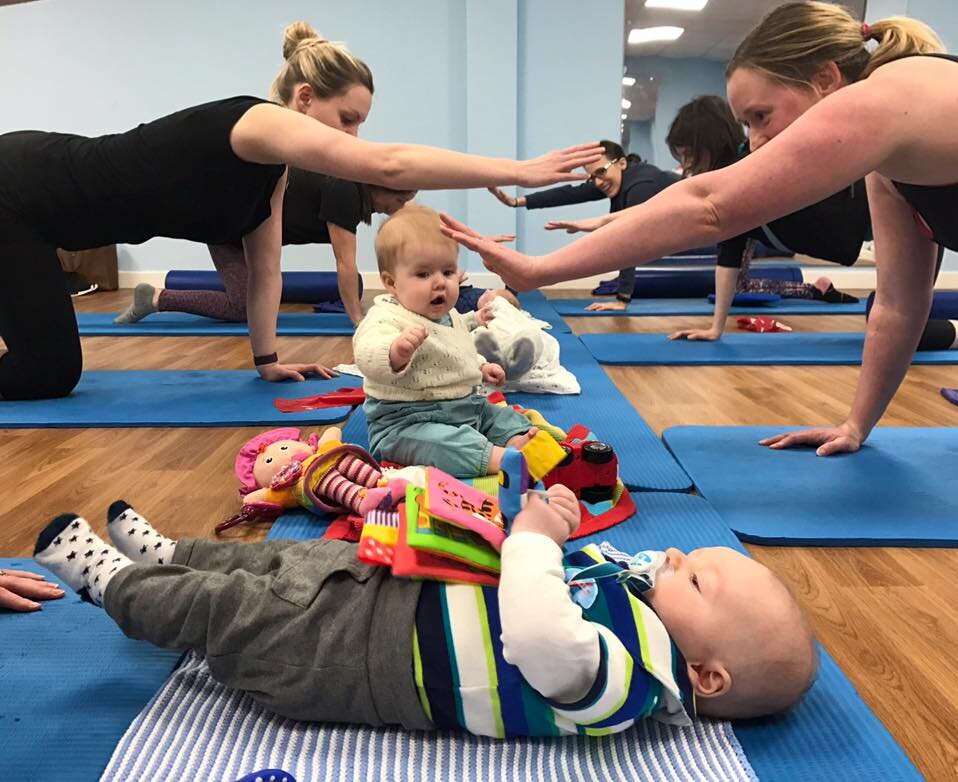
This is our Postnatal Pilates class which you can begin from 6 weeks postpartum if you had a straightforward vaginal delivery or 8 weeks after a C-section or assisted vaginal delivery (with any complications)
The class is designed to help heal and strengthen muscles affected after pregnancy and delivery such as your pelvic floor and abdominals.
We are very excited to announce that we are starting our very popular Crybaby Postnatal Pilates classes again in our Pilates studio within our Northside clinic in Borron Street. This is our physiotherapy-led rehabilitation class for new mums.
Due to the current Covid guidelines and to maintain social-distancing protocols, we are having smaller sized classes with a maximum of 6 participants only.
To join this class, you must be a minimum of 6 weeks postpartum if you had a straightforward vaginal delivery/8 weeks after a C-section or assisted vaginal delivery with any other complications (which can be discussed at your initial postnatal physiotherapy appointment).
NEW CLASS STARTING!
Mondays at 12noon
Duration: 1 hour
The next block will begin on MONDAY 30TH NOVEMBER 2020
Please get in touch below if you would like to sign up. Spaces are limited!
HOW DO I GET STARTED?
If you are starting our classes for the first time since having your baby, you will be required to have a 1:1 Postnatal Physiotherapy Appointment with one of our physiotherapists and you must be a minimum of 6 weeks postpartum for this to take place. This is a pre-screening appointment where you will also be able to discuss your pregnancy, labour and set some goals you’d like to achieve after having your baby. The physiotherapist will assess your pelvic floor and abdominal function and go over some basic, fundamental exercises in preparation to starting the classes. This appointment will take up to 45 minutes.
HOW MUCH DOES IT COST?
Physiotherapy Postnatal Appointment: £49 (you must be a minimum of 6 weeks postpartum)
6-week block: £75
CORONAVIRUS (COVID-19) SAFETY PROCEDURES
The class size will be smaller than usual to allow adequate social distancing (maximum of 6 participants).
Please bring your own mat to the class as well as a mat (and toys) for your baby to lay next to you or they may remain in their carseat next to you. Buggies will have to be left in our reception area outside the studio to allow for more space.
Pilates equipment such as circles, balls, bands, weights etc. will be provided for the class with strict cleaning measures in place before and after use.
A face-mask/covering is required to enter and leave the building and Pilates studio. Once you are allocated your floor space in the studio, you may remove your mask for the duration of the class if you wish.
Hand sanitising gel is provided for entering and leaving the building.
Unfortunately, the EDA Gym lounge area is closed for use however the Coorie Cafe is located in the 100 Borron Street Business Park above the gym which has delicious food, good coffee and outdoor seating. They have also very kindly offered to reserve a space for you all to have a chat and lunch after the class!
You are not your MRI: A Rehab Story.
Fiona Callan is a CrossFitter and Ultra-marathoner who injured her back in 2017. She had an MRI which showed an “L5/S1 disc bulge with nerve root irritation”. In this interview we discussed how she chose to avoid surgery and returned to the things she loved doing best.
Written by Mariam Kilpatrick, Physiotherapist and Clinical Pilates Lead at Physio Effect
Fiona Callan is a CrossFitter and Ultra-marathoner who injured her back in 2017. She had an MRI which showed an “L5/S1 disc bulge with nerve root irritation”. In this interview we discussed how she chose to avoid surgery and returned to the things she loved doing best.
Hi Fiona, thank you for taking the time to share your experience with us. Before we begin, tell us a bit about yourself…
I work in the NHS, primarily an office based job. Preceding my injury I was also studying for an MSc so basically spent all day and night sitting at a desk.
I started running in 2008, mainly 5k and 10k distance on roads but I wasn’t very good and didn’t enjoy it so moved to trail and hill running instead when I started gradually to increase my distance. I met some really cool people to run with as well. In 2012, I was talked into a trip to Nepal by a friend but it wasn’t until around 4 weeks to go that I found out he had signed me up to an ultra marathon. I didn’t even know what that was! It was sheer determination that got me through that and I really caught the ultra marathon bug.
In 2014 I started CrossFit as I thought some strength and conditioning type training would help with my running and I had no idea what I was doing in a conventional gym. The coaching and set workout approach has really worked for me and made me use muscles I didn’t know I had.
So the key question… how did you injure your back?
To be honest I’ve always had a bit of a lower back niggle, probably postural, but thought it would just go away. It was definitely something I started to feel more when I started CrossFit as I really had to use my back and core more than I had been doing running. Slowly I noticed it had started to affect my running, I had pain in my right buttock that shot down my leg now and again and my leg generally felt heavy. If I left it a few days it would go away but it meant I couldn’t really run or CrossFit as much as I wanted to.
It started affecting my job as I couldn’t sit comfortably for any period of time. I was travelling by train to Edinburgh at least twice a week which became difficult. On one journey I had to get off the train and go back to Glasgow as I couldn’t face sitting for an hour.
Then during a workout involving a barbell I cried so much I had to admit that something wasn’t right.
My initial symptoms were primarily in my lower back, there was a build up of pressure around my stomach and back even when I bent over the sink to wash my face. I tried to keep active but really scaled back on what I was doing. I kept up my hill walking as this is an activity I love doing with my nephew – I used poles and made Ewan carry my bag as he’s the young one! I tried running but could only manage 1k before I felt my back stiffen.
One Saturday I went walking with Dad and Ewan in the Lake District. It was an amazing day. The hill wasn’t too hard; we took our time and enjoyed it. It was the shooting pain in my right leg that woke me up early on the Sunday morning. I tried to stand up but my leg just wouldn’t work. I limped to the bathroom hanging onto the wall and at that point I knew there was something seriously wrong. It sounds dramatic but I genuinely felt paralysed down that whole side of my lower body, first thoughts were ‘I’ll never run again!’ and panicked. My boyfriend called NHS24 and a nurse managed to calm me down and suggested I took paracetamol with ibuprofen and try find a comfortable position until a doctor could get to me. A few hours and one injection later the pain had dulled. He said it was my sciatic nerve; I should try to relax and spend less time sitting down!
What treatment did you seek initially?
I got an appointment with Jonny who did some needling on my lower back/ glutes and gave me some exercises to do. I am the most impatient person and after a week of exercises I didn’t feel any different so I saw another physio (sorry!) who basically told me the same thing and gave me the same exercises. I really was in denial about how serious it was. I spoke to coaches in the gym, chatted to other runners and did a lot of Googling but all the answers were the same.
It was the mental part I actually found the toughest to deal with. I have made so many friends through running and CrossFit and my social media is full of it too so I was always seeing and hearing about all these amazing runs and PBs. I just felt stuck and disconnected. I saw my GP as I really felt like I was struggling to cope. People were always asking how I am and telling me I should ‘do this and do that’ and eventually I just got fed up talking about it. My GP didn’t really help me; she referred me to her physio friend but I didn’t go.
At the same time, Jonny had referred me to see Mariam for Clinical Pilates and it was during my consultation that she suggested some short term medication for my nerve problem in my right leg. I went to another GP for this and as well as giving me the medication, he was really keen to get me back running and to the gym so he referred me for an MRI.
What happened after your MRI?
I was really lucky in that I got an MRI pretty quickly. A few weeks after the scan. I received a letter with a hospital appointment but with no other information. Frustrating and worrying. I thought well there must be something not quite right and because of my problem with patience, I called the GP and asked him to give me a brief overview of the scan. He said he could see a disc bulge and I should continue doing my physio exercises until my appointment (with the consultant). I had just started with the Clinical Pilates class so I let Mariam know the issue and she tailored exercises for me until I found out more about the problem.
How did you feel after speaking to the neurosurgeon?
I remember getting a phone call from a surgeon in the spinal unit and it made me feel sick. I actually don’t remember what he said to me as the idea of back surgery just terrified me. I wasn’t exactly in crippling pain so the idea of surgery just felt a bit extreme to me. This was something I definitely wanted to avoid. I just really trusted my physios and they really believed I could get better without it. I didn’t feel that my pain was bad enough for surgery – for me this was the last resort.
At the appointment, the doctor went through my scan which I found fascinating. I actually felt a bit of weight come off my shoulders when I could physically see the issue. It had been hard to accept when I didn’t know for sure what the problem was but there it was clear in front of me. She then told me that they would do surgical intervention if I was getting sharp pains down the top of my leg. I told her I had that a few weeks before but it had been getting much better. We left it at that and I was told to get in touch if anything changed.
I had so many conversations with my boyfriend, my parents (and myself) and decided that it wasn’t the end of the world if I couldn’t run 50 miles or couldn’t deadlift 100kg as long as I could stay active. I would just scale back what I was doing.
You've spent the best part of a year doing some serious rehab with Clinical Pilates. In your own words, what is it and how did it help you?
I had done a bit of Pilates before as I’d read and heard it was good for runners. It was one of those things I struggled to stick to because I never left the class feeling like I’d worked hard and my issue with patience didn’t help. When I told my boyfriend about it he signed me up for 6 weeks because he knew I’d have to go if he paid for it! I noticed a huge difference after these 6 weeks.
It is basically pilates but physio-led so your exercises are all tailored to whatever issue you may have so we’re all doing something different generally. It’s a small class but everyone is in the same boat and really friendly. Mariam checks in with you regularly during the class and pushes you when you’re ready but also changing exercises if something isn’t quite feeling good.
I expected my exercises to all be lower back focused as that’s where my injury was but actually they’ve been full body movements. As well as having a stronger back, I feel stronger and much improved posture. Mariam also spent some time working on my legs, particularly my right leg as the nerve had been affected and I had limited movement and very little strength.
Eventually you returned to CrossFit and trail-running. How long did that take from when you first injured yourself?
I was always doing a scaled back version of CrossFit and a bit of trail running while I was injured but I was mindful of undoing my hard work. It was important to me mentally that I kept in touch with coaches/ friends in the gym and my runner friends.
I accepted my injury in May 2017 and started Clinical Pilates in the October. In May 2018 I was a more confident runner so decided to train for a race following a plan, building up in distance and I finished the Mad Hatters Half Marathon and the Glentress Half Marathon with a PB and no back or leg pain. Not quite back at ultra marathon distance but I’m actually enjoying the shorter runs at the moment. In June 2018 I started back at CrossFit and noticed that I’m better at a lot of the movements as I actually use my back and core as I should. I’m always conscious of loading too much weight on bars and I know certain movements still aggravate my back but I know when to stop and I just need to gradually build my strength back up. I was asked if I’d like to be part of a team from the gym for a CrossFit competition, I said yes why not I can try and we finished in 3rd place with no back pain!
Most people seek the "quick-fix" or miracle cure. What advice would you give them?
Your back is such a major part of your body so decisions on surgery should never be made lightly. Unless a professional is telling you there is no other option, I would encourage people to commit to the exercises and rehab, spend less time being sedentary and stay active by doing anything you find fun.
Working through this injury has taught me so much about my body and my lifestyle as well as making me a better runner and CrossFitter. This is all coming from the most impatient person!
SEEKING GUIDANCE? WE CAN HELP
Our experienced team at Physio Effect Glasgow are specialists in back pain and have helped 1000s of people recover and get back their quality of life. We talk the talk and walk the walk and will combine exercise based rehab such as Clinical Pilates with highly skilled hands on therapies to ensure you get the best possible treatment.
Most importantly we will listen and work with you in partnership to identify your specific issues and formulate an agreed unique treatment plan. We will relieve your back pain and give you long term self management strategies to strengthen your back and reduce the chance of pain relapse.
Please contact us if you have questions about our physiotherapy and Clinical Pilates services. Book an appointment and get your journey to back pain recovery under way.
Having a baby during Coronavirus Lockdown!
Lockdown has made many things more challenging, none more so than giving birth. Here I spoke to one mum who had been attending our Antenatal Clinical Pilates classes up until the country shut down on the brink of a global pandemic.
Written by Mariam Kilpatrick, Physiotherapist and Clinical Pilates lead at Physio Effect
Lockdown has made many things more challenging, none more so than giving birth. Here I spoke to one mum who had been attending our Antenatal Clinical Pilates classes up until the country shut down on the brink of a global pandemic.
Hi Elisa, thanks for taking the time to share your experience with us about being pregnant and having a baby during lockdown. Can you firstly tell us a little bit about yourself and your family?
My name is Elisa and I come from a small village in the Italian Dolomites. I have been living in Scotland for the past 12 years since I came as an Erasmus student studying Environmental Engineering. I met my husband at the University of Glasgow. We now have a very fluffy dog named Leo and two beautiful children: a three year old girl called Joanna Sofia and a our son, Eric Antonio, who arrived this April. He is known amongst our friends and family as our "pandemic" baby!
When lockdown started I was 36 weeks pregnant.
Pregnant Elisa and daughter, Joanna (3)
At what stage of your pregnancy did you start our antenatal Pilates classes in our studio, how did you find it and what did you enjoy about it?
I started the antenatal classes when I was 20 weeks pregnant. I was playing squash twice a week before my pregnancy and I wanted to keep exercising. I felt having a desk job I really needed to keep moving, especially for my back as the months progressed. I had heard great things from friends about the antenatal classes at Physio Effect and when I joined I loved being given exercises by Raz specifically tailor-made for me and my stage of pregnancy. It was also fabulous to meet other mums to be and have a bit of time for myself (which is hard to get with a toddler, a husband and a dog!).
How did you find moving over to the virtual (Zoom) antenatal classes during lockdown?
Virtual Pilates Class
It was a good! Technology wise at work, I use videoconferencing a lot and during lockdown cameras got switched on much more, so it was easy enough. At first it took a bit of time to get organised: finding the right space so that my dog and toddler would not interfere, identify the right room to have physical space to do exercise but after that it was a great opportunity to be active from the comfort of your own home, without the need to travel or drive. I found Raz was able to keep an expert eye on us all the time and could correct me if necessary. I also thought I knew what I was doing having done a few classes at the studio already.
And you had a beautiful baby boy named Eric! What was your experience like having him during lockdown compared to your daughter Joanna?
I have to be honest, it was quite different and worrying at times compared to the first experience. However on reflection it has also been an invaluable family time that I have not had with Joanna. On the run up to the birth I started worrying about going to a hospital and the risk of contracting the virus, not having my husband there at all times and also what to do with our toddler, who would have needed someone to be with her if dad was to be with me in the birthing room. However when the day came, I laboured alone in the hospital and in a way it was better for Joanna not to see me distressed. At the hospital everyone was fantastic, trying to make me feel as supported as they could. I was alone for a few hours but I was really well looked after by nurses and midwives. My husband was with me in the birth room and after the birth I got sent home the day after so my stay in hospital was very quick. We had some truly family time, getting to know each other and in a way not stressing about visitors. It was only us and our new baby, which gave Joanna a chance to not get jealous of her wee brother but instead accept him as a new member, especially since, as she said, he was so tiny and cute!
Can you give us an insight with what life has been like during lockdown, having a newborn/toddler/dog/husband working from home?!
Definitely not the maternity leave I was expecting, meeting other mums in coffee shops and at baby groups. However I do believe it has been the best time we have ever had as a family, with no pressure to do anything a part from being together. Life moved at a much slower pace and the kids, the dog and I had lots of walks in the park, which has been great.
Elisa with daughter Joanna, Baby Eric and Leo the dog
How old was Eric when you had your postnatal physio appointment and how did you find doing it virtually?
Eric was 8 weeks old when I had my "virtual" assessment. I thought it worked very well. I did like the fact I carried out an assessment on myself, getting to understand under supervision how my body was responding to the birth of my second child.
What was your experience like doing the virtual Crybaby (postnatal) Pilates classes? Did you find it enjoyable and would you recommend it?
I really enjoyed again having the time for myself. Life does get busy now and cutting out a bit of time for yourself to feel good I believe is key. I really enjoined them and the progression to harder exercises. I also feel was fantastic having had the possibility to watch the recordings afterwards: I had Eric there with me during the classes and sometimes he needed attention so I could replay the class whenever I wanted, which was brilliant.
From Bump, Birth And Beyond…
Here at Physio Effect, we support mums to stay strong, fit and healthy throughout their pregnancy and into their motherhood journey. For more information on all our ante- and postnatal services, click below:
Back Pain - A Self Help Guide
Back pain is very common. It’s frustrating at best and debilitating at worst. This guide will help you develop strategies for long term change to get rid of back pain and stay pain free long term. No magic bullet or ‘Guru’ advice here, just sensible and actionable tips allowing you to take control and start your journey to a pain free back.
Written by Daniel Wray (BSc Hons Physio/ PG Dip Sports Physio)
Back Pain?
We’ve all been there…..
Why does my back hurt?
Back pain is common, if you’re reading this i’m sure you have suffered at least one episode of back pain in your lifetime and in all likelihood more than that. It’s frustrating and restricting and can have a huge negative impact on your quality of life.
There are many reasons for back pain and unfortunately it’s rarely a quick fix. The most common form of back pain is often referred to as mechanical pain which is an umbrella term describing dysfunction in the soft tissues and joints preventing or impeding normal function. This may be stiffness, weakness, muscle shortening, joint wear and tear or any combination of these plus other factors.
In the absence of acute trauma back pain rarely appears suddenly or overnight and for most it’s a gradual and cumulative process related to lifestyle. Our modern lifestyles are simply too sedentary with too many hours spent in static positions meaning our joints and muscles don’t get the movement stimulus they need to stay flexible, hydrated and healthy.
For many people what began as a minor back ache or stiffness spirals steadily into chronic pain and disability and it can seem like you’re stuck in a repetitive cycle of injury and pain. We try to make changes but the daily grind means we continue to rack up hours of sedentary, static, and repetitive behavior trapping us in this negative cycle. The pain can force further lifestyle changes meaning less movement and exercise which reinforces the negative cycle and it can seem impossible to break free. Having a dodgy sore back slowly becomes the norm and we just accept it and carry on.
It’s not all bad news - here’s what you can do…
It all seems pretty grim and depressing right? Well the good news is that for the most part the majority of back pain, even when extremely painful and debilitating, is not due to serious pathology and it can get better. There are of course exceptions to this and we would always advise you seek advice from a qualified health professional if you have serious concerns about your back pain.
The bad news, if you look at it that way, is that the fix is rarely instant and usually requires significant effort on your part to make lifestyle changes and prioritise time every single day to look after your back. Of course if you Google hard enough (we’ve all done it) you will find some ‘Guru’ promising an overnight fix in exchange for a significant amount of your hard earned cash but truthfully the magic bullet doesn’t exist. Below we have listed some strategies you can implement to make a real difference.
6 self help strategies to help manage back pain:
1- Keep moving. Complete rest is not going to help and generally increases stiffness, pain and fear avoidance behaviors. Of course we must adapt our movement depending on the level of pain and there may be a need to avoid certain postures, positions or movements for a short period of time which is fine. I don’t recall any scenario with a patient where we couldn’t find at least one simple movement they could do to keep some gentle activity in their back to promote healing and relaxation while building confidence that they are not going to stuck in pain forever. Experiment with different movements and stretches (see below video) gently and slowly and see what you can manage comfortably and that will give you a starting point which you can gradually add other movements to as your pain allows.
Lunge with arm and spine rotation
2- Establish routine & be proactive not reactive. You need to act consistently and with purpose. Don’t wait until your pain is crippling to decide you need to try some exercises to relieve it. Even if you’re feeling okay find a rhythm that allows structured gentle movement and exercise to be part of your daily routine ideally multiple times a day. Frequent exercise micro breaks to interrupt static postures will reduce the build up of pressure and stiffness and are more desirable than trying to undo hours of sedentary behaviour with a single bout of exercise. Think 2-3 minutes activity every hour rather than a 30 minute blast at the end of the day. Use a timer to remind you.
3- Accept responsibility & seek guidance. It is your body and your back and you need to find a way forward, nobody can do it for you. Don’t pass responsibility onto any therapist (no matter what some ‘Guru’ promises) and assume that by chucking money at it that will be enough to fix you. Do find help from someone you trust who has your best interests at heart and involves you in all aspects of any treatment or rehab plan. Passive treatments such as massage, acupuncture, and manipulation can be great for pain relief but long term are only as good as the agreed exercise plan and responsibility you take in changing your lifestyle. Be wary of any therapist promising to fix you but providing no education or prescription of exercises you can use to help yourself.
4- Exercise for fun. Find a form of exercise you genuinely enjoy and commit regularly to it. Don’t drag yourself to the gym if you hate every minute of it, exercise should be enjoyable and a way to relax your mind as well as your body. Try new things and see what you enjoy. Ultimately your long term compliance will wain if you pursue something because you feel you have to rather than because you really want to.
Back Strengthening - Extensions on the GHD machine
5- Manage stress. One of the biggest silent assassins to any life goal is high stress levels. You can have all the good intent in the world in changing lifestyle and exercising more but if you are under high levels of stress you can easily sabotage any progress. I realise this is a broad blanket statement and stress management is a big topic beyond the scope of this article but at the very least be aware of how it contributes and can damage your progress, then start to look for solutions.
6- Be patient. You won’t change things overnight and chances are you will have many peaks and troughs in your recovery. This is normal. Try to be patient and remember a backward step with increasing pain symptoms is not the end of the world, try to continually adapt but keep taking positive actions even when you feel frustrated and annoyed. If you follow the steps above you should see over time the more severe episodes of back pain decrease while your ability to manage and recover from any acute episodes will improve.
Picking Exercises - Where to start?
It’s imperative to get moving ASAP with pretty much every kind of back pain or injury but the exact type of exercise or stretch you choose to get started with will differ depending on your level of pain, stiffness and disability. Below is a back mobility exercise flow covering a multitude of different exercises and positions. Try it but STOP if you feel any specific movement aggravates your pain. At most a slight awareness of stiffness or aching is permissible but do not force anything and take it slowly and gently.
You may decide that only a couple of these exercises work for you in your current situation and that is fine, identify what you can do and exclude what you can’t. That will be your start point and I would advise doing these exercises a minimum of 3 times per day but ideally more frequently at least initially. As you become more comfortable hopefully you can add more of the movements to your repertoire.
Long term most people will require a combination of strength and flexibility exercises but it is important that these are specific to your own individual requirements. The routine below is provided as a starting point but is not all encompassing so please seek advice on your own needs but do use these stretches to try and initiate positive change through movement. The exercises are broken down individually in the pictures below the video & you can download a PDF cheatsheet to keep for your reference at the end of this blog.
Back Mobility Flow Video:
Seeking Guidance? We Can Help
Our experienced team at Physio Effect Glasgow are specialists in back pain and have helped 1000s of people recover and get back their quality of life. We talk the talk and walk the walk and will combine exercise based rehab with highly skilled hands on therapies to ensure you get the best possible treatment.
Most importantly we will listen and work with you in partnership to identify your specific issues and formulate an agreed unique treatment plan. We will relieve your back pain and give you long term self management strategies to strengthen your back and reduce the chance of pain relapse.
Please contact us if you have questions or to book an appointment and get your journey to back pain recovery under way.
Exercise Breakdown:
Here is a breakdown of each of the exercises included in the back mobility flow video. These are available in a handy PDF download from the Subscription box at bottom of the page.
Exercise 1
Cat & Camel Stretch
Begin in all 4s position. Cat posture - Allow your spine to soften and hollow along its entire length. Tilt your tailbone gently to the ceiling. Relax you lower back, rib cage, shoulders and neck
Camel Posture - Arch your whole spine slowly and gently to the ceiling in one large ‘C’ shape. Tuck your tailbone between your legs
Hold each position for around 10 seconds. Transition from one to the other 6-8 times.
1- Cat Pose
2- Camel Pose
Exercise 2
Childs Pose to Cobra
Begin in all 4s position. Childs pose - Gently sit bottom back towards heels as far as is comfortable opening knees and hips softly and as required
Cobra Pose - Allow weight to come forward and lower hips gently to floor. Stay relaxed in hips and lower back and if required bend elbows slightly so that hips can rest in contact with floor.
Hold each position for around 10 seconds. Transition from one to the other 6-8 times
1- Childs Pose
2- Cobra Pose
Exercise 3
Childs Pose Side Bend
Begin in Childs Pose - Walk you hands around to one side into side bend aiming for at least a 45 degree angle, you should feel a good stretch down your side. Hold 20-30 seconds.
Walk hands around in same way to other side and again hold 20-30 seconds in side bend.
Repeat 2-3 times on each side
1- Childs Pose
2- Side Bend Right
3- Side Bend Left
Exercise 4
Lunge Hip Flexor Opener
Begin in Lunge position. Gently engage your lower tummy muscles and tuck your pelvis in. Aim to feel a stretch in the front of your hip and top of thigh
Gently engage your buttock muscles and lean slightly forward taking care not to arch your lower back
Hold the position 30-60 seconds. Repeat 1-2 times left and right
1- Lunge Hip Flexor Opener
2- Lunge Hip Flexor Opener - Forward Lean
Exercise 5 - Part 1
Lunge Hip Opener with Alternate Arm Rotations
From Lunge position reach hands forward and rest on floor beside front foot. Take outside arm and reach under and between legs ‘threading the needle’ holding for a few seconds
With the same arm rotate outward and upward toward ceiling trying to get arm to a straight vertical position, hold for a few seconds then return to ‘thread the needle’
Repeat this 10 times
1- Lunge Position Hands Forward on Floor
2- Lunge Position Hands Forward ‘Thread The Needle’
3- Lunge Position Hands Forward - Rotate arm vertically reaching for ceiling
Exercise 5 - Part 2
Lunge Hip Opener with Alternate Arm Rotations
After completing Part 1 of this series stay in the same position but extend out your back leg as far as is comfortable
Take inside arm now and rotate upward to the ceiling trying to achieve the straight arm vertical position, Hold for a few seconds
Bring the same arm down and with bent elbow drive your elbow towards the floor down the inside of your shin. Hold for a few seconds then rotate back to the vertical arm position
Repeat this 10 times
4- Lunge Position Extend Back Leg
5- Lunge Position Inside Arm Rotate to Ceiling
6- Lunge Position Inside Elbow Drive to Floor
Exercise 6
A-Frame Walk to Squat
From the all 4s position drive your hips into the air with straight knees and gentle lower your heels towards the floor into the A-Frame (it does not matter if you can’t fully extend knees or reach the floor with your heels). Hold for 10 seconds feeling stretch in back of legs
Keeping hands on floor slowly walk feet in towards hands and slowly sit down into a squat, hold for 10 seconds
Walk back to A-Frame position and hold for another 10 seconds
Repeat 4-6 times
1- A-Frame Position
2- A-Frame Walk to Squat
3- A-Frame Walk to Squat 2
4- Finish in Squat
Thank You
Thank you for taking the time to read this post, we sincerely hope that you find it useful and can use it to implement some positive changes and reduce your back pain. Take your time and work at your own level but be persistent and try to gradually improve on your own baseline.
Please download your own FREE PDF Cheatsheet to keep and to help with your practice and share this post with anyone who could benefit. If you have any questions or comments please just ask we would love to hear from you. Stay healthy and move well.
A Guide On Returning To Running After Pregnancy
Running after having a baby is the obvious choice for many new mums wanting to begin or return to exercise. There are however some important things to consider in order to safely return to running and any other high impact exercise after having your baby. Returning too soon can cause long term implications including pelvic floor dysfunction, pelvic girdle pain and other musculoskeletal issues. This guide outlines the impact pregnancy and birth has on your body and important healing time-frames you must be aware of before returning to running. You will also find 2 free Pilates strength videos to give you an idea of the kinds of exercise that will help prepare your postnatal body for the demands of running
Written by Mariam Kilpatrick - Physio, Clinical Pilates Instructor, Mum and Ultra-marathon runner
One of the most common questions I hear from new mums after giving birth is, “When can I start running?” A fair question, as it’s one of the simplest forms of exercise to fit in around your baby, no gym membership required and a good way to burn off that extra baby weight. We’ve all been there.
There are however some important things to consider in order to safely return to running and any other high impact exercise after having your baby. Returning too soon can cause long term implications causing pelvic floor dysfunction, pelvic girdle pain and other musculoskeletal issues. This usually happens because you haven’t adequately rehabilitated your body following the huge stresses placed upon it during pregnancy and childbirth. Giving birth (either vaginal or C-section) can be considered equal to a major sports injury which would require the same attention, specific rehab and a graded return to any sport. It is just as important to work on muscles affected by pregnancy and childbirth (such as the pelvic floor and abdominals) as it is to work on the muscles around your knee if you’ve had a knee injury/surgery.
My baby is 6 weeks old now so I’m good to go…right?!
Healing of the body after childbirth goes well beyond the traditional 6-week timescale that many health professionals go by.
Did you know…
The levator hiatus, the opening between the levator ani muscles (which forms part of your Pelvic Floor) stretches and widens significantly during pregnancy and childbirth. This can take between 4-6 months to recover (Stær-Jensen et al 2015)
After a C-section, the abdominals only regains 50% of its original strength by 6 weeks postpartum and 73%-93% of original strength by 6-7 months postpartum (Ceydeli et al 2005)
Up to 30% of first time mums will experience urinary incontinence (Milsom et al 2004)
Up to 56% of new mothers between 3-6 months postpartum demonstrate pelvic organ prolapse where one or more of the pelvic organs (bowel, bladder or uterus) descends downwards to the vaginal opening (Bø et al 2017). This can result in incontinence issues and the feeling of heaviness/dragging in the vagina.
You can’t go wrong with strong!
Your Pelvic Floor is a hugely important part of your body. It is made up of layers of muscle and connective tissue. These layers stretch like a hammock from the tailbone at the back, to the pubic bone in the front. They support your pelvic organs and control your bladder and bowel movements. The front passage (pee hole), the vagina and the back passage (poo hole) all pass through the pelvic floor muscles. Throughout your pregnancy, your pelvic floor has carried the weight of your baby, the placenta and a 50% increase in blood volume! As such, this will greatly affect its ability to do its job properly compared to pre-pregnancy function. It is therefore vital to work on these muscles after having a baby, regardless of the type of birth you had (whether vaginal or C-section).
In the latter stages of pregnancy, the connective tissue or fascia between your outermost abdominal wall (your six-pack muscles) can thin out/stretch to allow for a growing baby bump. After giving birth, you can be left with a gap between the two sides and sometimes it can look like you are still pregnant i.e. the dreaded “mum-tum”. This is called a Diastasis Recti or abdominal separation, a common condition that causes a lot of grief for many mums. However, like any muscle in the body, these can be addressed and worked on with specific corrective exercises targeting your deep abdominals.
When you are running, multiple times your body-weight in the form of ground reaction force is produced on impact with the ground. This has to be absorbed and controlled by the tendons, muscles and joints in the legs. Strengthening the muscles of the lower legs and core help prevent injury and increase the muscles’ load bearing capabilities.
Guidelines for postnatal exercise progression
Week 0-2: Walking, pelvic floor muscle strength and endurance exercises, basic abdominal exercises
Week 2-4: Introduce functional body weight exercises such as squats and lunges
Week 4-6: Introduce low impact cardio such as static bike, rowing machine or X-trainer
Week 6+: Progress to resistance training such as Pilates for pelvic floor/core and weights training
Week 12+: Graded/progressive return to running (e.g. Couch to 5K)
Some expert physiotherapists have developed a free guidance to help health and fitness professionals who work with postnatal runners which can be found here.
Postnatal Pilates
Pilates is a great form of rehabilitation to target the working relationships of your pelvic floor and core muscles (abdominals and diaphragm) especially in the first few months after having your baby. The benefits of Pilates include:
Strengthening your Pelvic Floor
Targeting your deep abdominal muscles to help heal Diastasis Recti (abdominal separation)
Addressing muscle imbalances that may be contributing to lower back pain or pelvic girdle pain
Targeting postural muscles of the back, neck and shoulder girdle
Postnatal Pilates Class at Physio Effect
Pilates for Runners
Try these free sample routines for strengthening your legs and gluts:
Pilates legs workout
Pilates Gluts Workout
We Want To Help You Get Your Body Back On Track
Physio Effect specialises in helping mums recover their health, fitness and confidence after having a baby. Our Cry-Baby Pilates classes where new mums attend with their babies has been a great success and very popular!
Want to read some REVIEWS about our classes from other mums? Click the links & read below: Yell.Com Reviews or Facebook Reviews
The cry baby Pilates classes led by Mariam were an absolute highlight of my maternity leave. They offered important rehab for all the changes to my body left by pregnancy and a c-section and the strengthening work got me back safely running sooner than I expected - yay! The classes were warm, friendly and supportive and my baby Helena loved meeting the other babies too (as well as getting cheeky cuddles from Mariam). Couldn’t recommend more highly to new mums!
Katherine C via Facebook reviews
I’ve recently completed 2 blocks of Crybaby Pilates with Mariam & would highly recommend it for postnatal recovery. Mariam was great at making you feel relaxed, gradually building up the intensity of the exercises over the weeks so it wasn’t too daunting in the beginning. I liked how the exercises also allowed you to interact with your baby. The classes are small enough that you get the opportunity to get to know the other mums & babies, which helps you feel completely at ease in the class too. I now feel back to my pre-baby self & body, ready to start running & hitting the gym! Thank you!
Keri. L.K via Facebook reviews
Seek Help & Advice Sooner Rather Than Later
As with everything in life, there isn’t a one size fits all when it comes to returning to running after pregnancy. Factors that need to be considered include:
Type of birth you had; was it a straightforward vaginal birth, a vaginal birth with complications such as forceps delivery/episiotomy/tears, a C-section? The timescales may be different for each case!
Previous level of exercise (e.g. were you a runner before pregnancy?)
Experiencing symptoms of lower back pain, pelvic or pubic pain, leakage and/or feeling of vaginal heaviness (which could be a sign of pelvic organ prolapse), coccyx/tailbone pain (which could be a sign of a hypertonic or tight pelvic floor)
Are you currently breast-feeding? Pregnancy hormones stay in the body for about three months postpartum, continuing to loosen joints, muscles, tendons and ligaments as they did in preparation for delivery. For those breast-feeding, hormones can still have a loosening effect even months after you stop.
Lifestyle changes such as sleep deprivation, lack of routine, demands of breastfeeding and altered eating habits which can cause energy deficiency and fatigue.
If you are unsure, it is advisable to seek help from a specialist trained physiotherapist or a pelvic health practitioner.
If you would like to chat to one of our physiotherapists you can use the link below to book an appointment. Or if you prefer send us a message with any questions you have and we will get back to you as soon as we can.
Thank You
Thanks for taking the time to read this guide, we hope you find it useful. Please share with anyone else who might benefit and if you have any questions comment and let us know. Please subscribe for regular updates and advice on everything health and fitness related - Zero spam promise.
Postnatal Pilates at Physio Effect
Running Technique - The key to your untapped running potential
Learn how Physio Effect can help assess your running technique and how this could be the key ingredient that’s been missing in your quest to be a faster and better runner while also reducing your injury risk. Slow motion video analysis combined with advanced running metrics analysis, achieved via wearable Runscribe Pods, gives a complete picture of your running health. Based on this we can advise on simple techniques to improve and optimise your running technique making you faster, stronger and less prone to injury
Repetition can facilitate skill and and your running skill will greatly impact your running economy and risk of injury!
Written by Jonathan Kilpatrick: Sports Physio at Physio Effect, Running Analysis Specialist and fully fledged Ultra-runner
These are massive differences, so why are we all not working on our running technique?
Simply put, most of us wouldn’t know where to start or how to even identify if we have any technique issues. Running is such a complex interaction of whole body movement and coordination that it’d be impossible to be self aware enough to accurately identify you own running technique issues while you’re actually running. Most runners also don’t have a running coach, and the vast majority that do use a coach are not in an elite sporting set up and will likely only use a coach remotely for guidance with a running plan.
Often when we get injured as runners or aren’t performing as well as we’d like, we are much more inclined to look for reasons that are much easier for us to do something about than addressing the white elephant in the room - our own running skill and technique. I feel this is part of the reason why as a sports physio I will often see the same runners multiple times for recurrences of the same injuries, or injuries on the same side of body that can be related to the original issue. During treatment we can manipulate a number of things that are causing excessive overload such as footwear, running mileage or strength deficits. Improvements from this approach may however be short lived if a large part of the reason for the overload in the first place was due to an individuals running style or technique.
What do runners think causes injury?
When runners were asked in a study to identify the reasons the considered to be causing their injuries, they suggest the following:
Not Stretching
Not Warming Up
Wearing the Wrong Shoes
Excess Training
Lack of Strength
With the exception of static stretching there could be an argument that each of these could contribute to running related injury. As previously mentioned above, it must however be appreciated that runners with technique training benefited by a 62% decrease in injury rates over a year following a short period of running training. This could indicate running technique to be one, if not the biggest causes of running related injury. The more uninterrupted running training you can manage in any given year will also give you more opportunity to improve your running efficiency and reach your maximum potential in any running plan that you’re following.
As also previously stated above, running technique can influence your running performance massively to the tune of a 31% improvement. Without addressing your running technique you could unknowingly be wasting a lot of your energy and effort in a number of different ways such as creating excessive upward motion rather than forward motion, to give just one example. Technique issues could be the difference between a 25 minute 5k time and a sub 20 minute one based on such improvements. In reality this effect may become less with faster and more experienced runners but proportionately they will seem just as important once those runners can break through their own glass ceiling of performance.
Here is a 2 part podcast where Jonny Kilpatrick from Physio Effect chatted to Kate from the Glasgow Triathlon club about injuries and performance in endurance sports. This chat expands on the need to address technique issues in sports such as running as well as discusses numerous other running related injuries and how to prevent and treat them.
How and where can I get my running technique assessed?
It is possible to do a running analysis on yourself using slow motion video and a combination of running dynamics such as cadence (steps per minute) and relating these to you injury histories . This is however quite difficult and would require additional equipment such as a camera that will film in slow motion, analysis software, a tripod, a treadmill and equipment to capture your running dynamics such as a high end running watch that may need to combined with running pods to assess efficiency. I would advise using trained professionals such as the sports physiotherapists we have here at Physio Effect who have this equipment and the experience of working with runners regularly.
What does a running assessment involve?
This depends on your own individual needs but what we can provide includes:
Visual Treadmill Analysis:
This is done using slow motion camera footage taken from all 4 sides that is then assessed using slow motion analysis software where we can identify problems and make these clear using editing tools. Comparison can be made of multiple videos taken over time or even in the same session while working through technique cues. You will be provided with an analysis video showing the findings and effect of any cues we have used to improve your form.
Side View Before and After
Rear View Before and After
Running dynamics:
This is assessed using state of the art technology in the form of RunScribe pods attached to each foot while you run. These will provide us with every important running metric including cadence, impact forces, foot contact patterns and efficiency measures such as flight time and contact time. We can relate these measures to what we’re seeing in the video analysis as well as previous injuries and running performance issues. Having this data taken from each foot is extremely important as it will identify one sided problems which are nearly always found in running related injuries. This can also tell us how well suited your shoe is to your running style and also give us comparable figures to chart your progress.
A Sports Physiotherapy Assessment to identify previous and current issues that relate to what is identified on our Running Analysis is also performed. This may involve additional advice, treatment and exercises to enable sustainable improvement in your running and reduction in your injury rates.
Interested to find out more or book in for an assessment?
Our running analysis service is available now. Read more at our Glasgow Running Clinic Site. If you are interested in finding out more about this or booking in for the assessment please contact Jonny at the clinic via the following link:
Seek Help & Advice Sooner Rather Than Later
If you find yourself injured and unable to run it’s advisable to get your injury seen to and diagnosed as quickly as possible. Getting the right advice early with an injury will significantly decrease the amount of time you will have to take off from your running and it will likely decrease your levels of pain and the stress you experience associated with it.
At Physio Effect our therapists are experienced and highly skilled in advising and managing running related injuries and we will be able to help you reach a diagnosis and an understanding of your injury, including why this likely happened in the first place. We will be able to offer you advice on alternative forms of cardiovascular exercise as well as specific strength training to address your issue so you don’t feel like training has stagnated or regressed. All treatment plans can be time graded and clear to you, with milestones to achieve that not only address your current levels of pain associated with the injury but also the issues that may have contributed to you developing the injury in the first place. We will get you back running pain free ASAP!
Thank You
Thank you for taking the time to read this post, we are confident our running service can really make a huge difference and look forward to helping all runners smash their goals.
Please share this post with anyone who could benefit. If you have any questions or comments please just ask we would love to hear from you. Stay healthy and run well.
Jonny Kilpatrick - Ultra-Runner
Animal flows - What, How and Why?
Animal flows are a great addition to any exercise plan, warm up routine or injury prevention plan. Learning to move like a monkey, frog, or bear helps to build full body strength, mobility and motor control which in turn will make you a more awesome human and less prone to injury. This blog with video tutorials will explain what these movements are, how to utilise them and why you should should be doing them
What are Animal Flows?
Animal flows essentially refer to movement and exercise patterns where we imitate different types of animals such as bears, monkeys, frogs or lizards. Moving in these patterns can be very challenging, especially for the stiff & inflexible among us, but can also be really fun & provide significant benefits.
Deep Squat
Practicing animal flows can help improve strength, flexibility, mobility and overall motor control which in turn will help to make you a better functioning human and less at risk of injury. These movements can really challenge us in unconventional ways demanding our joints and muscles learn to control movement in patterns and ranges we would rarely otherwise practice. They can provide a great way to warm the body up in preparation for other forms of exercise or can even act as a stand alone training session. Once you have tried some of these movements for a few minutes you will understand why!
Where do I start?
As with all areas of training and exercise when attempting something new or different our advice is always start slow and work safely within your own levels of capability. Never push through pain or injury and if in doubt about whether this is appropriate for you please seek advice from a qualified professional.
Very few people will be able to perform controlled animal flow movements perfectly or even well at the beginning. When incorporating these kinds of exercises with my patients it’s essential we first establish their base level where they feel safe to practice but also feel that it is challenging. I would advise starting with getting comfortable in the static positions required as the foundation for the movement. In this post we will look at 2 positions - Deep Squat & A-Frame (Downward dog). These are the foundation starting postures for progression onto the animal movements monkey, frog and bear.
Deep Squat
The squat is a great foundation exercise for strength and mobility in the lower limbs and yet for so many people it is a real area of weakness and frustration. A lot of us slowly lose our ability to sit into a deep squat mainly through neglect and lack of practice combined with our static and sedentary western lifestyles. We become weak, stiff and tight and can no longer control the range of motion required to allow a deep squat. We rarely challenge ourselves to sit into a deep squat position let alone spend time exploring and improving on our range and control in this position. So first things first lets get a measure of your baseline squat function - check out this video and see how you get on.
It may take weeks or months of work to improve your squat mobility and that’s okay. For a more detailed look at improving your hip and back mobility please click the links to see our previous blog posts on these areas. You can use these routines alongside your deep squat holds to improve your squat function.
If you feel up to increasing the mobility challenge of your deep squat lets check out this next video requiring some active hip rotation movements at the bottom of the squat - a great way to improve your range of motion and strength.
I would recommend slowly building these exercises into your routines, aim for 20-30 second rounds initially performed for 3-4 sets thereby accumulating 2-3 minutes in the deep squat. Try this at least 2-3 times per week. Long term the idea is to become comfortable spending longer periods in the deep squat and find it relatively easy to perform movements from this position. Try to build up to 5 minutes total in the deep squat per day of practice over several weeks.
Monkey & Frog Mobility
These animal flow progressions are suitable once you have a comfortable squat allowing you to sit at least to parallel depth without the need of hand support. Don’t worry if you’re not there yet, keep practicing the squat, back and hip mobility exercises and you can move on to these once you feel confident.
These exercises are difficult and physically demanding but the pay off of regular practice will be improved squat mobility, increased lower limb strength and motor control with an associated reduced injury risk in these areas. Give each of these a try and see how you get on.
Add these to your regular practice at least 2-3 times per week initially
Begin with 20-30 second rounds aiming to build up to 1-2 minutes or longer
Look to accumulate time in the positions - Try a 5 minute timer & while stopping for breaks when required, try to spend as much time actively moving in these flows
Ideally we want to develop a relaxed freedom of movement where you can drop comfortably into a deep squat and easily move through monkey and frog patterns. You can mix and match the movements to create variation in the flow and challenge your strength and mobility through mixed planes of movement. Don’t expect overnight success but as with all training with hard work and consistent practice you should be able to improve allowing you to move better and feel better.
A-Frame (Downward Dog)
This stretch position is probably best known in yoga circles, most people will of at least heard of the Downward Dog. Another term we will use is A-Frame which refers literally to the fact we are trying to get our body into a position whereby it looks the a capital letter ‘A’. This position is another staple in many exercise forms and for good reason, it challenges the flexibility and strength of our body in many areas. The shoulders, back, hips, knees and ankle joints will be tested and for many people deficiencies in strength and range of movement will limit the quality and range available in attempting this position.
For many of us just attempting this posture will be tough and tiring. A lot of you will be feeling significant resistance in the backs of the legs (hamstrings and calves) and through the shoulders and upper back. Build slowly and increase the time spent in the stretch as you feel able, again looking to improve on your own current baseline level. Before attempting bear movements from this position we can work on a couple of simple variations which are shown in the video - slow marching on the spot and active shoulder extension pushing the head and shoulders through. Let’s give it a try and see how you get on.
Bear Movement Flows
The bear crawl can be utilised as a full body exercise to develop strength, flexibility and control in many areas. It is challenging and will take time to develop the skill and movement control required to perform it well but as with all these exercises your only goal should be to steadily improve on your own current baseline level. Once you have developed some comfort and control with the A-Frame stretch the first Bear Crawl movement we will try is with straight arms and straight legs as demonstrated in the video below. The key here is control so take your time and just do what you can, even if it’s only a few seconds initially, you can build on that. Let’s give it a go.
In the next video we demonstrate a number of bear crawl variations to give you some more options to explore. Depending on your own levels of mobility and strength you may find some options easier and others harder but it is great to play around and explore a variety of positions to find any weaknesses or restrictions and ensure a variety of stimulus is achieved. The key is to safely work on your own issues and don’t be afraid to explore positions that are challenging as long as you do so gradually.
Add these to your regular practice at least 2-3 times per week initially
Try:
Straight arms & legs
Bent arms, straight legs
Bent arms, bent legs
Straight arms, bent legs
Begin with 20-30 second rounds aiming to build up to 1-2 minutes or longer
Move forwards, backwards and sideways
Look to accumulate time in the positions - Try a 5 minute timer & while stopping for breaks when required, try to spend as much time actively moving in these flows
Summary
In summary adding animal flow movement practice into your regular exercise routines or habits can have significant physical benefits by helping to improve full body strength, mobility and motor control. It is a challenging but fun way to mix up your normal exercise routines and pushes your body to explore a variety of joint postures and positions that are not routinely trained or strengthened. This variety of stimulus will help to ensure strong and healthy muscle and joint function. Enjoy exploring and playing with these movements and ultimately you can learn to move better & feel better.
Thank You
Thanks for taking the time to read this guide, we hope you find it useful. Please share with anyone who might benefit and if you have any questions comment and let us know. Please subscribe to our mailing list to receive more interesting and useful blogs. Good luck and remember to move better & feel better
Restore your core after pregnancy: A safe return to exercise
Returning to exercise after having a baby can be daunting & difficult. It is possible to cause yourself more harm than good if you return too soon or to the wrong type of exercise. This blog looks at the evidence and guidelines for returning safely to post-natal exercise and the specific benefits of Post-natal Pilates in restoring your Pelvic Floor muscle function, reducing Diastasis Recti and rebuilding your core strength and function. A FREE 30 minute Post-natal Pilates class is linked for you to try.
Written by Mariam Kilpatrick - Physio, Clinical Pilates Instructor, Ultra-marathon runner & Awesome mum
After 9 long months, finally, your cute little bundle of joy has arrived! Goodbye to feeling like a bloated whale and goodbye heartburn. Say hello to sleeping on your tummy and to eating stinky cheese & sushi again. You’re keen to get back to exercise, get that endorphin rush and reclaim your pre-pregnancy body! You’ve had your 6 week check-up and your doctor has given you the all clear to exercise. Yay! BUT…yes there is a but. You can sometimes do more harm than good if you push your body beyond what it is ready for. Here we review the guidelines for returning safely to postnatal exercise and look at the specific benefits of Postnatal Pilates which include improved Pelvic Floor function and reduced Diastasis Recti (abdominal separation). Read on for more….
As the saying goes, you shouldn’t build a house on a weak foundation.
For many women, it has become a common thing to accept “a little bit of wee escaping” with a sneeze or running for the bus, just because you’ve had a baby. But no matter what age your baby is, either 6 weeks or 6 years, this should not be the perceived norm. Some women may feel embarrassed to raise their concerns around continence and other intimate issues but this should never be the case. Please seek professional advice early, as with the right help and guidance, these issues can and should be addressed.
The Pelvic Floor Muscles
Your Pelvic Floor is a hugely important part of your body. It is made up of layers of muscle and connective tissue. These layers stretch like a hammock from the tailbone at the back, to the pubic bone in the front. They support your pelvic organs and control your bladder and bowel movements. The front passage (pee hole), the vagina and the back passage (poo hole) all pass through the pelvic floor muscles. Throughout your pregnancy, your pelvic floor has carried the weight of your baby, the placenta and a 50% increase in blood volume! As such, this will greatly affect its ability to do its job properly compared to pre-pregnancy function. It is therefore vital to work on these muscles after having a baby, regardless of the type of birth you had (whether vaginal or C-section).
Let’s practice how to correctly engage your pelvic floor…
Take a deep breath in, fill your lungs completely and allow your pelvic floor to relax.
As you breathe OUT, close your back passage as if you were holding in a fart, then pull upwards and inwards towards your front passage to close it, as if you were holding in a pee.
Visualise trying to "squish" your anus (poo hole) to your urethra (pee hole) towards your pubic bone.
Do this without clenching your butt cheeks, your jaw or tensing your neck and shoulders (tricky, huh?)
Let everything relax again as you breathe in.
Repeat x 10Now try and engage your pelvic floor as above in 10 x quick flicks on and off.
*Practice turning your pelvic floor on in both sitting and standing positions
**Practice turning your pelvic floor on when doing things at the same time like picking your baby up from his/her cot or picking a toy up from the floor.
Why do I still look pregnant months after giving birth?
In the latter stages of pregnancy, the connective tissue or fascia between your outermost abdominal wall (your six-pack muscles) can thin out/stretch to allow for a growing baby bump. After giving birth, you can be left with a gap between the two sides and sometimes it can look like you are still pregnant i.e. the dreaded “mum-tum”. This is called a Diastasis Recti or abdominal separation, a common condition that causes a lot of grief for many mums. However, like any muscle in the body, these can be addressed and worked on with specific corrective exercises - all hope is not lost! The key is to target the deep layer of abdominal muscles. This may mean avoiding certain traditional core stability exercises initially (e.g. sit ups and planks). Your deep abdominal muscles have functional connections to - guess what - the pelvic floor…so it’s a win-win situation all round!
Postnatal Pilates
Pilates is a great form of exercise to target the working relationships of your pelvic floor and core muscles (abdominals and diaphragm) especially in the first few months after having your baby. The benefits of Pilates include:
Strengthening your Pelvic Floor
Targeting your deep abdominal muscles to help heal Diastasis Recti
Addressing muscle imbalances that may be contributing to lower back pain or pelvic girdle pain
Targeting postural muscles of the back, neck and shoulder girdle
Postnatal Pilates Class at Physio Effect
Here is a short taster video of a postnatal Pilates workout:
We Want To Help You Get Your Body Back On Track
Physio Effect specialises in helping mums recover their health, fitness and confidence after having a baby. Our Cry-Baby Pilates classes where new mums attend with their babies has been a great success and very popular. We are working hard to bring this content to full digital online form so that all mums everywhere can enjoy and benefit from this safe, structured and fun specialist postnatal program. For advanced notice of when this course is available and for special early-bird promotional rates please register for your free sample class below and we will keep you informed.
Want to read some REVIEWS about our classes from other mums? Click the links & read below: Yell.Com Reviews or Facebook Reviews
The cry baby Pilates classes led by Mariam were an absolute highlight of my maternity leave. They offered important rehab for all the changes to my body left by pregnancy and a c-section and the strengthening work got me back safely running sooner than I expected - yay! The classes were warm, friendly and supportive and my baby Helena loved meeting the other babies too (as well as getting cheeky cuddles from Mariam). Couldn’t recommend more highly to new mums!
Katherine C via Facebook reviews
I’ve recently completed 2 blocks of Crybaby Pilates with Mariam & would highly recommend it for postnatal recovery. Mariam was great at making you feel relaxed, gradually building up the intensity of the exercises over the weeks so it wasn’t too daunting in the beginning. I liked how the exercises also allowed you to interact with your baby. The classes are small enough that you get the opportunity to get to know the other mums & babies, which helps you feel completely at ease in the class too. I now feel back to my pre-baby self & body, ready to start running & hitting the gym! Thank you!
Keri. L.K via Facebook reviews
Would you like a FREE 30 minute Specialist Postnatal Pilates class to try?
Please Click the following link to register & we will send you a video link to enjoy
Returning to Exercise - What do the guidelines say?
In the first six weeks after giving birth and when you feel you are able, you may commence your pelvic floor and abdominal exercises, functional bodyweight movements, as well as low impact cardiovascular exercise such as walking.
From six weeks onwards (or a little longer if you’ve had a C-section), you may commence light resistance exercise such as Pilates and light weights training.
The earliest you should start high impact exercise such as Running/HIIT/Bootcamp is between 3-6 months after having your baby. This of course may differ from person to person depending on the type of birth you had. A recent study for guidance in returning to running post pregnancy by some expert pelvic health physiotherapists can be found here
Seek Help & Advice Sooner Rather Than Later
As with everything in life, there isn’t a one size fits all when it comes to returning to exercise after pregnancy. Factors that need to be considered include:
Type of birth you had; was it a straightforward vaginal birth, a vaginal birth with complications such as forceps delivery/episiotomy/tears, a C-section? The timescales may be different for each case!
Previous level of exercise (e.g. were you a runner/gym-bunny/Crossfitter before pregnancy?)
Experiencing symptoms of lower back pain, pelvic or pubic pain, leakage and/or feeling of vaginal heaviness (which could be a sign of pelvic organ prolapse), coccyx/tailbone pain (which could be a sign of a hypertonic or tight pelvic floor)
Are you currently breast-feeding? Pregnancy hormones stay in the body for about three months postpartum, continuing to loosen joints, muscles, tendons and ligaments as they did in preparation for delivery. For those breast-feeding, hormones can still have a loosening effect even months after you stop.
If you are unsure, it is advisable to seek help from a specialist trained physiotherapist or a pelvic health practitioner.
If you would like to chat to one of our physiotherapists you can use the link below to book an appointment. Or if you prefer send us a message with any questions you have and we will get back to you as soon as we can.
Thank You
Thanks for taking the time to read this guide, we hope you find it useful. Please share with anyone else who might benefit and if you have any questions comment and let us know. Please subscribe for regular updates and advice on everything health and fitness related - Zero spam promise.
Postnatal Pilates at Physio Effect
Our simple 7 point strategy to keep you injury free in your new found love of running!
New runners are often the most vulnerable to injury. Your body needs time to adapt to the new loads and demands that running puts on your tissues and joints. This blog provides expert advice on preventing overload and injury through planning, awareness and patience as well as tips on how to maintain tissue strength and flexibility to minimise injury risk.
I Can’t believe it, I’ve only just taken up running and I’m injured already!
Unfortunately it is an all too common occurrence for us have a disappointed runner sat in front of us for assessment of a new injury from recently taking up running. More recently with the restrictions on the forms of exercise we can do during the Coronavirus pandemic, combined with the excellent weather during that period, this has become very common with many more people trying out and enjoying more outdoor running.
It has been shown that novice runners face a much greater risk of injury than recreational or competitive runners. This is due to a combination of overload in their tendons and muscles as well as technique and fatigue issues that unduly overload certain areas.
When you are running, multiple times your body-weight in the form of ground reaction force is produced on impact with the ground. This has to be absorbed and controlled by the tendons, muscles and joints in the legs. Over time and with progressive increases in running mileage and duration, the tendons in the lower limbs adapt and strengthen to this, making them less prone to injuries such as acute muscle tears or tendinopathy. Running technique and fitness are also shown to improve which can decrease the adverse and destructive repetitive loading on the joints as well as improve running economy.
The most common injuries we see in new runners, or those runners returning from a lay off tend to be at the front of the knee in the form of a patellofemoral joint irritation (under the knee cap) or patellar tendinopathy (the tendon below the knee cap). It is also very common to see a tear of the calf muscle or pain at the achilles tendon in the form of a tendinopathy. In a runner these are all overuse and overload issues and some of them depending on the severity can result in a lengthy time off running to settle and fix them.
What can I do to prevent these issues?
Most running issues and injuries are really preventable as they are nearly all as a result of overuse. It has been suggested that between 60-70% of all running injuries can be attributed to training errors. Novice runners are the most prone to injury but they are also a group who can easily adapt their training to limit exposure to common injuries and “start as the mean to go on”. Here are 7 simple suggestions for someone who is new to or has recently started running to lessen their likelihood of developing a running related injury.
Be realistic about your current running experience and plan your training to be conservative in the first few weeks with progressive increases in your distance by 10-15% per week.
Initially give yourself a day of rest after each run to allow any tendon or muscle overload to recover a little before your next run.
Don’t be hesitant to adapt your training to something non-impact based like cycling or take a rest day if you feel a niggle in your knee or achilles/calf/foot. This one day of change or rest from running impact may be enough to stop you causing a worse problem and it will likely result in a much shorter time off running.
Do adequate recovery work between runs to release tightness and restore normal muscle and joint range. This can include stretching, soft tissue release such as self-massage or equipment assisted massage like foam rolling.
Strengthen the muscles of the lower legs and core to help prevent muscle tears or tendinopathy and increase the muscles load bearing capabilities
Wear running shoes that you find comfortable. Shoes that do not feel comfortable when running such as when the toes feel squished or the cushioning feels too much or too little is likely to result in you offloading any discomfort and then abnormally loading your soft tissue and joints. Don’t get caught up in the marketing and hype of certain shoes or brands; try on a number of shoes and brands and go with your gut instinct as to which feel most comfortable to you.
Most of your runs should be at easy pace. With greater speed comes greater peak forces and also fatigue. You cannot expose your body to this too often otherwise you will acutely overload the legs and injuries may arise. I’d recommend a 2:1 ratio of easy to hard efforts, where if you do 3 runs a week, then 2 of them should be at your easy pace and one of them at a moderate to difficult effort. For an easy pace you should feel like you could speak normally or if you have a heart rate monitor watch, your heart rate should be at or below a value of 180-your age (eg. 180-36yrs = easy pace of <144 beats per minute). For the remaining session this can be ran a little faster or include variations in speed such as intervals. This approach will also give your musculoskeletal system and your cardiovascular system a chance to adapt well to your running.
Home Exercises to Try - Stretch, Strengthen & Release
Below are some basic strengthening, stretching and muscle release exercises that will benefit most people starting out running. Always work within your own comfort limits on these as they will improve gradually over time and you want to take a consistent and not a torturous approach that you dread the next time. If you can only do part of the movement or a modified / reduced range then that is fine, just do what you can. Try them twice a week to begin with and you should gradually start to feel better and move better.
Exercise 1 and Exercise 2 below are video links to some self-administered soft tissue massage and release for the thigh and calf muscles respectively
Foam rolling technique for the outer thigh
Calf release using a ball
Exercise 3
Couch Stretch
In a lunge position have the top of the foot or ankle on the left leg back against a wall or your couch making sure to have some padding underneath the knee left knee.
Pull your lower stomach muscles and belly button inwards while also engaging or contracting the buttock muscles on the left side and imagine lengthening your left thigh bone and knee downwards toward the floor.
This should produce a stretch along the front of the left thigh and up to the front of the left hip. Make sure to keep the tummy in and buttock contracted as this will keep the stretch focused on the front of the thigh and hip and stop you overarching your lower back as can bee seen in picture 2 below.
Hold this position for 1 minute and swap to the other leg. Repeat twice, making sure to ease yourself a little further into the stretch each time.
1- Couch Stretch
2- Over Arched Couch Stretch
Exercise 4
Calf Raises
Begin with the ball of the foot on the edge of a step. Using your calf muscles lift your weight up, raising the heel above the level of the step. (Image 1)
Slowly over 2-3 seconds lower the heel below the level of the step (Image 2)
Repeat this movement for 2 sets of 8-15 reps on each side depending on your strength.
If this is too difficult to begin with, you can do the same movement using both feet on the step and aim to progress to using a single leg over a number of weeks.
This movement can also be performed with the knee bent the entire time. This will primarily strengthen the lower portion of the calf (soleus muscle) which is also important in running (Images 3 and 4 below)
1. Calf Raise
2- Calf Lowering
3. Knee Bent Calf Raise
4. Knee Bent Calf Lowering
Exercise 5
Figure 4 Stretch
Begin by placing your left leg on the wall at 70-90 degrees of hip flexion (knee towards chest)
Place the right ankle just above the knee of the left leg and drop the right knee outwards
You should feel a stretch on the right outer hip and buttock
Hold for 1-2 minutes and repeat on each side twice
Figure 4 Stretch
Seek Help & Advice Sooner Rather Than Later
If you find yourself injured and unable to run it’s advisable to get your injury seen to and diagnosed as quickly as possible. Getting the right advice early with an injury will significantly decrease the amount of time you will have to take off from your running and it will likely decrease your levels of pain and the stress you experience associated with it.
At Physio Effect our therapists are experienced and highly skilled in advising and managing running related injuries and we will be able to help you reach a diagnosis and an understanding of your injury, including why this likely happened in the first place. We will be able to offer you advice on alternative forms of cardiovascular exercise as well as specific strength training to address your issue so you don’t feel like training has stagnated or regressed. All treatment plans can be time graded and clear to you, with milestones to achieve that not only address your current levels of pain associated with the injury but also the issues that may have contributed to you developing the injury in the first place.
Thank You
Thanks for taking the time to read this guide, we hope you find it useful. Please share with anyone else who might benefit and if you have any questions comment and let us know. Please subscribe if you would like to receive regular updates and advice on everything health and fitness related - Zero spam promise. Good luck and enjoy your running
Stiff back? Try our simple six step mobility routine
6 step mobility stretch routine to ease back stiffness and relieve back pain. Practice daily and you will see improvements in your range of movement and alleviate tension, stiffness and pain in your back.
Back Pain?
We’ve all been there…..
What’s up with my back?
We’ve probably all struggled with a stiff achy back at some point. The reality is that our modern lifestyles are often dictated by technology and we just don’t move enough to maintain healthy joints and soft tissues. If you truthfully counted up how many hours per day or week you spend in sedentary / static positions whether working from a computer, driving, or binge watching TV and social media what would that number look like? How would it compare with hours spent being active, stretching, moving and getting some exercise? Chances are you are in the majority with your results skewed in the wrong direction and sedentary hours winning hands down.
Even for those of us who do exercise regularly it’s often at the back of a long day of not moving much. There is often a misconception that working out a few times a week should be adequate to ward off the stiffness and tightness that comes from our daily work routines. While of course some exercise is better than none what most of us need to do is work harder at incorporating small amounts of varied regular movement into our everyday routines. Micro breaks of several minutes every hour are a great way to break up the day & if you can practice a few hip and back movements and stretches with these then that’s a winning combination.
Most of the back pain we suffer is not serious (but do ensure you have checked with a medical professional) even when the pain and stiffness reach fairly extreme and debilitating levels. It is most often a cumulative and gradual process which results in reduced joint and tissue flexibility and a lower threshold or tolerance for simple tasks.
You may have a sensation of achy stiffness and tightness in your back and feel the need to fidget and change position constantly just to get comfortable. Sometimes acute painful events occur as the result of a simple daily task like putting on your socks and you can feel trapped in a cycle of stiffness, pain and vulnerability.
These symptoms most often aren’t indicative of something seriously wrong but rather your body is sensing changes it doesn’t like and is giving warning that something needs to change. X-rays and MRI scans aren’t normally helpful, unless being used by a medical professional to exclude other suspected pathology, and more often than not can cause confusion and fear which can negatively impact behaviour and recovery.
What can I do?
All is not lost and it’s never too late to make positive change. For most of us that can be very simple in the form of developing strategies that encourage us to move more in our daily routines. Try these pointers:
Be positive and take action of some kind. Note anything that seems to help or has a positive effect on how you feel and work to develop that
Focus on what is within your control to change and don’t worry or get hung up on the things you cannot do or cannot change
Develop simple daily habits and routines that encourage an increase in regular movement, exercise, and stretching
If you plan on being static/sedentary for extended periods plan micro-breaks of 2-3 minutes at least every 60 minutes and include some walking and simple stretching movements
Try to find a physical activity or exercise that you enjoy and doesn’t feel like a chore as you are much more likely to perform it regularly and achieve a long term change
Consider other lifestyle factors where you can implement simple change - e.g. drink more water, increase sleep, meditate or practice deep breathing & reduce daily screen time usage.
Let’s get started!
Below is a mobility routine for your back of 6 different exercises performed as a movement flow to get you started. Always begin slowly and gently and work within your own comfort limits. If you can only do part of the movement or a modified / reduced range that is fine, just do what you can. Try them every day and perhaps even multiple times per day if you’re able and you will gradually start to feel better and move better. Ideally try the whole routine or you can divide it up into single exercises and see which ones you find give you the most relief but aim to practice all the movements every day.
Back Mobility Flow Video:
Exercise 1
Cat & Camel Stretch
Begin in all 4s position. Cat posture - Allow your spine to soften and hollow along its entire length. Tilt your tailbone gently to the ceiling. Relax you lower back, rib cage, shoulders and neck
Camel Posture - Arch your whole spine slowly and gently to the ceiling in one large ‘C’ shape. Tuck your tailbone between your legs
Hold each position for around 10 seconds. Transition from one to the other 6-8 times.
1- Cat Pose
2- Camel Pose
Exercise 2
Childs Pose to Cobra
Begin in all 4s position. Childs pose - Gently sit bottom back towards heels as far as is comfortable opening knees and hips softly and as required
Cobra Pose - Allow weight to come forward and lower hips gently to floor. Stay relaxed in hips and lower back and if required bend elbows slightly so that hips can rest in contact with floor.
Hold each position for around 10 seconds. Transition from one to the other 6-8 times
1- Childs Pose
2- Cobra Pose
Exercise 3
Childs Pose Side Bend
Begin in Childs Pose - Walk you hands around to one side into side bend aiming for at least a 45 degree angle, you should feel a good stretch down your side. Hold 20-30 seconds.
Walk hands around in same way to other side and again hold 20-30 seconds in side bend.
Repeat 2-3 times on each side
1- Childs Pose
2- Side Bend Right
3- Side Bend Left
Exercise 4
Lunge Hip Flexor Opener
Begin in Lunge position. Gently engage your lower tummy muscles and tuck your pelvis in. Aim to feel a stretch in the front of your hip and top of thigh
Gently engage your buttock muscles and lean slightly forward taking care not to arch your lower back
Hold the position 30-60 seconds. Repeat 1-2 times left and right
1- Lunge Hip Flexor Opener
2- Lunge Hip Flexor Opener - Forward Lean
Exercise 5 - Part 1
Lunge Hip Opener with Alternate Arm Rotations
From Lunge position reach hands forward and rest on floor beside front foot. Take outside arm and reach under and between legs ‘threading the needle’ holding for a few seconds
With the same arm rotate outward and upward toward ceiling trying to get arm to a straight vertical position, hold for a few seconds then return to ‘thread the needle’
Repeat this 10 times
1- Lunge Position Hands Forward on Floor
2- Lunge Position Hands Forward ‘Thread The Needle’
3- Lunge Position Hands Forward - Rotate arm vertically reaching for ceiling
Exercise 5 - Part 2
Lunge Hip Opener with Alternate Arm Rotations
After completing Part 1 of this series stay in the same position but extend out your back leg as far as is comfortable
Take inside arm now and rotate upward to the ceiling trying to achieve the straight arm vertical position, Hold for a few seconds
Bring the same arm down and with bent elbow drive your elbow towards the floor down the inside of your shin. Hold for a few seconds then rotate back to the vertical arm position
Repeat this 10 times
4- Lunge Position Extend Back Leg
5- Lunge Position Inside Arm Rotate to Ceiling
6- Lunge Position Inside Elbow Drive to Floor
Exercise 6
A-Frame Walk to Squat
From the all 4s position drive your hips into the air with straight knees and gentle lower your heels towards the floor into the A-Frame (it does not matter if you can’t fully extend knees or reach the floor with your heels). Hold for 10 seconds feeling stretch in back of legs
Keeping hands on floor slowly walk feet in towards hands and slowly sit down into a squat, hold for 10 seconds
Walk back to A-Frame position and hold for another 10 seconds
Repeat 4-6 times
1- A-Frame Position
2- A-Frame Walk to Squat
3- A-Frame Walk to Squat 2
4- Finish in Squat
Thank You
Thank you for taking the time to read this post, we sincerely hope that you find it useful and can use it to implement some positive changes in your daily routines. Take your time and work at your own level but be persistent and try to slowly improve on your own baseline. Please download your own FREE Cheatsheet to keep and to help with you practice and share this post with anyone who could benefit. If you have any questions or comments please just ask we would love to hear from you. Stay healthy and move well.
Childs Pose
